Advertisement
Quick Links
Advertisement

Related Manuals for Eclipse TD712Z


Summary of Contents for Eclipse TD712Z
- Page 1 Owner's Manual Thank you for purchasing the Eclipse TD Speaker 712Z. Please read this Owner’s Manual before use. Be particularly sure to read the Important Safety Instructions section. Keep this Owner’s Manual together with the Warranty Certificate in a safe place for later...
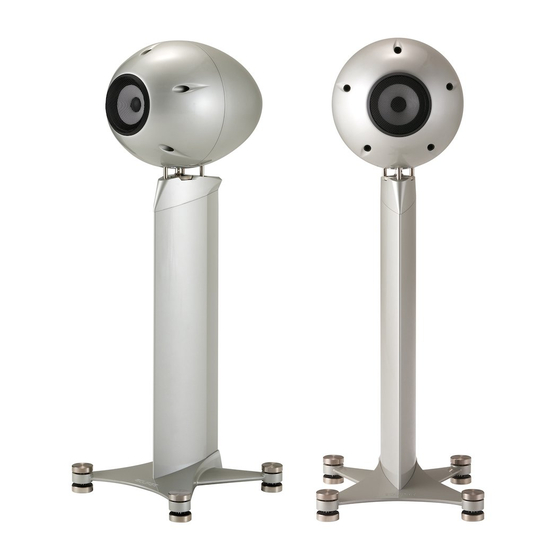
- Page 2 Protective cover x 1 Hexagonal wrench x 1 Speaker stand x 1 Hexagonal socket head boltsx 3 Eclipse TD logo sticker x 1 Owner's Manual x 1 Washer x 3 Warranty Certificate This product is a speaker which has been designed using Time Domain theory.
-
Page 3: Before Use
Important Safety Instructions Before use The warnings contained within this instruction manual and on the unit itself are to ensure safe and correct use of the unit and thus prevent injury to our customers or other people and damage to property. -
Page 4: Notes On Use
Notes on Use Before turning the unit on or changing the input source, be sure to set the volume to Low. Sudden bursts of loud noise may cause damage to any connected speaker systems. To avoid disturbance in your neighborhood, enjoy your unit at an appropriate volume. Remember that particularly at night, even low volumes carry well into surrounding areas. -
Page 5: Part Names And Functions/Connections
Part Names and Functions/Connections Speaker cable Speaker Input Terminals When connecting the speakers, insert the ends of the speaker cables so that they do not touch neighbouring terminals or other parts. -
Page 6: Assembly Instructions
Assembly Instructions 1 Speaker Fitting CAUTION Before securing the speaker to the stand, Hexagonal socket head bolts x 3 follow the instructions in "[3] Setting the angle 12cm speaker adjustment screw at 0 degrees" and use the cardboard gauge to measure the height of the angle adjustment screw and ensure the angle Align speaker with stand is set at 0 degrees. - Page 7 3 Setting the angle adjustment screw at 0 degrees Template Angle adjustment screw ADVICE When adjusting the speaker angle, follow these instructions and start from a 0 degrees position. Template 4 Adjusting the speaker angle Using the hexagonal wrench, loosen the Upward adjustment hexagonal socket head bolts (3 places).
- Page 8 5 Installation of protective cover. As shown in the diagram, install the protective cover. ADVICE The protective cover may be attached when the speaker is not in use or at the user s discretion.
-
Page 9: Maintenance/Specifications
Before maintaining the unit, ensure that Specifications and appearance are subject to the power is off and the power cord change without prior notification. removed. Remove any dirt from the unit by lightly wiping •œ TD712z with a soft cloth. Diameter: 12cm Type: Bass ref/box... - Page 10 Warranty and After-Service Warranty Certificate (included) When Requesting a Repair After reading the contents of the Warranty Within warranty period Certificate, put it away in a safe place. Present your Warranty Certificate Repairs will be carried out in accordance with Warranty period the conditions on the Warranty Certificate The warranty period is one year from...
- Page 11 Cut and remove Ausschneiden und entfernen Découpez et retirez Tagliare e rimuovere Recorte y retire Tip of the angle adjustment screw Neck of the screw Base Angle 0 degrees Spitze der Winkeleinstellschraube Schraubenhals Unterteil Winkel 0 Grad Angle 0 degré Pointe de la vis de réglage d'angle Col de la vis Base Angolo 0 gradi...
Need help?
Do you have a question about the TD712Z and is the answer not in the manual?
Questions and answers