Table of Contents
Advertisement
Quick Links
SAFETY
SAFETY
SAFETY
SAFETY
SAFETY
WARNINGS:
CLASS 1
LASER PRODUCT
WARNINGS:
RISK OF ELECTRIC SHOCK
WARNING: SHOCK HAZARD-
The lightning flash with an arrowhead symbol, within an equilateral
triangle is intended to alert the user to the presence of uninsulated
"dangerous voltage" within the product's enclosure that may be
of sufficient magnitude to constitute a risk of electric shock to
persons.
The exclamation mark within an equilateral triangle is intended
to alert the user to the presence of important operating and
maintenance (servicing) instructions in the literature accompanying
the appliance.
To reduce the risk of fire or electric shock, do not expose this appliance
to rain or moisture.
DO NOT REMOVE COVER or OPEN CASING.
Dangerous high voltages are present inside the enclosure. Do not open
the casing. Refer servicing to qualified personnel only.
Use of controls or adjustments or performance of procedures other
than those specified may result in hazardous radiation exposure.
LASER:
Type:
Wavelength:
Output Power:
Beam Divergence: 60 degrees
INVISIBLE LASER RADIATION WHEN OPEN OR INTERLOCK
FAILED OR DEFEATED.
DO NOT STARE INTO BEAM. Avoid direct exposure to laser beam.
To prevent direct exposure to the laser beam, do not try to open the
enclosure.
CAUTION
DO NOT OPEN
DO NOT OPEN
Dual semiconductor laser GaAIAs
650nm and 780nm
7mW
GB - 1
Advertisement
Table of Contents

Related Manuals for Scott DMX20 HBK

Summary of Contents for Scott DMX20 HBK
-
Page 1: Safety
SAFETY SAFETY SAFETY SAFETY SAFETY CAUTION RISK OF ELECTRIC SHOCK DO NOT OPEN WARNING: SHOCK HAZARD- DO NOT OPEN The lightning flash with an arrowhead symbol, within an equilateral triangle is intended to alert the user to the presence of uninsulated "dangerous voltage"... -
Page 2: Important Safety Instructions
WICHTIGE SICHERHEITSBESTIMMUNGEN IMPORTANT SAFETY INSTRUCTIONS CAUTION: RETAIN THIS BOOKLET FOR FUTURE REFERENCE. This DVD player has been designed and manufactured in a way that ensures your personal safety. Improper use can result in electric shock or fire hazard. The safeguards incorporated in this unit will protect you if you observe the following procedures for installation, use and servicing. -
Page 3: Table Of Contents
BOX CONTENTS X CONTENTS X CONTENTS X CONTENTS X CONTENTS SAFETY--------------------------------------------------------------------------------------------------------------------------------------------1 IMPORTANT SAFETY INSTRUCTIONS-------------------------------------------------------------------------------------------------2 BOX CONTENTS--------------------------------------------------------------------------------------------------------------------------------3 INSTALLATION --------------------------------------------------------------------------------------------------------------------------------3-4 UNIT PREPARATION-----------------------------------------------------------------------------------------------------------------------4-5 FRONT / SIDE PANEL & BACK PANEL-------------------------------------------------------------------------------------------------6 CONNECTIONS -----------------------------------------------------------------------------------------------------------------------------6-8 REMOTE CONTROL --------------------------------------------------------------------------------------------------------------------------9 GETTING STARTED & BASIC SETUP ---------------------------------------------------------------------------------------------10-13 PLAYING DVD / CD / VCD DISCS -------------------------------------------------------------------------------------------------13-14 ADVANCED PLAYBACK FUNCTIONS----------------------------------------------------------------------------------------------15-18 PLAYING MP3 / JPEG / WMA / MPEG4 FILES-----------------------------------------------------------------------------------18-19 AUDIO CD RIPPING (ENCODING IN MP3 FORMAT)-----------------------------------------------------------------------------19... -
Page 4: Installation
DVD discs allow up to 8 languages and 32 subtitles on a single disc. The language and subtitles can be changed, and the whole disc or just part of it can be played and viewed from different angles (if the video is shot at different camera angles). - Page 5 Mounting on the wall Preparation: 1/8”(3.2mm) • Remove the stand from the main unit: 3/16”(5mm) Grip the top of the unit with one hand and grip the stand with the other hand. Slowly but firmly pull the main unit off its stand. •...
-
Page 6: Front / Side Panel & Back Panel
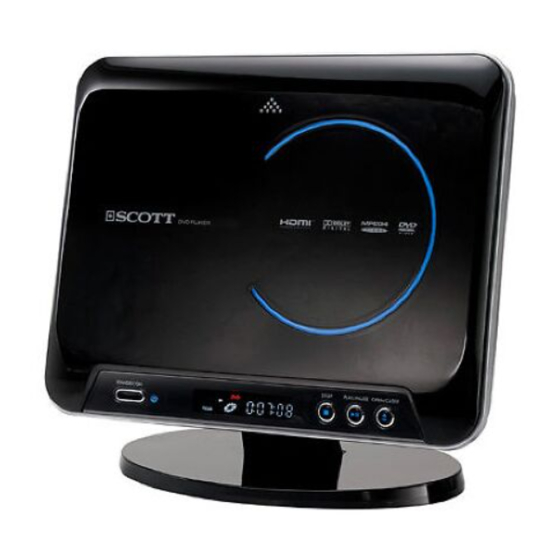
FRONT / SIDE PANEL & BACK PANEL Front/Side panel 1. STANDBY/ON button 2. Infrared receiver window 3. VFD Display 4. STOP button 5. PLAY/PAUSE button 6. OPEN/CLOSE button 4 5 6 7. Motorized door of disc tray 8. USB Port 9. - Page 7 What is HDMI (High Definition Multimedia Interface)? This device transmits digital audio/video signals without the process of converting to an analog signal. You can get sharper digital picture by connecting your TV to the unit using an HDMI connection cable. HDMI was developed to provide HDCP technology (High Definition Content Protection).
- Page 8 Use a DIN SCART cable (included) DIN SCART CABLE (Included) SCART OUT Connecting to a 5.1 CH digital receiver When connecting to a 5.1 channel receiver, do not connect the L-R Audio sockets to the TV. If the L-R connections are made, the TV volume must be set to zero. Using a coaxial audio cable, connect the coaxial out socket (3.5mm jack) at the back of the player to the digital coaxial audio in socket of the 5.1 channel receiver.
-
Page 9: Remote Control
REMOTE CONTROL REMOTE CONTROL REMOTE CONTROL REMOTE CONTROL REMOTE CONTROL 16. RIPPING (encoding in MP3 format): Convert CD audio files into MP3 digital files and save them on a USB flash drive. 17. DIMMER: Adjust the brightness of the display, the buttons and the backlighting on the motorized door in the following order: “ON”, “DIM”, “OFF”. -
Page 10: Getting Started & Basic Setup
GETTING ST GETTING ST GETTING ST GETTING ST GETTING STAR ARTED & B TED & B TED & B TED & B TED & BASIC SETUP ASIC SETUP ASIC SETUP ASIC SETUP ASIC SETUP GETTING STARTED Power supply for the unit Carry out the connections for the DVD player as shown in the previous section. - Page 11 4. Repeat steps 1 to 3 to change any settings. 5. Press the SETUP/EXIT button to exit setup. For more details, please refer to the next chapters. 1. SYSTEM SETUP 1.1 “SCREEN SAVER” Use this setting to turn the screen saver option on or off. If you turn the screen SYSTEM SETUP saver on, the screen saver image appears when you leave the player in pause or SCREEN SAVER...
- Page 12 2. LANGUAGE SETUP 2. LANGUAGE SETUP 2. LANGUAGE SETUP 2. LANGUAGE SETUP 2. LANGUAGE SETUP You can select different languages for the setup menu. You can also select different languages for the audio, subtitles and disc menu recorded on the DVD. 2.1 OSD LANGUAGE LANG SETUP Select the on screen display language.
-
Page 13: Playing Dvd / Cd / Vcd Discs
4. AUDIO SETUP 4. AUDIO SETUP 4. AUDIO SETUP 4. AUDIO SETUP 4. AUDIO SETUP 4.1 DIGITAL OUTPUT If an amplifier is connected to the unit’s “COAXIAL” socket, the following settings AUDIO SETUP can be selected. DIGITAL OUTPUT SPDIF/RAW DYNAMIC RANGE SPDIF/PCM “SPDIF/RAW”: Dolby Digital signals are fed unaltered to the digital output. - Page 14 (Stop) Press once to stop the current playback instantly and enter the “Resume Play” mode. Press • resume playback from the point where the disc was stopped. Press twice to stop playback completely. It is now impossible to resume playback from the place where •...
-
Page 15: Advanced Playback Functions
ADVANCED PLAYBACK FUNCTIONS 1. DISPLAY function Disc format Current chapter Title Total chapter While a disc is playing, press DISPLAY to display the available playback 7/36 1/41 00:03:12 information, depending on the disc. Chapter Total title Elapsed time Current title For DVD: Subtitle Audio... - Page 16 2. GOTO function Current Chapter This function allows you to select any point on the disc and to start Total Chapter playback from this point. 07/36 1/41 00:03:12 Total Title 2.1 Selecting a Specific Title/Chapter for a DVD or track for a Time Current Title CD/VCD...
- Page 17 4. Random playback Chapters in a DVD and tracks in a CD/VCD can be played in random order. Press the PLAYMODE button. • When MODE is highlighted, use the / buttons to select RANDOM • mode. Then press OK to confirm. Note: This function is only available with VCDs when PBC is off.
-
Page 18: Playing Mp3 / Jpeg / Wma / Mpeg4 Files
7.2 Recalling a Bookmark • During playback, press BOOKMARK to access the bookmark menu. • Use the button to highlight the desired bookmark and press to play from the bookmark point. Press CLEAR to delete the highlighted bookmark. Note: • This function is only available with VCDs when PBC OFF mode only. -
Page 19: Audio Cd Ripping (Encoding In Mp3 Format)
Selection Menu The selection menu will appear when MP3/WMA/JPEG/MPEG4 files are read. All the folders will appear on the left hand menu and will be numbered in ascending order. When one of the folders is highlighted, 01 . BITRATE_03 01 . BITRATE all the contents of the folder will be displayed on the right of the 02 . -
Page 20: Compatible Discs / Files
COMPATIBLE DISCS / FILES While improvement have been made to ensure that your disc player is compatible with the largest number of discs possible, it cannot be guaranteed that you will be able to play discs which might not be compliant with audio CD standards. - Page 21 WMA Files CD-R, CD-RW, DVD-R, DVD+R, DVD-RW and DVD+RW discs and USB devices containing WMA files are compatible with this player. Windows Media Audio (WMA) is another compressed audio file format that is similar to the MP3 format. WMA files can also be grouped in folders or albums like MP3 files. When naming your WMA files do not exceed 8 characters, and use “.wma”...
-
Page 22: Troubleshooting Guide
TROUBLESHOOTING GUIDE If it appears that the unit is faulty, first consult this checklist. It may be that something simple has been overlooked. Note: Under no circumstances should you try to repair the unit yourself as this will void the warranty. Only qualified service personnel should remove the cover or service this unit. -
Page 23: Technical Specifications
TECHNICAL SPECIFICATIONS Power supply AC 230V ~ 50 Hz Power Consumption 15 Watts Discs and files supported DVD-Video, DVD+R/RW DVD-R/RW, CD-DA, CD-R/RW, MP3, JPEG, VCD2.0, MPEG 4 TV system PAL/NTSC Video out Composite video 1.0 Vp-p 75 ohm Audio out Analog audio out 2.
Need help?
Do you have a question about the DMX20 HBK and is the answer not in the manual?
Questions and answers