Table of Contents

Related Manuals for Hawking HAWNU1


Summary of Contents for Hawking HAWNU1
- Page 1 USER’S MANUAL HI-GAIN WIRELESS-150N USB NETWORK ADAPTER with RANGE AMPLIFIER website www.hawkingtech.com e-mail techsupport@hawkingtech.com tech support 1-888-202-3344 HAWNU1 © COPYRIGHT 2010 HAWKING TECHNOLOGIES,INC. ALL RIGHTS RESERVED.
- Page 2 Hawking Customer Service in order to obtain a Return Authorization number. Warranty is for repair or replacement only. Hawking Technology does not issue any refunds. Hawking Technologies is not responsible for freight fees for items shipped to Hawking Technologies.
- Page 3 COPYRIGHT Copyright ©2010/2011 by Hawking Technologies, Inc. All rights reserved. No part of this publication may be reproduced, transmitted, transcribed, stored in a retrieval system, or translated into any language or computer language, in any form or by any means, electronic, mechanical, magnetic, optical, chemical, manual or otherwise, without the prior written permission of this company.
- Page 4 Federal Communication Commission Interference Statement This equipment has been tested and found to comply with the limits for a Class B digital device, pursuant to Part 15 of FCC Rules. These limits are designed to provide reasonable protection against harmful interference in a residential installation. This equipment generates, uses, and can radiate radio frequency energy and, if not installed and used in accordance with the instructions, may cause harmful interference to radio communications.
- Page 5 R&TTE Compliance Statement This equipment complies with all the requirements of DIRECTIVE 1999/5/EC OF THE EUROPEAN PARLIAMENT AND THE COUNCIL of March 9, 1999 on radio equipment and telecommunication terminal Equipment and the mutual recognition of their conformity (R&TTE) The R&TTE Directive repeals and replaces in the directive 98/13/EEC (Telecommunications Terminal Equipment and Satellite Earth Station Equipment) As of April 8, 2000.
-
Page 6: Table Of Contents
Connecting To Your Wireless Network (Mac 10.3~10.4.9) ......52 Configure IP Manually vs. Automatic (DHCP) ..........54 Hawking Wireless Utility for Mac OS X ............55 Site Survey ......................55 Profiles ......................56 Configure Profile ....................56... - Page 7 Authentication vs. Security ..................58 Link Status ......................59 Statistics ......................60 Advanced ......................60 WPS ........................61 About......................... 63 Product Specifications ................... 64 Troubleshooting ..................... 64 Glossary ......................66 ...
-
Page 8: Product Information
1 PRODUCT INFORMATION 1.1 Introduction and safety information Thank you for purchasing this high-speed wireless network card! The HAWNU1 Wireless-150N USB Adapter is backward compatible with wireless 802.11b/g. This wireless card is capable of transfer data at speeds of up to 150Mbps, three times faster than 802.11g wireless network. -
Page 9: System Requirements
5. There’s no user-serviceable part inside the network card. If you find that the network card is not working properly, please contact your dealer of purchase and ask for help. DO NOT disassemble the network card by yourself, warranty will be void. 6. -
Page 10: Package Contents
1.4 Package Contents Before you start to use this wireless network card, please check if there is anything missing from the package. 1. HAWNU1 Hi-Gain Wireless-N USB Adapter (1 pc) 2. Protective Cap (1 pc) 3. Quick Installation Guide (1 pc) 4. -
Page 11: Familiarize With Your New Wireless Network Card
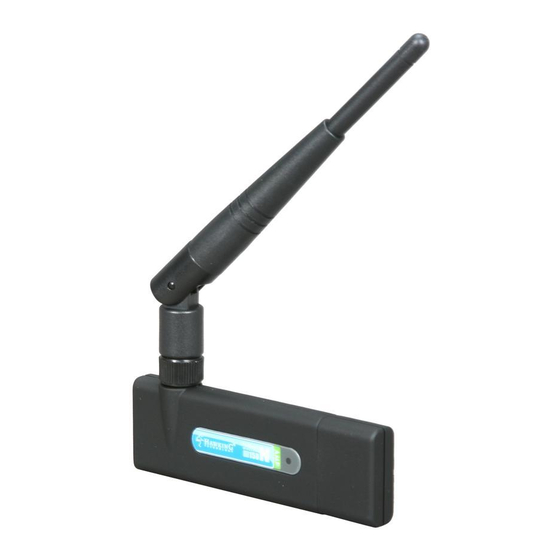
1.5 Familiarize with your new wireless network card 1. USB Connector 2. Connector Cap (To protect USB connector when not in use) 3. Link/Activity LED LED Name Light Status Description Radio Off Wireless LAN function is disabled. No link to wireless AP or Router Radio On (No Link) Flashing Transmitting management information. -
Page 12: Instructions For Windows Operating System
‘I accept the terms of the license agreement’ then click ‘Next’ button, to accept license agreement. 2. Select ‘Install driver and Hawking Wireless Utility’. Click ‘Next’ to continue. Note: If you are using a Window Vista or 7, you may select ‘Install driver only’... - Page 13 3. Select ‘Install’ to begin the installation. 4. The install wizard will prompt you to insert the USB Adapter into your PC. IGNORE the message for now. Select “OK” to continue. (It is recommended to finish installing the driver before plugging in the Adapter.)
-
Page 14: Connect To A Wireless Connection: Windows 7
5. Please wait while the install procedure is running. When Install Wizard completes, please click ‘Finish.’ 6. Now, insert the Adapter into an available USB Port. 2.2 Connect to a Wireless Connection: Windows 7 (It is recommended that you use the Windows Wireless Utility for Windows 7 and Vista) 1. - Page 15 3. Click on the Network and Sharing Center icon from your system tray (bottom right on your screen). A list of available wireless networks will appear. Select a wireless network that you wish to connect to. 4. If you are connecting to a Security-enabled Network, your system will prompt you to enter your security key.
-
Page 16: Connect To A Wireless Connection: Windows Vista
2.3 Connect to a Wireless Connection: Windows Vista (It is recommended that you use the Windows Wireless Utility for Windows 7 and Vista) 1. Wait a few seconds until your system detects the new hardware (Adapter). A Found New Hardware screens may show up at this point, select “Locate and Install driver software (recommended)”. - Page 17 If you are connecting to an unsecured networking, select Connect Anyway. If you are connecting to a security-enabled Network, type in the network security key or passphrase. If you do not have the security key or passphrase, please obtain it from your network administrator.
-
Page 18: Connect To A Wireless Connection: Windows Xp/2000
6. Close the Set Network Location when you are done. 2.4 Connect to a Wireless Connection: Windows XP/2000 Note: Installation was performed on a Windows XP system. Install Screen may vary slightly, but the installation steps should be similar on a Windows 2000. 1. Plug-in the Adapter into your USB port if you have not done so. -
Page 19: Hawking Wireless Utility
Windows XP and 2000 users.) 2.5 Hawking Wireless Utility There are two ways you can configure your HAWNU1 Adapter to connect to a wireless access point: 1. Using the Hawking Wireless Utility/Hawking Configuration Utility or 2. Using the built-in Windows Zero Configuration Utility (also known as the Windows Wireless Utility). -
Page 20: Hawking Wireless Utility Overview
Config Utility again by going to ‘Start Menu All Programs Hawking Wireless-N Amplified Adapter folder HAWNU1 Wireless Utility icon.’ Hawking Wireless Utility Overview Hawking HAWNU1 Wireless Utility will launch, and begin to scan for all wireless access points automatically. The Wireless Utility is separated into three parts: Menu Setup Area ... -
Page 21: Scan For Other Wireless Devices
If the wireless device you wish to connect uses encryption, you must know its encryption key. Launch the Hawking setup utility. The Utility will automatically scan for wireless access points nearby. (Make sure in the menu area, you are on the Network tab) - Page 22 Scan results will be displayed similar to the image shown above. Now, check if the wireless device (access point or another computer) with the SSID you wish to connect to is shown here. Scan result includes 6 types of information, they are: The SSID (Service Set Identifier) of wireless device.
- Page 23 If you wish to see detailed information for a specific access point, please double-click on it, and you’ll be provided with its detailed information. There are 4 types of technical information: General: Displays basic information about this access point, such as SSID, MAC Address, authentication / encryption type, channel etc.
-
Page 24: Connect To An Access Point
Rescan Click this button to rescan access points. You can click this button for several times, if the access point you wish to use does not show in the list. Add to Profile You can store a specific access point to profile, so you can link to that access point directly next time, without inputting authentication key again. - Page 25 Note: Connect to an access point without an SSID: you’ll be prompted to input the SSID. If you don’t have the SSID, please ask the owner of wireless access point for the exact SSID and input it here, then click ‘OK’ when ready. If the SSID you provided here is wrong, you’ll not be able to connect to this access point.
- Page 26 You can put the mouse cursor over the Hawking configuration utility icon, and the brief information about link status and signal strength of current wireless connection will be shown as a popup balloon. You can also click More / Less button (...
-
Page 27: Add An Access Point To Profile
Add an Access Point to Profile If you are going to connect to a specific wireless access point frequently, you can create a profile to save your access information and you can connect to it directly without reentering the access information. You can add a found access point to profile, or input all information of an access point by yourself. - Page 28 The setup utility will expand: System Config Overview: Item Name Description Profile Name Name your Profile. A unique name that you’ll remember (i.e. Home, Work, etc.) SSID If your SSID is hidden, please input the SSID of this access point. If you selected an access point from the list (not hidden SSID), the SSID will automatically be filled (note: you’ll be able to modify the SSID) Network Type...
- Page 29 you can select a lower output power to save energy; for a distant access point, you can select a higher output power. It is recommended to select “Auto” so the setup utility can determine the best output power for you. Preamble Select the preamble for Ad hoc mode here.
- Page 30 To set authentication / encryption information for the access point. Please select ‘Auth. \ Encry.’ tab: Auth.\Encry Overview: Item Name Description Authentication Select the authentication type of the wireless access point or wireless device you wish to connect. When you are adding a profile from an existing access point or wireless device, authentication type will be selected automatically, and please do not change it.
- Page 31 WEP Key You can select key type (Hexadecimal or ASCII) and input WEP key here. If encryption is not enabled, or you select ‘WPA’ as encryption type, this field will be disabled and grayed out. You can set up to 4 WEP keys here.
- Page 32 When you use 'EAP-FAST' as authentication type, the protocol setting is always 'Generic Token Card' and cannot be modified. You also need to select ‘Soft Token’ or ‘Static Password’ as password in ‘ID \ Password’ setting. ’EAP Fast’ authentication type also have a sub-menu to set EAP fast-specific parameters: If you need to use protected authentication credential, check ‘Use protected authentication credential’...
-
Page 33: Profile Management
To manage profiles, right-click the Hawking configuration utility icon located at lower-right corner of computer desktop, then click ‘Launch Config Utility’. - Page 34 Add a Profile If you want to click new profile, click ‘Profile’ menu, then click ‘Add’ button. You’ll be prompted to input the selected access point’s information. Edit an existing profile To change the content of an existing profile, please select the profile you wish to edit from your list, then click ‘Edit’...
- Page 35 Delete an existing profile To delete a profile, select the profile you wish to delete from the list, and click ‘Delete’ button to delete it.
- Page 36 Activate a profile To connect to a specific wireless device from your profile list, select it and click ‘Activate’ button to establish a connection. When you selected a profile and click ‘Activate’ button to activate the profile, a icon will be displayed in front of the profile to show that the connection is failed;...
-
Page 37: Advanced Settings
You can change these settings to increase data transfer performance, or change operation mode. Please follow the following instructions to set advanced wireless settings: 1. Right-click the Hawking configuration utility icon located at lower-right corner of computer desktop and then click ‘Launch Config Utility’. 2. Select ‘Advanced’ Menu. - Page 38 Advanced Menu Overview: Item Name Description Wireless mode Display the wireless operation mode of the network card. Enable Tx Burst Check this box to accelerate the data transmit rate. It may not work with all wireless access point and wireless devices. Enable TCP Check this box and the configuration utility will adjust TCP Window Size...
-
Page 39: View Network Statistics
Please follow the following instructions to check network statistics: 1. Right-click the Hawking configuration utility icon located at lower-right corner of computer desktop and then click ‘Launch Config Utility’. 2. Statistics Menu shows the current status of your wireless network: Transmit (Tx) and Receive (Rx) data. -
Page 40: Wmm Setting
Please follow the following instructions to set advanced wireless settings: 1. Right-click the Hawking configuration utility icon located at lower-right corner of computer desktop and then click ‘Launch Config Utility’. 2. Click ‘WMM’ menu, and the following settings will appear: In ‘WMM Setup Status’... -
Page 41: Wps Configuration
this window will be activated or deactivated respectively. WMM - Power Save Check this box to enable WMM power saving mode to Enable save energy, and let your computer’s battery live longer. You also have to select WMM power save modes here: AC_BE: Best Performance AC_BK: Worst Performance AC_VI: Video data has priority... - Page 42 WPS Setup - PBC (Push-Button Configuration) 1. Right-click the Hawking configuration utility icon located at lower-right corner of computer desktop and then click ‘Launch Config Utility’. 2. Click ‘WPS’ menu and the following settings will appear. 3. Set ‘Config Mode’ to ‘Enrollee’, and then push the ‘WPS’ button on your wireless access...
- Page 43 All access points with WPS function enabled will be displayed here. Please make sure the access point you wish to connect is displayed. If not, please click ‘Rescan’ few more times. You can also click ‘Information’ button to see the detailed information about selected access point.
- Page 44 If the wireless access point you wish to connect supports PIN, please follow the following instructions to establish connection to it: 1. Right-click the Hawking configuration utility icon located at lower-right corner of computer desktop and then click ‘Launch Config Utility’.
- Page 45 3. The PIN code of your wireless network card is an eight-digit number located at the upper-right position of configuration utility. Remember it then input the number to your wireless access point as the WPS PIN code . (Please refer to the user manual of your wireless access point for instructions about how to do this).
-
Page 46: Ccx Configuration
WPS associate IE: Check this box to send the association request with WPS IE during WPS setup. This is optional and you can use default value if you don’t know what will be affected. WPS probe IE: Check this box to send the WPS probe request with WPS IE during WPS setup. - Page 47 CCX Menu Overview: Item Name Description Enable CCX Check this box if you need to connect to CCX-compatible (Cisco Compatible wireless devices. When you enabled CCX, the following eXtensions) setup items will become available: Enable Radio Measurements: When you’re connecting to CCX-compatible access point, check this box to enable radio measurement function to improve wireless connectivity.
-
Page 48: Radio On/Off
You can switch the wireless radio transceiver on and off by the utility, so if you want to disable wireless network function, you don’t have to remove the network card physically. 1. Right-click the Hawking configuration utility icon located at lower-right corner of computer desktop and then click ‘Launch Config Utility’. - Page 49 Wireless radio is on (Green) Wireless radio is off (Red)
-
Page 50: About
Please follow the following instructions to see these information: 1. Right-click the Hawking configuration utility icon located at lower-right corner of computer desktop and then click ‘Launch Config Utility’. -
Page 51: On-Line Help
‘Windows Zero Configuration’ (WZC). You can also use WZC to configure your wireless network parameter: 1. Right-click Hawking configuration utility icon and select ‘Use Zero Configuration as Configuration utility’. 2. Right click Windows Zero Configuration icon and select ‘View Available Wireless Networks’. - Page 52 3. Click ‘Start’ button (should be located at the bottom-left corner of windows desktop), click ‘Control Panel’, then click ‘Network and Internet Connections’ in Control Panel. 4. Click ‘Network Connections’. Right-click ‘Wireless Network Connection’ (it may have a number as suffix if you...
- Page 53 ‘HAWNU1 Wireless LAN Card), then select ‘View Available Wireless Networks’. 5. All wireless access points in proximity will be displayed here. If the access point you want to use is not displayed here, please try to move your computer closer to the access point, or you can click ‘Refresh network list’...
- Page 54 If you can see ‘Connected’ message, the connection between your computer and wireless access point is successfully established.
-
Page 55: Instructions For Mac Operating System
3 INSTRUCTIONS FOR MAC OPERATING SYSTEM 3.1 Driver & Software Installation IMPORTANT Please do not install the wireless adapter into your Mac desktop or notebook before installing the software program from the CD. The following installation was operated under Apple OSX 10.5 Leopard. (Installation Procedures are similar in other OS. However, the installation images and screens may not look the same as the ones in this manual) If you have previously installed other Wireless Adapter Drivers &... - Page 56 3. The Introduction Screen will welcome you to the HAWNU1 Installer, select “Continue.” 4. Select a destination for the driver. Select “Continue”. (Typically, the default destination is the Macintosh HD.) 5. Then select “Install”. 6. If your computer is password protected*, enter the password and click OK.
-
Page 57: Connecting To Your Wireless Network (Mac 10.5 Or Later)
7. Click Agree to continue. 8. Please wait for the installation process to complete. Select Finish when it is done and your computer will reboot. 3.2 Connecting To Your Wireless Network (Mac 10.5 or later) 1. After restarting your computer, insert the Adapter into an available USB port on your desktop or notebook computer. - Page 58 2. The Hawking Wireless Utility will automatically pop up. You will be asked to enable your WLAN card. When a NOTICE comes up, select “OK”. Then, select “Network Preferences.” Please note the “Ethernet Adapter (en…)”network interface. You will need to enable this in the Network Preferences.
-
Page 59: Connecting To Your Wireless Network (Mac 10.3~10.4.9)
5. If your selected network has encryption, please enter the network key and confirm it. If the selected network has encryption, please enter the password and confirm it. 6. Congratulations! The asterisk sign (*) next to the selected network indicates that you are connected. - Page 60 2. The Hawking Wireless Utility will automatically pop up. You will be asked to enable your WLAN card. When a NOTICE comes up, select “OK”. 3. Go to the APPLE icon on the top left corner of your desktop, select System Preferences ...
-
Page 61: Configure Ip Manually Vs. Automatic (Dhcp)
3.4 Configure IP Manually vs. Automatic (DHCP) If you are using an automatically assigned IP address (MOST NETWORKS) you do not have to worry about this. Simply close the window to proceed. If you plan on using a “Static” (Manually entered) IP address for your computer, go to the ‘Configure you may do so here by double clicking the “USB Wireless Adapter”... -
Page 62: Hawking Wireless Utility For Mac Os X
3.5 Hawking Wireless Utility for Mac OS X The Hawking HAWNU1 Wireless Utility is an application that helps you configure the Adapter and monitor the link status and statistics of your wireless connection. Each time you insert HAWNU1 into your computer, the Hawking Wireless Utility should automatically load. -
Page 63: Profiles
Profiles The “Profiles List” is for you to manage the networks you connect to frequently. You are able to Add/Delete/Edit/Activate a profile. Parameter Description Profiles List The profiles list display all the profiles and the relative information including Profile Name, SSID, Channel, etc. Add/ Click these buttons to Add/ Edit/Remove/Duplicate the selected Edit/Remove/Duplicate... - Page 64 Power Saving Mode The power saving function is only available when the network type is in Infrastructure. CAM (Constantly Awake Mode) – The card will always set in active mode. Power Saving Mode – Enable the card in the power saving mode when it is idle.
-
Page 65: Authentication Vs. Security
Authentication vs. Security Parameter Description Authentication This setting has to be consistent with the wireless networks that the card intends Type to connect to. All security keys within a network must match to allow successful communications. None – No authentication is needed among the wireless network. Shared –... -
Page 66: Link Status
Fill the text box by following the rules below. 64-bit – Input 10-digit Hex values (in the “A-F”, “a-f” and “0-9” range) or 5-digit ASCII characters (including “a-z” and “0-9”) as the encryption keys. For example: “0123456aef” or “test1”. 128-bit – Input 26-digit Hex values (in the “A-F”, “a-f” and “0-9” range) or 13-digit ASCII characters (including “a-z”... -
Page 67: Statistics
Statistics This option enables you to view the available statistic information with its Tx counts (Tx success, Tx error, RTS Success and RTS Failed), and its Rx counts (Rx success, Rx error). You may reset the counters by selecting "Reset Counter”. Advanced ... -
Page 68: Wps
WPS Wi-Fi Protected Setup (WPS) is the latest wireless network technology which makes wireless network setup become very simple. This Wireless Card supports the configuration setup using PIN configuration method or PBC configuration method through an internal or external Registrar. To use WPS, your product must support WPS and be compatible with WPA security. - Page 69 (NOTE: If you experienced problem with the pin code provided here, you can click ‘Renew’ to get a new pin code.) Config Mode Select as an Enrollee or an external Registrar. WPS Profile List Display all of credentials got from the Registrar. List information includes 40 SSID, MAC address, Authentication and Encryption Type.
-
Page 70: About
Profile Detail You can click ‘Detail’ button to see detailed information of connected access point. If you wish to save this connection as a profile, you can click ‘Export Profile’ button, and this connection will be saved. You can find this connection in ‘Profile’... -
Page 71: Product Specifications
4 Product Specifications Standard IEEE 802.11b/g/n Bus Type USB 2.0 Type A Frequency Band 2.4000~2.4835GHz (Industrial Scientific Medical Band) Data Rate 11b: 1/2/5.5/11Mbps 11g: 6/9/12/24/36/48/54Mbps 11n (20MHz): MCS0-7 (up to 72Mbps) 11n (40MHz): MCS0-7 (up to 150Mbps) Security WEP 64/128, WPA, WPA2 Cisco CCX Support Antenna Detachable 3dBi Dipole Antenna with RP-SMA... - Page 72 1. Please make sure the wireless network card is ‘Launch Config Utility’ inserted into your computer’s USB port. If the Hawking configuration utility’s icon is black, the network card is not detected by your computer. 2. Reboot the computer and try again.
-
Page 73: Glossary
problem when transferring located. large files 2. Disable ‘Tx Burst’ in ‘Advanced’ tab. 3. Enable ‘WMM’ in ‘WMM’ tab if you need to use multimedia / telephony related applications. 4. Disable ‘WMM – Power Save Enable’ in ‘WMM’ tab. 5. There could be too much people using the same radio channel. - Page 74 CSMA/CA plus Acknowledge Protocol Multi-Channel Roaming Automatic Rate Selection RTS/CTS Feature Fragmentation Power Management 4. What is Ad-hoc? An Ad-hoc integrated wireless LAN is a group of computers, each has a Wireless LAN card, Connected as an independent wireless LAN. Ad hoc wireless LAN is applicable at a departmental scale for a branch or SOHO operation.
- Page 75 scrambling. On the software side, WLAN series offer the encryption function (WEP) to enhance security and Access Control. Users can set it up depending upon their needs. 12. What is DSSS? What is FHSS? And what are their differences? Frequency-hopping spread-spectrum (FHSS) uses a narrowband carrier that changes frequency in a pattern that is known to both transmitter and receiver.
- Page 76 16. What is GI? GI stands for Guard Interval. It’s a measure to protect wireless devices from cross- interference. If there are two wireless devices using the same or near channel, and they are close enough, radio interference will occur and reduce the radio resource usability. 17.
Need help?
Do you have a question about the HAWNU1 and is the answer not in the manual?
Questions and answers