Kaiser KG / KCG / KCG 6380 Turbo / KCG 6382 Turbo / KG 6325 Turbo / KG 9325 Turbo / KCG 6335 Turbo Series, KG 3351, KCG 3382, KG 6340 Turbo Manual
- User manual (52 pages) ,
- Manual (36 pages) ,
- User manual (52 pages)
Advertisement
INSTALLATION INSTRUCTIONS
Attention! Installation and electrical connection must be made by a qualified expert only.
Attention! The manufacturer declines all responsibility for damage or injury if the above instructions and normal safety precautions are not respected.
ELECTRICAL CONNECTION
Before connecting the cooking hob to the mains power supply, make sure that:
- the plant characteristics are such as to follow what is indicated on the matrix plate placed at the bottom of the working area,
- the mains supply has an efficient ground connection complying with all applicable laws and regulations.
Correct grounding is a legal requirement. If the appliance is not pre-fitted with a power cable and/or plug, use only suitable cables and plugs capable of handling the power specified on the appliance's data plate and capable of resisting heat. The power cable should never reach a temperature 50°C above ambient temperature at any point along its length.
If the appliance is to be connected directly to mains terminals, fit a switch with minimum aperture of 3 mm between the contacts. Make sure that the switch is of sufficient capacity for the power specified on the appliance's data plate, and compliant with applicable regulations. The switch must not break the yellow-green earth wire. The socket or switch must be easily reachable with the cooking hob fully installed.

GAS CONNECTION
The cooking hob is designed to operate with both natural gas (methane) and liquid gas (LPG), and can be easily converted from one type to another following the instructions given in the relative section of this booklet «Converting to a different type of gas».
At factory the appliance has been pre-installed to natural gas.
Attention! Connection to the gas supply and converting to a different type of gas must be carried out by qualified technicians and in conformance with the requirements.
Depending on regional rules and regulations, may be used different (from mentioned) types of connections.
If the appliance is to operate with gas bottles (LPG), a pressure regulator conforming to the requirements.
Rigid pipe connection
Connection to the mains gas supply may be made via a metal pipe or via a rigid stainless steel pipe, or via a flexible steel-tipped hose 3 which is tightly attached to the fitting 2 (remove the plastic cap 1).
When connecting to LPG, use the fitting 4.
A service-adapter 5 is for gas service personal only. The gas connection with this adapter is prohibited.
The fittings 4 and 5 with seals are supplied with the appliance and comply with standards.

You must prevent the pipe from crushing, coming into contact with moving parts of the kitchen unit (for example, a drawer) and prevent access to any spaces which might become obstructed.
Attention! CHECK UP LEAKPROOFNESS of the connection to the gas supply pipe or gas cylinder using soap suds only. Spread soap suds on the joints, if there are bubbles, please close the valve and reconnect the hose until no bubbles.
Don't use open flame – danger to life!
It is advisable to tighten the junctions by insulating teflon tape.
And if there is gas leak happens during using, please immediately shut off the gas source or call local gas sector service for help.
If the hob is to be combined with an oven, please check, that gas intake connection of the appliance has a "male thread"
When making the connection, take care not to apply stresses of any kind to the appliance.
CONVERSION TO A DIFFERENT TYPE OF GAS
Before converting the appliance for operation with a different gas type, check which type of gas it is currently set to operate with (adhesive label on appliance).
For the correct nozzle diameter, refer to the relative table in this booklet.
Conversion to a different gas type must be carried out by qualified technicians and in conformance with the requirements.
Conversion procedure:
- Disconnect the electrical power supply to the appliance,
- Turn the knobs in the null position.
- Replace the nozzles 1 with the corresponding type of gas to be used (see table «Nozzle table»).
![]()
- To adjust to the minimum, light the fire und turn the knob 2 in the position of minimal flame, then remove the knob of gas submission.

- Use a slotted screwdriver on the screw placed on the tap 3.
![]()
- For LPG (butane/propane) screw tight the tap.


| NOZZLE TABLE | ||||
| Burner | Rated load kW | Nozzle bore in mm | ||
| G20/20 | G30/30 | G30/50 | ||
| Turbo | 3,80 | 1,35 | 0,98 | 0,77 |
| Turbo* | 3,80 | 1,49 | 0,98 | 0,77 |
| Turbo** | 3,50 | 1,45 | 0,95 | 0,77 |
| Strong | 3,00 | 1,15 | 0,85 | 0,75 |
| Normal | 1,75 | 0,97 | 0,65 | 0,58 |
| Small | 1,00 | 0,72 | 0,50 | 0,43 |
| Burner | Rated load kW | Nozzle bore in mm | ||
| G25/20 | ||||
| Turbo | 3,60 | 1,60 | ||
| Strong | 3,00 | 1,34 | ||
| Normal | 1,50 | 0,94 | ||
| Small | 0,90 | 0,72 | ||
* – for KG 6340 Turbo
** – for KG 6325... Turbo
| RATED POWER | |
| Model | |
| KG 3351 | |
| KCG 3382 | |
| KG 6340 Turbo | |
| KG 6350 Turbo, KCG 6380 *** Turbo | |
| KCG 6382 *** Turbo KG 6357 Turbo KCG 6387 Turbo | |
| KCG 8382 Turbo | |
| KG 6325 *** Turbo | |
| KG 9325 *** Turbo KCG 6383 Turbo | |
| KCG 6335 *** Turbo | |
| KG 9356 Turbo, KCG 9386 Turbo KG 9357 Turbo |
INSTALLATION
The regulations covering the installation, maintenance and operation of gas appliances for domestic use are applicable regulations.
This appliance is not provided with a combustion product discharge.
Installation and connection should be made in accordance with this regulation.
It is recommended that it be installed in sufficiently aerated places, in terms of the laws in force.
The quantity of air which is necessary for combustion must not be below 2,0 m³/h for each kW of installed power (See «Nozzle table»).
The appliance can be fitted into a working area as illustrated on the corresponding figure.
The installation space measurements are given in mm.
Make sure that surrounding materials are heat resistant.
Apply the seal provided over the whole of the area perimeter.


Attention! To install the appliance is not recommended the use of the silicone or other sealants and other adhesives besides the supplied mounting materials. If additional fastening materials and substances have been used, the removing the device from the mounting niche in case of necessary service is provided by and at the expense of the owner. The manufacturer and the customer services are not responsible for damages of equipment and furniture because of the disassembling.
Attention! Installation and electrical connection of the cooking hob must be made by a qualified expert only.
Attention! We Inform you that our devices which are the object of the present operating instructions are precertain exclusively for the domestic use.

CRYSTAL HOBS
DO NOT TIGHTEN SCREW 'A' EXCESSIVELY, ONE TURN MAX WILL BE SUFFICIENT, AFTER CORRECTLY FITTING SHAFT 'B' INTO PLACE, AS SHOWN IN THE PICTURE. ENSURE THAT THE SUPPORTING SURFACE IS PERFECTLY EVEN. FIT THE APPROPRIATE EXPANDED SEAL. CRYSTAL HOBS MUST NOT BE SUBJECTED TO STRAINS CAUSED BY UNEVEN SUPPORTING SURFACES.

Attention! Check again before installation the fit sizes of the hob to avoid possible mistakes during installation.
EQUIPMENT
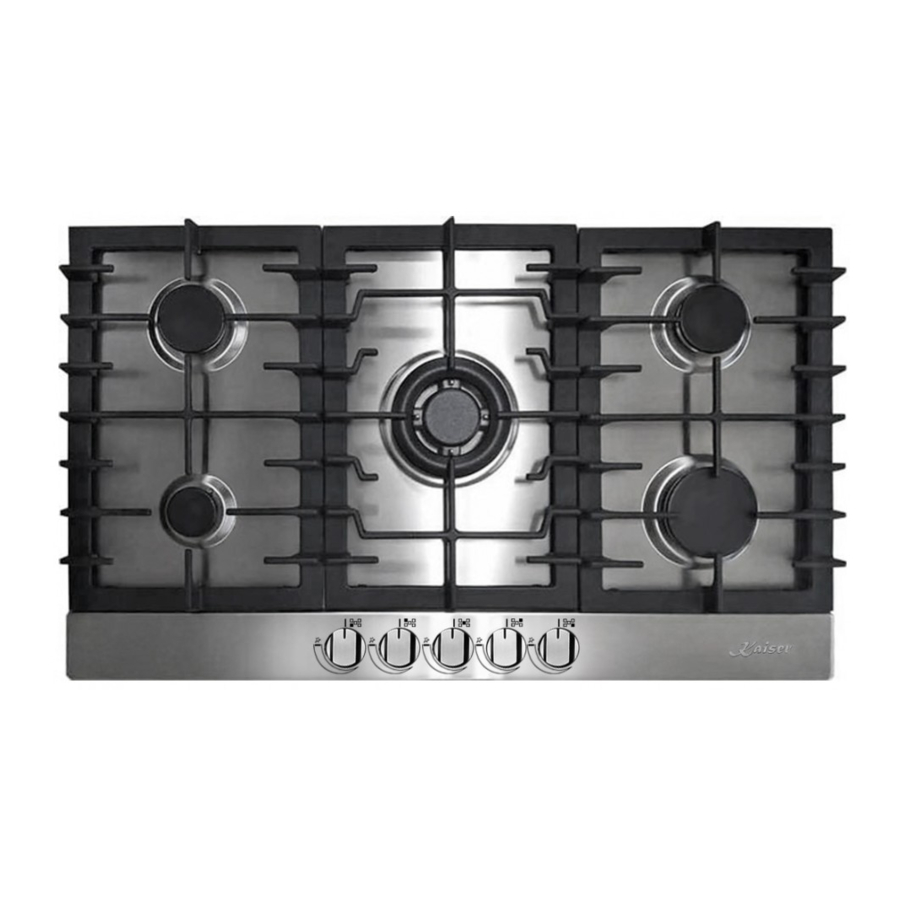
GAS COOKING HOB

Attention! The use of a gas cooking hob results the production of heat, moisture and products of combustion in the room in which it is installed. Ensure that the kitchen is well ventilated especially when the hob is in operation: keep natural ventilation apertures open or install a mechanical ventilation device (cooker hood). Prolonged intensive use of the appliance may require additional ventilation. Open a window or increase the power of the cooker hood.
USAGE
The cooking zones control is achieved by means of knobs set up on the control panel of the cooker.(See a section "Equipment")
Correctly adjusted burners have a light blue flame with a distinct internal cone.
Flame volume is adjusted by rotary switches:

Rotary switches ensure gradual setting of flame volume.
All gas cooking hob are provided with the system of electrical ignition operated by means of knobs or electrical ignition button.
To switch on a gas burner:
Models with the system of electrical ignition
- press the corresponding rotary switch of the selected burner against the stop and turn it to the left up to the position big flame
- keep the switch pressed till the burner ignites
The electric spark between the ignition plug and the burner provides the ignition of the burner itself.
- after the burner has ignited, let the rotary switch go and select the required flame volume (e.g. "sparing").
- to switch off the burner after the food is ready turn on the rotary switch to the right (position "gas supply is stopped").
For models with a thermoelectric safety system, the burner is ignited as in the various cases described above; keeping the knob fully pressed on the position big flame for approximately 3-5 seconds to activate the control system.
After releasing the knob, make sure the burner is actually lit.
It is recommend the use of pots and pans with a diameter matching that of the burner, thus preventing the flame from escaping from the bottom part and surrounding the pot. The flame must not touch the sides of the pan.
Do not use small pots and pans on large burners.

| Burner | Minimum pan diameter, mm | Maximum pan diameter, mm |
| Triple flame burner | 220 | 260 |
| Large burner | 180 | 220 |
| Normal burner | 120 | 200 |
| Small burner | 100 | 160 |
Always centre the pan over the burner, not to one side. Otherwise it could tip over.
Do not use damaged pans, which do not sit evenly on the hob. Pans may tip over. Only use pans with a flat base.
Do not place large pans on the burners near the control knobs. These may be damaged by the very high temperatures.
Do not leave any empty pots or pans on the fire
When cooking is finished, it is also a good norm to close the main gas pipe tap and/or cylinder.

Fire danger
The overheated fats or oils are flammable. Watch the cooking processes with fats or oils carefully. Never use water to put the fire out if oil or fats do catch fire. Put the fire out by covering the pan with a lid and switching off the hob.
CARE AND ATTENDANCE
Current maintenance
Prior to any operation, disconnect the appliance from the electrical system. For long-life to the equipment, a general cleaning operation must take place periodically, bearing in mind the following:
- The glass, steel and/ or enamelled parts must be cleaned with suitable non-abrasive or corrosive products (found on the market). Avoid chlorine-base products (bleach, etc.)
- Avoid leaving acid or alkaline substances on the working area (vinegar, salt, lemon juice, etc.)
- The wall baffle and the small covers (mobile parts of the burner) must be washed frequently with boiling water and detergent, taking care to remove every possible encrustation. Dry carefully and check that none of the burner holes is fully or partially clogged
- The electrical parts are cleaned with a damp cloth and are lightly greased with lubricating oil when still warm
- The stainless steel grids of the working area, after having been heated, take on a bluish tint which does not deteriorate the quality.
Cleaning of the taps must be carried out by qualified personnel, who must be consulted in case of any functioning anomaly.
Check periodically the state of conservation of the flexible gas feed pipe. In case of leakage, call immediately the qualified technicians for its replacement.
Cyclic inspection
Besides the current maintenance, the user should ensure:
- alternate check and maintenance of hob elements and assemblies,
- cyclic inspection by the customer service once in two years after the warranty has expired.
- repair of faults.
In case of a damage:
- switch off all hob operating functions (gas burner, electrical cooking zone)
- disconnect the appliance from the power supply
- contact the Customer Centre or another authorized organisation to order the servicing.
Note! Care and servicing as well as all kind of reparations are to be carried out by authorized personnel only.

The user is responsible for good working order and correct operation of the appliance. If the customer service is called because of an operating mistake, the servicing costs are carried by the user even if the warranty is still valid.
Damages caused by non-observance of the given instruction are not approved.
SAFETY CONDITIONS
![]()
Please, keep watch over children as long as the cooker hob is in operation. Children are unaware of operating rules. Hot gas burners, pans and pots with hot liquid on the grid above the burners can cause a skin-burn.- Connection cords of electric appliances, e.g. a mixer, should not get in contact with hot parts of the cooker hob.
- Keep watching the cooker hob while frying: oils and fats can get inflamed due to overheating.
- If faults occur, further operation is not allowed until the appliance has been repaired by an authorized serviceman.
- Don't turn on the valve of the gas inlet or gas cylinder before you make sure that the gas burners are switched off.
- Keep the burners clean. The overflow food or residues must be immediately removed after the burners get cold. Don't put pans directly onto the burners.
- Don't strike the knobs and the burners.
- Unauthorized persons are not allowed to carry on amendments or repair the cooker.
- Don't blow out the flame of the burner.
- Users are not allowed to adjust the cookers to different gas type on their own, move the cooker to another place or make changes in the gas supply system. These operations can be carried on only by an authorized serviceman.
- Don't let children and persons who are not informed about the operation instructions to operate the oven.
- The liquefied gas equipment is intended only for domestic use. This equipment should be checked every 2 years on security.
- This device is not intended for use by children. The nozzles, adapters and other small components and accessories can be swallowed by children and can cause a risk of strangulation. Do not allow children to play with the device or close to it. During operation, the surface is heated. Children should not admit to it until it has cooled down.
In case of gas leak, it is not allowed:
to strike a match, smoke, switch on and off an electric receiver (a door bell, a light switch) as well as use other electrical or mechanical appliances which can cause electric or chugging spark.
In this case, immediately shut off gas supply (turn off the valve of the gas cylinder or the switch which cuts off the connection to the gas supply), air the room and contact an authorized person.
- Don't attach any cables to the gas appliance.
- If the gas leaking out of a no tight junction gets inflamed, immediately cut off the gas supply by turning off the valve of the gas cylinder or the switch which disconnects gas supply).
- In case of damage: air the room, disconnect the appliance from the power supply and repair the fault.
- If the gas leaking out of the no tight junction of the gas cylinder gets inflamed, wrap the cylinder with a wet blanket to extinguish the flame and turn off the valve (stopcock) of the gas cylinder. Further use of the damaged gas cylinder is not allowed.
- If you don't use the gas cooker hob for a few days, disconnect it from the gas supply by turning off the stop valve. In case of a gas cylinder, turn off the stopcock every time after the use.
The gas supply should provide the gas cooker hob with the type of gas it has been adjusted to in plant. Information about the gas type which the gas cooker hob has been adjusted to is registered on the data plate.
Documents / ResourcesDownload manual
Here you can download full pdf version of manual, it may contain additional safety instructions, warranty information, FCC rules, etc.
Advertisement


Need help?
Do you have a question about the KG Series and is the answer not in the manual?
Questions and answers