
Related Manuals for Haier HOQ-P16AN5SX


Summary of Contents for Haier HOQ-P16AN5SX
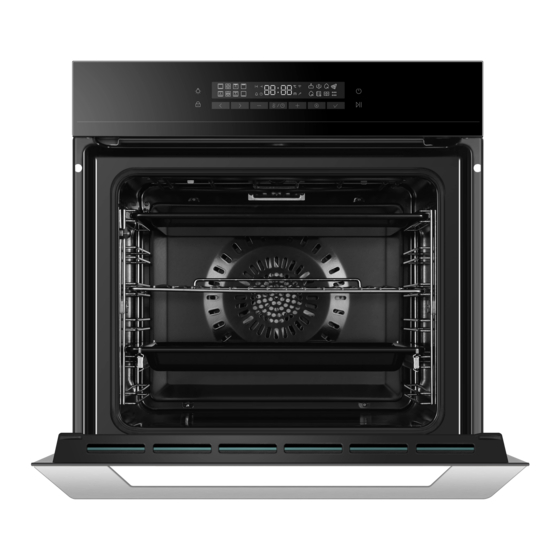
- Page 1 Built-in Electric Oven USER GUIDE Model: HOQ-P16AN5GB HOQ-P16AN5GW HOQ-P16AN5SX Please read this instruction before using your Haier appliance.
-
Page 2: Table Of Contents
SAFETY AND WARNINGS Your oven has been carefully designed to operate safely during normal cooking procedures. Please keep the following safety instructions in mind when you are using it: WARNING! lectrical Shock Hazard Turn the oven off at the wall before replacing the oven CONTENTS lamp. - Page 3 Do not leave children alone. Children should not be left alone or WARNING! unattended in the area where the appliance is in use. They should never be allowed to sit or stand on any part of the appliance. ot Surface Hazard Children of less than 8 years old must be kept away from the Accessible parts may become hot when in use.
-
Page 4: Installation Instructions
INSTALLATION INSTRUCTIONS SAFETY AND WARNINGS Always keep oven vents unobstructed. Do not operate your appliance by means of an external timer or separate remote-control system. Caution: Hot air can blow from the vent at the top of the oven as WARNING! part of the oven’s cooling system. -
Page 5: Important Safety Instructions
IMPORTANT SAFETY INSTRUCTIONS PRODUCT DIMENSIONS To avoid hazard, follow these instructions carefully before installing or using this appliance. Please make this information available to the person installing the appliance - doing so could reduce your installation costs. This appliance must be installed and connected to the mains power supply only by a suitably qualified person according to these installation instructions and in compliance with any applicable local building and electricity regulations. -
Page 6: Prior To Installation
PRIOR TO INSTALLATION Before you install the oven, make sure that the benchtop and oven cavity are square and level, and are the required dimensions the installation will comply with all clearance requirements and applicable standards and regulations a suitable isolating switch providing full disconnection from the mains power supply is incorporated in the permanent wiring, mounted and positioned to comply with the local wiring rules and regulations. -
Page 7: Unpacking The Oven
(as specified on the rating plate) The voltage corresponds to the value given on the rating plate. Mode code Volume Rated Power Rated Voltage Rated Frequency HOQ-P16AN5GB HOQ-P16AN5GW 3200~3750W 220-240V~ 50/60Hz HOQ-P16AN5SX Lower edge IMPORTANT! -
Page 8: Final Checklist
Do not seal the oven into the cabinetry with silicone or glue. This Check that the power supply cable does not touch any metal parts makes future servicing difficult. Haier will not cover the costs of that can become hot during use. -
Page 9: Product Instruction
PRODUCT INSTRUCTION Congratulations on your new purchase. Product Intro Your Haier oven has a number of features to make cooking a great Control Panel experience for you: ● a wide choice of oven functions ● intuitive controls and displays Rack... -
Page 10: Control Panel
CONTROL PANEL Fitting the sliding shelf supports To fit Display Oven Lamp Cooking Functions Auto Functions ON/OFF 1.Ensure the slides are the correct way around (the front of the slide has the triangular shaped tab as shown). 2.Fit the top of the clips over the side rack, the front clip should be fitted as close to the front of the side rack as possible. -
Page 11: First Use
FIRST USE When your oven is first turned on, or after a power cut, you will need to set the clock in order to use the oven. Setting the Clock 1. The display will flash12:00 1.Touch to select the Bake function. 2. -
Page 12: Function Application
FUNCTION APPLICATION Clock function Application Set end time You can change the time settings by touching at any time. Touch repeatly to set the Cooking duration, Ending time, To set the switch-off time for a heating function. This option is Timer and Up time in circles. -
Page 13: Using Meat Probe
Using meat probe Use meat probe for cooking 1. Touch to start oven. 2. Insert the tip of the Meat probe into the center of meat or fish, in Meat probe Application the thickest part if possible. Make sure that at least 3/4 of the Meat probe is inside of the dish. -
Page 14: Cooking Guide
COOKING GUIDE General guidelines ROASTING This oven has been designed to utilise its four elements and Use fan grill or fan bake to roast meat, chicken or vegetables. rear fan in differing combinations to provide you with enhanced Boneless, rolled or stuffed roasts take longer than roasts performance and a wide range of functions, allowing you to cook all containing bones. -
Page 15: Cooking Functions
COOKING FUNCTIONS Shelf Position Guide General guidelines For thinner cuts of meat, toasting or browning foods, use a higher IMPORTANT! shelf position. Thicker cuts of meats should be grilled on lower shelves or at a epending on your model, you may only have some of these lower grill setting to ensure even cooking. -
Page 16: Fan Grill
By using the central rear heating element and fan, hot air is Grill blown into the cavity, providing a consistent temperature at all levels, making it perfect for multi-shelf cooking. Trays of cookies cooked on different shelves are crisp on the outside and chewy in the middle. - Page 17 The oven fan circulates hot air from the top outer and the lower Roast elements and distributes it around the oven cavity. Food cooked tends to brown more quickly than foods cooked on the traditional Bake function. You may need to decrease the time from that recommended in traditional recipes.
-
Page 18: Classic Bake
For best cooking experience , we recommend you below table for reference Classic Bake .Each function has a preset temperature, you can reset them depending on food types and weight Preset Temperature D u r a t i o n Meat Icon Function... -
Page 19: Auto Program For Cooking
AUTO PROGRAM FOR COOKING Inteligent program can help you cook food more efficent and 2. Depending on your cooking experience , you can set a dough delicious, also can help to clean your appliance easily. proof duration . 3. Touch to start proof. - Page 20 IMPORTANT FOR VACUUM COOKING FUNCTION: 1. Touch to scroll to Defrost Note: The Display will show the preset temperature 40°C. Necessary equipments for Vacuum Cooking function are a 2. Remove the food packaging and put the food on a plate. Do not vacuum sealer and vacuum bags.
- Page 21 2.1 Vacuum Cooking: Meat Thickness Amount of Temperature Time Shelf Food Do not use meat portions of a larger thickness than the tables of food food (g) (°C) (min) position show to prevent undercooking. Low Temperature eggs The cooking times in the tables are the minimum necessary times.
- Page 22 2.3 Vacuum Cooking: Vegetables 2.4 Vacuum Cooking: Fruits and sweets Peel the vegetables where necessary. Peel the fruits, remove the seeds and cores where necessary Some vegetables can change their colour when you peel them To keep the colour of the apples and pears, put them in water and cook in a vacuum bag.
- Page 23 Pizza Mode Vacuum Storage This function will PREHEAT for around 10 minutes to 250°C. In this function, you can preserve cooked food in your appliance The fan circulates heat from the lower element throughout for a long period. There are 2 temperatures preset in this function , the entire oven.
- Page 24 Shelves Funcation Position in °C Temperature Code Code mins Your Haier Oven can memory recipes you used in past 5 times automatically . Then you can cook easily by selecting the past 5 P1-1 Rare recipes. Single P1-2 Beef Medium 1.
-
Page 25: Aqua Cleaning
Aqua Cleaning Multi-step cooking You can set multi-programes at one time by using this function. Remove as much dirt as possible manually. Remove the accessories and the shelf support to clean the side walls.The Aqua cleaning functions support the steam cavity cleaning of the appliance. -
Page 26: Sabbath Setting
How to set Sabbath setting Lock the panel 1. Touch and hold together for 3 seconds, the display will show This function is to prevent accidental use of the oven (eg by 2 .Press to set Sabbath mode. You can only use bake children). -
Page 27: Care And Cleaning
CARE AND CLEANING Manual cleaning WHAT? HOW? IMPORTANT! ALWAYS NEVER ● Never use a steam cleaner. ● lways read the label to ●Before any manual cleaning or ● Never store flammable substances in make sure that your stainless maintenance, first wait for the oven ●... - Page 28 Removing the side racks WHAT? HOW? IMPORTANT! IMPORTANT! lways turn off the oven at the wall first. Ensure the oven has ● Clean with a solution of mild cooled down completely before starting. detergent and hot water. ● Pre-soak stubborn burnt- Remove all shelves: Grill tray Grill rack on stains in a solution of...
- Page 29 Replace the side rack: Removing and refitting the sliding shelf supports (purchased separately) 1. Slide the rear prongs of the side rack into the holes at the rear of the oven. 2. Fit the side rack front tab over the fixing screw. IMPORTANT! 3.
- Page 30 To remove Refit the oven trays and grill pan Grasp the slide and rotate the bottom up to release the the clips Slide in the shelves you need, making sure that: and remove. They slide between the two wires of a shelf position (unless a sliding shelf support is being use) The stop notices point down The guard rail is to the rear.
- Page 31 Drop-down upper element Removing and refitting the oven door. IMPORTANT! IMPORTANT! lways turn off the oven at the wall before lowering the upper ake care, the oven door is heavy. element. Make sure the oven has cooled down completely before starting.
- Page 32 To refit the door: Removing the door glass panes for cleaning 1.Holding the door on both sides, IMPORTANT! line up the holes in the base of lways turn off the oven at the wall before lowering the upper the door with the hinges and slide element.
- Page 33 To remove the inner pane After cleaning replace the door glass panes. 1. Touch the glass retainer tabs in on both sides of the door. 2. Pull the glass retainer up until the tabs relocate in the topmost When replacing the glass panes make sure that hole.
- Page 34 Replace the inner pane Replacing the oven light bulbs Ensure the pane is the right way up (ie the logo should be readable at the bottom of the door) Note: Oven bulb replacement is not covered by your warranty. 4. Slide the pane into the notch at the bottom of the door. 5.
-
Page 35: Trouble Shooting
TROUBLE SHOOTING Troubleshooting chart If there is a problem, check the chart below to see if you can fix it. If the problem cannot be fixed or persists, call your Authorised Repairer or Customer Care. PROBLEM POSSIBLE CAUSES WHAT TO DO PROBLEM POSSIBLE CAUSES WHAT TO DO... -
Page 36: Alert Codes
ALERT CODES If there is a problem, the oven will: ALERT CODE POSSIBLE CAUSES WHAT TO DO automatically suspend all oven functions 1. Note down the alert code. beep five times 2. Wait until the cooling fans display an alert code. have stopped and the oven has completely cooled down. -
Page 37: Warranty And Service
WARRANTY AND SERVICE Before you call for service or assistance ... Check the things you can do yourself. Refer to the installation instructions and your user guide and check that: 1. Your product is correctly installed. 2. You are familiar with its normal operation. If after checking these points you still need assistance or parts, please refer to...
Need help?
Do you have a question about the HOQ-P16AN5SX and is the answer not in the manual?
Questions and answers