Table of Contents

Related Manuals for VINCENT SAV-C1


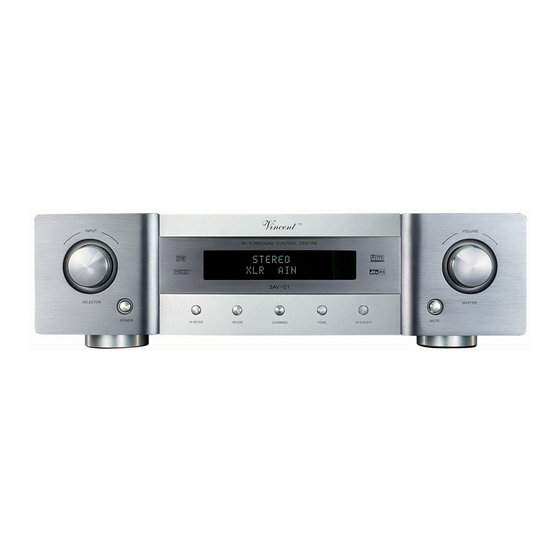
Summary of Contents for VINCENT SAV-C1
- Page 1 Vincent Bedienungsanleitung deutsch Instructions for use english Manuel d‘utilisation français SAV-C1 Digitale AV Mehrkanal-Vorstufe Digital AV Surround Preamplifier Préamplificateur 5.1 AV digital...
-
Page 2: Table Of Contents
à la garantie ou pour les réparations après la période de garantie. Dans tous les cas, vos Dépannage expériences avec les produits Vincent l'intéressent, n'hésitez pas à lui en faire part. Caractéristiques techniques Nous vous souhaitons beaucoup de plaisir avec notre / votre produit. -
Page 3: Sicherheitshinweise
Genehmigung weder komplett noch aus- werden. Überlassen Sie die Wartung qualifizier- daran anschließen, es längere Zeit nicht benutzen empfehlen wir, die Geräte auf Vincent Racks zu zugsweise kopiert oder verteilt werden. tem Fachpersonal. Das Produkt ist nur für den oder dessen Oberfläche reinigen wollen. -
Page 4: Lieferumfang
• 1 Netzkabel • dieses Handbuch BESCHREIBUNG DES GERÄTES Heimkinosysteme sollen Originalfilme authentisch Das Gerät SAV-C1 ist eine 6-Kanal Vorstufe, die wiedergeben können und diese zum Erlebnis alle Wünsche im Mehrkanalbereich erfüllt: sie bie- werden lassen. Besonders Heimkino-Gesamt- tet hervorragenden Klang, hochwertige Verarbei- 1. -
Page 5: Fernbedienung
Stromversorgung. Das kleine Verwenden Sie ausschließlich Receiver. Die zugehörige Videobuchse im An- Kunststoff-Gehäuse an der Netzbuchse beinhal- Mikrozellen der Größe AAA (LR3) schlussfeld „VIDEO INPUT“ (18) ist mit „6.1CH“ tet die Gerätesicherung. Beachten Sie dazu die beschriftet. Sicherheitshinweise. Vincent Vincent... - Page 6 Mit den Tasten „VOL+“ und „VOL-“ verändern Sie „6.1CHANNEL“ momentan als Quelle gewählt sind. die Lautstärke des Systems (Master Volume). Das 27. TEST SAV-C1 Siehe Kapitel „Lautsprecherkonfiguration und HDCD- Signal der Vorverstärkerausgänge „ANALOG Nach Betätigung dieser Taste durchläuft ein rauschen- Modus (Taste „SPEAKER“)“.
-
Page 7: Installation
Modus „Interlaced Scan“, „Progressive oder „AUDIO IN/OUT“ beschriftet. Mehrkanal- Stecker sind rund, etwa 1,5 cm im Durchmesser Video-Anschlussmöglichkeiten bietet diese Scan“ ist nicht möglich. Für diese Verbindung be- Anschlussbuchsen tragen meist die Bezeichnung und besitzt drei Kontaktstifte. Die entsprechenden Vincent Vincent... -
Page 8: Zur Besonderen Beachtung
Dies ist immer der Fall, wenn beide Geräte von und Endverstärker kann eine solche Verkabelung PCM- (Stereo-Digitalabtastsignale), Dolby Digital- Achten Sie darauf dass Sie Vincent hergestellt wurden. Werden zwei Geräte verwendet werden. und DTS-Bitströme geeignet. CD-, DVD-Player und diese Anschlüsse bei der unterschiedlicher Norm verbunden, wird dadurch Empfänger für digitales TV besitzen oft diesen... - Page 9 Digital TV-Receiver ses Gerätes. VIDEO Oftmals lässt sich unter Zuhilfenahme von Adaptern auch der Stereo-Ton von Geräten nutzen, VIDEO OUTPUT INPUT ( * )( ** ) deren Line-Pegel-Ausgänge nicht über Cinch-Ausgangsbuchsen, sondern andere Steckverbinder video (DIN-Stecker, Klinkenstecker) angeschlossen werden. Vincent Vincent...
- Page 10 INPUT INPUT INPUT anschluss benutzt werden kann. ****) Die digitalen Anschlüsse gehören zu den Vorstufeneingängen „CD/AV1“, „DVD/AV2“, „D-TV/AUX2“ Stereo- Stereo- Stereo- Stereo- Mono- oder „SAT/AUX1“. Sie lassen sich wie gewünscht auf diese verteilen. Endverstärker Endverstärker Endverstärker Endverstärker Endverstärker Vincent Vincent...
- Page 11 („RECORD“, „LINE IN“ oder „INPUT“) des put) durch ein Cinch-Kabelpaar mit dem Signalein- Aufnahmegerätes. Drücken Sie den Kaltgerätestecker des mitgelieferten Geräterückwand. Verbinden Sie das andere Ende Netzkabels fest in die Netzbuchse an der des Netzkabels mit einer Netzsteckdose. Vincent Vincent...
-
Page 12: Lautsprecher-Einstellungen
Führen Sie die Einstellungen in fol- speichert werden. Diese Einstellungen haben Einfluss kleine Lautsprecher sind nicht in der Lage, tiefe Töne up ist für die Vorstufe SAV-C1 auf das Mindestmaß gender Reihenfolge durch: darauf, wie Signale der einzelnen Kanäle auf die wiederzugeben, so dass der Subwoofer dies mit über-... - Page 13 Die Lautsprechereinstellungen sind „global“, d. h. sie gelten für alle Eingänge mit Ausnahme des Vorstufeneingänge und in allen Ton-Wiedergabe-Modi. „6.1 CHANNEL“ und in allen Audio-Wiedergabemodi. Der Testton kann auch verwendet werden, um angeschlossene Lautsprecher auf Funktion zu überprüfen. Vincent Vincent...
- Page 14 S-DEL 17ms sprecher, kann keine Verzögerung für die vorderen Lautsprecher eingestellt werden. Belassen Sie in Werden für einige Sekunden keine Eingaben gemacht, wird der Einstellmodus wieder in den normalen diesem Fall die Werte auf ihrem Minimum. Betriebszustand verlassen. Vincent Vincent...
-
Page 15: Bedienung Des Gerätes
Tasten die automatische HDCD-Dekodierung bei Erkennung eines HDCD- Dekodierung von Signals ein- oder ausgeschaltet werden. Die Vorstufe SAV-C1 ist mit einem P P A A R R A A M M E E T T E E R R HDCD-Signalen bei... - Page 16 ( * ) Kanal aktiv wenn der zugehörige Lautsprecher im Menü „SPEAKER“ als vorhanden eingestellt ist Die folgende Tabelle fasst für jedes Tonformat zusammen, welche Kanäle im jeweiligen Modus aktiv sind und welche Bedingungen für die Aktivierbarkeit gegeben sein müssen. - - Kanal nicht aktiv Vincent Vincent...
-
Page 17: Weitere Tipps
Wenn einer der Eingänge „CD/AV1“, „DVD/AV2“ (jeweils auf Analogton gestellt), hervorrufen. Ist dieses Brummgeräusch durch eigene Versuche „XLR/AV4“ oder „6.1 CHANNEL“ gewählt wurde, ist es nicht möglich, DSP-Programme zu nicht zu beseitigen, wird Ihnen Ihr Fachhändler verwenden. weiterhelfen. Vincent Vincent... -
Page 18: Fehlersuche
Videoeingangs- und Ausgangs- AV-Vorstufe, Endstufe oder Quellgerät Prüfen Sie im Zusammenspiel mit anderen verbindung der AV-Vorstufe verwendet. derselbe Standard (Composite, S-Video, etc.) defekt. Geräten, welche Systemkomponente ausge- verwendet werden. fallen ist und kontaktieren Sie den ent- sprechenden Fachhändler. Vincent Vincent... -
Page 19: Technische Daten
1V bezeichnet, die als Musik-Signale aufbereitung im empfangenden Gerät die auf dem für Verstärker-Eingänge geeignet sind. Eingänge des Signalweg durchs Kabel eingestreuten elektromag- Verstärkers (in der Regel Cinch-Buchse), die für Signale netischen Störungen beseitigt werden können. des CD-Players, Tape-Recorders, DVD-Players usw. vor- Vincent Vincent... - Page 20 Deshalb verbreiten sich die digitalen Format meist ten HiFi-Frequenzbereich und bietet die rückwärtigen Aus dem RGB-format berechnete alternative Signal- schen dem Helligkeitssignal und dem Signal des Blau- auf DVDs, CDs oder im digitalen Fernsehen. Die analo- (Surround) Kanäle in Stereo. Vincent Vincent...
- Page 21 Jahr 2000 das Verfahren DTS-ES Discrete 6.1 rere Komponentensignale verwendet werden, die zu EX Modus schaltet. Bisher musste dieses Umschalten eingeführt, welches den Rear Center Kanal nun in einem einem Datenstrom vermischt werden. Meist ist damit das Vincent Vincent...
-
Page 22: Security Precautions
There are no parts in the appliance that require maintenance by the user. equipment on Vincent racks and not putting them Vincent is a registered trademark of Sintron Vertriebs on top of each other. -
Page 23: Included In Delivery
In combination with one or more They can only be set for the channels currently mechanical construction and reserve power from Vincent main amplifiers a system can be created, 2. Display Shows information regarding the supported in the playback mode presently... -
Page 24: Rear View
In order to make full use of the batteries’ life, do connectors. The corresponding video socket is led “VIDEO INPUT”. For the SAV-C1 inputs “DVD” not mix new and used batteries. Make sure that located in the connection fields “VIDEO INPUT”... - Page 25 “INPUT/PARAMETER” knob (1) on the front of the position in the room. The channel volume can be set SAV-C1 are used shortly after pressing one of the during this test by using the “SET” key (31) or the change-settings operating keys (CHANNEL, TONE,...
-
Page 26: Installation
(in this case you exclude any, even minimal, loss of quality by passing the video signal through the preamplifier). Or even if one of the source units outputs a video format not supported by the SAV-C1 (VGA, DVI, etc.). The advantage of using the video signal path through the preamplifier lies in also being able to switch over the video signals of the AV-sources by selecting the input on the SAV-C1. - Page 27 Which of the four digital sound connectors nection is removed from this is allocated to which SAV-C1 input can be freely programmed using the DIN SET (23) function. Please note that European and American (US) XLR input, the cap should be replaced.
- Page 28 Type of Video Connection of the sockets in the “DIGITAL INPUT” terminal field Please note that the SAV-C1 does not divert the chan- (12) of the preamplifier for up to four source units. nel signal if the analogue multi-channel input is selec- Please note that, on the preamplifier, there is no more ted.
- Page 29 INPUT ****) The digital terminals belong to the preamplifier inputs “CD/AV1”, “DVD/AV2”, “D-TV/AUX2” or “SAT/AUX1”. They can be distributed as desired over them. Stereo Stereo Stereo Stereo Mono power amplifier power amplifier power amplifier power amplifier power amplifier Vincent Vincent...
-
Page 30: Connecting The Power Cable
(line level) from the signal source (15) on the back of the appliance to connect an ana- selected on the SAV-C1 at any given time. The output logue stereo recording device (e.g. CD recorder, cas- level is independent from the volume and mute functi- sette recorder, video recorder) or another appliance ons. -
Page 31: Speaker Settings
The HDCD option is global, which means the setting is retained if another input channel is selec- ted or the audio playback mode is changed. The setting also does not change if the analogue sound connection (“IN MODE” (6)(22)) of one of the inputs “CD”, “DVD”, “SAT” or “D-TV” was temporarily selected. Vincent Vincent... - Page 32 All Speaker settings are „global“, they have effect on all source input channels except „6.1 CHAN- NEL“ and in all sound playback modes. The test sound can also be used to check that the connected speakers are working. Vincent Vincent...
- Page 33 The following summary exemplifies menu control for you: The SAV-C1 allows Surround delay times from 0ms to range 0ms...5ms must be set. All this has to be done 15ms (milliseconds) in the „Dolby Digital“ (“DIG5.1” after first installation of the system and to be repeated CHANNEL and DIG.EX”) modes and from 15ms to 30ms in the...
-
Page 34: Operating The Appliance
“PARAMETER” knob or the HDCD signals with “SET” keys. The SAV-C1 preamplifier is equipped with an HDCD-decoder, P P A A R R A A M M E E T T E E R R... - Page 35 ( * ) Channel active if corresponding speaker has been made available in the „SPEAKER“ menu The following table summarizes for every audio format which speaker channels are active and what conditions have to be met for them to be available. Channel inactive Vincent Vincent...
-
Page 36: Tips
DSP is especially effective with material from CD, TV and FM radio. Just try different DSP-Modes when Burn in/ Warm up this problem when connected to the amplifier. using the SAV-C1 to listen to a concert or watch a sports broadcast! Your audio components need a certain time Experience shows that this problem is mainly cau- period until they reach maximum performance. -
Page 37: Troubleshooting
(Composite, S-Video, etc.) tion of the AV preamplifier. and contact the relevant dealer. has to be used for Video In and Video Out. Vincent Vincent... -
Page 38: Glossary
(with approx. 1.5 cm in diameter) and has 3 contacts/pins. XLR is an alternative connection to dB-Level RCA used to transmit NF-Signals in professional This is a way of describing any physical quantity; it Vincent Vincent... - Page 39 However, there are ple digital PCM, analogue Stereo or Dolby the Component Signal. The associated terminal box information are transmitted separately. analogue as well as digital surround sound Surround Prologic signals 5.1 separate channels Vincent Vincent...
- Page 40 8 channels, the DTS-ES Discrete 6.1 process ced from the time sequence of the binary code- sents inaudible alterations there. Only very few CD words. However, PCM is not the name for digitised titles are obtainable in this extended format. Vincent Vincent...
-
Page 41: Consignes De Sécurité
Ce produit n'est autorisé que pour être branché sur longue période ou si vous voulez nettoyer sa surfa- racks Vincent et de ne pas les poser l'un sur l'autre. Vincent est une marque enregistrée de la société un courant alternatif de 230volt/50Hz, la prise de ce. -
Page 42: Contenu De La Livraison
• le présent manuel DESCRIPTION DE L'APPAREIL Les systèmes home cinéma doivent être en mesure L’appareil SAV-C1 est un préamplificateur à 6 can- de reproduire avec authenticité des films originaux aux, qui répond à tous les souhaits dans le domaine et en faire de véritables événements. -
Page 43: Télécommande
électrique. Le petit boîtier plastique de la prise sec- piles rondes AAA (LR3). vidéo correspondante dans la zone de raccorde- teur contient un fusible de protection de l’appareil. ments „VIDEO INPUT“ (18) est adressée „6.1CH“. Respectez les instructions de sécurité à ce sujet. Vincent Vincent... - Page 44 Ceci ches agissent sur le signal des sorties du préamplifi- chapitre „Modes de reproduction du son (touche SAV-C1 n’est pas possible, si les entrées réglées sur prise son cateur „ANALOG AUDIO OUTPUT“ (17).
-
Page 45: Installation
Les douilles de connexion multicanal portent de contact. Les connexions correspondantes sont toutes les possibilités de raccordement vidéo, celle- Scan“, „Progressive Scan“ n’est pas possible. Pour la plupart du temps la désignation „6.1 CHAN- généralement désignées par „XLR IN/OUT“ ou Vincent Vincent... - Page 46 Ceci est toujours le cas, quand les deux appareils rique), Dolby Digital et au flux binaires DTS. Les des sorties. Veillez à ne pas sont de fabrication Vincent. Si deux appareils de Connexion opto-numérique (Toslink) pour lecteurs de CD, de DVD et récepteur pour TV numé- mélanger ces connexions...
- Page 47 Souvent, avec l’aide d’adaptateurs, on pourra utiliser le son stéréo d’appareils, dont les sorties ne VIDEO OUTPUT INPUT ( * )( ** ) peuvent pas être raccordées avec des douilles de sortie Cinch, mais d’autres fiches (fiche DIN, video fiche à Jack). Vincent Vincent...
- Page 48 ****) Les prises digitales appartiennent aux entrées de préamplificateur „CD/AV1“, „DVD/AV2“, „D-TV/ Amplificateur de Amplificateur de Amplificateur de Amplificateur de Amplificateur de AUX2“ ou „SAT/AUX1“. Elles peuvent y être affectées comme souhaité. puissance stéréo puissance stéréo puissance stéréo puissance stéréo puissance mono Vincent Vincent...
- Page 49 Cinch, à l’entrée du signal d’enregistrement. appropriée. Cela est le cas si elle est alimentée en (23) au dos de l'appareil. Reliez l'autre extrémité du courant alternatif de 230 V (50 Hz). Enfichez bien la câble secteur à une prise secteur. Vincent Vincent...
-
Page 50: Configuration Des Haut-Parleurs
Temps de retard des signaux des canaux sur- télécommande Temps de retard DELAY (29) ches „SET“(31). Le préamplificateur SAV-C1 est équi- part un signal HDCD est réceptionné, ceci est indiqué round et du canal central par rapport aux de 0 ms ... 30 ms pé... - Page 51 „5.1 Input“ et dans tous les modes de reproduction son. entrées à l’exception du „6.1 CHANNEL“ et dans tous les modes de reproduction audio. Le son test peut aussi être utilisé, pour vérifier le fonctionnement des haut-parleurs raccordés. Vincent Vincent...
- Page 52 Dans ce cas, laissez les valeurs à leur minimum. Vincent Vincent...
-
Page 53: Utilisation De L'appareil
à l’aide du bouton tournant « PARAMETER » ou décodage de signaux des touches « SET ». Le préamplificateur SAV-C1 est équipé d’un décodeur P P A A R R A A M M E E T T E E R R... - Page 54 ( * ) Canal actif, si le haut-parleur correspondant dans le menu « SPEAKER » est réglé comme existant Le tableau suivant résume pour chaque format de son, quels sont les canaux actifs pour chaque mode et quelles conditions doivent être réunies pour permettre l’activation. - - Canal inactif Vincent Vincent...
-
Page 55: Conseils
Si une des entrées « CD/AV1 », « DVD/AV2 » (chacune placée sur son analogique), L’expérience montre que ce phénomène est soit dû « XLR/AV4 » ou « 6.1 CHANNEL » a été sélectionnée, il n’est pas possible d’utiliser des programmes DSP. Vincent Vincent... -
Page 56: Dépannage
été utilisé. (Composite, S-Video, etc.) pour « Video In » et prenez contact avec le revendeur corres- et « Video Out ». pondant. Vincent Vincent... -
Page 57: Caracteristiques Techniques
», on désigne des tensions inférieures de transmission supplémentaire du même signal, cepen- à 1V (RMS) appropriées comme signaux musicaux dant modifié (c’est la raison des trois broches), de façon pour entrées d'amplificateur. Les entrées de l'amplifica- Vincent Vincent... - Page 58 DVD, CD ou en télévision numérique. Les formats vaille sur la totalité de la plage de fréquence HiFi et le signal de la partie bleue (Pb) ainsi qu’un signal dif- analogiques se trouvent sur des vidéocassettes, télévisi- offre des canaux arrières (Surround) en stéréo. Vincent Vincent...
- Page 59 Seuls de très rares titres de utilisé avec des anciens décodeurs DTS. Pour ce faire, composants pour la représentation d’une image cou- CD, sont disponibles dans ce format étendu. Vincent Vincent...
- Page 60 NOTIZEN - NOTES NOTIZEN - NOTES Vincent Vincent...
-
Page 61: Vincent
Vincent Bewahren Sie die Kaufquittung zusammen mit der Bedienungsanleitung auf. Die Kaufquittung dient Ihnen als Nachweis für den Beginn der Garantiezeit. Die Seriennummer befindet sich an der Rückseite des Gerätes. Please keep the receipt, store it together with this manual. The receipt is your proof for the beginning of the warranty period.
Need help?
Do you have a question about the SAV-C1 and is the answer not in the manual?
Questions and answers