Table of Contents
Advertisement
Advertisement
Table of Contents

Related Manuals for Ferroli PEGASUS 32


Summary of Contents for Ferroli PEGASUS 32
- Page 1 for heating with electronic ignition and fl ame control...
- Page 2 a e lly ead the a nin s in this inte ene ontact o essionally inst ction boo let since they o ide ali ed e sonnel im o tant in o mation sa e Any e ai e lacement o od cts installation se and maintenance...
-
Page 3: Table Of Contents
Pegasus 1. Operating instructions 1 1 Introduction 1 2 Control panel 1 3 Turning on and off 1 4 Adjustments 1 5 Maintenance 1 6 Anomalies . nsta ation 2 1 General Instructions 2 2 Place of installation 2 3 Plumbing connections 2 4 Gas connection 2 5 Electrical connections 2 6 Flue connection... -
Page 4: 1 Introduction
Pegasus 1.1 Introduction Dear Customer, Thank you for choosing Pegasus, a FERROLI fl oor-standing boiler featuring advanced design, cutting-edge technology, high reliability and quality construction. Please read this manual carefully and keep it for future reference. Pegasus is a high-effi ciency heat generator for central heating running on natural or liquid gas (confi gurable at the time of installation) and regulated by an advanced electronic control system. -
Page 5: 2 Control Panel
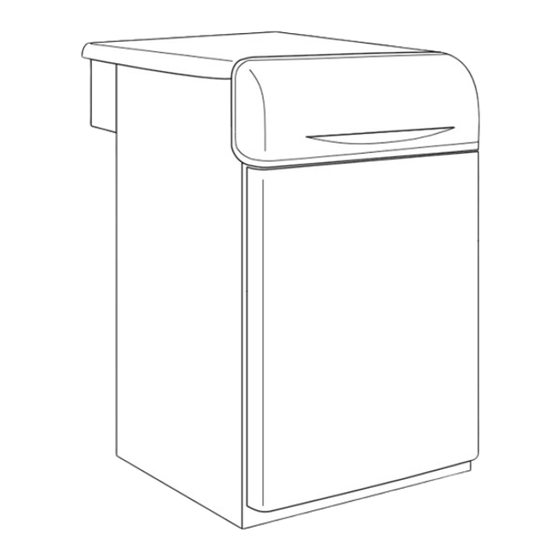
Pegasus 1.2 Control panel To access the control panel, lift the front door. Mod. 23 Mod. 32 - 45 - 56 fi g. 1 Arrangement for thermostatic controller Boiler pressure temperature gauge ume thermostat cover lame control reset button with block light Boiler control thermostat 0-1-Test switch Automatic reset safety thermostat (located inside the panel) -
Page 6: 4 Adjustments
Pegasus 1.4 Adjustments System temperature adjustment Turn knob 5 (fi g. 1) clockwise to increase the heating water temperature, turn anticlockwise to decrease it. The temperature can be varied from a minimum of 30° to a maximum of 90°. However, it is advisable not to operate the boiler below 45°. -
Page 7: 5 Maintenance
Pegasus 1.5 Maintenance he user must have the heating system serviced by uali ed personnel at least once a year and combustion checked at least every two years. onsult chapter . of this manual for more information. he boiler casing, panel and aesthetic parts can be cleaned with a soft damp cloth, possibly soaked in soapy water. -
Page 8: 1 General Instructions
Pegasus 2.1 General Instructions This device must only be used for the purpose for which it is specially designed. This unit is designed to heat water to a temperature below boiling point at atmospheric pressure and must be connected to a heating system and/or a water supply system for domestic use, compatible with its performance, characteristics and its heating capacity. -
Page 9: 4 Gas Connection
Make the boiler connection in such a way that its internal pipes are free of stress. Type and Delivery Return model Inlet Ø heating heating Pegasus 23 1” 1” 1/2” Pegasus 32 1” 1” 1/2” Pegasus 45 1” 1”... -
Page 10: 5 Electrical Connections
Pegasus 2.5 Electrical Connections Connection to the electrical grid The boiler must be connected to a single-phase, 230 Volt-50 Hz electric line. The unit’s electrical safety is only guaranteed when correctly connected to an effi cient earthing system executed according to current safety standards. Have the effi ciency and suitability of the earthing system checked by professionally qualifi... -
Page 11: 6 Flue Connection
Pegasus The diameter of the fl ue connection pipe must not be less than that of the connection on the anti-backfl ow device. Starting from the anti-backfl ow device it must have a vertical section at least 50 cm long. Current standards must be complied with regarding the dimensioning and installation of the fl... -
Page 12: Er Ice An Aintenance
Pegasus 3.1 Adjustments All adjustment and conversion operations must be carried out by Qualifi ed Personnel. The manufacturer declines any responsibility for damage or physical injury caused by unqualifi ed and unauthorized persons tampering with the device. Heating output adjustment This operation is carried out with the boiler wor ing. - Page 13 Pegasus Electronic control unit Honeywell S 4565 BF 1088 Gas valve Honeywell VK 4100 C 1075 Alarm Decrease RESET Increase Key for fi gures 4 and 5 Upstream pressure point Downstream pressure point Protection hood I nition “STEP” re ulator Protection plu Gas pressure adjustment screw IGNITION STEP ADJUSTMENT...
-
Page 14: 2 Tart Up
Pegasus 3.2 System start-up System start-up must be carried out by Qualifi ed Personnel. Checks to be made at fi rst ignition, and after all maintenance operations that involved disconnecting from the systems or an intervention on safety devices or parts of the boiler: e re pen any on-off valves bet een the boiler and the system. -
Page 15: 3 Maintenance
Pegasus • Turn the knob on main switch 6 (fi g. 1) to the 0 position; • Close the gas cock ahead of the boiler; • Disconnect the electrical power to the unit; To avoid damage caused by freezing during long shutdowns in winter, it is advisable to drain all water from the boiler and the system;... - Page 16 Pegasus ening the ront anel To open the ront panel ee the e ence in fi g. . e ore carrying o t any operation in i e the boiler i connect the electrical po er pply an clo e the ga coc p trea .
- Page 17 Pegasus Combustion analysis A point for sampling fumes has been included inside the boiler in the upper part of the anti-backfl ow device (see fi g. 7). To take the sample: 1) Remove the upper panel of the boiler 2) Remove the insulation on the anti-backfl ow device 2) Open the fume sampling point;...
-
Page 18: 4 Troubles Ooting
Pegasus 3 ÷ 4 mm 1 Combustion chamber door 2 Inspection door 3 Pilot burner 4 Ignition electrode 5 Detection electrode 6 Pilot nozzle 7 High voltage cable 8 Gas supply pipe fi g. 10... - Page 19 Pegasus Cause and cure mp , Pilot light nozzle dirty - Clean with compressed air Chec the regular gas ow to the oiler and that air has een eliminated from the pipes. Chec that the electrodes are correctly positioned and free of any deposits (see fi...
-
Page 20: 1 Imensions And Connections
Pegasus mp a m s a . s mp s s m. p mp s mp a m s a p mp s p mp a s s m. as p ss m s a mp a m s a . nd n a mp a w 50°... -
Page 21: 2 General Ie And Main Components
Pegasus 4.1 Dimensions and connections ont ie ide ie fi g. 11 Type and model Delivery Return Inlet Ø heating heating Pegasus 23 1” 1” 1/2” Pegasus 32 1” 1” 1/2” Pegasus 45 1” 1” 1/2” Pegasus 56 1” 1”... -
Page 22: 3 Tec Nical Data Table
Pegasus 4.2 General view and main components fi g. 12 Arrangement for fi tting a thermostatic controller Boiler pressure/temperature gauge Fume thermostat reset cover Flame control reset button Control thermostat Automatic reset safety thermostat (inside control panel) Switch with test button Control panel with front door raized Gas valve 10 Main burner... -
Page 23: 4 Iagrams
Pegasus 4.3 Technical data Powers Pmax Pmin Pmax Pmin Pmax Pmin Pmax Pmin Heating Power (Net Heat Value - Hi) 25,3 10,1 34,9 14,9 49,5 19,7 61,6 24,5 Available Thermal Power 80˚C - 60˚C 23,0 32,0 13,0 45,0 17,2 56,0 21,6 Gas supply Pmax... -
Page 24: 5 Iring Diagrams
Pegasus 4.4 Diagrams ir ra g 1,35 1,05 0,75 0,45 0,15 fi g. 13... - Page 25 Pegasus 4.5 Wiring diagrams iring diagram fi g. 14a Spark electrode Central heating pump Combination gas valve Overheat cut-off thermostat C.h. boiler thermostat Room thermostat (not fi tted) Ionisation electrode Full sequence automatic control Flue thermostat Switch Reset knob with lamp Test knob Auxiliary contact Dotted lines indicate connections to be performed during installation...
- Page 26 Pegasus Electrical connection diagram fi g. 14b Spark electrode Central heating pump Combination gas valve Overheat cut-off thermostat C.h. boiler thermostat Room thermostat (not fi tted) Ionisation electrode Full sequence automatic control Flue thermostat Switch Reset knob with lamp Test knob Auxiliary contact Dotted lines indicate connections to be performed during installation...
- Page 28 37047 SAN BONIFACIO - VR - ITALY tel. 045/6139411 - tlx 480172 fax 045/6100233-6100933 All rights reserved...
Need help?
Do you have a question about the PEGASUS 32 and is the answer not in the manual?
Questions and answers