
Related Manuals for SystemAir VSR 500


Summary of Contents for SystemAir VSR 500
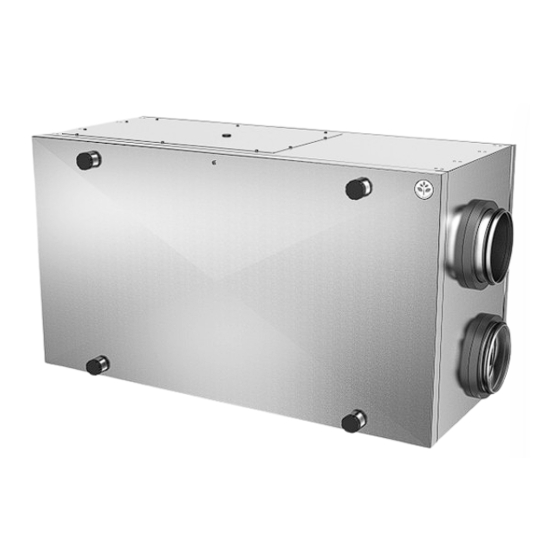
- Page 1 SAVE VSR 300/500 Service & Accessories Installation Manual Document in original language | · v1_1.12.0...
- Page 2 This also applies to products already ordered, as long as it does not affect the previously agreed specifications. Systemair is not liable or bound by the warranty if these instructions are not adhered to during installation or service. | v1_1.12.0...
-
Page 3: Table Of Contents
Contents Overview ............1 6.3.1 Main board layout ....29 6.3.2 External connections Warranty ..........1 (Connection board)....31 Type label..........1 Troubleshooting ........31 Disposal and recycling ......1 Accessories..........32 Important Safety Information ......1 Internet Access Module (IAM) ....32 Intended Use.........2 7.1.1 Setting up remote control of Admonitions .........2... -
Page 5: Overview
For the assertion of warranty claims, the products must be correctly connected and operated, and used in accordance with the data sheets. Further prerequisites are a completed maintenance plan with no gaps and a commissioning re- port. Systemair will require these in the case of a warranty claim. Type label Before calling your service representative, make a note of the specification and production number from the type label, which can be found on the side of the units, next to the external connections. -
Page 6: Intended Use
| Important Safety Information • Do not allow children to play with the device. Intended Use • Abide by the system-related conditions and requirements of the system manufacturer or plant constructor. • Keep all the warning signs on the device and in a legible condition. •... -
Page 7: Declaration Of Conformity
Heat recovery ventilation unit: SAVE VSR 300/500 (The declaration applies only to product in the condition it was delivered in and installed in the facility in accordance with the included installation instructions. The insurance does not cover components that are added or actions carried out subsequently on the product). -
Page 8: Technical Data
| Technical Data Technical Data Power consumption and fuse size SAVE VSR 300/500 come with 1670 Winstalled re-heater battery. Model VSR300 VSR500 1670 W Re-heater Fans 166 W 338 W 1836 W 2008 W Total power consumption Fuse 10 A... -
Page 9: Extract Air, G3/Iso Coarse 60% Type Filter
• The week schedule and airflow settings are correctly programmed. Configuration General SAVE VSR 300/500 has a modern touchscreen LCD control panel, simply known as HMI — Human Machine Interface. The touchscreen display provides information about current state of the unit and allows you to control all system functions. -
Page 10: Menu Overview
| Configuration On and Off slider to activate or Back button to return to a previous deactivate a function. White bubble — menu, located at the upper left corner function is inactive, green bubble — function is active. Up arrow to increase a value Button to cancel changes CANCEL Buttons to confirm changes... - Page 11 Configuration | Settings of all modes can be modified in Service menu. 5.5.1.1 Permanent modes Permanent modes are always active unless interrupted by temporary modes, activated user functions or alarms: Icon Text Description Automatic airflow control. AUTO mode is available for selection when Demand Control, Week Schedule and/or external fan control functions are configured, otherwise AUTO mode icon won’t be visible in active user modes menu.
- Page 12 | Configuration Icon Text Description Function sets speed of supply air fan to High level and extract air fan to Low level to increase air pressure within the apartment for better dust collection Central through central vacuum cleaner. Vacuum Function can be activated via digital input — Central Vacuum Cleaner Cleaner Function.
-
Page 13: Temperature Settings
Configuration | Fig. 2 Hierarchy of user modes and digital inputs Modes are listed from the highest to lowest priority; A — user modes that can be activated from the control panel; B — user modes and functions activated via digital input 5.5.2 Temperature settings Temperature can be set at SET TEMPERATURE menu accessible from the home screen by touching... -
Page 14: Airflow Settings
| Configuration While ECO mode is active, a temperature setpoint at which heater is activated is lowered to avoid activation of the heat- er during cold nighttime. If the temperature is very low and the heater is activated during the nighttime (even with lowered temperature set- point), then during the upcoming daytime indoor temperature will be increased using the heat exchanger so that accu- mulated heat could be used during the next cold nighttime, the lowered setpoint for the heater remains. -
Page 15: Status Line
Configuration | Setpoint for relative humidity and CO level can be set in Service menu. 5.5.5 Status line Status line located at the bottom area of home screen displays information about: List of active alarms. See List of active user functions. chapter 5.7.2.3 for more See chapter 5.6 for more information. -
Page 16: Main Menu
| Configuration Configurable digital input for custom user function. Airflow levels for both fans Configurable are freely configurable. Digital Input High–priority function. Configurable digital input for custom user function. Airflow levels for both fans Configurable are freely configurable. Digital Input Mid–priority function. - Page 17 Configuration | • Date/time stamp • Information if the alarm stops the unit or other note 5.7.2.3 Alarm list Alarm name Explanation Do the following Frost protection of return water in The alarm will reset once the water Frost protection heating coil.
- Page 18 | Configuration Alarm name Explanation Do the following Bypass damper Indicates malfunction in bypass Disconnect the main power supply damper. for 10 seconds to reset control function. Power up the unit, an automatic bypass damper test will be performed. If the alarm occurs again after approximately 2 minutes –...
- Page 19 Configuration | Alarm name Explanation Do the following PDM RH Indicates internal relative humidity Check that sensor is connected sensor malfunction. properly and cable is not damaged. Active: measured humidity = 0% Contact your installation company or Returned: measured humidity > 5% place of purchase.
-
Page 20: Week Schedule
| Configuration Alarm name Explanation Do the following External relative humidity sensor Check that sensor is connected malfunction. properly and cable is not damaged. In case sensor wireless – check RS485 gateway status and sensor status in HMI. Contact your installation company or place of purchase. -
Page 21: Filter
Configuration | Fig. 3 Week schedule example Scheduled days are highlighted (pos. 1). First time period (pos. 2) and the second time period (pos. 3) are shown on the right side of each schedule. 5.7.4 Filter In this menu the remaining time until filter change is displayed. Editing is locked with a password, use administrator password. - Page 22 | Configuration Settings for analog, digital and universal input terminals on the main board and connection board, configuration of functionality. Table 1 Digital universal inputs available for selection User modes Activation of specific user modes. Central Vacuum Cleaner Activation of Central vacuum cleaner function. Cooker hood function Activation of Cooker Hood function.
- Page 23 Configuration | Table 3 Digital outputs available for selection Step controllers for Heater/Cooler/Extra controller control signals. Heating/Cooling/Extra controller Sum Alarm Fault indicating output. Outdoor-/Exhaust air damper control signal. Outdoor-/Exhaust Air Damper Secondary air damper control. Secondary Air Activate Cooling Cooling mode activation signal to an external system. Interlock External fan Automatic indication about prohibited external fan control (i.e.
- Page 24 | Configuration Range: 0–20°C. • Set circulation pump stop delay. Default setting is 5 minutes. This option is available if Water / Change-over heat- er type is selected. Range: Off / 1–60 min. Cooler • Choose cooler type. Each selection unlocks additional configuration options. Default setting is None. Available types: None / Water / Change-over.
- Page 25 Configuration | Only available for Room temperature control / Extract air temperature control modes. ECO mode • Configure ECO mode settings. Set heater offset. Default setting is 5°C. Range: 0–10°C. Fan Control • Configure airflow and fan settings. Select fan control (airflow) type. Default setting is Manual (%). Available types: Manual (%) / Manual rpm / Flow (CAV) / Pressure (VAV) / External Pressure Setting...
- Page 26 | Configuration Important Changing the airflow type does not change P-band value automatically. P-band value have to be changed manually after changing the airflow type. Demand Control Configure indoor air quality sensors. Once sensor(s) are configured, Demand Control function is activated by choosing AUTO mode in home screen.
- Page 27 Fan speed differ for each household because of different unit size, duct system and system pressure. In order to find correct fan speed, external tool must be used at Systemair website. 1. Go to Systemair website and find your unit.
- Page 28 | Configuration • Configurable Digital Input 1 • Configurable Digital Input 2 • Configurable Digital Input 3 • Pressure Guard 5.7.6.6 Communication Configure Modbus and wireless settings Modbus • Set Modbus address. Default setting is 1. • Set baud rate. Default setting is 115200. •...
-
Page 29: Help
Configuration | Level 4: 45–59% Level 5: 60–100% Parameters • Select parameter type, position in y-axis, period from 60 minutes to 2 weeks and then create a graph based on stored data by touching icon in the top right corner . -
Page 30: Service
| Service Service Warnings Danger • Make sure that the mains supply to the unit is disconnected before performing any maintenance or electrical work! • All electrical connections and maintenance work must be carried out by an authorized installer and in accordance with local rules and regulations. -
Page 31: Internal Components
Service | Internal components Fig. 6 Internal components Position Description Supply air fan Overheat protection sensor Overheat protection reset button Internal electrical re-heater Rotor sensor Rotating heat exchanger Outdoor air sensor Supply air filter Extract air fan Drive belt for rotating heat exchanger Rotor motor Relative humidity/Extract air temperature sensor Extract air filter... - Page 32 The filter type is labelled on the top of the filter 6.2.1.3 Heat exchanger SAVE VSR 300/500 is equipped with a highly efficient, rotating heat exchanger. Required supply air temperature is therefore normally maintained without adding additional heat. The heat exchanger is removable for cleaning and maintenance, see “User Manual” for more information.
-
Page 33: Electrical Connections
The electrical connection box is on top of the unit behind a cover plate. 1. Main print card 6.3.1 Main board layout The SAVE VSR 300/500 is equipped with built-in regulation and internal wiring. The figure shows the main circuit board. See wiring diagram for more information. | v1_1.12.0... - Page 34 | Service Fig. 7 Main circuit board connections Position Description Main circuit board Connection to the external connection box Terminals for a heater Terminals for a TRIAC Terminals for the mains power supply Terminals for power supply of extract air fan Terminals for power supply of supply air fan Terminals for internal relative humidity/temperature sensor Analog input 1 —...
-
Page 35: External Connections (Connection Board)
Service | 6.3.2 External connections (Connection board) External connections to the main circuit board are done via connection board situated outside of the unit. Fig. 8 External connection box and board Position Description Connection to the main circuit board Connection for external control panel (HMI) or Internet access module (IAM) Modbus RS485 connection AI6–7 Freely configurable Analog input. -
Page 36: Accessories
4. Check that the rotor belt is not slipping if the unit has rotating heat exchanger. Accessories SAVE VSR 300/500 have many available accessories that can be used to expand functionality of the unit and increase comfort level. Recommended accessories can be always found at Systemair website www.systemair.com... -
Page 37: Setting Up Remote Control Of The Unit
Accessories | 7.1.1 Setting up remote control of the unit | v1_1.12.0... -
Page 38: Indoor Air Quality Sensors
• D1 — Download and install Systemair mobile application on your device. Systemair mobile application is available for both Android and iOS mobile operating systems. • D2 — Systemair web application does not require installation and can be accessed directly through the website (homesolutions.systemair.com ) by using any web browser. -
Page 39: Temperature Control
• 3 — Extract air • 4 — Exhaust air Component/product — Article number: • Systemair-1 CO2 duct sensor — 14906 • Systemair-E CO2 sensor — 14904 • Room sensor 0-50C (temperature) — 211525 • Systemair-E CO2 RH Temperature — 211522 Installation and connection 1. - Page 40 • 3 — Extract air • 4 — Exhaust air Component/product — Article number: • CB Preheater Connection Kit — 142852 • VSR 300: CB 160-1,2 230V/1 Duct heater — 5291 • VSR 500: CB 200-2,1 230V/1 Duct heater — 5384 7.3.1.1 Heater installed in the outdoor air duct...
-
Page 41: Duct Water Heater
Component/product — Article number: • RVAZ4 24A Actuator 0-10V (S) — 9862 • Duct sensor -30-70C (SAT) — 211524 • Surface sensor -30-150C (FPT) — 211523 VSR 300: VSR 500: VBC 160-2 Water heating battery— 5458 VBC 200-2 Water heating battery— 5459 VBC 160-3 Water heating battery —... -
Page 42: Duct Water Cooler
| Accessories Installation and connection 1. Install water heater in the duct. Connect pipes, 2/3– way valve and actuator. Important Do NOT use 24V DC power output from the connection board for valve actuator. 2. Connect actuator (S) to any free analog output. Fig. - Page 43 • 4 — Exhaust air Component/product — Article number: • RVAZ4 24A Actuator 0-10V (S) — 9862 • Duct sensor -30-70C (SAT) — 211524 VSR 300: VSR 500: CWK 160-3-2,5 Duct cooler,circ — 30022 CWK 200-3-2,5 Duct cooler,circ — 30023 ZTV 15-0,4 2-way valve —...
-
Page 44: Change-Over Coil For Heating/Cooling Function
| Accessories 7.3.4 Change-over coil for heating/cooling function Change-over coil can be used for both heating and cooling based on the demand. Important The change-over (heating/cooling) system can be implemented in many different ways and may vary in each household. This description explains the most common solution for connecting and controlling heating and cooling with a water coil and a heat pump. -
Page 45: Airflow Control
Accessories | Fig. 12 Change-over heating/cooling connections Configuration Before change-over heating/cooling can be activated, all components must be configured in the control panel. 1. Go to Service menu 2. Enter password (default 1111) 3. Go to Components menu, select Heater menu and select type as Change-over. Do advanced settings if necessary. -
Page 46: Installation/Maintenance
| Accessories • VSR 300: SPI-160 C Iris damper — 6753 • VSR 500: SPI-200 C Iris damper — 6754 Installation and connection • Follow instructions in the manual which is delivered with the accessory. Installation/Maintenance 7.5.1 Outdoor/Exhaust air dampers If manual fan stop is activated, the unit should be provided with dampers in exhaust and outdoor ducts to avoid cold draught and risk of condensation when the unit has been stopped. -
Page 47: Pressure Guard
Accessories | Note: 24 VAC dampers can be powered and controlled only by using a relay mounting kit with a transformer (article number: 153548). This installation procedure describes how to connect dampers powered by 230 V~ with a relay mounting kit without transformer (article number: 153549). -
Page 48: Multiple Control Panels
| Accessories 1. A differential pressure switch 2. Metal tube 3. Exhaust air direction 4. Exhaust air duct 1. Mount a differential pressure switch in a suitable place, for example on or near the outlet duct from the kitchen fan. Set the pressure switch to the lowest possible pressure, for example 20 Pa. -
Page 49: Presence Detector
Accessories | Note: • If the 24 V power supply on the connection board (CB) is used for other equipment, the number of control panels that can be powered from the unit will decrease. • A single active control panel draws 50 mA. The connection board supplies up to 250 mA. If no other accessories use 24 V power supply from the unit, up to 5 control panels can be connected without a need of external power supply. -
Page 50: Push Button
Then go to Components menu, select Heat Exchanger and turn on Passive house function. 2. Install filter kit approved by Passive House Institute (PHI). Component/product — Article number: • BF VSR 300 PH kit — 211585 • BF VSR 500 PH kit — 211586 | v1_1.12.0... - Page 51 | v1_1.12.0...
- Page 52 Systemair UAB Linų st. 101 LT–20174 Ukmergė, LITHUANIA Phone +370 340 60165 Fax +370 340 60166 www.systemair.com...
Need help?
Do you have a question about the VSR 500 and is the answer not in the manual?
Questions and answers