Advertisement
Quick Links
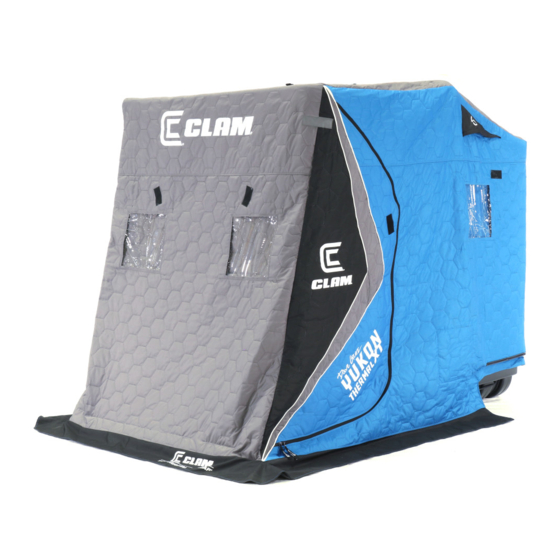
SPECIFICATIONS
▪
Part Number: 116607
▪
Set Up Size: L 93 x W 63 x H 79
▪
Packed Size: L 63 x W 40 x H 26 folded seats
▪
W e i g h t: 109 lbs.
▪
Fishable Area: 23 sq.ft
▪
Instructions: 106981
Please contact customer service directly at the E-mail or phone number listed below for any
quality issues. ONCE USED THIS PRODUCT CANNOT BE RETURNED TO STORE.
** Warranty cannot be honored without an original, dated receipt **
IMPORTANT-PLEASE READ:
This product is warranted to the original retail purchaser (from an authorized dealer) and is non-transferable.
Clam Outdoors has a three year manufacturer's defect warranty from the date of original purchase. Warranty
does not cover cracked or worn bases (if runner kits have not been installed as recommended), cracked
windows, tent tears or cuts, or broken or bent hoops due to high wind weather conditions or unattended use.
Defective parts will be replaced or repaired (at the manufacturer's option) if found to be defective within three
years from the date of original purchase. Warranty will be void if product has been subject to neglect, misuse,
improper installation, misapplication, alteration, accident including but not limited to improper maintenance, or
use of unauthorized parts or attachments. Please read the entire owner's manual to ensure proper installation,
use, storage and care of your Clam Shelter.
To submit a warranty claim request, please use one of the following methods:
▪
https://clamoutdoors.com/pages/warranty-form
▪ Email:
customerservice@clamcorp.com
In your request, please include your full name, address, phone number, a copy of your receipt, a brief description
of the problem, and pictures to clearly show the area(s) of concern. Our Warranty Department will review your
request, and a Clam representative will contact you regarding your claim status. All returns must be shipped to
us postage pre-prepaid.
It is expressly understood that Clam Outdoors Inc., liability for its products, whether due to breach of
warranty, negligence, strict liability, or otherwise, is limited to the repair of the product as stated above. Clam is
not liable for any injury, loss, damage, or expense, whether direct or consequential, including but not limited to loss
of use, income, profit, or damage to material arising in connection with the sale, installation, use of, inability to
use, or the repair or replacement of Clam products. Clam reserves the right to make alterations or
modifications in its products at any time, which in its opinion, may improve the performance and efficiency of
the product. Clam shall not be obligated to make such alterations or modifications to products already in service
Clam contact information
Customer Service Hrs: 9am to 4pm, Monday – Friday Central Standard Time
Clam Outdoors
Attn: Customer Service
12135 Brockton Lane
Rogers, MN 55369
Phone: 763-231-4120
CLAMOUTDOORS.COM
WARRANTY INFORMATION
** REGISTER YOUR PURCHASE ONLINE AT CLAMOUTDOORS.COM **
LIMITATION OF LIABILITY
MODEL 16607
Advertisement

Related Manuals for Clam 16607


Summarization of Contents
Warranty and Support Information
Submitting a Warranty Claim
Detailed instructions for submitting a warranty claim, including web form and email.
Limitation of Liability
Explains the extent of Clam Outdoors Inc.'s liability for its products.
Contact Information
Provides customer service hours, mailing address, and phone number.
Assembly Instructions
Step 1: Install Brackets
Install brackets to both sides with fasteners as shown and securely tighten.
Step 2: Install Brackets and Seat Rail Support
Install brackets and seat rail support to brackets with fasteners as shown.
Step 3: Install Poles
Install straight and bent poles to brackets with fasteners, ensuring slots face inward.
Step 4: Install Hinge Clips and Collars
Slide hinge clips into place and install two collars to each hoop pole.
Step 5: Assemble Hoop Poles
Slide hoop poles over tube extensions, lock with collars, and attach extension poles.
Step 6: Assemble Seat Components and Blocks
Rotate swivel, assemble seat components, and assemble blocks with fasteners.
Step 6 Continued: Attach Swivel and Seat Rail
Attach swivel assembly to seat bottom and assemble seat rail to front bracket.
Step 6 Continued: Slide Seat Rail and Assemble Rear Bracket
Slide seat rail through blocks and assemble the rear bracket with components.
Step 7: Secure Seat
Use latch to secure the seat in place.
Step 8: Drape and Attach Tent
Drape tent over poles, attach with Velcro straps, and connect to extension tubes.
Step 9: Install U-Channel Molding
Heat and install U-channel molding to secure tent material to the base lip.
Tips for Use
Folding and Transporting
Instructions on how to properly fold and transport the ice fishing shelter.
Setup and Take Down
Guidance on the proper procedure for setting up and taking down the fish trap.
Safety Instructions
General Warnings
Important warnings regarding heater use, ventilation, unattended use, and visibility.
Frequently Asked Questions
Runner Kit and Base Warranty
Information on whether installing a runner kit affects the shelter's base warranty.
Zipper Lubrication
Advice on preventing zippers from freezing or sticking.
Pole Lubrication and Repair
Tips for lubricating sticking poles and how to bend them back.
Replacement Parts
Information on purchasing replacement parts directly from the manufacturer.
U-Channel Installation
Guidance on attaching the U-channel molding and troubleshooting stiffness.
Pinholes and Waterproofing
Explanation of pinholes in fabric and advice on waterproofing.
Fabric Cracks and Coating
Explanation for cracks on the inside fabric finish and potential fixes.
Drying and Storage
Recommendations for drying and storing the shelter to prevent damage.
Rodent Prevention
Advice on keeping mice or rodents from damaging the tent.
Tent Washing
Recommendations for washing the tent to remove mildew and odor.
Condensation and Heaters
Explanation of how heaters can increase condensation in the shelter.
Patch Kits and Application
Information on available patch kits and how to apply them correctly.
International Shipping
Details on shipping outside of the United States, specifically to Canada.
Need help?
Do you have a question about the 16607 and is the answer not in the manual?
Questions and answers