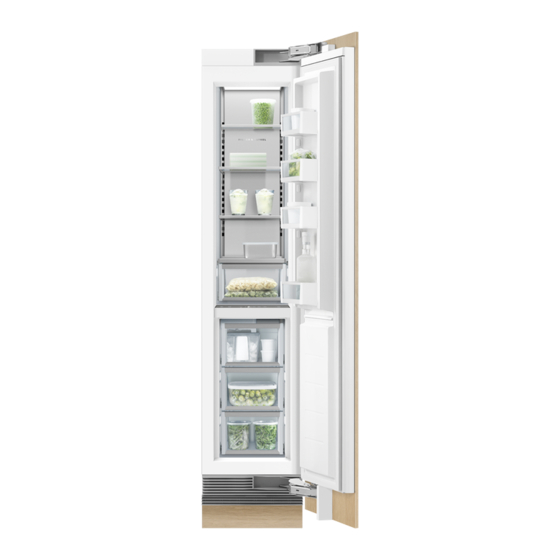
Summarization of Contents
(1) SAFETY AND WARNINGS
General Safety Warnings
Read and follow safety and warning instructions before operating the appliance.
(2) INTEGRATED COLUMNS OVERVIEW
Integrated Column Models
Overview of different integrated column refrigerator and freezer models.
(3) COMPONENTS LIST
Door Panel Attachment Kit
Components for attaching door panels to the appliance.
Anti-Tip Bracket Assembly
Parts required to secure the appliance and prevent tipping.
Fasteners and Separate Parts
Various fasteners and components supplied in separate bags.
(4) PRODUCT DIMENSIONS AND SPECIFICATIONS
Product Dimensions
Overall height, width, and depth measurements of the appliance.
Product Specifications
Door clearance, weight, and door hinge type specifications.
(5) CABINETRY OPTIONS
Frameless Cabinetry
Installation method for frameless cabinetry, aligning product with cabinetry.
Framed Cabinetry
Installation method for framed cabinetry, aligning product with frame.
(6) CAVITY DIMENSIONS
Single Install Cavity Dimensions
Required cavity dimensions for single appliance installation.
Dual Install Cavity Dimensions
Required cavity dimensions for dual appliance installation.
(7) DOOR AND TOE KICK PANEL DIMENSIONS
Door Panel Dimensions
Specifications for stainless steel and custom door panel dimensions.
Toe Kick Dimensions
Dimensions for toe kicks, including height and depth.
(8) CUSTOM DOOR PANEL DIMENSIONS
Panel Preparation Guidelines
Guidelines for preparing custom door panels, including screw hole locations.
(9) DOOR OPENING ROTATION AND CLEARANCE
Door Opening Clearance Dimensions
Clearance measurements for 115° and 90° door openings.
(10) ELECTRICAL AND PLUMBING SPECIFICATIONS
Electrical and Plumbing Dimensions
Dimensions of supply areas for electrical and plumbing connections.
Electrical and Plumbing Requirements
Power supply, service, outlet, and water inlet specifications.
(11) BEFORE INSTALLATION CHECKLIST
Installation Location Checks
Checking cabinetry, power supply, and water supply before installation.
Appliance Checks
Verifying appliance model, packaging, and components.
(12) UNPACKING AND MOVING THE PRODUCT
Unpacking Procedures
Steps for safely removing packaging and internal parts.
Moving Procedures
Instructions for safely moving the appliance using a cart.
(13) ATTACH THE ANTI-TIP BRACKET
Bracket Installation Steps
Detailed steps for attaching the anti-tip bracket to the wall.
(14) CONNECT TO WATER AND POWER SUPPLY
Water and Power Connection Steps
Connecting the appliance to water supply and power outlets.
(15) SINGLE INSTALLATION: DEPTH ALIGNMENT GAUGES
Installing Depth Alignment Gauges
Attaching depth alignment gauges to the door panel.
(15) SINGLE INSTALLATION: POSITIONING AND ALIGNMENT
Positioning Appliance in Cabinetry
Coiling hose, inserting plugs, and rolling appliance into cabinetry.
Aligning Appliance in Cabinetry
Marking, aligning, and checking gaps for appliance placement.
(15) SINGLE INSTALLATION: HEIGHT ADJUSTMENT AND FIXING
Adjusting Appliance Height
Adjusting front and rear feet for correct height and alignment.
Fixing Appliance in Cabinetry
Attaching top and side brackets to secure the appliance.
(16) DUAL INSTALLATION: INITIAL SETUP
Attach Central Spacer to Cabinetry
Installing the central spacer between two appliances.
Installing Depth Alignment Gauges
Attaching depth alignment gauges for dual installation.
(16) DUAL INSTALLATION: FIRST APPLIANCE POSITIONING
Positioning and Aligning First Appliance
Rolling, aligning, and checking the first appliance in cabinetry.
(16) DUAL INSTALLATION: FIRST APPLIANCE HEIGHT AND FIXING
Adjusting Height of First Appliance
Adjusting the height of the first appliance inside the cabinetry.
Fixing First Appliance in Cabinetry
Attaching top and side brackets for the first appliance.
(16) DUAL INSTALLATION: SECOND APPLIANCE POSITIONING
Positioning and Aligning Second Appliance
Rolling and aligning the second appliance next to the first.
(16) DUAL INSTALLATION: SECOND APPLIANCE HEIGHT ADJUSTMENT
Adjusting Height of Second Appliance
Adjusting the height of the second appliance inside the cabinetry.
(16) DUAL INSTALLATION: FIXING SECOND APPLIANCE
Fixing Second Appliance in Cabinetry
Securing the second appliance using joiner kits and brackets.
(17) INSTALL WATER FILTER
Flushing the Water Filter
Procedure for flushing the water filter before use.
(18) INSTALL BRACKETS TO STAINLESS STEEL DOOR PANEL
Attaching Top and Side Brackets
Steps to attach hanging brackets to stainless steel door panels.
(19) INSTALL BRACKETS TO CUSTOM DOOR PANEL
Attaching Top and Side Brackets to Custom Panel
Steps to attach hanging brackets to custom door panels.
(20) INSTALL DOOR PANELS
Attach Door Handle
Attaching the door handle to stainless steel or custom panels.
Hang Door Panel
Mounting the door panel onto the appliance hinges.
(20) DOOR PANEL ADJUSTMENT AND LOCKING
Adjust Door Panel Alignment
Adjusting door height, depth, and position for flush fitment.
Fix Locking Brackets
Securing the door panel using locking brackets.
(21) INSTALL TOE KICK
Installing Toe Kick Mounting Plate and Toe Kick
Attaching the toe kick mounting plate and the toe kick to the plinth.
(22) INSTALL TOE KICK GRILLE
Adjusting and Attaching Toe Kick Grille
Adjusting grille depth and attaching top/bottom grilles.
(23) INSTALL CABINET TRIMS
Install Side Trims
Applying adhesive dual-lock strips and sliding trims into place.
(23) INSTALL TOP AND CENTER TRIMS
Install Top Trim
Sliding top trim into cabinet hinge pockets and engaging dual lock.
Install Center Trims (Dual Install)
Positioning and fixing center trims between cabinets for dual installations.
(24) INSTALL FLOW DIVIDER AND DOOR TRIMS
Install Flow Divider
Attaching the flow divider to the door panel.
Install Door Trims
Installing top and side door panel extrusions.
(25) OPTIONAL: CHANGING OVER DOOR HINGES
Removing the Door and Hinges
Steps for safely removing the appliance door and its hinges.
Detailed Hinge Removal
Detailed steps for removing top and bottom door hinges and components.
Moving Sensor Housing
Moving the sensor housing to the opposite side for hinge change.
Reinstalling Hinges and Brackets
Reinstalling top/bottom hinges, adapter brackets, and pockets on the new hinge side.
Final Door Installation
Reattaching the door and activating the hinge spring.
(26) FINAL CHECKLIST
To Be Completed by Installer
Checklist of tasks for the installer to complete.
Ice Models Only Checks
Specific checks for ice maker models after installation.


Need help?
Do you have a question about the RS3084FLJ1 and is the answer not in the manual?
Questions and answers