
Related Manuals for Absen N4 Plus


Summary of Contents for Absen N4 Plus
- Page 1 N Plus Series User’s Manual N1.8 Plus/N2 Plus/N3 Plus/N4 Plus/N4D Plus/N5 Plus Shenzhen Absen Optoelectronics Co., Ltd.
-
Page 2: Table Of Contents
Table of contents *Safety information .………………………………………………………………………….…. 3 *Product introduction ……………………………………………………………………………. About N Plus series ……………………………………………………………………………….. 7 Product Dimensions …………………………………………………………………………………. 8 Product specifications ……………………………………..…………………………………… 9 Product Value Features ………………………………………………………………………… 11 *Product Components ..………………………………………………………………………… 12 Cabinet Introduction ………………………………………………………………….…………... 12 Product Structure / Electronic Components Details …………………………………… 12 *Product Installation …………………………………………………………………..…………. -
Page 3: Safety Information
This product may result in serious injury or death due to fire hazard, electric shock or on dropping. Please read this manual carefully before installing, powering up, operating and maintenance of thisproduct. Follow safety instructions in this manual and on the product. If you have any questions, please seek help from Absen. Beware of electric shock! - Page 4 • To prevent electric shock the device must be properly grounded during installation. Do not ignore using the grounding plug, or else there is a risk of electric shock. • During a lightning storm, please disconnect the device’s power supply, or provide other suitable lightning protection.
- Page 5 • When stacking products, please hold products firmly to prevent tipping or falling. • Ensure all components and steel frames are securely installed. • When installing, repairing, or moving the product, ensure the working area is free of obstacles, and ensure the working platform is securely and stably fixed.
- Page 6 Product disposal • Any component that has a recycling bin label can be recycled. • For more information on collecting, reusing and recycling, please contact the local or regional waste management unit. • Please contact us directly for detailed environmental performance information. Warning: Changes or modifications to this unit not expressly approved by the party responsible for compliance could void the user's authority to operate the equipment.
-
Page 7: Product Introduction
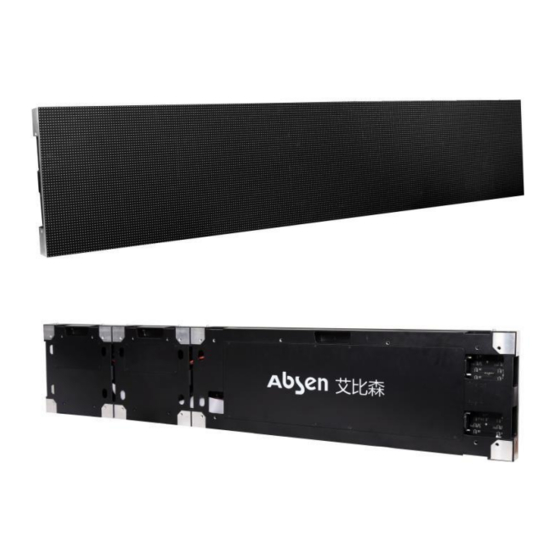
Product introduction About N Plus Series N1.8 Plus/N2 Plus/N3 Plus/N4 Plus/N4D Plus/N5 Plus are indoor fixed mounted high- definition display with unique competitive advantages. Designed in a long rectangle shape with full aluminum structure, it looks like a tablet. Its cabinets are light and thin, only10kg/cabinet, and only 54mm thickness. -
Page 8: Product Dimensions
Product Dimensions Cabinet Size Module size:288mmx288mm... -
Page 9: Product Specifications
Product specifications N1.8 Plus N5 Plus Parameter N2 Plus N3 Plus N4 Plus N4D Plus Black Black Black Black Black LED Type SMD1921 SMD1515 SMD1515 SMD2121 SMD2121 SMD2121 5.14 Pixel Pitch (mm) 1.89 Panel Dimensions 864×288× 864×288× 1440×288 1440×288 1440×288 1440×288 (WxHxD)/(mm) ×54... - Page 10 PSU & Others Front Front Front Front Front/Rear Front/Rear Maintenance /Rear /Rear /Rear /Rear Stack, Stack, Stack, Stack, Stack, Stack, Panel Installation Front/ Front/ Front/ Front/ Front/Rear Front/Rear Type Rear Rear Rear Rear Installation Installation Installation Installation Installation Installation TUV- TUV- TUV- TUV-...
-
Page 11: Product Value Features
*Super large viewing angle, high contrast ratio. Uses TOP type SMD LED, combined with light trap mask design, ensuring excellent optical effects *Supports Absen’s 3 with built-in data correction memory, so that users can directly replace modules without cumbersome setup, and can easily import and... -
Page 12: Product Components
Product Components Cabinet Introduction Product Structure / Electronic Components Details Product structure consists of two parts: Cabinet and module. Cabinet have two different type:864*288mm(3 modules width) and 288*288mm (one module width) It can be easily combined into three kinds of cabinet size by the bolts, 864*288mm/1152* 288mm/ 1440*288mm, which can application in different case. - Page 13 Cabinet structure: Full aluminum die-casting cabinet is extremely thin and light. Cabinet can be installed either horizontally or vertically. Modular structure: Magnetic modules. Relative to the cabinet structure, modules can be rotated by 90 degrees for installation, so that the cabinet can be installed vertically or horizontally.
- Page 14 Receiving card and hub card Receiving card Hub card Flat cable Up and down signal cable, 0.3m length: Left and right signal cable, 1.5m length: Up and down power cable, 0.3m length: Screen long power cable, 10m length:...
- Page 15 Packaging...
-
Page 16: Product Installation
Installation-use connecting plates and mounting bolts Product Installation Various installation methods are available for this product: front installation, rear installation, floor installation,using sub-frame for fast installation, as well as wall- mounted installation. Front Installation Remove the modules from left and right sides of the cabinet, use M5x60 bolt at the front mounting holes to fix it to the steel structure. - Page 17 Use M8x60 bolts and connecting plates to fix onto the 40X40 square tube bar. When installing, first fix 4 (2 to 4) cabinets onto the sub-frame, and then mount the sub-frame onto the steel structure or wall, to achieve fast installation. Note: Front or rear installation can also be used for sub-frame installation.
-
Page 18: Wall-Mounting Solution
Wall-mounting Solution Install cabinets onto the sub-frame or fixed structure, and then directly mount the sub-frame onto the wall,to achieve wall-mounting installation. Front Installation Instructions (Wall-mounting) Step 1:... - Page 19 Step 2: Take a properly spliced cabinet, remove modules from four corners, mark installation positions on the wall according to the mounting holes on the sub-frame. Step 3: According to the installation positions marked on the wall, install M10 expansion screws.
-
Page 20: Product Wiring
same procedures to install the next spliced cabinet. Product Wiring Power Supply Wiring • Preparation before wiring Before connecting to power supply and switching on control signal to the entire screen, please carefully check the power supply and signal cable connections. Please carefully check the "L"... -
Page 21: Power Cable Wiring
Take 2x4 cabinets for example; following are the instructions for power and signal cable connection method: Power Cable Wiring Total power for 8 cabinets with size 1440x288mm each is: 8x1.440x0.288x480w=1.6kw, arranged in 2x4 with 2 cabinet columns, and 4 cabinets for each column connected to power supply in series. -
Page 23: Maintenance
Maintenance Preparation Tools... -
Page 24: Module Front & Rear Maintenance
Module Front & Rear Maintenance Module Front Maintenance: Use front maintenance tool to take off module. front maintenance tool Use the screwdriver to take off the front maintenance tool power supply and receiving card... - Page 25 Module Rear Maintenance: 1. Use screwdriver take off base screw Remove these screws 2. Rear service. The power supply is inside 1, After remove the back cover, you can find the power supply and receiving card 2, Remove these screws, you can take out the receiving card...
- Page 26 3, Remove these screws, you can take off the power supply...
-
Page 27: Check For Power Supply Short Circuit
GND). If there is a short circuit, please carefully investigate the wirings. Make sure all wirings are normal, and only then connect power to operate the unit. All rights reserved by Shenzhen Absen Optoelectronic Co., Ltd. Shenzhen Absen Optoelectronic Co., Ltd. reserves the rights to modify contents without any further notice.
Need help?
Do you have a question about the N4 Plus and is the answer not in the manual?
Questions and answers