Advertisement
Quick Links
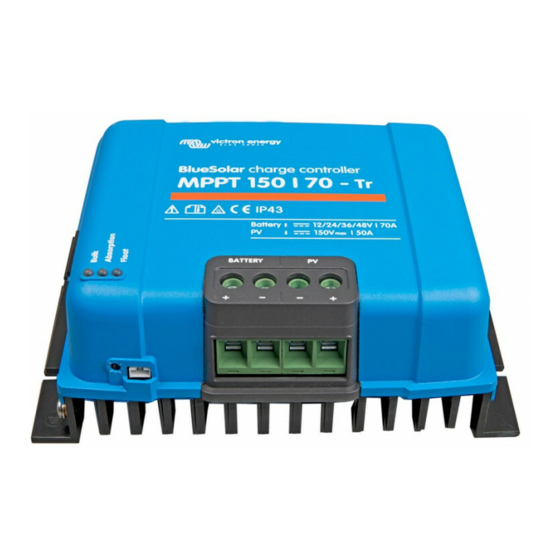
SmartSolar charge controllers with CAN-bus
MPPT 150/70-Tr VE.Can
MPPT 150/85-Tr VE.Can
MPPT 150/100-Tr VE.Can
MPPT 250/70-Tr VE.Can
MPPT 250/85-Tr VE.Can
MPPT 250/100-Tr VE.Can
Användarhandbok
MPPT 150/70-MC4 VE.Can
MPPT 150/85- MC4 VE.Can
MPPT150/100-MC4 VE.Can
MPPT 250/70-MC4 VE.Can
MPPT 250/85-MC4 VE.Can
MPPT 250/100-MC4 VE.Can
Manual
Handleiding
Manuel
Anleitung
Manual
Manuale
Advertisement

Related Manuals for Victron energy MPPT 150/85- MC4


Summary of Contents for Victron energy MPPT 150/85- MC4
- Page 1 Manual Handleiding Manuel Anleitung Manual Användarhandbok Manuale SmartSolar charge controllers with CAN-bus MPPT 150/70-Tr VE.Can MPPT 150/70-MC4 VE.Can MPPT 150/85-Tr VE.Can MPPT 150/85- MC4 VE.Can MPPT 150/100-Tr VE.Can MPPT150/100-MC4 VE.Can MPPT 250/70-Tr VE.Can MPPT 250/70-MC4 VE.Can MPPT 250/85-Tr VE.Can MPPT 250/85-MC4 VE.Can MPPT 250/100-Tr VE.Can...
-
Page 3: General Description
1. General Description Bluetooth Smart built-in: dongle not needed The wireless solution to set-up, monitor, update and synchronise multiple controllers using Apple and Android smartphones, tablets or other devices. Up to 10 units can be synchronised with Bluetooth. VE.Direct port and two VE.Can ports Both ports can be used for a wired data connection to a Color Control, Venus GX, PC or other devices. - Page 4 Optional external voltage and temperature sensor (range -20 °C to 50 °C) The Smart Battery Sense is a wireless battery voltage-and-temperature sensor for Victron MPPT Solar Chargers. The Solar Charger uses these measurements to optimize its charge parameters. The accuracy of the data it transmits will improve battery charging efficiency, and prolong battery life Alternatively, Bluetooth communication can be set up between a BM V-712 battery monitor with battery temperature sensor and the solar charge...
- Page 5 Configuring and monitoring Configure the solar charge controller with the VictronConnect app. Available for iOS & Android devices; as well as macOS and Windows computers. An accessory might be required; enter victronconnect in the search box on our website and see the VictronConnect download page for details. For simple monitoring, use the MPPT Control;...
-
Page 6: Safety Instructions
2. Safety instructions SAVE THESE INSTRUCTIONS - This manual contains important instructions that shall be followed during installation and maintenance. Danger of explosion from sparking Danger of electric shock ● Please read this manual carefully before the product is installed and put into use. ●... - Page 7 ● Use flexible multistranded copper cable for the battery and PV connections. The maximum diameter of the individual strands is 0,4 mm/0,125 mm² (0.016 inch/ AWG26). A 25 mm² cable, for example, should have at least 196 strands (class 5 or higher stranding according to VDE 0295, IEC 60228 and BS6360).
-
Page 8: Installation
3. Installation WARNING: DC (PV) INPUT NOT ISOLATED FROM BATTERY CIRCUIT. CAUTION: FOR PROPER TEMPERATURE COMPENSATION THE AMBIENT CONDITION FOR CHARGER AND BATTERY MUST BE WITHIN 5 °C. 3.1 General ● Mount vertically on a non-flammable surface, with the power terminals facing downwards. - Page 9 3.3 PV configuration (also see the MPPT Excel sheet on our website) ● The controllers will operate only if the PV voltage exceeds battery voltage (Vbat). ● PV voltage must exceed Vbat + 5 V for the controller to start. Thereafter minimum PV voltage is Vbat + 1 V.
- Page 10 3.6 CAN bus interface The charger is equipped with two CAN bus RJ45 sockets. The CAN bus on this charger is not galvanically isolated. The CAN bus is referenced to the minus battery connection. The CAN bus interface will be referenced to ground if the minus pole of the battery is grounded.
- Page 11 3.7 Synchronised parallel operation Several charge controllers can be synchronised with the CAN interface. This is achieved by simply interconnecting the chargers with RJ45 UTP cables (bus terminators needed, see section 3.6). The paralleled charge controllers must have identical settings (e.g. charge algorithm).
- Page 12 3.9 Configuration of the controller with the rotary switch Fully programmable charge algorithm (see the software page on our website) and eight preprogrammed charge algorithms, selectable with a rotary switch: Suggested battery type Equalize d V/dT Absorption Float °C 31,8 28,2 27,6 Gel Victron long life (OPz V)
- Page 13 A binary LED code helps determining the position of the rotary switch. After changing the position of the rotary switch, the LEDs will blink during 4 seconds as follows: Switch Blink position Bulk Float frequency Fast Slow Slow Slow Slow Slow Slow Slow...
- Page 14 For the latest and most up-to-date information about the blink codes, please refer to the Victron Toolkit app. Click on or scan the QR code to get to the Victron Support and Downloads/Software page. 3.11 Battery charging information The charge controller starts a new charge cycle every morning, when the sun starts shining.
- Page 15 Voltage Limit (C VL) is for some batteries even dynamic; changes over time; based on for example maximum cell voltage in the pack and other parameters. When, in case of the above-mentioned exceptions, several solar chargers are connected to a GX device, these chargers will automatically be synchronised.
- Page 16 These settings are adjustable. Reset of the charge algorithm: The default setting for restarting the charge cycle is Vbatt < (Vfloat – 0,4 V) for lead-acid, and Vbatt < (Vfloat – 0,1 V) for LiFePO batteries, during 1 minute. (values for 12 V batteries, multiply by two for 24 V) 3.9 Automatic equalization Automatic equalization is default set to ‘OFF’.
- Page 17 Pressing the "-" button or the "+"button for 4 seconds activates the auto- scroll-mode. Now all LCD-screens will pop-up one by one with short intervals. The auto-scroll-mode can be stopped by pressing the "-" or the "+" button shortly. 3.14 Pluggable LCD display - History data The charge controller tracks several parameters regarding the energy harvest.
- Page 18 h. To return to normal mode, press SETUP during 3 seconds. Scrolling text Icons Segments Units Function or parameter On/off switch , .-. A Maximum charge current System voltage -...
- Page 19 Scrolling text Icons Segments Units Function or parameter Reset to default settings (11) History data reset (12) Lock settings , Temperature unit °C/ °F , Notes: 1) The factory defined battery type can be selected with the rotary switch next to VE.Direct connector.
- Page 20 9) VE.Direct port RX pin mode (setting 57) Description Value Remote on/off (default). Can be used for on-off control by a VE.Bus BMS (instead of connecting the BMS to the remote on-off port. VE.Direct non-inverting remote on/off cable needed. (ASS030550310) No function.
-
Page 21: Troubleshooting
4. Troubleshooting Problem Possible cause Solution Reversed PV connection Connect PV correctly Charger does not function Reverse battery Non replacable fuse blown. connection Return to VE for repair Check battery A bad battery connection connection Cable losses too high Use cables with larger cross section Large ambient Make sure that... - Page 22 Using the pluggable LCD display or VictronConnect and the procedures below, most errors can be quickly identified. If an error cannot be resolved, please refer to your Victron Energy supplier. Error nr. Problem Cause / Solution n. a. The LCD does not light up...
- Page 23 Error nr. Problem Cause / Solution Err 26 Terminal overheated Power terminals overheated, check wiring and fasten bolts if possible. This error will auto-reset. Err 33 PV over-voltage This error will auto-reset after PV-voltage has dropped to safe limit. This error is an indication that the PV-array configuration with regard to open-circuit voltage is critical for this charger.
- Page 24 Specifications, 150 V models SmartSolar charge MPPT 150/70 150/85 150/100 controller Battery voltage 12/24/48 V Auto Select (36 V: manual) Maximum battery current 70 A 85 A 100 A Nominal PV power, 12 V 1a,b) 1000 W 1200 W 1450 W Nominal PV power, 24 V 1a,b) 2000 W 2400 W...
- Page 25 Specifications, 250 V models SartSolar charge controller MPPT 250/70 250/85 250/100 Battery voltage 12/24/48 V Auto Select (36 V: manual) Maximum battery current 70 A 85 A 100 A Nominal PV power, 12 V 1a,b) 1000 W 1200 W 1450 W Nominal PV power, 24 V 1a,b) 2000 W 2400 W...
Need help?
Do you have a question about the MPPT 150/85- MC4 and is the answer not in the manual?
Questions and answers