
Related Manuals for Victron energy BlueSolar MPPT 150/85


Summary of Contents for Victron energy BlueSolar MPPT 150/85
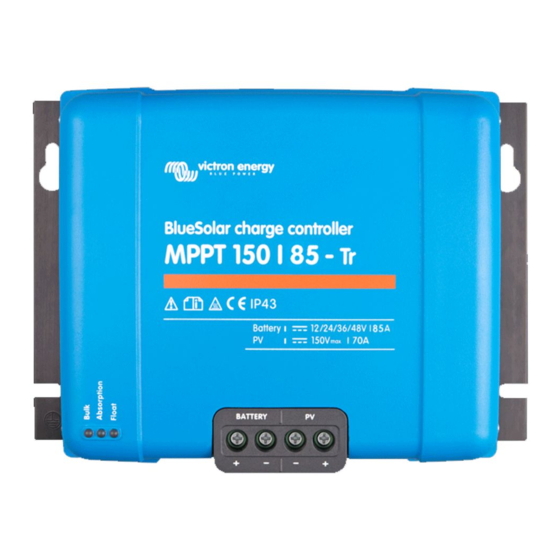
- Page 1 Manual Handleiding Manuel Anleitung Manual Användarhandbok BlueSolar charge controller MPPT 150/85...
-
Page 2: Product Introduction
1. PRODUCT INTRODUCTION Charge current up to 85 A and PV voltage up to 150 V The BlueSolar 150/85-MPPT charge controller is able to charge a lower nominal- voltage battery from a higher nominal voltage PV array. The controller will automatically adjust to a 12, 24, or 48 V nominal battery voltage. Synchronised parallel operation of up to 25 units Interconnect the charge controllers with RJ45 UTP cables and they will automatically synchronise. -
Page 3: Safety Instructions
2. SAFETY INSTRUCTIONS Danger of explosion from sparking Danger of electric shock ● It is advised to read this manual carefully before the product is installed and put into use. ● This product is designed and tested in accordance with international standards. The equipment should be used for the designated application only. -
Page 4: Installation
3. INSTALLATION This product may only be installed by a qualified electrical engineer. Important: In order to enable automatic system voltage recognition always connect the batteries before connecting the solar panels. 3.1 Location The product must be installed in a dry and well-ventilated area, as close as possible to - but not above - the batteries. - Page 5 Table 1 below gives some examples of battery cable cross sections calculated with formula (5). (in this case I and V in formula (5) are the output current and output voltage of the charge controller) 12V system (solar array up to 1200W) Maximum Length 2x1,5 m Length 2x2,5 m...
- Page 6 3.3 PV connection The PV input current of the charge controller is limited to 75A. In case of a potential solar array output exceeding 75A, the solar array voltage will increase up to the level at which the output is reduced to 75A. The voltage on the PV input should never exceed 150V under any condition.
-
Page 7: Optional Connections
48V system (solar array up to 4850W) Length 2x20 Solar array Solar array Power loss Length 2x5 meter Length 2x10 meter meter MPP-voltage MPP-current in PV cables α (%) recommended 0,75 Note 1: highlighted cable cross sections: minimum cross section due to thermal limit. Note 2: please consult local regulations regarding maximum allowed current carrying capacity of cables. - Page 8 3.4.4 Programmable relay The charge controller is equipped with a potential-free Single Pole Double Throw relay that by default is programmed according to option 3 below. The relay can be programmed to energize on one of the following events: option 1: when the maximum voltage on the PV input is exceeded option 2: when the temperature protection becomes active option 3: when the battery voltage becomes too low (adjustable low voltage limit) option 4: when the charger is in equalisation mode...
-
Page 9: Connecting The Battery
4. POWERING UP (The REMOTE connector should be wired , see 4.5) 4.1 Connecting the battery Close the connection to the battery, but DO NOT connect the solar array. All the icons of the display will now light up: This is followed by the software version: In this case the Software-version is 2.03 After the software-version has been displayed, the charger will start the system voltage recognition... - Page 10 4.3 Charge algorithm 4.3.1. Overview Several preset charge curves and one user adjustable curve are available, see table below. The DEFAULT-setting is algorithm nr 2. Make sure the charge algorithm is correct for the battery-type that must be charged. If necessary, contact the battery supplier for the appropriate battery-settings.
- Page 11 4.3.2. Procedure for choosing a preset charge algorithm a. Press SETUP during 3 seconds: the “Menu” icon will light up. b. Press the "-" or "+" button several times until the screen shows “ ”. c. Press SELECT: the algorithm number will now blink (a number with superscript “type”).
-
Page 12: Remote On-Off
If the absorption period is interrupted due to a cloud or due to a power hungry load, the absorption process will resume when absorption voltage is reached again later on the day, until the absorption period has been completed. The absorption period also ends when the output current of the solar charger drops to less than 2 Amps, not because of low solar array output but because the battery is fully charged (tail current cut off). - Page 13 5. MORE INFORMATION ABOUT THE LCD SCREENS 5.1 Scrolling through the LCD screens The following information will be displayed if the "-" button is pressed (in order of appearance): Displayed info Icons Segments Units Battery charge current (1) . Battery voltage (1) ...
-
Page 14: History Data
5.2 History data The charge controller tracks several parameters regarding the energy harvest. Enter history data by pressing the SELECT button when in monitor mode, a scrolling text will be visible. Press + or – to browse the various parameters as shown in table 5, press SELECT to stop scrolling and show the corresponding value. - Page 15 5.3 SETUP MENU parameter details Scrolling text Icons Segments Units Function or parameter On/off switch , .-. A Maximum charge current (bulk current) ,- V System voltage ,- Type Charge algorithm ...
- Page 16 Press SELECT to confirm the change, the value will stop blinking, and the change is made final. g. Press SETUP to return to the parameters menu. With the "-" or "+" button it is now possible to scroll to another parameter that needs change. h.
-
Page 17: Troubleshooting
The equalise duration is however limited to max. 1h when triggered manually. 7. TROUBLESHOOTING With the procedures below, most errors can be quickly identified. If an error cannot be resolved, please refer to your Victron Energy supplier. Error nr. Problem... - Page 18 Error nr. Problem Cause / Solution on LCD display Err 5 Remote temperature This error will not auto-reset. sensor failure 1. Scroll through the LCD-screens to find the battery temperature. 2. If the LCD indicates an unrealistic temperature value or "---", replace the remote sensor.
-
Page 19: Specifications
8. SPECIFICATIONS MPPT 150/85 BlueSolar charge controller 12 / 24 / 36 / 48V Auto Select Nominal battery voltage Rated charge current 85A @ 40°C (104°F) Maximum solar array input power 12V: 1200W / 24V: 2400W / 36V: 3600W / 48V: 4850W 150V absolute maximum coldest conditions Maximum PV open circuit voltage 145V start-up and operating maximum... -
Page 20: Temperature Compensation
9. TEMPERATURE COMPENSATION Figure 1: temperature compensation curve Absorption Float 6 °C 25 °C 50 °C Battery temperature... -
Page 21: Overview Connections
10. OVERVIEW CONNECTIONS 1 Temperature sense 2. Voltage sense 3. Battery 4. Solar array 5. Ground connection (PE) 6. 2x CAN Bus RJ45 7. Programmable relay 8. Remote on/off... - Page 22 Distributor: Serial number: Version : 14 Date : September 21 , 2018...