Advertisement
Quick Links
2021/10/09 17:28
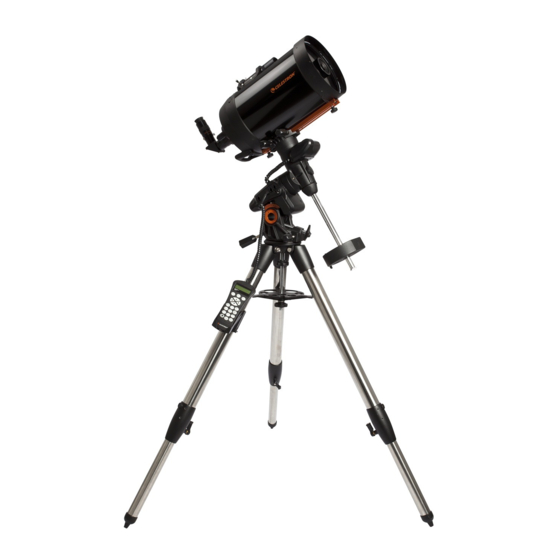
C8 & Celestron Advanced GT
The Celestron 8 (C8) is our smallest Schmidt Cassegrain telescope not accounting for binoculars or
finderscopes. The telescope is usually attached to a Celestron Advanced GT mount, which can be can
be set up by a single person because of its compact construction.
Assembly
In the following the setup of this telescope and the mount will be explained step by step:
Description
One needs to
carefully choose
the place where
the telescope
should be placed.
For example, the
relevant part of
the sky needs to
be visible (the
dome covers a
certain part of
the sky when the
telescope is
setup on the
roof) and the
1
cables of the
power supply or
the cameras
should not
become tripping
hazards. The
example setup
was performed in
the laboratory-
course room
directly behind
the door →
directly in the
way, hidden, and
no sky → Bad
choice!
OST Wiki - https://polaris.astro.physik.uni-potsdam.de/wiki/
1/9
Used parts
C8 & Celestron Advanced GT
Telescope after the corresponding step
Advertisement

Related Manuals for Celestron Advanced GT


Summarization of Contents
Assembly
Choosing Placement and Initial Setup
Selecting the correct location and ensuring cables are not tripping hazards for safe telescope setup.
Tripod Setup and Stability
The tripod forms the telescope's backbone; a disk and rod stabilize its legs for vertical alignment.
Stabilizing Tripod Legs Internally
Using an internal disk and rod to stabilize tripod legs, ensuring the rod is vertically slidable.
Mounting the Celestron Advanced GT Mount
Placing the mount on the tripod base, aligning a specific pin with its corresponding housing.
Attaching Counterweight Assembly
Threading the counterweight bar into the declination axis and securing counterweights.
Attaching Telescope Optical Tube
Connecting the telescope tube to the mount via its dovetail and clamp mechanism.
Connecting Hand Controller and Power
Plugging the hand terminal and power supply into mount ports; securing the terminal holder.
Removing Telescope Tube Cover
Removing the protective cover from the telescope tube prior to further setup stages.
Securing Sun Filter
Attaching a sun filter to the tube, secured by screws to prevent detachment during movement.
Balancing Telescope Axes (Taring)
Balancing the telescope on RA and Dec axes by adjusting counterweights and tube position.
Aligning Axes to Index Marks
Moving the telescope's Right Ascension and Declination axes to their designated index positions.
Performing Telescope Alignment
Carrying out the telescope alignment procedure, noting similarities with other models.
Final Assembly Step: Finished
The final step indicating that the telescope assembly process has been successfully completed.
Need help?
Do you have a question about the Advanced GT and is the answer not in the manual?
Questions and answers