Table of Contents
Advertisement
A
s
t
r
o
M
a
s
A
s
t
r
o
M
a
s
●
A
s
t
r
o
M
a
s
t
e
r
7
0
E
Q
#
●
A
s
t
r
o
M
a
s
t
e
r
7
0
E
Q
#
t
e
r
S
e
r
i
e
t
e
r
S
e
r
i
e
I
N
S
T
R
U
C
T
I
O
I
N
S
T
R
U
C
T
I
O
2
1
0
6
2
●
A
s
t
r
o
M
a
s
t
e
r
2
1
0
6
2
●
A
s
t
r
o
M
a
s
t
e
r
s
T
e
l
e
s
c
o
s
T
e
l
e
s
c
N
M
A
N
U
A
L
N
M
A
N
U
A
L
7
6
E
Q
#
3
1
0
3
5
●
A
s
t
r
o
7
6
E
Q
#
3
1
0
3
5
●
A
s
t
r
o
p
e
s
o
p
e
s
M
a
s
t
e
r
1
1
4
E
Q
#
3
1
0
4
M
a
s
t
e
r
1
1
4
E
Q
#
3
1
0
4
2
2
Advertisement
Table of Contents


Need help?
Do you have a question about the AstroMaster 114EQ and is the answer not in the manual?
Questions and answers
Have the Celestron AstroMaster 114 AZ (model 31043). Can I change the AZ mount on my actual tripod for an equatorial mount? Is is worthwhile? Is it easy to change? What would be the cost in cnd$. Any custom fees if from?
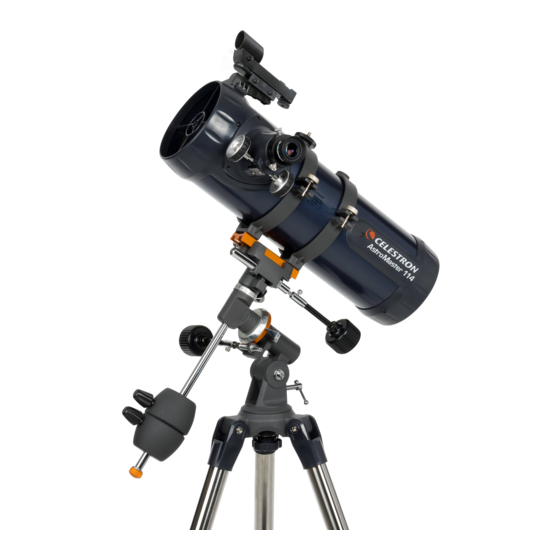
The Celestron AstroMaster 114EQ already uses a German equatorial mount (CG-2) and does not need to be converted from an alt-azimuth (AZ) mount. Therefore, no conversion is necessary, and setup involves attaching the equatorial mount to the tripod as described in the instructions.
This answer is automatically generated
why does the lens cap not stay in place when I put it back on . It just almost pushes itself off again