Table of Contents
Advertisement
Quick Links
Download this manual
See also:
Use and Care Manual
Advertisement
Table of Contents

Related Manuals for Dacor DRT304


Summary of Contents for Dacor DRT304
-
Page 1: Installation Instructions
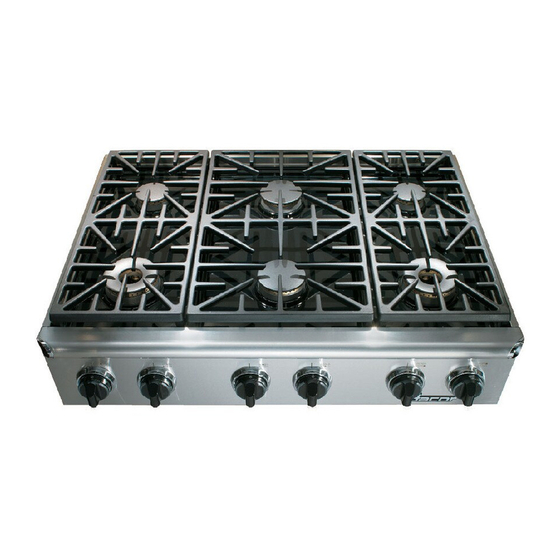
Installation Instructions Distinctive Series Cooktop Models: DRT304S, DRT366S THIS APPLIANCE HAS BEEN TESTED IN ACCORDANCE WITH THE LATEST EDITION OF ANSI Z21.1 STANDARD FOR HOUSEHOLD GAS APPLIANCES. Part No. 106522 Rev. E... -
Page 2: Table Of Contents
(Propane) ALTITUDE High Altitude Model, 4000 ft.(1219 m) and up No character = Equipped for low altitude operation All specifications are subject to change without notice. Dacor assumes no liability for changes to specifications. © 2009 Dacor, all rights reserved. -
Page 3: Important Safety Instructions
From a neighbor’s phone, immediately call the gas ating this or any other appliance. supplier. Follow the gas supplier’s instructions. • Always contact the Dacor Customer Service Team • If you cannot contact the gas supplier, call the fire about problems and conditions that you don’t under- department. -
Page 4: General Safety Precautions
Do not allow pot holders to touch hot sur- the rear of the cooktop to a combustible material faces or gas burners. must use Dacor backguard model AEB3009, (for • Do not wear loose or hanging apparel while using model DRT304S) AEB3609, AEB3612 (for model the cooktop. -
Page 5: Installation Requirements
Installation Requirements Gas Supply Requirements WARNING • Observe all governing codes and ordinances during • Check your local building codes for the proper method planning and installation. Contact your local building of installation. In the absence of local codes, this department for further information. -
Page 6: Cabinet And Countertop Layout
Cabinet and Countertop Layout • To reduce the risk of personal injury and to reduce accumulated smoke in the room, Dacor strongly recom- mends installing a range hood. A hood should project WARNING forward a minimum of five (5) inches beyond the face of the cabinets. -
Page 7: Cabinet/Cutout Dimensions
36” (91.4 cm)* Hood DRT366S 36” (91.4 cm) 42” (106.7 cm)** * Minimum ** Recommended See note 2 NOTE: Model DRT304 is not approved for use with a raised vent. 30” (76.2 cm) Cutout for min. 18” (45.7 cm) utility access 1, 3 min. - Page 8 33 1/2” (85.1 cm) ERV3615** * Model DRT304 is not approved for use with a raised vent. ** Use only raised vent model specified. Raised vent is not compatible with DRT cooktops having a serial number starting with letters “SA.”...
-
Page 9: Important
Control panel raised vent chassis to clear Minimum stiffener countertop Cabinet face height: 30 1/4" Use Dacor raised (76.8 cm) vent, model ERV3615 only IMPORTANT: See raised vent installation instructions for duct system layout/planning Cabinet/Countertop With Raised Vent- Side View... -
Page 10: Installation Instructions
¼ - 20 x 1 ½ hold down bolts - 2 (PN 83383) not overtighten the bolts. • ¼ - 20 washers - 2 hold down (PN 83203) • Regulator nat. gas (PN 62834) or LP (PN 72980) • Dacor Stainless Steel Cleaner (PN A302) • Literature kit Quantity Quantity Part DRT304S... -
Page 11: Knob Installation
Installation Instructions Knob Installation Control Panel - 1. Attach the SimmerSear burner knobs as shown DRT304S below. The SimmerSear knobs have a wider space between the large flame icon and the simmer icon than the standard burner knobs. Align the “D-shaped” open- ing on the back of each knob with the end of the valve shaft. -
Page 12: Burner Component Installation
Installation Instructions Burner Component Installation WARNING • Never attempt to operate the cooktop with any of the burner parts removed. • Do not attempt to adjust the burner air mixture settings. All adjustments are preset at the factory. Remove the burner parts and grates from their shipping packages. SimmerSear Burner Assembly Standard Burner Assembly 1. -
Page 13: Verifying Proper Operation
Be sure to have the model position. and serial numbers available when you call. See the inside HIGH cover for location. Dacor is not responsible for the cost of 2. Connect the power correcting problems caused by a faulty installation. cord to the electrical outlet. -
Page 14: Wiring Diagrams
Wiring Diagrams... - Page 15 Wiring Diagrams...
- Page 16 Dacor ● 600 Anton Blvd. Suite 1000 Costa Mesa, CA 92626 ● Phone: (800) 793-0093 ● Fax: (626) 403-3130 ● www.Dacor.com...
Need help?
Do you have a question about the DRT304 and is the answer not in the manual?
Questions and answers