Advertisement
Quick Start Guide
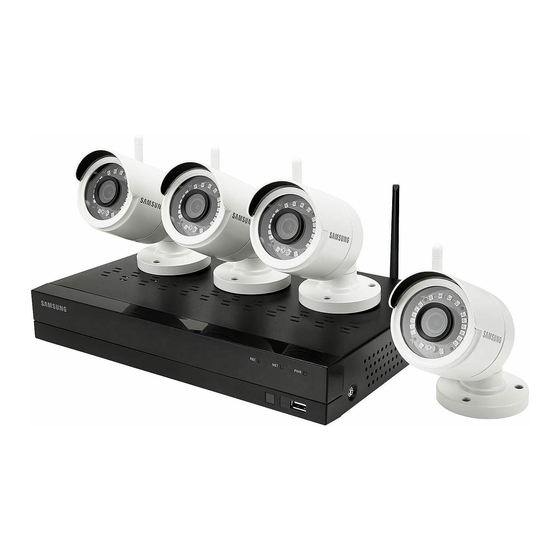
Thank you for purchasing the NVR Security System.
Follow the simple steps in this guide to set up and start using your new security system.
If you have any questions or need help installing your new product, please contact our free technical support.
US:
Telephone: +1-877-349-3149 (Toll free)
6am - 6pm PST (7 days a week)
Web: www.samsungsv.com
CAUTION!
The transmission range of the wireless signal may weaken if heavy obstructions, such as concrete, brick, or metal walls are
`
between the NVR and cameras.
If there are multiple Wi-Fi routers and devices in your environment, it may reduce the wireless bandwidth available. Weak
`
network bandwidth may reduce the videoquality or video loss.
❒ Front
❒ Back
The appearance of power adaptor differs depending on sales region.
`
2
CAUTION
RISK OF ELECTRI SHOCK
DO NOT OPEN
CAUTION : TO REDUCE THE RISK OF ELECTRICAL SHOCK
DO NOT OPEN COVERS. NO USER SERVICEABLE
PARTS INSIDE. REFER SERVICING TO QUALIFIED
SERVICE PERSONNEL.
WARNING : TO PREVENT FIRE OR SHOCK HAZARD. DO NOT
EXPOSE UNITS NOT SPECIFICALLY DESIGNED
FOR OUTDOOR USE TO RAIN OR MOISTURE.
1
Part Name
Ground connection
1
Antenna
2
WAN: (RJ45)
3
Network port
VGA port
4
HDMI
5
USB port
6
Power port
7
ALL-IN-ONE SECURITY SYSTEM
Europe:
Telephone: 00800-801-08022 (Toll free)
8am - 4pm CET, Monday - Friday (5 days a
week)
Web: www.hanwha-security.eu
REC
NET
PWR
USB
4
5
WAN
HDMI
VGA
12V
3
6
A terminal to connect a separate ground cable.
Make sure to add a ground cable in order to use the equipment safely.
`
Receive signal from wireless camera.
Connect with WAN, Ethernet cable.
Connect with VGA display devices, such as PC monitor.
Connect with HDMI display devices, such as PC monitor.
Connect with USB.
Connect with the power supply DC12V 2A, included with the device
7
Function
SNK-B73040BW
Australia:
Telephone: 1800-665-397 (Australia) or
09-363-7877 (New Zealand)
9:00AM - 5:00PM Australian Eastern
Web: www.ddlaustralia.desk.com
English
KIT MODEL
NVR MODEL
SNR-73200W
_1
Advertisement
Table of Contents

Related Manuals for Samsung Wisenet SNR-73200W


Summary of Contents for Samsung Wisenet SNR-73200W
- Page 1 KIT MODEL Quick Start Guide SNK-B73040BW NVR MODEL SNR-73200W ALL-IN-ONE SECURITY SYSTEM Thank you for purchasing the NVR Security System. Follow the simple steps in this guide to set up and start using your new security system. If you have any questions or need help installing your new product, please contact our free technical support. Europe: Australia: Telephone: +1-877-349-3149 (Toll free)
-
Page 2: Getting Started
Getting Started CAUTION RISK OF ELECTRI SHOCK DO NOT OPEN CAUTION : TO REDUCE THE RISK OF ELECTRICAL SHOCK DO NOT OPEN COVERS. NO USER SERVICEABLE PARTS INSIDE. REFER SERVICING TO QUALIFIED SERVICE PERSONNEL. WARNING : TO PREVENT FIRE OR SHOCK HAZARD. DO NOT EXPOSE UNITS NOT SPECIFICALLY DESIGNED FOR OUTDOOR USE TO RAIN OR MOISTURE. - Page 3 Hard Drive Management New hard drive(s) connected must be formatted before use. Upon connection, it will indicate to format new hard drive. Click on "Select" to select the unformatted hard drive. Click on "Format HDD" to pop up the user login window and enter the password to log in. A notice window will indicate "Entire Data Will Be Erased.
- Page 4 Email Setting. Receive or Send NVR alarm email and set parameters like email address, Encryption, email enable, and interval. • Encryption: Disable, SSL, TLS and Auto optional. Auto means it can detect the encryption type automatically. It is recommended to set the encryption type as Auto.
-
Page 5: Mobile App
Mobile App ❒ Android Phones/Tablets Open Play Store to search for WiseView and click “INSTALL”. After installation, open WiseView and select “Device”. Then click [ ] to add new device. Scan QR code under Information page. Then input client port, user name and password, and then click Save to log into the NVR. - Page 6 ❒ iPhone/iPad Open App Store to search for WiseView, and click icon [ ] to install. Open WiseView, and go to Device. Click [ ] to add new device. Scan QR code under Information page. Then input client port, user name and password, and then click Save to log into the NVR. 6_ English...
- Page 7 Registering with DDNS ❒ To register your product with the Wisenet DDNS Visit the Wisenet DDNS web site (http://ddns.hanwha-security.com) and sign in with a registered account. From the top menu bar, select <MY DDNS>. Click the [Register Product] tab. Select DDNS button. Enter the product ID.
-
Page 8: Main Interface
❒ Main Interface In real-time preview mode: right click on any area to access the desired menu. Right click on it to open a context menu. Menu items may vary depending on the condition, such as sign-in, sign-out, split screen mode and various operation conditions. Left click on any channel to access shortcut menu. -
Page 9: Network Settings
Component Name Function Realtime: There is no delay of video, but it is not that smooth. Preview Policy Smooth:There may be some delay of video, but it is smooth. Balanced: Take both realtime and smooth into consideration at the same time. Start SEQ Press this button to switch the screen mode in sequence. -
Page 10: Web Application Manager
Select PPPoE for direct dial-up in the following procedure: Enter Client port. Enter HTTP port (which must be different from Client port). Enter user name and password for PPPoE, which are provided by network operator. Enter DNS (domain name server) address. Click on "Save"... - Page 11 Download and installation of plugin for IE Enter IP address plus HTTP port of the NVR in the address bar of IE, for example, http://192.168.2.173:80. Click "Download" and then "Run" to begin downloading the file. Click on "Install" in the "Setup-WirelessPlugin" dialog box. Close your IE browser and restart it.
- Page 12 Download and installation of plugin for Mac SAFARI Enter the IP address and HTTP port for the NVR in the address bar of Mac SAFARI browser. For example, http://192.168.2.173:80, and click on "Download" to download the plugin. Locate the downloaded plugin "WirelessPlugin.dmg" and double click on it. Install the plugin by double clicking on "WirelessPlugin.pkg".
-
Page 13: Web Application Manager Login
Close your Mac Safari browser and restart it. Enter the IP address and HTTP port for the NVR in the address bar to access login page. The above instruction is to install the initial plugin. You can use the same plugin for IE and Firefox. - Page 14 MEMO 14_ English...
-
Page 15: Camera Front
Camera Installation Template - SNC-79440BW To make camera installation easier, you can tear off this page and adhere it to the place you would like to install your cameras. TEMPLATE This template is used to install the camera on the wall Screw holes for the Camera installation... - Page 16 MEMO 16_ English...
Need help?
Do you have a question about the Wisenet SNR-73200W and is the answer not in the manual?
Questions and answers