Advertisement
Quick Start Guide
Thank you for purchasing the Samsung DVR Security System.
Follow the simple steps in this guide to set up and start using your new security system.
If you have any questions or need help installing your new product, please contact our free technical support.
Telephone: 00800-801-08022 (Toll-free)
9am - 4pm CET, Monday - Friday
Web : http//www.hanwha-security.eu/home-security/
❒ Front
❒ Back
1
3
AUDIO
2
INPUT
8
Part Name
Audio output
1
Video input
2
VGA port
3
LAN: Network port
4
Power port
5
USB port
6
HDMI
7
Audio input
8
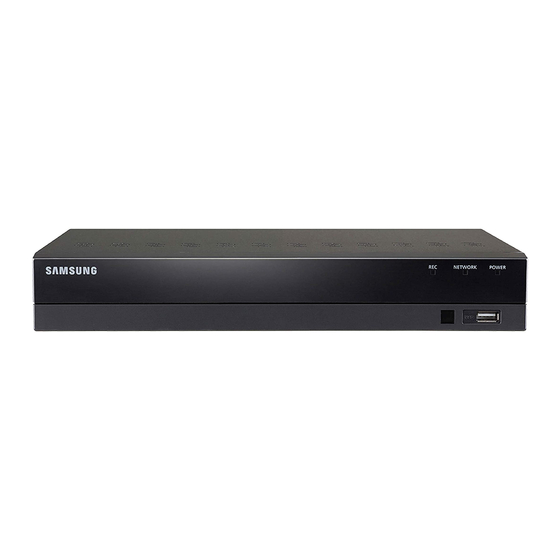
SAMSUNG ALL-IN-ONE SECURITY SYSTEM
1
2
1
3
5
7
AUDIO
VIDEO
4
2
4
6
8
HDMI
OUTPUT
INPUT
Audio signal output, RCA port
Connect with CH1-8 (analog) video input device, standard BNC port
Connect to VGA monitor
Connect with LAN, Ethernet and RJ45 port
Connect to the power supply, DC12V 2A, included with the system
Connect to USB mouse or device
Connect to HDMI monitor
Connect with CH1-4 audio input signals, RCA port
REC
NET
PWR
USB
3
4
LAN
12V
VGA
7
6
Function
SDH-B74041/SDH-B74081
5
KIT MODEL
DVR MODEL
SDR-B74301
_1
English
Advertisement
Table of Contents

Related Manuals for Samsung SDR-B74301


Summary of Contents for Samsung SDR-B74301
- Page 1 SDR-B74301 SAMSUNG ALL-IN-ONE SECURITY SYSTEM Thank you for purchasing the Samsung DVR Security System. Follow the simple steps in this guide to set up and start using your new security system. If you have any questions or need help installing your new product, please contact our free technical support.
-
Page 2: Startup Wizard
Startup Wizard After DVR startup is completed, the startup wizard will be displayed. Wizard setting menu includes: • Homepage • Admin password setting • Hard drive management • Video recording schedule • Basic system configuration • Network setup • E-mail setting • DDNS setting You can click on "Don't show this window next time"... - Page 3 Basic System Configuration- You can set date, time, date format, time format, language, video format and menu timeout. Network Setup (DHCP). In DHCP mode, the router will automatically allo- cate IP address to the DVR. If the DVR fails to obtain an IP address, refer to the DVR User Manual and Router Guide.
- Page 4 DDNS SETTING. User may set DDNS under network type of PPPoE/ Static/DHCP after applying dynamic domain service. User may remotely access DVR through domain by using browser in the form of http://ap- plied domain: mapped HTTP port number when using DDNS domain name to access DVR.
-
Page 5: Main Interface
Date & Time Display current date and time Channel Name Display channel name SAMSUNG Logo The logo of SAMSUNG will display only when video is loss. Image Capture Make a snapshot of current video Manual Recording Enable or disable manual recording... -
Page 6: Network Settings
Component Name Function Nine-Channel Layout Display nine channels of video. Display six channels of video. N-Channel Layout Display eight channels of video. Polling Start or stop polling. Sound Adjust volume or mute. Playback Replay video recorded & Network Settings • DNS: DNS is usually provided by local ISP. Enter the IP address of your domain name server. • UPnP (Plug and Play): function of automatic upload from port. -
Page 7: Web Application Manager
Select PPPoE for direct dial-up in the following procedure: Enter Client port. Enter HTTP port (which must be different from Client port). Enter user name and password for PPPoE, which are provided by network operator. Enter DNS (domain name server) address. Click on "Save"... - Page 8 Download and installation of plugin for IE Enter IP address plus HTTP port of the DVR in the address bar of IE, for example, http://192.168.2.173:80. Click "Download" and then "Run" to begin downloading the file. When you see the dialog box, "Do you want to run this software?", click on "Run". Click on "Install"...
- Page 9 Download and installation of plugin for Mac SAFARI Enter the IP address and HTTP port for the DVR in the address bar of Mac SAFARI browser. For example, http://192.168.2.173:80, and click on "Download" to download the plugin. Locate the downloaded plugin "SurveillanceClient.dmg" and double click on it. Install the plugin by double clicking on "SurveillanceClient.pkg".
-
Page 10: Web Application Manager Login
Close your Mac Safari browser and restart it. Enter the IP address and HTTP port for the DVR in the address bar to access login page. The above instruction is to install the initial plugin. You can use the same plugin for IE, for Google Chrome and Firefox. -
Page 11: Mobile App
Mobile App ❒ Android Phones/Tablets Open Play Store to search for WiseView and click "INSTALL". After installation, open WiseView and select "Device". Then click [ ] to add new device. Scan QR code under Information page. Then input client port, user name and password, and then click Save to log into the DVR. - Page 12 ❒ iPhone/iPad Open App Store to search for WiseView, and click icon [ ] to install. Open WiseView, and go to Device. Click [ ] to add new device. Scan QR code under Information page. Then input client port, user name and password, and then click Save to log into the DVR. 12_ English...
-
Page 13: Camera Front
Camera Installation Template To make camera installation easier, you can tear off this page and adhere it to the place you would like to install your cameras. TEMPLATE This template is used to install the camera on the wall Screw holes for the Camera installation CAMERA FRONT... - Page 14 MEMO...
Need help?
Do you have a question about the SDR-B74301 and is the answer not in the manual?
Questions and answers
how do you change a forgotting password
@gary W selmon did you find out how/
I'm trying to figure out how to reset my dvr, so I can RESET MY PASSWORD.
To reset the password on the Samsung SDR-B74301 DVR, follow these steps:
1. Startup Wizard: When the DVR starts, the startup wizard will appear.
2. Admin Password Setting: Create a new username and password. The password must be 8-13 characters long and contain at least two different types of characters (e.g., letters and numbers).
3. Retype Password: Enter the new password again for confirmation.
If you cannot access the DVR due to a forgotten password, a full reset may be required. This typically involves pressing a reset button on the device or contacting the manufacturer for further instructions.
This answer is automatically generated
My unit will not re-format disc.
Check if the data cable connection for the HDD is secure and if the system time is properly adjusted. Try restarting the system a few times. If the issue persists, verify whether the HDD is faulty.
This answer is automatically generated
How do I reset the cameras to communicate with a new dvd unit?
To reset Samsung SDR-B74301 cameras to communicate with a new DVR unit, perform a factory reset on the DVR. Follow these steps:
1. On the DVR front panel, press and hold the MODE + PTZ buttons together for 5 seconds.
2. Enter the code 4321.
3. The DVR should reboot and reset to factory settings. All footage will be erased.
4. Once rebooted, follow the prompts and log in using the default password.
If this method does not work:
1. Press and hold MODE + CH2 buttons for 5 seconds.
2. Enter 4321 and follow the prompts.
This resets the DVR, allowing it to pair with connected cameras as if newly installed.
This answer is automatically generated
I have purchased a refurbed SDR-B74301N DVR but can't get into the startup wizard with out a password. Is there a default or factory reset?
To reset the Samsung SDR-B74301 DVR and access the startup wizard, restart the DVR. After the DVR completes the startup process, the startup wizard will be displayed. If the wizard does not appear automatically, check if the "Don't show this window next time" option was previously selected. If so, you may need to reset the DVR settings to factory defaults to restore the wizard.
This answer is automatically generated
I need to rest my password and I would like to figure it t how to us my mobile app
My WiseView app got deleted on my android phone. I have been on my playstore and unable to find the WiseView app. is there a alternative?
My DVR doesn't have a control and any other button that I can press to reset...what can I do?