
Related Manuals for Aqua-Marina BT-88821


Summary of Contents for Aqua-Marina BT-88821
- Page 1 INFLATABLE LEISURE & FISHING BOATS User’s Guide Motion BT-88820/88821 WildRiver BT-88822/88823 w w w . a q u a m a r i n a . c o m...
- Page 2 Thank You For Choosing Aqua Marina leisure and fishing boats You’ll love our inflatable leisure and fishing boats. Every Aqua Marina inflated boat is easy to ® inflate and deflate, without the storage and care concerns of other boats. Choose from a wide selection of inflatable rafting and fishing boats, each combining rugged, reliable construction with the comfort and convenience that is synonymous with the Aqua Marina reputation for premium quality.
- Page 3 1. As per Directive 2013/53/EU boat design category Design Category D “SHELTERED WATERS” Designed for voyages on sheltered coastal waters, small bays, small lakes, rivers and canals when conditions up to, and including, wind force 4 and significant wave heights up to, and including, 0,3 m may be experienced, with occasional waves of 0,5 m maximum height, for example from passing vessels.
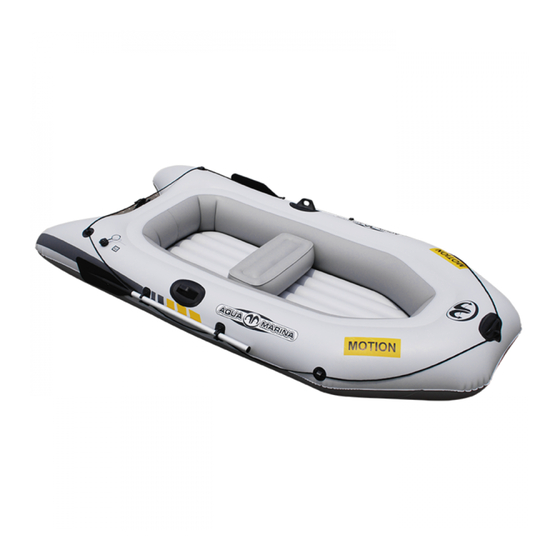
- Page 4 DESCRIPTION NOTE: Drawings for illustration purpose only. Actual product may vary. Not to scale. Bow carry handle All round grab line Inflatable cushion seat Inflatable I-beam floor Oar lock Oar holder Aluminum oar Inflation valve Electric motor connector Fishing rod holder Gear pouch or accessory Boston screw valve (for WildRiver only)
- Page 5 INFLATION VALVE OPERATION 1. Open external cap and pull firmly to extend out. (Fig.1) 2. Attach suitable adapter nozzle to inflation end of pump. Insert pump and start pumping. (Fig.2) 3. When fully inflated, gently twist adapter sleeve to right while backing pump out of valve.(Fig.3) 4.
- Page 6 OAR ASSEMBLY 1. Insert the “shaft A” through the oar-lock first 2. Insert “shaft A” with the pin end into the “shaft B” with the blade towards outboard (water). 3. Double check and make sure the retainer ring onto the other end of the “shaft A”, from inside of the boat.
- Page 7 • Storage is best in a dry room. Ensure protection against rodents and other vermin, as they feed on the fabric of the canoe. • Store the product and accessories in a dry, temperature controlled, between 32 degrees Fahrenheit (0 degrees Celsius) and 104 degrees Fahrenheit (40 degrees Celsius) storage location.
- Page 8 6. Apply the patch to the product, using your thumb or finger; apply even pressure across the entire surface of the patch. Make sure the edges of the patch are pressed down along the entire diameter. 7. Allow the product to dry for at least 12 hours before inflating and using. If there are large tears/cracks, please bring the water craft or any essential equipment part into a professional repair shop for appropriate repair or replacement.
Need help?
Do you have a question about the BT-88821 and is the answer not in the manual?
Questions and answers