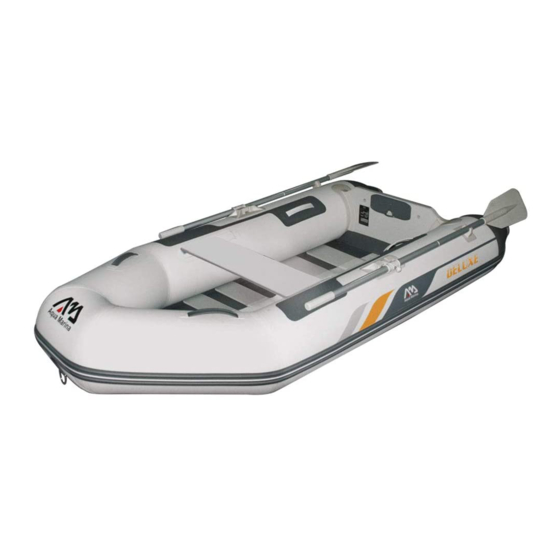
Summary of Contents for Aqua-Marina BT-88850AL
- Page 1 INFLATABLE SPORT BOATS User’s Guide Model: BT-88810, BT-88830, BT-88850, BT-88850AD,BT-88850AL BT-06300WD, BT-06300AL, BT-06330WD, BT-06330AL,BT-06360WD,BT-06360AL 2016-2017 Version w w w . a q u a m a r i n a . c o m...
-
Page 2: General Information
THANK YOU FOR CHOOSING AQUA MARINA DELUXE SPORT BOATS Compact and lightweight, these economical inflatable boats are great ship to shore tender crafts or a highly portable pleasure boat for the boater on the go. Bring your roll-up boat with you to the lake, the beach or wherever! With a set-up time of just minutes, no trailers and no special equipment, these boats will allow easy access to some of those places you've only seen from the shore. -
Page 3: Specifications
1. 94/25/EC as amended by Directive 2003/44/EC boat Label format for boat with the *optional console Design Category C - Inshore: Designed for voyages in coastal waters, large bays, estuaries, lakes and rivers where conditions up to, and including, wind force 6 and significant wave heights up to, STANDARD EN ISO 6185-2:2001 DESIGN CATEGORY C... -
Page 4: Standard Equipment
(1190lbs) 14.7KW (125.4lbs) 06360AL STANDARD EQUIPMENT Wooden bench Pressure Aluminum Model Hand pump Repair kit Carry bag seat gauge BT-88810 BT-88830 BT-88850 BT-88850AD BT-88850AL 16” hand pump 1pair BT-06300WD (repair patch and BT-06300AL glue 30ml) BT-06330WD BT-06330AL BT-06360WD 19” hand pump... - Page 5 Rubbing strake Wooden bench seat Inflatable keel (except BT-88810/30) Seat connector Safety grab handle (2 pairs for BT-88810, BT-88830, 3 pairs for (1 pair for BT-88810,BT-88830, BT-88850, BT-88850, BT-88850AD/AL BT-06300WD/AL, BT-88850AD/AL, BT-06300WD/AL, BT-06330WD/AL, BT-06360WD/AL) 2 pairs for BT-06330WD/AL, BT-06360WD/AL) PVC lift handle...
-
Page 6: Set Up Instruction
Clear a flat area (make sure it is clean and free of sharp objects). Remove the hull from box and take off the plastic bag. BT-88810 is the easiest tender to set-up, it has slat floorboards ready to be assembled, so just unroll the hull and lay it out. Insert the five slat wood deck boards with proper order into boat floor. - Page 7 1.4 Align the protrusion of Board #3 with the slot on the Board #4 and push the two pieces together. (Fig. 4) 1.5 Lifting up Board #2 and #3, align the protrusion of Board #2 with the slot on the Board #3 and push the two boards down making them flush.
- Page 8 Fig.4 Fig.5 e. Inflate the left and right tube of the boat firstly and then inflate bow section of the boat. Finally, inflate the keel. Use hand pump to finish. WOOD DECK INSTALLATION 1. BT-88850 BT-88850 is equipped with a foldable floorboard system. (Fig. 1) back Fig.1 Tip: It's better to inflate the boat about 20% before plywood deck installation.
- Page 9 Fig.4 d. Inflate left and right tube of the boat firstly and then inflate bow section of the boat. Finally, inflate the keel. Use hand pump to finish. 1.3 BT-06300WD/BT-06330WD/BT-06360WD 1.1 Start the assembly from deck board installation. Insert the Board #1 into the bow and push it forward until the Air Valve of the inflatable Keel is aligned with the hole on the board.
- Page 10 c. Lift the middle section a bit and create a roof-like structure.(Fig.3) Fig.3 d. Step on raised part of two connected floor sections and make sure that floor will flatten by spreading inside the boat.(Fig.4) Fig.4 e. Connect the side stringers.(Fig.5) Fig.5 f.
-
Page 11: Valve Operation
2. Inflate the hull. After inflation, insert the provided pressure gauge into the air valve to check the air pressure. The ideal pressure is 0.16bar - 0.25bar. (Fig. 1) 3. Inflate the keel (BT-88810, BT-88830 excluded) Stop inflating until the pressure reaches 0.3bar. (Fig. 2) Fig.1... -
Page 12: Accessory Assembly
4. Inflate the floor (only BT-88830) Inflation valve operation for BT-88830 1. Open the external cap and pull firmly to make it pushed out. (Fig.1) 2. Attach a suitable adapter nozzle to the inflation end of the pump. Insert the pump and start pumping. -
Page 13: Outboard Motor Installation
OUTBOARD MOTOR INSTALLATION After the boat is fully inflated and well assembled, attach your outboard motor onto the Engine Mount at the center of the transom. NOTE: • Ensure the motor is always fixed on the transom. • Read the instruction manual of the outboard motor for correct installation and operation. WARNING: Overpowering a boat can result in serious injury, death or boat damage. -
Page 14: Product Care And Storage
PRODUCT CARE AND STORAGE The boat is made of the highest quality materials and complies with ISO 6185 standards. Altering the construction of the boat will endanger your own safety, safety of the occupants and void the limited warranty! There is very little that you have to do to keep your boat in good condition for many years. •... -
Page 15: Small Repairs
LEAK DETECTION AND REPAIR AIR LEAK DETECTION If your boat appears a bit soft, it might not be because of a leak. If the boat was inflated late in the day with 32 °C (90 °F) air, that air might cool down to 25 °C (77 °F) overnight. The cooler air exerts less pressure on the hull, so it could appear soft the next morning. -
Page 16: Warranty
WARRANTY AM warrants this product to be free from major defects in material or workmanship to the original purchaser for a period of ONE (1) Year from the date of purchase. This warranty is subject to the following limitations: 1. The warranty is valid only when the warranty card is completed and returns within 30 days of date of purchase 2.


Need help?
Do you have a question about the BT-88850AL and is the answer not in the manual?
Questions and answers