
Related Manuals for BIXOLON XT2-43


Summary of Contents for BIXOLON XT2-43
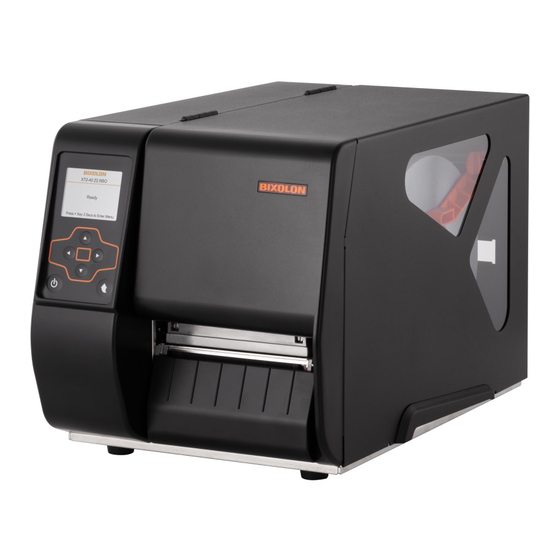
- Page 1 User’s Manual XT2-40 Series Industrial Label Printer Ver. 1.00 http://www.bixolon.com...
- Page 2 XT2-40 Series Introduction XT2-40 series printers have been designed to be connected to various types of electronic devices such as computer peripheral devices. ※ The main features of the printer are as follows 1. Industrial Label Printer 2. Thermal Transfer / Direct Thermal Printing 3.
-
Page 3: Table Of Contents
XT2-40 Series Table of Contents 1. Content Confirmation ......................7 2. Product Part Names ......................8 2-1 Printer Part Names ......................8 2-2 Major Control Part Names ..................... 11 2-2-1 Control Panel ......................11 2-2-2 Detailed Descriptions ....................12 3. Installation & Usage ......................14 3-1 Printer Installation Placings ................... - Page 4 XT2-40 Series Manual Information This user’s guide contains basic information for product usage as well as for emergency measures that may be required. Safety Information Warning: Warnings must be heeded carefully in order to prevent serious physical harm. Caution: Cautions must be heeded in order to prevent minor injuries, equipment damage, or data loss.
- Page 5 XT2-40 Series Safety Precautions In using the present appliance, please keep the following safety regulations in order to prevent any hazard or material damage. WARNING Warnings must be heeded carefully in order to prevent serious physical harm. Use only the supplied parts for AC/DC power Do not plug several products in one multi-outlet.
- Page 6 XT2-40 Series CAUTION Cautions must be heeded in order to prevent minor injuries, equipment damage, or data loss. If you observe a strange smoke, odor or noise from Keep the desiccant out of children’s reach. the printer, unplug it before taking following •...
-
Page 7: Content Confirmation
XT2-40 Series 1. Content Confirmation The following items should all be contained in the printer package. Contact the dealer from which the purchase was made if any item is damaged and/or missing. - Product XT2-40 Series Power Cord USB Cable... -
Page 8: Product Part Names
XT2-40 Series 2. Product Part Names 2-1 Printer Part Names - Front Display Panel Feed Button Power Button Media Cover - Back Ethernet Port Externel Paper Insert Serial(RS-232C) Port Auto Sensing Button USB Port Power Jack USB Host Port - 8 -... - Page 9 XT2-40 Series - Internal Print Head Pressure knob Ribbon Supply Hub Print Head Lever Label Supply Hub Front Lower Panel Label Roll Guide Ribbon Return Hub Label Roll Guide Fixing Knob Label Guide Platen Roller Label Sensor Guide Print Head Black Mark &...
- Page 10 XT2-40 Series - Printer Option Auto Cutter - 10 - Ver. 1.00...
-
Page 11: Major Control Part Names
XT2-40 Series 2-2 Major Control Part Names 2-2-1 Control Panel Number Explanation Model Name & Firmware version Printer status Direction button Power button Select & Feed button - 11 - Ver. 1.00... -
Page 12: Detailed Descriptions
XT2-40 Series 2-2-2 Detailed Descriptions 2-2-2-1 Model Name & Firmware version List Explanation XT2-40 V2.RB0 Model Name & Firmware version 2-2-2-2 Printer Status List Explanation Ready Ready for print Pause Printing pause Check Ribbon Ribbon is not installed correctly Check Media... - Page 13 XT2-40 Series 2-2-2-5 Printer Operation Button List Explanation FEED Turn on the printer and press the FEED button. When you press the FEED button, the printer will advance media until the FEED button is released. If you are using continuous labels, pressing the FEED button will advance a length of media until the button is released.
-
Page 14: Installation & Usage
XT2-40 Series 3. Installation & Usage 3-1 Printer Installation Placings • Install the printer in a location that meets the following conditions. - Allow sufficient space around the printer for proper ventilation. - Do not place objects close to the back or bottom of the printer, which may hinder the air circulation. -
Page 15: Power Connection
XT2-40 Series 3-2 Power Connection • Connect power to the printer as shown below. Power Button Power Cord 1) Connect the power cord to the power port on the printer. 2) Connect the power cord to a power source/outlet. 3) Press the printer power button. -
Page 16: Interface
XT2-40 Series 3-3 Interface Shielded cables must be used to prevent radiation and reception of electrical noise. Use the shortest possible communication cable to minimize the detection of electrical noise in the cable. Note - Serial(RS-232C) Cable (1.8m or less recommended) - USB B-Type Cable (1.8m or less recommended) -
Page 17: Standard Interface
XT2-40 Series 3-3-1 Standard Interface This printer can use the following types of communication. - LAN (Ethernet) Cable / Serial (RS-232C) Cable / USB B-Type Cable / USB A-Type (Storage) LAN (Ethernet) Cable Serial (RS-232C) Cable USB B-Type Cable USB A-Type (Storage) 1) Turn off the power button. -
Page 18: Media Installation
XT2-40 Series 3-4 Media Installation 3-4-1 Media Installation Method of Standard Model For standard models, install media in the following ways: 1) Open the media cover. 2) Open the print head lever. Release Label roll guide fixing knob to the right, and rotate the Label Roll Guide to upward as in the below. - Page 19 XT2-40 Series knob. Label Roll Guide Fixing Knob Label Roll Guide 4) Feed the media through the media guide and adjust the guide until it touches the media. Fixing Guide Label Guide - 19 - Ver. 1.00...
- Page 20 XT2-40 Series 5) Please make sure the sensor position where media gap/black mark will pass through for sensing. The position of sensor can be adjust by Label Sensor guide, and the position of the sensor is marked in white. Black Mark & Notch Sensor Label Sensor Guide 6) Close the print head lever and media cover.
-
Page 21: Media Installation Method For Auto Cutter (Optional) Model
XT2-40 Series 3-4-2 Media Installation Method for Auto Cutter (optional) Model Use the autocutter to cut the printed media. For Auto Cutter Model, install media in the following ways: 1) Refer to '3-4-1 Media Installation Method of Standard Model' to install media, adjust media guide and sensor position. -
Page 22: Ribbon Installation
XT2-40 Series 3-5 Ribbon Installation 3-5-1 Ribbon Type 1) Type by film coating position - This printer can be used with both Outside and Inside Ribbon. Coated side (print side) Coated side (print side) Outside Ribbon Inside Ribbon Perform an adhesion test to determine which side of the ribbon is coated. -
Page 23: Ribbon Installation Method
XT2-40 Series 3-5-2 Ribbon Installation Method Install ribbon as follows. 1) Insert the ribbon core into the ribbon 2) Open the print head lever and install the return hub and insert the ribbon into the ribbon as shown below. ribbon supply hub. -
Page 24: Ribbon Remove Method
XT2-40 Series 3-5-3 Ribbon Remove Method Remove the ribbon as follows. Cut the ribbon. Open the print head levers and remove the ribbon and ribbon core from left to right. Ribbon Core Clip Don’t remove the ribbon and ribbon core while the printer is printing. -
Page 25: Adjusting Ribbon Tension Method
XT2-40 Series 3-5-4 Adjusting ribbon tension Method You can adjust the ribbon tension by turning the ribbon shaft knob clockwise or counterclockwise. The r ribbon shaft knob are set to level 3 when shipped from the factory. There are 4 possible settings, which is marked on the ribbon shaft knob. -
Page 26: Print Head Load Control Method
XT2-40 Series 3-6 Print Head Load Control Method • You may need to adjust printhead pressure if printing is too light on one side or if there are winkle, if you use thick media, or if the media drifts from side to side during printing. -
Page 27: Ribbon Guide Control Method
XT2-40 Series 3-7 Ribbon Guide Control Method • Wrinkles can be improved by adjusting on the ribbon guide. ※ If your print result looks like the example in (a), you need to turn screw clockwise. If your print result looks like the example in (b), you need to turn screw counterclockwise. - Page 28 XT2-40 Series 3-8 How to Fine Tune Print Head Position • By fine tuning the print head position, you can improve the printing quality. 1) Turn off the printer. 2) Unplug the power cord from the printer. 3) Open the media cover.
- Page 29 XT2-40 Series 3-9 Auto Cutter Module Installation Method for Standard Model • To install Auto Cutter module on Standard model, complete these steps: 1) Turn off the printer. 2) Unplug the power cord from the printer. 3) Open the media cover.
- Page 30 XT2-40 Series 6) Assemble “A” parts to the “B” in Skyblue. Cable Cable Path 7) Using (+) Screw Driver, lock the 2 Screws` Screw - 30 - Ver. 1.00...
- Page 31 XT2-40 Series 8) Connect the auto cutter module connector as in the picture, and secure the cable with the cable hub. Auto Cutter Module Connector 10) Close the media cover. For personnel safety, always power off and unplug the printer before Caution performing this procedure.
-
Page 32: Printer Setting
XT2-40 Series 4. Printer Setting 4-1 Menu Composition Printer settings Explanation LCD Language Speed Darkness Wizard Media Type Printer Mode Tear-off Position Darkness Speed Sensor Media Detection Media Type Setting Print Mode Tear-off Position Top of Form CodePage Label Settings... - Page 33 XT2-40 Series Printer Control Explanation Calibration Self-test Label Format Graphic Bitmap Fonts Clear Memory True Type Fonts Asian Fonts TPH Test Restore Defaults Exit Explanation Back to the main display - 33 - Ver. 1.00...
-
Page 34: Menu Select Method
XT2-40 Series 4-2 Menu Select Method This is a normal LCD output screen. 2) Please keep pressing button and wait for the timer to be filled, then the LCD interface will enter into the main page for setting mode. You can make various setting functions in... - Page 35 XT2-40 Series Press Feed button to enter the submenu. Enter - 35 - Ver. 1.00...
-
Page 36: Setting Confirm Method
XT2-40 Series 4-3 Setting Confirm Method 1) On setting pages, press button to select the setting items. Select a designated function and press FEED button, you will enter the setting value page for the function. Select Enter 2) On setting value pages, press button to change the setting values. - Page 37 XT2-40 Series 3) Press FEED button will apply the setting value you just selected, and the yellow tick will appear to mark the value. Apply - 37 - Ver. 1.00...
-
Page 38: Exit From Current Page To Ready Status
XT2-40 Series 4-4 Exit from current page to ready status The icon on top-left corner guides you back to upper level with left or up arrow. NAVIGATION ICON 1) On setting value pages, press button will go back to the upper level screen. - Page 39 XT2-40 Series 3) On main page, select the “EXIT” icon and press the FEED button to exit from setting mode and the printer goes back to ready status. EXIT from setting mode Back to the ready status - 39 -...
-
Page 40: Icon Definition
XT2-40 Series 4-5 Icon Definition Definition Icon Function Explanation Appears on the navigation icon of setting pages. To upper level It guides you back to upper level by pressing “LEFT“ key. Appears on the navigation icon of setting value To upper level pages. -
Page 41: Setting Menu Explanation
XT2-40 Series 4-6 Setting Menu Explanation 4-6-1 Printer Setting List Explanation Explanation Setting language to be displayed on the LCD Default Value English LCD Language Variable Value English, Deutsch, 繁體中文, 简体中文, Français, 'Espaṅol 한국어, Italiano, Русский, Türkçe Explanation Wizard Printer Setting with Wizard... - Page 42 XT2-40 Series Explanation Setting printing mode Default Value Print Mode Thermal Transfer Variable Value Direct Thermal, Thermal Transfer Explanation Setting media location after printing or feed Default Value Tear-off Position Variable Value 0 ~ 40 Explanation Setting Top of Form Enable/Disable.
-
Page 43: Label Setting
XT2-40 Series 4-6-2 Label Setting List Explanation Explanation Setting printing rotation Default Value Rotation 0° Variable Value 0° , 90° , 180° , 270° Explanation Setting horizontal offset Default Value Horizontal Offset Variable Value -100 ~ +100 Explanation Setting vertical offset... -
Page 44: Devices
XT2-40 Series 4-6-3 Devices List Explanation Explanation Setting beep on / off Default Value Buzzer Apply Variable Value Apply, Cancel Explanation Setting print mode suitable to the printer option Default Value Option None Variable Value None, Cutter, Label Dispenser(Peeler), Applicator... - Page 45 XT2-40 Series Explanation Setting IP Address Dynamic Default Value 000.000.000.000 Variable Value 0 ~ 255 Explanation Setting subnet mask Subnet Default Value Mask 255.255.255.0 Variable Value 0 ~ 255 Explanation Setting a password to restrict printer settings Default Value LCD Password...
-
Page 46: Printer Control
XT2-40 Series Variable Value 1 , 2 Explanation Set whether time is displayed Clock Default Value Display Cancel (Real Variable Value time Apply, Cancel clock) Explanation Settings Setting RTC date and time (Real time Date and time format clock) YYYY-MM-DD... -
Page 47: Label Size Calibration And Self Test Page
XT2-40 Series 4-7 Label size calibration and Self Test Page The printer can automatically detect and store label height. That means the host computer does not need to transmit the label height to the printer. And the self-test function lets you check whether the printer is functioning normally. -
Page 48: Maintenance
XT2-40 Series 5. Maintenance 5-1 Cleaning Printer • Due to dust, foreign substances, adhesives, and other contaminants on or inside print head, print quality may be reduced. In this case, clean the printer using the cleaning tools for each area as indicated in the following table. -
Page 49: Cleaning Print Head
XT2-40 Series 5-2 Cleaning Print Head 1) Open the media cover and print head levers and remove the media and ribbon. 2) Clean the print head toward both sides from the center using a cotton swab dipped in medical alcohol. -
Page 50: Cleaning Platen Roller
XT2-40 Series 5-3 Cleaning Platen Roller 1) Open the media cover and print head levers and remove the media and ribbon. 2) While rotating the roller, remove dust or foreign substances using a dry cloth or cotton swab. 3) In case that adhesive substances or other contaminants remain, remove it using a cloth or cotton swab dipped in medical alcohol solution while rotating the roller. -
Page 51: Cleaning Auto Cutter (Optional)
XT2-40 Series 5-4 Cleaning Auto Cutter (optional) 1) Open the media cover and print head levers and remove the media and ribbon. 2) Please refer ‘3-9 Auto Cutter Module Installation’ and remove the Auto Cutter Module. 3) Remove 2 screws on both side and remove the cutter cover. -
Page 52: Replacing Platen Roller
XT2-40 Series 5-5 Replacing Platen Roller 1) Open the media cover and print head levers and remove the media and ribbon. 2) Pull upwards the buckle on right side and remove the platen roller to the right. Buckle Platen Roller 3) Assemble new Platen roller assembly in reverse order. -
Page 53: Printer Specifications
XT2-40 Series 6. Printer Specifications Item Description Printing Method Thermal Transfer / Direct Thermal Printing XT2-40: 203dpi (8 dot/mm) Dot Density XT2-43: 300dpi (12 dot/mm) Printer XT2-40: Max 108mm(4.25 Inch) Print Width XT2-43: Max 105.7mm(4.16 Inch) XT2-40: Max 152mm/sec (Max 6ips) - Page 54 BIXOLON Co., Ltd. The information contained herein is designed only for use with this BIXOLON product. BIXOLON is not responsible for any direct or indirect damages, arising from or related to use of this information.
- Page 55 XT2-40 Series Caution Electronics, such as printers, are prone to damage by static electricity. Therefore, to protect the printer from static electricity, be sure to turn off the printer before connecting or disconnecting the cable to the rear of the printer. If the printer is damaged by static electricity, contact your local dealer.
- Page 56 XT2-40 Series Compliance information This device complies with Part 15 of the FCC Rules. Operation is subject to the following two conditions: (1) This device may not cause harmful interference, and (2) This device must accept any interference received, including interference that may cause undesired operation.
- Page 57 XT2-40 Series Revision History Rev. Date Page Description 1.00 24.03.20 - 57 - Ver. 1.00...
Need help?
Do you have a question about the XT2-43 and is the answer not in the manual?
Questions and answers