
Subscribe to Our Youtube Channel
Related Manuals for BIXOLON XT5-40NR Series


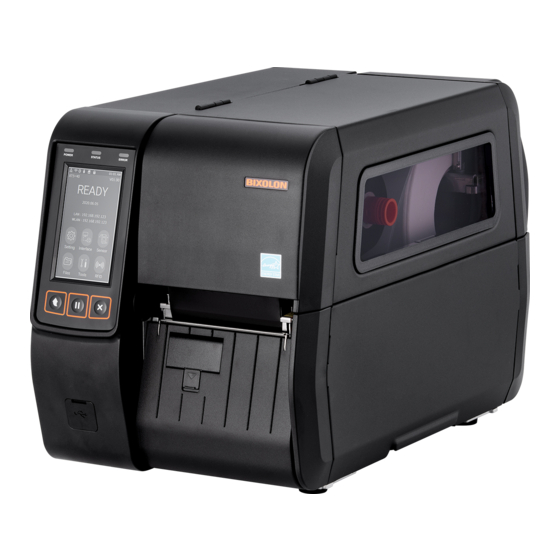
Summary of Contents for BIXOLON XT5-40NR Series
- Page 1 User’s Manual XT5-40NR Series Industrial RFID Label Printer Ver. 1.00 http://www.bixolon.com...
- Page 2 XT5-40NR Series Introduction XT5-40NR series printers have been designed to be connected to various types of electronic devices such as computer peripheral devices. ※ The main features of the printer are as follows 1. Industrial Label Printer 2. Thermal Transfer / Direct Thermal Printing 3.
-
Page 3: Table Of Contents
XT5-40NR Series Table of Contents 1. Content Confirmation ......................9 2. Product Part Names ......................10 2-1 Printer Part Names ......................10 2-2 Major Control Part Names ..................... 13 2-2-1 Control Panel ......................13 2-2-2 Detailed Descriptions ....................14 3. Installation & Usage ......................17 3-1 Printer Installation Placings ................... - Page 4 XT5-40NR Series 4-7-2 Twin Function ......................77 4-7-3 Firmware Update ....................82 4-8 Tools Menu Explanation ....................83 4-9 RFID Menu Explanation ....................86 5. Maintenance ........................87 5-1 Cleaning Printer ......................87 5-2 Cleaning Print Head ...................... 88 5-3 Cleaning Platen Roller....................89 5-4 Cleaning Auto Cutter (optional) ..................
- Page 5 XT5-40NR Series Manual Information This user’s guide contains basic information for product usage as well as for emergency measures that may be required. ※ The following separate manuals provide more detailed content on various technological issues and areas. 1. Windows Driver Manual This manual provides information on the installation instructions and main functions of the Windows Driver.
- Page 6 XT5-40NR Series Symbol Information AC (Alternating current) DC (Direct current) Note Caution, Warning Ver. 1.00 - 6 -...
- Page 7 XT5-40NR Series Safety Precautions In using the present appliance, please keep the following safety regulations in order to prevent any hazard or material damage. WARNING Warnings must be heeded carefully in order to prevent serious physical harm. Use only the supplied parts for AC/DC power Do not plug several products in one multi-outlet.
- Page 8 XT5-40NR Series CAUTION Cautions must be heeded in order to prevent minor injuries, equipment damage, or data loss. If you observe a strange smoke, odor or noise from Keep the desiccant out of children’s reach. the printer, unplug it before taking following measures.
-
Page 9: Content Confirmation
XT5-40NR Series 1. Content Confirmation The following items should all be contained in the printer package. Contact the dealer from which the purchase was made if any item is damaged and/or missing. - Product XT5-40NR Series - Basic Components Power Cord... -
Page 10: Product Part Names
XT5-40NR Series 2. Product Part Names 2-1 Printer Part Names - Front Control Panel Media Cover USB Host Port - Back USB Port USB Host Port Ethernet Port Serial(RS-232C) Port SD Card Slot Power Switch Rear Access Slot(Media) Power Connector Ver. - Page 11 XT5-40NR Series - Internal Print Head Pressure Adjustment Rear Media Guide Cover STD Ribbon Take-up Spindle Media Damper Ribbon Supply Spindle Media Damper Button Media Holder Print Head Lever Media Fixing Guide Ribbon Sensor Black Mark Sensor (Green LED) Platen Roller Gap &...
- Page 12 XT5-40NR Series - Printer Option Rewinder Auto Cutter Peeler Peeler + Rewinder Ver. 1.00 - 12 -...
-
Page 13: Major Control Part Names
XT5-40NR Series 2-2 Major Control Part Names 2-2-1 Control Panel Description Printer status LED Interface status icon Time Model name Firmware version Printer status Main icon Ethernet IP, WLAN IP Date Printer operation button Ver. 1.00 - 13 -... -
Page 14: Detailed Descriptions
XT5-40NR Series 2-2-2 Detailed Descriptions 2-2-2-1 Printer Status LED List Status Explanation Printer power on Printer power off Waiting for data reception BLINK Receiving data BLINK Print error In normal operation 2-2-2-2 Interface Status Icon List Status Explanation Ethernet is connected... - Page 15 XT5-40NR Series 2-2-2-4 Model Name List Explanation XT5-40NR Model name 2-2-2-5 Firmware Version List Explanation V01.00 Firmware version 2-2-2-6 Printer Status List Explanation READY Ready for print Standing by for user input button: Switch to Print Standby Mode without feeding any...
- Page 16 XT5-40NR Series 2-2-2-7 Main Icons List Explanation Printer settings Interface settings Sensor settings File settings Additional, other functions settings and printer information RFID Settings 2-2-2-8 Ethernet IP, WLAN IP List Explanation LAN: 192.168.100.123 Ethernet IP WLAN IP WLAN: 192.168.100.123 (displayed only when WLAN is supported)
-
Page 17: Installation & Usage
XT5-40NR Series 3. Installation & Usage 3-1 Printer Installation Placings • Install the printer in a location that meets the following conditions. - Allow sufficient space around the printer for proper ventilation. - Do not place objects close to the back or bottom of the printer, which may hinder the air circulation. -
Page 18: Power Connection
XT5-40NR Series 3-2 Power Connection • Connect power to the printer as shown below. Power Switch Power Cord 1) Turn off the printer power switch. 2) Connect the power cord to the printer. 3) Connect the power cord to a power source/outlet. -
Page 19: Interface
XT5-40NR Series 3-3 Interface Shielded cables must be used to prevent radiation and reception of electrical noise. Use the shortest possible communication cable to minimize the detection of electrical noise in the cable. - Serial(RS-232C) Cable (1.8m or less recommended) -
Page 20: Standard Interface
XT5-40NR Series 3-3-1 Standard Interface This printer can use the following types of communication. - LAN (Ethernet) Cable / USB B-Type Cable / Serial (RS-232C) Cable Serial(RS-232C) Cable USB B-Type Cable LAN(Ethernet) Cable 1) Turn off the power switch. 2) Connect the communication cable to the printer communication port to be used. -
Page 21: Option Interface
XT5-40NR Series 3-3-2 Option Interface This printer can use the following types of communication. - WLAN / Bluetooth / Parallel(IEEE1284) Cable WLAN or Bluetooth Parallel(IEEE1284) Cable 1) Turn off the power switch. 2) Connect the communication cable to the printer communication port to be used. -
Page 22: Media Installation
XT5-40NR Series 3-4 Media Installation 3-4-1 Media Installation Method of Standard Model For standard models, install media in the following ways: 1) Open the media cover. 2) Open the print head lever. Flip down the media fixing guide and place the media in the media holder with print side up. - Page 23 XT5-40NR Series 3) After flip up the media fixing guide, push the holder so that it is close to the media. Push the front and rear media guides to the right. Rear Media Guide Front Media Guide 4) After inserting the media into the fixing guides, adjust the front and rear media guides to the media width.
- Page 24 XT5-40NR Series 5) Please make sure the sensor position where media gap/black mark will pass through for sensing. Sensor(gap & notch sensor, black mark sensor) can be moved by the sensor lever. Check the sensor position with LED color. Gap & Notch Sensor (Red LED) Black Mark Sensor (Green LED) 6) Close the print head lever and media cover.
-
Page 25: Media Installation Method Of Auto Cutter (Optional) Model
XT5-40NR Series 3-4-2 Media Installation Method of Auto Cutter (optional) Model Use the autocutter to cut the printed media. For Auto Cutter Model, install media in the following ways: 1) Refer to '3-4-1 Media Installation Method of Standard Model' to install media, adjust media guide and sensor position. -
Page 26: Media Installation Method Of Rewinder(Optional) Model
XT5-40NR Series 3-4-3 Media Installation Method of Rewinder(optional) Model Use the rewinder to automatically rewind the printed media. When shipped from the factory, the rewinder is attached. For Rewinder Model, install media in the following ways: 3-4-3-1 Media Installation Method - Using Media Core. - Page 27 XT5-40NR Series 4) After installing the media in the same way as the picture, attach the media to the media core using tape. Tape Insert Media 5) After flip up the rewinder fixing guide, push it close to the media.
- Page 28 XT5-40NR Series 3-4-3-2 Media Installation(Removal) Method - Not Using Media Core 〮 Media Installation Method 1) Refer to '3-4-1 Media Installation Method of Standard Model' to install media, adjust media guide and sensor position. 2) Open the rewinder cover. Rewinder Cover 3) After installing the media in the same way as the picture, fix the media at rewinder media guide.
- Page 29 XT5-40NR Series 4) Adjust the rewinder fixing guides to the media width. Rewinder Fixing Guide 5) Close the print head lever, the rewinder cover, and the media cover. Ver. 1.00 - 29 -...
- Page 30 XT5-40NR Series 〮 Media Removal Method 1) Open the media cover, the rewinder cover and the print head lever. 2) Rotate the rewinder media holder counter-clockwise to collect the media. Rewinder Media Holder Ver. 1.00 - 30 -...
- Page 31 XT5-40NR Series 3) After flip down the rewinder fixing guide and remove the media. When removing the media, make sure it is not damaged Note by other parts. - When opening or closing the cover, be careful not to pinch your fingers.
-
Page 32: Media Installation Method Of Peeler (Optional) Model
XT5-40NR Series 3-4-4 Media Installation Method of Peeler (optional) Model Use a peeler to automatically separate the printed media from the liner. When shipped from the factory, the peeler is attached. For Peeler Model, install media in the following ways: 1) Refer to '3-4-1 Media Installation Method of Standard Model' to install media, adjust media guide and sensor position. - Page 33 XT5-40NR Series 4) Remove several sheets of label media and insert liner as in the picture. 5) Close the peeler cover until it clicks. Be careful that the media does not cover the Peeler Sensor peeler sensor Ver. 1.00 - 33 -...
- Page 34 XT5-40NR Series 6) Close the print head lever and media cover. - When opening or closing the cover, be careful not to pinch your fingers. - Do not open the print head levers while the printer is printing. The printer may be damaged.
-
Page 35: Media Installation Method Of Peeler + Rewinder(Optional) Model
XT5-40NR Series 3-4-5 Media Installation Method of Peeler + Rewinder(optional) Model Use the ‘peeler + rewinder’ to automatically separate the printed media from the liner and rewind the printed media. When shipped from the factory, the peeler is attached. For ‘Peeler + Rewinder Model’, install media in the following ways:... - Page 36 XT5-40NR Series 4) Move the peeler switch to ON. Please make sure that the LED has turned on. Peeler Switch 5) Remove several sheets of label media and insert liner as in the picture. Ver. 1.00 - 36 -...
- Page 37 XT5-40NR Series 6) After installing the media in the same way as the picture, attach the media to the media core using tape. Tape Rewinder Fixing Guide Insert media 7) Raise the rewinder fixing guide, and then push it close to the media.
- Page 38 XT5-40NR Series 3-4-5-2 Media Installation(Removal) Method - Not Using Media Core. 〮 Media Installation Method 1) Refer to '3-4-1 Media Installation Method of Standard Model' to install media, adjust media guide and sensor position. 2) Open the rewinder cover. After flip down the rewinder fixing guide, push it inside.
- Page 39 XT5-40NR Series 5) Remove several sheets of label media and insert liner as in the picture. 6) After installing the media in the same way as the picture, fix the media on rewinder media guide. Insert media Rewinder Media Guide Ver.
- Page 40 XT5-40NR Series 7) Adjust the rewinder fixing guides to the media width. Rewinder Fixing guide 8) Close the peeler cover until it clicks. Be careful that the media does not cover the Peeler Sensor peeler sensor 9) Close the print head lever, the rewinder cover, and the media cover.
- Page 41 XT5-40NR Series 〮 Media Removal Method 1) Open the peeler cover, the media cover, the rewinder cover and the print head lever. 2) Please refer to Media Removal Method of ‘Media Installation(Removal) Method - Not Using Media Core’. When removing the media, please work to avoid damaging the Note surrounding parts.
-
Page 42: Media Installation Method For 1Inch Media Core (Optional) Model
XT5-40NR Series 3-4-6 Media Installation method for 1inch Media Core (optional) Model For 1inch Media Core Model, install media in the following ways: 1) Remove the current 3 inch media holder fixture from the printer using a hexagonal screwdriver (3mm). -
Page 43: How To Install Media Externally
XT5-40NR Series 3-4-7 How To Install Media Externally Install media from outside the printer as follows. 1) Insert the media through the rear access slot of the printer. Insert media 2) Adjust the media fixing guide to the media width. -
Page 44: How To Use Media Damper (Standard Model)
XT5-40NR Series 3-5 How to Use Media Damper (Standard Model) • You can use the media damper to avoid the issue shown in the following images. label stuck to the ribbon guide folded label end when printing 1) Push the media damper button down to lift the media damper. -
Page 45: Ribbon Installation
XT5-40NR Series 3-6 Ribbon Installation 3-6-1 Ribbon Type 1) Type by film coating position - This printer can be used with both Outside and Inside Ribbon. Coated side (print side) Coated side (print side) Outside Ribbon Inside Ribbon Perform an adhesion test to determine which side of the ribbon is coated. -
Page 46: Ribbon Installation Method
XT5-40NR Series 3-6-2 Ribbon Installation Method Install ribbon as follows. 1) Insert the ribbon core into the ribbon take- 2) Open the print head lever and install the up spindle and insert the ribbon into the ribbon as shown below. -
Page 47: Load Adjustment By Ribbon Length
XT5-40NR Series Tape 4) Close the print head lever and the media cover. - When opening or closing the cover, be careful not to pinch your fingers. - Do not open the print head levers while the printer is printing. - Page 48 XT5-40NR Series DOWN Do not adjust the ribbon supply spindle load while the printer is Caution printing. The printer may be damaged. Ver. 1.00 - 48 -...
-
Page 49: Ribbon Remove Method
XT5-40NR Series 3-6-4 Ribbon Remove Method Remove the ribbons as follows. Cut the ribbon. Open the print head levers and remove the ribbon and ribbon core from left to right. Ribbon Core Clip Don’t remove the ribbon and ribbon core while the printer is printing. -
Page 50: Print Head Load Control Method
XT5-40NR Series 3-7 Print Head Load Control Method • Adjust the print head load by turning the left and right knobs depending on the media width and thickness. The left and right knobs are set to level 3 when shipped from the factory. -
Page 51: Ribbon Guide Control Method
XT5-40NR Series 3-8 Ribbon Guide Control Method • Wrinkles can be improved by adjusting A and B on the ribbon guides. 1) How to adjust ribbon guide A - Slightly loosen the screw fastened to the ribbon guide A using a cross-tip screwdriver to adjust it up and down. -
Page 52: How To Fine Tune Print Head Position
XT5-40NR Series 3-9 How to Fine Tune Print Head Position • When using special paper, you can fine tune the print head position. There is no need to do this when using standard paper. By fine tuning the print head position, you can improve the printing quality. - Page 53 XT5-40NR Series ※ Move the print head in direction ① if you are using thick paper (0.26~0.3mm). Screw Screw ① Print Head ※ The factory default position of the print head (green side) is 0.6mm from the red guide in direction ②.
- Page 54 XT5-40NR Series 6) After fine tuning the position, re-assemble in reverse order of disassembly. Be careful not to let the wires come out. - Do not adjust the print head position while the printer is in operation as it may cause damage.
-
Page 55: Gap Sensor Calibration Mode
XT5-40NR Series 3-10 Gap Sensor Calibration Mode • Use this mode when media is not detected correctly. Printer feeds media and calibrates Gap Sensor automatically. The printer will enter error mode if media detection fails after feeding up to 600mm of media. - Page 56 XT5-40NR Series Printer feeds media and calibrates Black Mark Sensor automatically. The printer will enter error mode if media detection fails after feeding up to 600mm of media. Error mode can be released by opening and closing the cover. Use Manual Calibration Mode if media detection fails in this mode.
-
Page 57: Rfid Auto Calibration
XT5-40NR Series 3-12 RFID Auto Calibration • This process must be repeated each time a different RFID label type is used. RFID coding does not work properly due to improper position setting of the RFID transponder (coding). In such case, use RFID auto calibration mode function for a proper detection. -
Page 58: Media Sensor Manual-Calibration
Users can calibrate sensor parameters in detail by using the Unified Label Utility-II program provided by the manufacturer. The Unified Label Utility-II can be downloaded from the Internet via the BIXOLON website www.bixolon.com. Please make sure the printer is connected and execute the Unified Label Utility-II program. -
Page 59: Calculating The Position Of Rfid Transponder (Coding)
RFID transponder (coding). Use the following utility program to calculate the RFID transponder (coding) position. The installation files and manuals are provided on the BIXOLON official website. (http://www.bixolon.com) Follow the procedure described below to calculate the RFID transponder position using the utility. -
Page 60: Printer Setting
XT5-40NR Series 4. Printer Setting 4-1 Menu Composition Explanation Print Width Print Length Print Direction Print Speed Print Density Print Method Media Type Tear Off Print Offset Left Position Print Mode Power Up Action Print Head Close Explanation Baud Rate... - Page 61 XT5-40NR Series Device Name Pincode Pairing SSP (Secure Simple Pairing) MAC Address Bluetooth Bluetooth Low Energy Connect Mode Mode Auth&Enc Standard Mode (Authentication & Encryption) Interface Info Explanation Gap Calibration Black Mark Calibration Sensor Sensitivity Explanation Template Image Download Font...
- Page 62 XT5-40NR Series Explanation Self Test Factory Reset Dump Mode Print Head Check Dead Pixel Test Touch Position Test Backlight Brightness Date Setting Time Setting Real Time Clock Date Format Time Format Language Setting Emulation USB Serial Number Buzzer Setting Sleep Mode...
-
Page 63: Menu Select Method
XT5-40NR Series 4-2 Menu Select Method 1) In Print Ready, press the Settings menu. 2) Press screen to enter the sub menu. 3) If there are no input for 5 seconds, it returns to main screen . Ver. 1.00 - 63 -... -
Page 64: Setting Confirm Method
XT5-40NR Series 4-3 Setting Confirm Method 1) How to use the up and down buttons (1) Select the desired setting value using button (2) After selecting the setting value, save it with button (3) If you want to exit the menu without setting,... - Page 65 XT5-40NR Series 3) How to input characters(English only) (1) Select the desired setting value using keypad. (2) With , you can delete the input value. (3) With , you can input the capital lettere. (4) After selecting the setting value, save it with...
-
Page 66: Setting Menu Explanation
XT5-40NR Series 4-4 Setting Menu Explanation List Explanation Explanation Setting media width[dots] Function to adjust image buffer size according to print width Default Value 203dpi: 832dots Print Width 300dpi: 1248dots 600dpi: 2496dots Maximum Value 203dpi: 832dots 300dpi: 1248dots 600dpi: 2496dots... - Page 67 XT5-40NR Series Explanation Setting printing direction Top to bottom: Printing from top to bottom Bottom to Top: Printing from bottom to top Default Value Bottom to Top Variable Value Bottom to Top, Top to Bottom Print Direction Printing Direction Top to bottom...
- Page 68 XT5-40NR Series Explanation Setting print method Default Value Print Method Transfer Variable Value Transfer, Direct Explanation Setting media type Default Value Media Type Variable Value Gap, Black Mark, Continuous Explanation Setting media position[dots] for tear off after printing or feed...
- Page 69 XT5-40NR Series Explanation Setting the action for the printer after the power-up sequence. Default Value Power Up Action No Feed Variable Value No Feed, Set Label Length, Media Calibration, Feed Explanation Setting the action for the printer when you close the print head...
-
Page 70: Interface Menu Explanation
XT5-40NR Series 4-5 Interface Menu Explanation 4-5-1 Serial List Explanation Explanation Setting the baud rate Default Value Baud Rate 115200 Variable Value 9600,19200,38400,57600,115200 Explanation Setting the data bit Default Value Data Bits Variable Value 7, 8 Explanation Setting the parity... -
Page 71: Ethernet
XT5-40NR Series 4-5-2 Ethernet List Explanation Explanation Setting IP assignment method Default Value IP Protocol DHCP Variable Value DHCP, Static IP Explanation Setting IP Address method Default Value IP Address Static IP: 192.168.192.123 DHCP: 0.0.0.0 Variable Value 0 ~ 255... -
Page 72: Wlan
XT5-40NR Series 4-5-3 WLAN List Explanation Explanation Setting channel when creating Adhoc network Default Value Channel Variable Value 1 ~ 14 Explanation Setting WLAN operation mode Default Value Network Soft AP Variable Value Soft AP, Infrastructure, Adhoc, P2P Explanation Setting the ID of AP to be accessed... - Page 73 XT5-40NR Series Explanation Setting IP assignment method Default Value IP Protocol DHCP Variable Value Static IP, DHCP Explanation Setting IP address Default Value IP Address Static IP: 192.168.1.1 DHCP: 0.0.0.0 Variable Value 0 ~ 255 Explanation Setting subnet mask Default Value Subnet Mask Static IP: 255.255.255.0...
-
Page 74: Bluetooth
XT5-40NR Series 4-5-4 Bluetooth List Explanation Explanation Device Name Name of Device Explanation Pincode Changes required pin code to connect Explanation Secures simple pairing Pairing Default Value Disable Variable Value Disable, Just Works, Numeric Comparison, Passkey Entry Explanation MAC Address... -
Page 75: Sensor Menu Explanation
XT5-40NR Series 4-6 Sensor Menu Explanation List Explanation Explanation Gap Calibration Detect media gap and calibrate automatically Black Mark Explanation Calibration Detect media black mark and calibrate automatically Explanation Adjusts the sensitivity of the gap sensor Default Value Sensor Sensitivity... -
Page 76: Files Menu Explanation
XT5-40NR Series 4-7 Files Menu Explanation List Explanation Template Image Refer Download Fonts Saved File E Drive (Flash Memory) 4-10-1 Saved File A Drive (USB Memory ) B Drive (SD Card Memory ) PRT Set (Printer Setting) Refer Files Template... -
Page 77: Twin Function
XT5-40NR Series 4-7-2 Twin Function Saves the current printer settings, save files (templates, images, download fonts) to another printer using USB, or loads the settings of another printer and saves files to the current printer. List Explanation Explanation Saves printer settings to a USB storage device, or loads the print settings from USB storage. - Page 78 XT5-40NR Series List Explanation Explanation Saves printer settings to a USB storage device, or loads the print settings from USB storage. File path F:\configuration • Save Function Explanation - Connect a USB storage to the printer. - Select Save on the menu using the up and down buttons.
- Page 79 XT5-40NR Series List Explanation Explanation Saves template file to a USB storage device, or load the template from USB storage. File path F:\ USER_AREA_TEMPLATES • Save Function Explanation - Connect a USB storage to the printer. - Select Save on the menu using the up and down buttons.
- Page 80 XT5-40NR Series List Explanation Explanation Saves image file to a USB storage device, or load the image from USB storage (*.pcx) File path F:\ USER_AREA_Images • Save Function Explanation - Connect a USB storage to the printer. - Select Save on the menu using the up and down buttons.
- Page 81 XT5-40NR Series List Explanation Explanation Saves download font file to a USB storage device, or load the download font from USB storage. File path F:\ USER_AREA_FONTS • Save Function Explanation - Connect a USB storage to the printer. - Select Save on the menu using the up and down buttons.
-
Page 82: Firmware Update
XT5-40NR Series 4-7-3 Firmware Update Firmware can be updated through USB storage. Explanation Printer firmware update available using the USB storage directly without any communication. File path F:\ FW_DOWNLOAD File name “XT5-4xNR_Vxx.xx_STD_mmddyy.fls” in F:\ FW_ DOWNLOAD folder. ( 203dpi : x is 0 / 300dpi : x is 3 / 600dpi : x is 6) F/W Update •... -
Page 83: Tools Menu Explanation
XT5-40NR Series 4-8 Tools Menu Explanation List Explanation Explanation Self Test Prints for self-test Explanation Factory Reset Initializes the printer settings to factory default Explanation Diagnoses communication status when printing is not normal Dump Mode Default Value Disable Variable Value... - Page 84 XT5-40NR Series Explanation Setting language to be displayed on the LCD Default Value Language Setting English Variable Value English, Korean, German, French, Spanish Explanation Setting printer emulation Default Value Emulation AUTO Variable Value AUTO(SLCS, BPL-Z, BPL-E), BPL-D Explanation USB Serial Number...
- Page 85 XT5-40NR Series Explanation Demo Print Demo format output function Explanation Printer Info Checking the printer usage information Explanation Installation & Usage Site linking(QR code) for installation and usage instructions Explanation Troubleshooting Site linking(QR code) for troubleshooting Explanation Contact US Site linking(QR code) for technical support Ver.
-
Page 86: Rfid Menu Explanation
XT5-40NR Series 4-9 RFID Menu Explanation List Explanation Explanation RFID transponder position can be set to match RFID label characteristics. Default Value Transponder 0(dot) Position Variable Value -300 ~ +32000 (203dpi) -450 ~ +30000 (300dpi) -900 ~ +24000 (600dpi) Explanation Read/Write transceiver power of RFID module. -
Page 87: Maintenance
XT5-40NR Series 5. Maintenance 5-1 Cleaning Printer • Due to dust, foreign substances, adhesives, and other contaminants on or inside print head, print quality may be reduced. In this case, clean the printer using the cleaning tools for each area as indicated in the following table. -
Page 88: Cleaning Print Head
XT5-40NR Series 5-2 Cleaning Print Head 1) Open the media cover and print head levers and remove the media and ribbon. 2) Clean the print head toward both sides from the center using a cotton swab dipped in medical alcohol. -
Page 89: Cleaning Platen Roller
XT5-40NR Series 5-3 Cleaning Platen Roller 1) Open the media cover and print head levers and remove the media and ribbon. 2) While rotating the roller, remove dust or foreign substances using a dry cloth or cotton swab. cloth or 3) In case that adhesive substances or other contaminants remain, remove it using a cotton swab dipped in medical alcohol solution while rotating the roller. -
Page 90: Cleaning Auto Cutter (Optional)
XT5-40NR Series 5-4 Cleaning Auto Cutter (optional) 1) Open the media cover and print head levers and remove the media and ribbon. 2) After exposing the cutter blade completely by rotating the knob, remove dust or foreign cotton swab dipped in medical alcohol solution. -
Page 91: Cleaning Peeler Module (Optional)
XT5-40NR Series 5-5 Cleaning Peeler Module (optional) 1) Open the media cover, print head levers, and peeler cover and remove the media and ribbon. 2) While rotating the roller, remove dust or foreign substances using a dry cloth or cotton swab. -
Page 92: Printer Specifications
XT5-40NR Series 6. Printer Specifications 6-1 Specifications Item Description Printing Method Thermal Transfer / Direct Thermal Printing XT5-40NR: 203dpi (8 dot/mm) XT5-43NR: 300dpi (11.8 dot/mm) Dot Density XT5-46NR: 600dpi (23.6 dot/mm) XT5-40NR: Max 104mm (Max 4.09 inch) Printer Print Width XT5-43NR: Max 105.7mm (Max 4.16 inch) - Page 93 BIXOLON Co., Ltd. The information contained herein is designed only for use with this BIXOLON product. BIXOLON is not responsible for any direct or indirect damages, arising from or related to use of this information.
- Page 94 XT5-40NR Series Warning Hazardous moving parts Keep fingers and other body parts away Pull the print head lever can be stop all moving parts. IEC 60417-6057 (2011-05) for other moving parts. Mise en garde Les appareils électroniques, tels que les imprimantes, risquent d'être endommagés par l'électricité...
- Page 95 XT5-40NR Series Compliance information This device complies with Part 15 of the FCC Rules. Operation is subject to the following two conditions: (1) This device may not cause harmful interference, and (2) This device must accept any interference received, including interference that may cause undesired operation.
- Page 96 XT5-40NR Series Revision History Rev. Date Page Description 1.00 15.12.20 Ver. 1.00 - 96 -...
Need help?
Do you have a question about the XT5-40NR Series and is the answer not in the manual?
Questions and answers