Table of Contents
Advertisement
Advertisement
Table of Contents

Related Manuals for AirTurn Quad 200


Summary of Contents for AirTurn Quad 200
-
Page 2: Table Of Contents
C O NTENTS Contents Before Turning on Your AirTurn BT200 Controls BT200S/QUAD 200 Controls Power Connecting and Pairing Open and Closed Pairing Open Pairing Closed Pairing Reset Pairing Switching Between Pairing Methods Pairing in AirDIRECT MODE 1 Pairing in MODE 2-6 (Keyboard/Mouse) - Page 3 MODES for BT200S/QUAD 200 Changing the MODE Virtual Keyboard in iOS Power Consumption Recharging the Battery LED Indications AirTurn Manager Unit Identification Care of Your AirTurn Warranty Radio Information Recycling and Disposal Trademarks...
-
Page 4: Before Turning On Your Airturn
(keyboard) support are compatible. For older PCs you can use Bluetooth 4.1 USB dongles that can connect to the AirTurn. A compatible app is required. Apps are listed on the AirTurn website: https://AirTurn.com/apps There are three compatibility modes: AirTurn Direct, HID, (keyboard), and MIDI. -
Page 5: Bt200 Controls
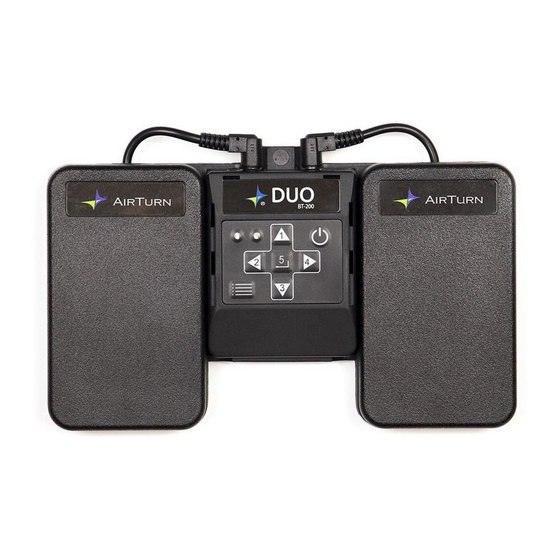
BT200 C O NTROLS The BT200 series uses the same transceiver for each model. The controls consist of a power button, a membrane pad with 5 buttons, a dedicated Mode button, two stereo ports for use with up to four pedals, two LED indicators, and a Micro-USB port for charging. -
Page 6: Bt200S/Quad 200 Controls
BT200S/QUAD 200 C O NTROLS The BT200S series uses the same controls for all three models, with 2, 4, or 6 footswitches. The controls consist of a power button, two LED indicators, and a power port for an external power supply or the internal rechargeable battery. Switches are in numerical order left to right, the function of each switch is explained on page 13. -
Page 7: Power
OFF - Press and hold the Power Button until the red and blue LEDs turn off. C P NNECTING ND A IRING Once the AirTurn is selected for pairing, the blue LED will blink 5 times per second until pairing is completed. O C P P EN A ND... -
Page 8: Closed Pairing
If you connect to more than 8 devices, the next pairing will delete the a pairing that you haven’t used recently. If you delete or “forget” the pairing of the AirTurn on a device, restart the Bluetooth and attempt to re-pair with the AirTurn – It may require two attempts to connect. -
Page 9: Switching Between Pairing Methods
MODE was created to prevent conflicts with the virtual keyboard. Power on the AirTurn Be sure the AirTurn is in MODE 1 (Hold down the MODE button for 1 blink of the red light) Turn on your device’s Bluetooth then On iOS, go to the ... -
Page 10: Pairing In Mode 2-6 (Keyboard/Mouse)
If requested, tap Pair. Android –Select Settings > Bluetooth. Tap the SCAN button. When the AirTurn appears, tap to pair. If you are asked to verify the passcode, click on OK. PC – Select Control Panel > My Bluetooth Devices > Select... -
Page 11: Midi Mode
Support for Bluetooth MIDI is required, and special setup for your tablet or computer may be required. MIDI commands may be setup using the AirTurn Manager. More detailed instructions available online ( A irTurn.com/support/midi) o r reach out to our support team at ... -
Page 12: Modes For Bt200
OR There are seven modes available on your AirTurn. Each mode sends a different signal for each pedal. The AirTurn is set to MODE 2 by default. You can also customize MODES 2-6 with the AirTurn Manager App. (See page 14 for instructions on mode... -
Page 13: Modes For Bt200S/Quad 200
OR There are seven modes available on your AirTurn. Each mode sends a different signal for each pedal. The AirTurn is set to MODE 2 by default. You can also customize MODES 2-6 with the AirTurn Manager App. (See page 14 for instructions on mode... -
Page 14: Changing The Mode
C MODE H ANGING T HE Turn on the AirTurn. Press and hold the MODE button. The red LED will flash once per second from 1 to 7 flashes. The number of flashes corresponds to the MODE number. Be sure to count the flashes. -
Page 15: Power Consumption
C WER O NSUMPTION The AirTurn uses an idle timeout function to conserve power. After two hours of inactivity when powered on and connected, the AirTurn will power down automatically. The timer is reset when any button is pressed. You can change this time out period or turn it off completely using the AirTurn Manager software. -
Page 16: Airturn Manager
R RN A NAGER To change the configuration of your AirTurn and update its firmware to the latest available, download the AirTurn Manager App from the Apple App Store or Google Play Store. It is available for iPad, iPhone, most Android devices and Mac computers. -
Page 17: Care Of Your Airturn
This is helpful if there are many AirTurn units in the same location. Your MAC address will always be the same so you can easily identify your unit. You will find your specific MAC address labeled on the bottom of your AirTurn at the end of the serial number. ... -
Page 18: Radio Information
Product and shall constitute full satisfaction of all claims, whether based on contract, negligence, strict liability or otherwise. In no event shall AirTurn be liable, or in any way responsible, for any damages or defects in the Product which were caused by repairs or... -
Page 19: Recycling And Disposal
BLE113 can be integrated to an end product without a need for additional MIC Japan certification of the end product. KCC (Korea) BLE113 has type certification in Korea with certification number KCC-CRM-BGT-BLE113. AirTurn also holds unintended emissions testing on file for FCC/CE R D... -
Page 20: Trademarks
Electronic components and construction comply with RoHS and REACH standards. Packaging is recyclable. Please recycle. Contains Lithium Ion Battery. Battery should be disposed of according to local law. AirTurn will recycle returned batteries and electronics. Please request an RMA from the support desk: ... - Page 22 888-247-1223...
Need help?
Do you have a question about the Quad 200 and is the answer not in the manual?
Questions and answers