
Related Manuals for Sherwood CD-5090


Summary of Contents for Sherwood CD-5090
- Page 1 OPERATING INSTRUCTIONS BEDIENUNGSANLEITUNG ISTRUZIONI PER L’USO MANUAL DE INSTRUCCIONES CD-5090C/R Compact Disc Player Compact Disc-Spieler Lettore compact disc Reproductor de Discos Compactos...
-
Page 2: Introduction
Introduction Introduction UNPACKING AND INSTALLATION UNPACKING AND INSTALLATION Congratulations on your purchase! Your new high fidelity Compact Disc Player is designed to deliver maximum enjoyment and years of trouble free service. Please take a few moments to read this manual thoroughly. It will explain the features and operation of your unit and help ensure a trouble free installation. -
Page 3: Read This Before Operating Your Unit
Introduction READ THIS BEFORE OPERATING YOUR UNIT FOR U.S.A. AND CANADA 120 V FOR EUROPE AND AUSTRALIA 230 V/240 V FOR YOUR SAFETY FOR YOUR SAFETY Units shipped to the U.S.A. and Canada are Units shipped to Australia are designed for designed for operation on 120 V AC only. -
Page 4: Table Of Contents
CONTENTS Introduction Introduction UNPACKING AND INSTALLATION READ THIS BEFORE OPERATING YOUR UNIT System Connections Controls Before Operation Operations PLAYING A DISC SEARCH AND SKIP PLAY PLAYING A DISC IN RANDOM SEQUENCE (RANDOM PLAY) PLAYING THE FIRST 10 SECONDS OF EACH TRACK (INTROSCAN PLAY) (ONLY FOR CD-5090R) REPEAT PLAY PLAYING TRACKS IN ANY SEQUENCE (PROGRAMMED PLAY) EDITING FOR RECORDING... -
Page 5: System Connections
Connect these jacks to the CD(or AUX) input jacks of your amplifier such as AX-5090R or receiver. DIGI LINK III JACKS Connect this jack to the DIGI LINK jack of Sherwood amplifier such as AX-5090R bearing the DIGI LINK III or II mark to control this unit remotely by DIGI LINK System. -
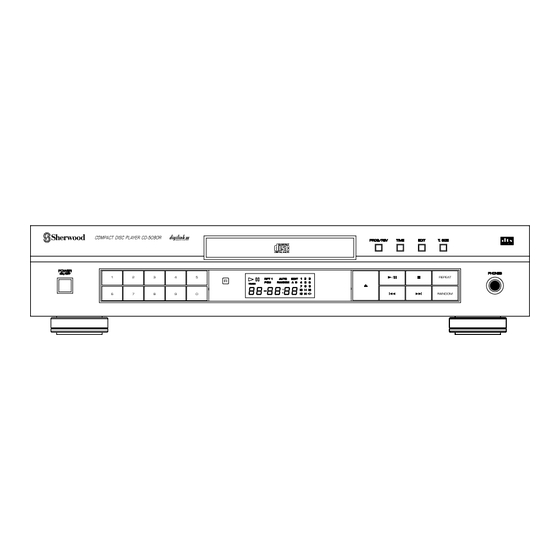
Page 6: Controls
Controls FRONT PANEL CONTROLS REMOTE CONTROLS(ONLY FOR CD-5090R) - Page 7 POWER SWITCH NUMERIC BUTTONS Press this switch to turn the power on and press again Press the corresponding button when selecting tracks to turn the power off. for play or programming, then the selected track is For system operation, plug the AC input cord into the played or programmed directly without the use of the switched AC outlet on amplifier or receiver, keep the PLAY or PROGRAM/REVIEW button.
- Page 8 This unit can be remotely controlled with Sherwood DIGI LINK III amplifier such as AX-5090R or receiver. For available functions, refer to the compatible unit’s operating instructions. To listen to a CD by DIGI LINK system, first make DIGI LINK connection between this unit and the Sherwood compatible amplifier such as AX-5090R or receiver.
- Page 9 REMOTE CONTROL OPERATION RANGE (ONLY FOR CD-5090R) COMPACT DISC PLAYER CD-5090R PROG/REV TIME EDIT T. SIZE POWER ON/OFF PHONES REPEAT RANDOM the remote control unit within a range of about 7 meters (23 feet) and angles of up to 30 degrees aiming at the remote sensor.
-
Page 10: Before Operation
Before Operation Only compact discs bearing this mark can be Notes reproduced. Do not expose discs to direct sunlight, high humidity or high temperature for a long time. When loading or unloading a disc in the disc tray, always place it with the printed side up. Printed side In handling a disc, hold it carefully with edges. -
Page 11: Operations
Operations PLAYING A DISC Turn the power on. Load a disc and close the tray. POWER ON/OFF “ ” indicator lights up when the number of tracks is more than 14. When the CD door is kept opened, if it elapsed over 60 seconds, the CD door will be closed automatically. -
Page 12: Search And Skip Play
SEARCH AND SKIP PLAY Selecting a track during play Searching for a passage during play Press and hold down these buttons until the Press the button momentarily and repeatedly desired passage is reached. until the desired track is selected. When using the NUMERIC buttons on the remote control or on the front pannel. -
Page 13: Repeat Play
REPEAT PLAY Repeating all tracks during play If this button is pressed once, all tracks are played repeatedly. Each time this button is pressed, the repeat mode changes as follows ; RPT 1 Repeating a single track during play At the desired track, press again in the repeat all mode. Press again to cancel the repeat play. -
Page 14: Playing Tracks In Any Sequence(Programmed Play)
PLAYING TRACKS IN ANY SEQUENCE(PROGRAMMED PLAY) Up to 20 tracks can be programmed to play in any desired sequence. The track number greater than 99 can not be memorized. Programming the tracks on a CD In the stop mode, enter the program mode. PROG/REV program mode Select the desired track. - Page 15 Checking the programmed tracks PROG/REV PROG/REV Each time the PROGRAM/REVIEW button is pressed in the program mode (meaning “PGM” lights up in the stop mode), the programmed tracks will appear in the programmed sequence. Rectifying any wrong programmed track Select track 10. Example) When track 5, 9 and 7 are programmed and you want to replace track 9 with track 10.
-
Page 16: Editing For Recording
4 second blank space between the tracks, is automatically activated for the automatic music search function on the Sherwood DIGI-LINK III casette deck such as DD-5090C. Select the desired tape length. You can select the tape length at your option Example) When the tape length is 46 with the NUMERIC buttons. - Page 17 If all tracks of the side A have been played, press the PLAY button to start play from the first track of the side B for recording. When this unit is connected to Sherwood compatible cassette deck such as DD-5090C controlled remotely by DIGI LINK system, if using the CD synchro record function on the DD-5090C, recording a CD is easier.
-
Page 18: Selecting A Brightness Of The Display (Only For Cd-5090R)
Checking the edited tracks In the edit mode, check as you do the programmed tracks. (refer to “Checking the programmed tracks” on page 15) PROG/REV PROG/REV Clearing all edited tracks In the edit mode, press the STOP/CLEAR button for more than 4 seconds or open the tray. In the manual edit mode only, you can clear or rectify the edited tracks like “Rectifying any wrong programmed tracks”... -
Page 19: Selecting A Time Display
SELECTING A TIME DISPLAY Each time this button is pressed during play, time display changes as follows ; Elapsed playing time of the current track. TIME TIME Remaining playing time of the current track. Remaining playing time of the disc. During random play, etc., the time display may show “---:--”. -
Page 20: Troubleshooting Guide
Troubleshooting Guide If your unit does not perform as expected, consult the table below to see if the problem can be corrected before seeking help from your dealer or our service organization. POSSIBLE CAUSE REMEDY PROBLEM No power The AC input cord is disconnected. Connect the cord securely. -
Page 21: Specifications
Specifications SYSTEM Compact Disc Digital Audio TYPICAL AUDIO PERFORMANCES Number of channels Frequency range, 20 - 20,000 Hz 0.5 dB Signal to noise ratio, A Wtd. 110 dB Dynamic range 95 dB Total harmonic distortion, 1 kHz 0.005 % Wow and flutter Quartz crystal precision Audio output level 2 V RMS... - Page 22 5707-04710-002-0...
Need help?
Do you have a question about the CD-5090 and is the answer not in the manual?
Questions and answers