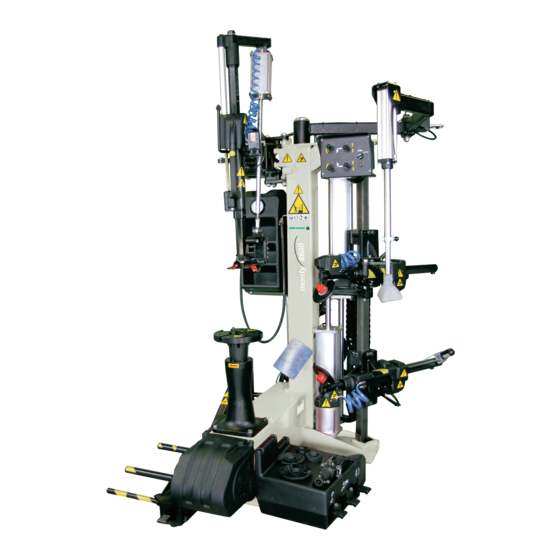

Related Manuals for Hofmann MONTY 8600


Summarization of Contents
Chapter 1: Introduction
1.1 General
Manual overview, target audience, and updating instructions.
Chapter 2: Tools and Safety
2.1 Tools and Special Tools
Lists standard and specialized tools required for tire changer maintenance.
2.2 Important Safety Instructions
Crucial safety precautions for operating the tire changer equipment.
2.3 Electrical Safety Precautions
Safety measures specifically for electrical components and wiring.
Chapter 3: Electric, Pneumatic and Hydraulic Diagrams
3.1 Electric Diagram
Schematic diagram illustrating the machine's electrical system.
3.2 Pneumatic Diagram
Schematic diagram illustrating the machine's pneumatic system.
Chapter 4: AC/DC Power Distribution
4.1 Lockout and/or Tagout System Procedure
Procedure for safely isolating the machine from its power source.
4.2 Electrical Requirements
Specifies necessary electrical connections and safety features for the machine.
4.3 AC Theory of Operation
Explains the AC power distribution and components within the machine.
4.4 DC Theory of Operation
Explains the DC power distribution and components within the machine.
Chapter 5: Electric Section
5.1 Power Supply Cable and Plug: Check and Replacement
Guide to inspecting and replacing the main power supply cable and plug.
5.2 Main Rotary Switch Q1 # 2-15359A: Check and Replacement
Procedure for checking and replacing the main rotary ON/OFF switch.
5.3 Centerpost Motor M3 Cable: Check and Replacement
Instructions for checking and replacing the cable for the centerpost motor.
5.4 Centerpost Motor M3 # 2-49166A and Belt # 8-06831A: Check and Replacement
Guide to checking and replacing the centerpost motor and its drive belt.
5.5 Lower Bead Breaker Arm Actuator M1 EAA0377G02A: Check and Replacement
Procedure for checking and replacing the lower bead breaker arm actuator.
5.6 Transformer T3 # 7-02702A: Check and Replacement
Steps for checking and replacing the power transformer T3.
5.7 Centerpost Switch S1 # 2-15259A: Check, Adjustment and Replacement
Guide to checking, adjusting, and replacing the centerpost switch.
Chapter 6: Electronic Section
6.1 Inverter T1 # EAA0358G49A: Check and Replacement
Instructions for checking and replacing the motor speed control inverter.
6.2 Inverter T1# EAA0358G49A Rev.B: Firmware Update
Procedure for updating the firmware of the inverter T1.
6.3 CPU Board A1 # EAP0275G50A: Check and Replacement
Guide to checking and replacing the main control processing unit (CPU) board.
6.4 Bead Breaker Arms Potentiometers B1 and B2 # EAA0377G07A: Check and Replacement
Procedure for checking and replacing the bead breaker arm potentiometers.
6.5 Procedure to Adjust Bead Breaker Disks Alignment
Steps to correct the analog output value for accurate disk alignment.
6.6 Bead Breaker Arms Calibration SW 1.0.3 / 1.0.4
Calibration procedure for bead breaker arm potentiometers using specific switches.
Chapter 7: Pneumatic Section
7.1 Pneumatic Function
Overview of the machine's pneumatic system and its functions.
7.2 Air Filter – Lubricator Assy # EAA0350G85A: Check and Replacement
Guide to checking and replacing the air filter and lubricator assembly.
7.3 Opening Arm Cylinder # EAA0350G44A: Check and Replacement
Procedure for checking and replacing the opening arm cylinder.
7.4 Valve Control Opening Arm Cylinder # EAA0356G96A: Check and Replacement
Steps for checking and replacing the control valve for the opening arm cylinder.
7.5 Vertical Locking Cylinder # EAA0344G32A: Check and Replacement
Guide to checking and replacing the vertical locking cylinder.
7.6 Horizontal Blocking Cylinder # EAA0344G33A: Check and Replacement
Procedure for checking and replacing the horizontal blocking cylinder.
7.7 Vertical Rod Lift Cylinder # EAA0363G79A: Check and Replacement
Steps for checking and replacing the vertical rod lift cylinder.
7.8 Valve # EAA0338G09A: Check and Replacement
Guide to checking and replacing a specific valve.
7.9 Automatic Tool Cylinder # EAA0363G81A: Check and Replacement
Procedure for checking and replacing the automatic tool cylinder.
7.10 Automatic Tool Cylinder Valve # EAA0328G73A: Check and Replacement
Steps for checking and replacing the automatic tool cylinder valve.
7.11 Bead Breaker Cylinders # EAA0363G62A / EAA0351G77A: Check and Replacement
Guide to checking and replacing bead breaker cylinders.
7.12 Bead Breaker Cylinders and Discs Valves # EAA0350G58A / EAA0377G25A / EAA0350G57A: Check and Replacement
Procedure for checking and replacing bead breaker cylinder and disc valves.
7.13 Bead Breaker Arms Blocking Cylinder # EAA0344G48A: Check and Replacement
Steps for checking and replacing the bead breaker arms blocking cylinder.
7.14 Bead Breaker Arms Valve Blocking # EAA0377G26A: Check and Replacement
Guide to checking and replacing the bead breaker arms valve blocking.
7.15 Wheel Lift Cylinder # EAA0344G93A: Check and Replacement
Procedure for checking and replacing the wheel lift cylinder.
7.16 Wheel Lift Valve # EAA0349G00A: Check and Replacement
Steps for checking and replacing the wheel lift control valve.
7.17 MH Cylinder # EAA0345G61A: Check and Replacement
Guide to checking and replacing the MH cylinder.
7.18 MH Cylinder Control Valve #EAA0328G73A: Check and Replacement
Procedure for checking and replacing the MH cylinder control valve.
7.19 Bead Inflating Valve # EAA0329G75A: Check and Replacement
Steps for checking and replacing the bead inflating spool valve.
7.20 Bead Blaster Valve # 1-29581A and Air Tank : Check and Replacement
Guide to checking and replacing the bead blaster valve and air tank.
7.21 Air Control # EAA0350G54A: Check and Replacement
Procedure for checking and replacing the air control valve.
7.22 Manometer: Check and Replacement
Steps for checking and replacing the pressure gauge (manometer).
7.23 Spiral Pipes: Check and Replacement
Guide to checking and replacing the pneumatic spiral pipes.
Chapter 8: Mechanical Section
8.1 Opening Arm Bushings # 1-10065A: Check and Replacement
Procedure for checking and replacing the opening arm bushings.
8.1.1 Opening Arm Bushings Linkage: Check and Adjustment
Guide to check and adjust the opening arm linkage for bushings.
8.2 Automatic Tool # EAA0356G25A: Check – Replacement and Adjustments
Procedure for checking, replacing, and adjusting the automatic tool.
8.3 Horizontal Arm Rollers # EAA0347G76A: Check and Adjustment
Steps for checking and adjusting the horizontal arm rollers.
8.4 Gear Box: Check and Replacement
Guide to checking and replacing the machine's gearbox.
8.5 Bead Breaker Discs # EAM0065G63A: Check and Replacement
Procedure for checking and replacing the bead breaker discs.
8.6 Bead Breaker Discs # EAM0065G63A: Check and Replacement
Procedure for checking and replacing the bead breaker discs (new type).
8.7 Bead Breaker Disc Bearing# 1-06963A: Check and Replacement
Guide to checking and replacing the bead breaker disc bearing.
8.8 Bead Breaker Discs Inclination Adjustment
Procedure to adjust the inclination angle of the bead breaker discs.
8.9 Bead Breaker Discs Clearance: Check and Adjustment
Steps to check and adjust the clearance between bead breaker discs and rim.
8.10 Bead Breaker Carriage: Check and Adjustment
Procedure for checking and adjusting the bead breaker carriage.
8.11 Lead Screw Nut # EAM0076G10A : Check and Replacement
Guide to checking and replacing the lead screw nut.
Chapter 9: Trouble Shooting Section
Complaint 1: Centerpost does not turn, bead breaker arm does not move, laser pointer off
Troubleshooting steps for a specific set of machine malfunctions.
Complaint 2: Centerpost does not turn, bead breaker & laser pointer work
Troubleshooting steps when the centerpost is inoperative but other functions work.
Complaint 3: Bead breaker arm does not move, centerpost & laser pointer work
Troubleshooting steps for inoperative bead breaker arm with other functions fine.
Complaint 4: Centerpost speed/direction issues
Troubleshooting steps for incorrect centerpost rotation speed or direction.
Complaint 5: Low rotational torque on centerpost
Troubleshooting steps for insufficient torque during centerpost operations.
Complaint 6: Wheel lift does not lift wheels
Troubleshooting steps for the wheel lift function failure.
Complaint 7: Operating arm does not close or open
Troubleshooting steps for unresponsive operating arm movement.
Complaint 8: Operating arm moves downward when opening, catches on closure
Troubleshooting steps for operating arm movement issues.
Complaint 9: Tool damages rims
Troubleshooting steps when the tool causes damage to rims.
Complaint 10: Bead breakers do not detach tire bead
Troubleshooting steps for bead breaker failure to detach tire bead.
Complaint 11: Air control does not inflate tire
Troubleshooting steps for tire inflation failure.
Complaint 12: Pneumatic cylinders too slow
Troubleshooting steps for slow operation of pneumatic cylinders.
Complaint 13: MH arm lacks force
Troubleshooting steps for insufficient force from the MH arm.
Complaint 14: Automatic tool does not lift tire bead
Troubleshooting steps for the automatic tool's inability to lift the tire bead.
Complaint 15: Bead breaker arms locked, beeper beeps
Troubleshooting steps when bead breaker arms are locked and a beeper sounds.
Complaint 16: Bead breaker discs are not aligned
Troubleshooting steps for misaligned bead breaker discs.
Chapter 10: Service Bulletins
Service-Bulletin No. SB 852 TC 10-May-12
Bulletin regarding Homologated Wika manometer accuracy.
Service-Bulletin No. SB 867 TC 13-Jul-12
Bulletin regarding MH arm control valve issues and replacement.
Service-Bulletin No. SB 879 TC 23-Jul-12
Bulletin concerning wired multiturn potentiometer cable updates.
Service-Bulletin No. SB 896 TC 18-Oct-12
Bulletin about new bead breaker discs and their replacement.
Service-Bulletin No. SB 921 TC 24-Jan-13
Bulletin on procedure to adjust bead breaker disks alignment.
Service-Bulletin No. SB 929 TC 25-Feb-13
Bulletin regarding KPa Wika manometer accuracy.
Need help?
Do you have a question about the MONTY 8600 and is the answer not in the manual?
Questions and answers