Electrolux E36GF76GPS Use And Care Manual
Use and care manual
Hide thumbs
Also See for E36GF76GPS:
- Dimensions and specifications (2 pages) ,
- Technical & service manual (96 pages) ,
- Use & care manual (40 pages)
Table of Contents
Advertisement
Quick Links
Advertisement
Table of Contents

Related Manuals for Electrolux E36GF76GPS


Summary of Contents for Electrolux E36GF76GPS
-
Page 2: Finding Information
Finding Information PLEASE READ AND SAVE THIS GUIDE Thank you for choosing Electrolux, the new premium brand in home appliances. This Use & Care Guide is part of our commitment to customer satisfaction and product quality throughout the service life of your new appliance. -
Page 3: Questions
NOTE Registering your product with Electrolux enhances our ability to serve you. You can register online (at the Internet address below) or by dropping your Product Registration Card in the mail. Complete and mail the Product Registration Card as soon as possible to validate the registration date. -
Page 4: Table Of Contents
Finding Information TABLE OF CONTENTS Finding Information ........... 2 Getting Started ..........21 Please Read And Save This Guide ....2 Before Setting Oven Controls ......21 Make A Record For Quick Reference ....2 Arranging Oven Racks........22 Questions ............3 Setting Oven Controls ........ -
Page 5: Safety
Safety IMPORTANT SAFETY INSTRUCTIONS Safety Precautions Do not attempt to install or operate your appliance until you have read the safety precautions in this manual. Safety items throughout this manual are labeled with a Warning or Caution based on the risk type. Definitions This is the safety alert symbol. -
Page 6: General Precautions
Safety GENERAL PRECAUTIONS IMPOR IMPOR IMPORT T T T T ANT IMPOR IMPOR • Begin by ensuring proper installation and grounding of the appliance by a qualified technician according to the accompanying Installation Instructions. Have the installer show you where the fuse or junction box is located so that you know how and where to turn off power. - Page 7 Safety GENERAL PRECAUTIONS IMPOR IMPOR IMPORT T T T T ANT IMPOR IMPOR • Always light each burner prior to placing a utensil on the burner grate. Also, turn the control knob to the “off” position before removing a utensil from the burner grate.
- Page 8 Safety GENERAL PRECAUTIONS UTION UTION CAUTION UTION UTION • Do not use the appliance for warming or heating the room. • Do not leave children alone or unattended in the area where the appliance is in use. Never allow children to sit or stand on any part of the appliance. Do not let children play with the appliance.
- Page 9 Safety GENERAL PRECAUTIONS CAUTION UTION UTION UTION UTION This appliance cannot be coverted to LP (liquid petrolium) gas. No additions, changes or conversions should be made in order for this appliance to satisfactorily meet the application needs. Failure to follow these instructions could result in serious injury or property damage.
-
Page 10: Feature Overview
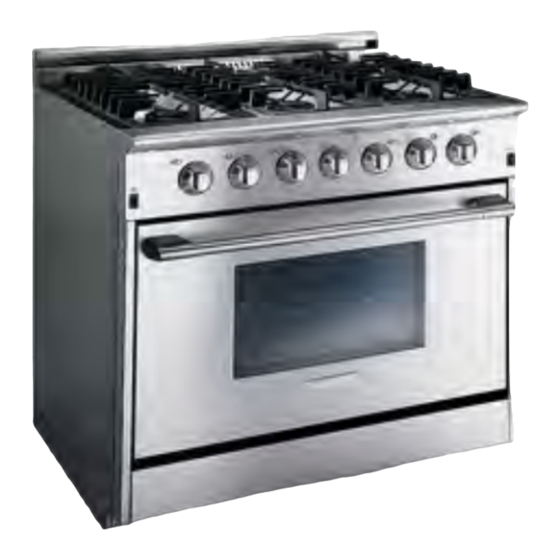
Feature Overview Before using your range, become familiar with the features and control panel layout. See Figure 22 (page 23) for a detailed control panel layout for your model. 1. Control Panel 2. Infrared Broiler 3. Convection Fan 4. Bake Burner 5. -
Page 11: Cooktop Features
Adjust or clean burner if flame is yellow-orange. To clean burner, see instructions under Care & Cleaning. BURNER LOCATIONS All Electrolux Icon range cooktops are equipped with sealed burners. See Figure 2 for a detailed burner layout for your model. -
Page 12: Sealed Burner Configurations
Cooktop Features SEALED BURNER CONFIGURATION On ICON all-gas ranges, there are a total of four (4) or six (6) burners, all rated with a maximum of 15K btu. Additionally, all burners are equipped with a slow simmer setting rated at 620 btu. On ICON 36”... -
Page 13: Control Knobs
Cooktop Features/Surface Cooking CONTROL KNOBS The control knobs provided with this cooktop are designed for ease of use and longevity. The “D” shaped design of the knob shaft ensures proper orientation when reinstalling the knob. Located beneath each knob is a bezel ring that mounts to the control panel. -
Page 14: Surface Cooking
Surface Cooking SURFACE COOKING UTENSILS *GOOD POOR • Curved and warped pan bottoms. • Pan overhangs cooktop by more • Flat bottom and straight than 2.5 cm (1”). sides. • Tight fitting lids. • Weight of handle does not tilt pan. -
Page 15: Using The Integrated Griddle
Surface Cooking USING THE INTEGRATED GRIDDLE Figures 8 To Grill Food: 1. Remove griddle cover. 2. Set temperature using the grilddle control knob and cook food directly on the flat surface of the griddle. 3. Replace the cover after griddle has cooled. Figures 9 To Clean: 1. -
Page 16: Using The Wok Stand
Surface Cooking USING THE WOK STAND The Wok Stand provided with your cooktop is designed to allow round-bottomed woks to be used. It is recommended that you use a 14 inch diameter (35.5 cm) or less Wok. Also, using the front burners with the wok stand will produce the best results. -
Page 17: Using The Simmer Plate
Surface Cooking USING THE SIMMER PLATE The Simmer Plate has been specifically designed for simmering and holding food at the lowest safe temperature. It can be used for cooking sauces long periods of time, or melting chocolate. With the grate in position over the burner, set the simmer plate on top of the grate, centering the plate over the grate fingers (See Figure 11). -
Page 18: Operation
Operation BEFORE COOKING Ensure that the range has been installed by a qualified individual who has tested the operation of the cooktop and oven in accordance with the Installation Instructions. The burner rings, burner caps, grates, and knobs must be in place for the cooktop to operate properly. - Page 19 Operation WARNING WARNING WARNING WARNING WARNING Do not touch any burner caps, burner base, burner head, or igniter while the igniters are sparking, as an electrical shock could result. IMPOR IMPOR IMPORT T T T T ANT IMPOR IMPOR • If the gas does not ignite within four seconds, turn off the valve.
-
Page 20: Setting The Burner Flame Height
Operation SETTING THE BURNER FLAME HEIGHT Setting the proper burner flame height for the desired cooking process and selected utensil will result in superior cooking performance, while also saving time and energy. Follow these recommendations for best results: Use low or medium flame heights when cooking in utensils that are poor conductors of heat, such as glass, ceramic, and cast iron cooking vessels. -
Page 21: Getting Started
Getting Started BEFORE SETTING OVEN CONTROLS Removing and Replacing Oven nstalling and Removing Oven Racks Rack Supports ALWAYS ARRANGE OVEN RACKS WHEN THE OVEN IS COOL (PRIOR TO ALWAYS INSTALL OVEN RACK SUPPORT OPERATING THE OVEN). BEFORE TURNING ON THE OVEN (WHEN Always use oven mitts when using the OVEN IS COOL) oven. -
Page 22: Arranging Oven Racks
Getting Started ARRANGING OVEN RACKS ALWAYS ARRANGE OVEN RACKS WHEN THE OVEN IS COOL (PRIOR TO OPERATING THE OVEN. Three chrome-plated Smooth-Glide oven racks and one chrome plated conventional oven rack are provided with your range. To bake on a single rack, place the rack in position 3. To bake on 2 racks, place the racks in position 2 and 4. -
Page 23: Setting Oven Controls
Read the instructions carefully in this manual before using the oven. Figure 22 E30GF74GPS E36GF75GPS E36GF76GPS OVEN FUNCTION For satisfactory use of your oven, become familiar with the various functions of the oven as described below. Standard Bake- With the Standard Bake function, the bottom bake burner provides conventional baking heat. -
Page 24: Cooking Instructions
Cooking Instructions BAKING This cooking mode is for normal baking, roasting or warming. The temperature control knob can be set at any temperature from 170°F (77°C) to 500°F (260°C). To set the Bake temperature to 350°F: 1. Arrange interior oven racks to desired positions.. 2. -
Page 25: Baking Problems
Cooking Instructions BAKING PROBLEMS For best cooking results, preheat the oven before baking cookies, breads, cakes, pies or pastries, etc. There is no need to preheat the oven for roasting meats and poultry, or baking casseroles. The cooking times and temperatures needed to bake a product may vary slightly from your previous appliance. -
Page 26: Convection Baking And Roasting
Cooking Instructions CONVECTION BAKING AND ROASTING As a general rule, convection baking will allow preparation of most foods at reduced temperatures for shorter periods of time. while allowing superior results. Typically, you can reduce the standard bake temperature the recipe recommends by 25°F (approx. - Page 27 Baking Problems CONVECTION BAKING AND ROASTING To roast meats and poultry, the Convection mode is recommended to produce meats and poultry that are deliciously seared on the outside and succulently juicy on the inside in record time Foods that are exceptional when prepared with the Convection mode include: beef, pork, ham, lamb, chicken, turkey and Cornish hens.
- Page 28 Cooking Instructions CONVECTION BAKING AND ROASTING 7 The Convection mode is not recommended for meats or poultry cooked with a cooking bag, foil tent or other cover. Food cooked with these methods will produce better results when using the standard Bake mode. 8 Roasting times will always vary according to the size, shape and quality of meats and poultry.
-
Page 29: Broiling
Cooking Instructions BROILING Broiling is a method of cooking tender cuts of meat directly under the infrared broiler in the oven. Broiling in the oven is accomplished with the oven door closed. It is normal and necessary for some smoke to be present to give the food a broiled flavor. -
Page 30: Broiling Tips
Cooking Instructions BROILING TIPS The broiling pan and its insert allow dripping grease to drain and be kept away from the high heat of the broiler. NOTE DO NOT use the broiler pan without its insert. DO NOT cover the broiler pan insert with foil. The exposed grease could ignite. -
Page 31: Care And Cleaning
Care and Cleaning OVEN LIGHT Your new range has halogen oven lights to enhance the view into the oven. The light assembly consists of a removable lens cover and 50-watt 120VAC halogen bulb, as well as a light fixture housing. Light bulb replacement is considered to be a homeowner maintenance operation. -
Page 32: Cleaning Tips
Care & Cleaning CLEANING TIPS FOR RANGE OVEN Porcelain Enamel Oven The oven interior is porcelain on steel and it is safe to clean using oven cleaners. General Cleaning Remove soils using hot, soapy water. Do not allow food spills with a high sugar or acid content (such as milk, tomatoes, sauerkraut, fruit juices or pie filling) to remain on the surface as they may cause a dull spot even after cleaning. -
Page 33: Cleaning Tips For Range Cooktop
Care and Cleaning CLEANING TIPS FOR RANGE COOKTOP No maintenance, other than the Care and Cleaning identified in this Use & Care Manual, should be attempted by the owner/operator. All other maintenance and service must be performed by a qualified appliance technician. WARNING WARNING WARNING... - Page 34 Stubborn stains may be removed by applying full-strength, all purpose cleaning sprays. (If you are unable to locate these cleaning compounds, please phone the Electrolux Customer Service Department for a referral.) IMPOR IMPOR IMPORT T T T T ANT...
-
Page 35: Cleaning Stainless Steel Surfaces
Care and Cleaning CLEANING STAINLESS STEEL SURFACES Clean these surfaces with the provided Stainless Steel Cleaner. Rinse and dry with a soft lint-free cloth. IMPOR IMPOR IMPORT T T T T ANT IMPOR IMPOR If commercially available stainless steel cleaners are used, it is important to read the labels for chlorine compounds. -
Page 36: Cleaning Knobs And Bezels
Care and Cleaning CLEANING KNOBS AND KNOB BEZELS The control knobs provided with this appliance are designed for ease of use and longevity. The “D” shaped design of the knob shaft ensures proper orientation when reinstalling the knob. The knobs and knob bezels are made of a composite plastic. These components should be washed regularly in warm, soapy water. -
Page 37: Cleaning Burner Rings
Dry the burner thoroughly. Stubborn stains may be removed by applying a metal polishing compound. (If you are unable to locate this type of polishing compound, please phone the Electrolux Customer Service Department for a referral.) -
Page 38: Cleaning General
Care & Cleaning GENERAL CLEANING Cleaning Various Parts of Your Appliance Before cleaning any part of your appliance, be sure all controls are turned OFF and the appliance is COOL. REMOVE SPILLOVERS AND HEAVY SOIL AS SOON AS POSSIBLE. REGULAR CLEANING WILL REDUCE THE NUMBER OF MAJOR CLEANINGS LATER. -
Page 39: Troubleshooting
Troubleshooting Problem Possible Causes What to Do Ensure the oven is connected to a properly sized Nothing works. Oven is not connected to electrical power. electrical power supply which was installed by a qualified electrician. Power supply is not energized. Have an electrician check power supply, including the house circuit breaker, wiring and fuses. -
Page 40: Warranty
Your appliance is protected by this warranty In the U.S.A., your appliance is warranted by Electrolux Home Products North America. We authorize no person to change or add to any of our obligations under this warranty. Our obligations for service and parts under this warranty must be performed by us or an authorized Electrolux Home Products North America servicer.
Need help?
Do you have a question about the E36GF76GPS and is the answer not in the manual?
Questions and answers