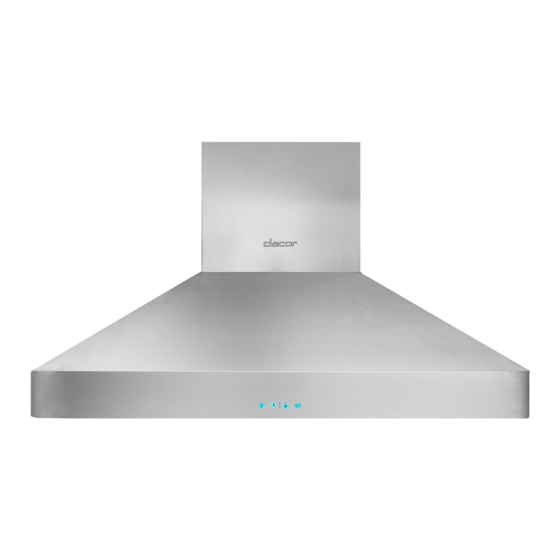
Dacor Millennia DHI361 Installation Instructions Manual
Island (ceiling mount) range hoods
Hide thumbs
Also See for Millennia DHI361:
- Installation instructions manual (16 pages) ,
- Use and care manual (16 pages) ,
- Planning manual (1 page)
Table of Contents
Advertisement
Quick Links
Download this manual
See also:
Use and Care Manual
Advertisement
Table of Contents

Subscribe to Our Youtube Channel
Summary of Contents for Dacor Millennia DHI361
- Page 1 Installation Instructions Millennia Island (Ceiling Mount) ® Range Hoods Models: DHI361, DHI421, DHI482 and DHI542 ® Approved for use with All dAcor rAnges And cooktops. iMportAnt: instAllAtion of this hood reQuires A chiMneY kit, dAcor pArt # dhich. Part No. 101744 Rev. F...
-
Page 2: Table Of Contents
■ The label is located inside the hood chassis behind the filter(s). Remove the filter(s) to view it. All specifications subject to change without notice. dacor assumes no liability for changes to specifications. © 2008 Dacor, all rights reserved. -
Page 3: Important Safety Instructions
Hazards or unsafe practices that could result in ■ Always contact the Dacor Customer Service Team severe personal injury or death. about problems and conditions that you don’t under- stand. cAution Hazards or unsafe practices that could result in minor personal injury or property damage. -
Page 4: General Safety Precautions
Important Safety Instructions General Safety Precautions to reduce the risk of fire, electric shock, serious injury or death when using your appliance, follow basic safe- ty precautions, including the following: wArning • If the information in this manual is not followed exactly, a fire or explosion may result causing property damage, personal injury or death. -
Page 5: Installation Specifications
Model Blowers lights filters current draw * 18” 1/4 on models DHI482 and DHI542 DHI361 3.8 Amp. iMportAnt: The minimum installed distance from the DHI421 3.8 Amp. hood to the cooking surface must be no less than 30 DHI482 6.8 Amp. -
Page 6: Planning The Location
Installation Specifications Planning the Location Planning the Duct Work wArning wArning • Observe all governing codes and ordinances during • To prevent combustion by-products, smoke or odors planning and installation. Contact your local building from entering the home and to improve efficiency, department for further information. -
Page 7: Installation Instructions
Installation Specifications Calculating the Maximum Duct Run Length Duct Work Design Tips The maximum straight duct length for the hood is 50 feet. Wherever possible, reduce the number of transitions and To determine the actual maximum duct run, subtract the turns to as few sharp angles as possible. -
Page 8: Install Mounting Bracket
Remove the tape that holds the wiring in place on top the unit. They are part of a standard mounting hard- of the hood during shipment. ware package provided with many Dacor hoods, but not suitable for use with this model. On models with two blowers, put the exhaust cowling over the blower outlets on the top of the hood. - Page 9 Carefully put the chimney over the top of the frame- work, taking care not to scratch the surfaces. Make sure the Dacor logo faces the same side as the con- trol panel. Make sure any wires are tucked in behind the chim- Hood ney and are not pinched.
-
Page 10: Hang The Hood
Installation Instructions Hang the Hood Install the Duct Work wArning wArning To prevent personal injury, do not rely on the Do not use screws to attach the duct work to the hood mounting springs to hold the hood assembly in place exhaust outlet. -
Page 11: Final Electrical Installation
Preparing for Installation Final Electrical Installation Final Chimney Assembly wArning wArning • To avoid electric shock or fire hazard, prior to con- Be careful not to pinch the electrical wires while necting the electrical wiring to the hood, make sure assembling the chimney. -
Page 12: Verifying Proper Operation
See the inside cover for location. Dacor is not responsible for the cost of correcting prob- lems caused by a faulty installation. -
Page 13: Wiring Diagram
LIGHT FIXTURES EXTERNAL BLOWER CONNECTION Please note—the layout on the PC Board shown above may vary— however all wires are coded and the connections on the PC Board are also coded with the same number/letters. single Blower Models: dhi361, dhi421... - Page 14 Wiring Diagrams YELLOW/GREEN MAIN POWER TO BLOWER SWITCH MOTOR TO BLOWER MOTOR TRANSFORMER LIGHT FIXTURES TRANSFORMER LIGHT FIXTURES EXTERNAL BLOWER CONNECTION Please note—the layout on the PC Board shown above may vary— however all wires are coded and the connections on the PC Board are also coded with the same number/letters.
- Page 16 Dacor ● 600 Anton Blvd. Suite 1000 Costa Mesa, CA 92626 ● Phone: (800) 793-0093 ● Fax: (626) 403-3130 ● www.Dacor.com...


Need help?
Do you have a question about the Millennia DHI361 and is the answer not in the manual?
Questions and answers