Table of Contents
Advertisement
Quick Links
Download this manual
See also:
User Manual
Advertisement
Table of Contents

Related Manuals for Dacor DHD30M967


Summary of Contents for Dacor DHD30M967
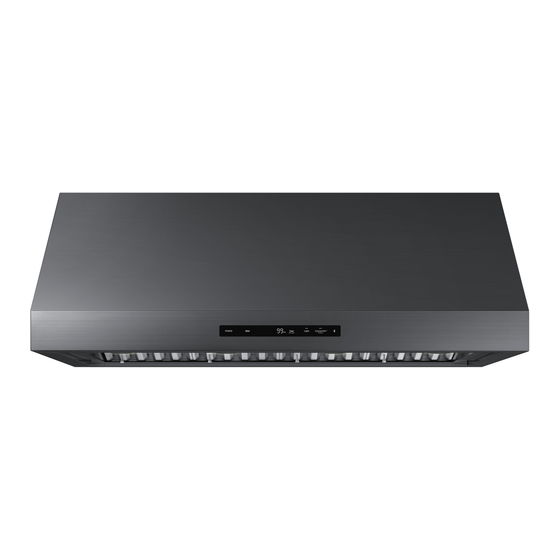
- Page 1 Installation Instructions Modernist Range Hood DHD30M967/DHD36M987/DHD48M987 Part No. 110452 Rev E...
-
Page 2: Table Of Contents
Contents Before You Begin Important Notes Customer-Assurance Information Important Safety Instructions Related Equipment Safety Installation Safety Installation Requirements Checklist Preparing to Install the Hood Installation Planning Hood Specifications Electrical/Ductwork Connections Overall Hood Dimensions Cabinet Layout Dimensions Installation Instructions Meeting Electrical Codes Preparation and Setup Installing the Electrical Source Meeting Installation Requirements... -
Page 3: Before You Begin
(800) 793-0093 x2813 (US, Canada) Hours of Operation: Mon – Fri 5:00 a.m. to 5:00 p.m. Pacific Time Website: www.dacor.com/customer-care/contact-us All specifications are subject to change without notice. Dacor assumes no liability for such changes. © 2017 Dacor, all rights reserved. English 3... -
Page 4: Important Safety Instructions
• Follow the directions in this manual exactly • Use the hood only as intended by the manufacturer. If you have questions, contact Dacor (Pg. 3). • Installation and wiring must be done by qualified person(s) according to applicable codes and standards, including fire-rated construction. - Page 5 Important Safety Instructions Installation Safety, cont. WARNING To reduce risk of property damage, fire, personal injury, and death: • If you receive a damaged product, immediately contact the dealer/builder. Do not install/use a damaged hood. • Install the hood as instructed in this manual and as specified by the cooktop/range manufacturer. Improper installation, adjustment, alteration can cause serious personal injury or property damage.
-
Page 6: Installation Requirements
Have these tools and hardware available before starting the installation. Hood Installation Dual-to-Single Vent Transition Kit (option) • Phillips screwdriver • Dacor Kit #AHT10 (DHD48 only) • Flat-head screwdriver • 10" ducts, ducting material • Pencil/marking tool • Drill, bits •... -
Page 7: Installation Planning
48” (4), 36” (3), 30” (2) * Ready-to-assemble kit ** Installation Instructions, User Manual Product literature** (2) Dacor cleaning cream (1) Stainless-steel units only Installation Planning • The owner shall ensure that the hood is installed by qualified personnel. • The hood should be placed for convenient access. Ensure that electrical power can be provided to the selected location and that the outlet is easily accessible for service/emergency shutoff. -
Page 8: Hood Specifications
Installation Requirements Hood Specifications General: All Models (DHD30/36/48) Features Description Blower Speeds Four (4) Filters Baffle style, dishwasher safe Exhaust(s) 8” duct diameter 30”, 36”: 120V, 60 Hz, 15 Amp (actual load 3.3 Amp, 6 Amp initial surge) Total Connect Load 48”: 120V, 60 Hz, 15 Amp (actual load 6.1 Amp, 12 Amp initial surge) Lights Dimmable LED: PAR16 E26/27;... -
Page 9: Electrical/Ductwork Connections
Installation Requirements Electrical/Ductwork Connections Connect wires and ductwork through the top or rear of the hood. Before installing the hood, mark the access holes according to the diagrams below. (Tolerances: +1/16” -0”, unless otherwise stated.) Top Connections: All models Model Dual-Exhaust 1 1/2”... -
Page 10: Overall Hood Dimensions
Installation Requirements Overall Hood Dimensions Tolerances: +1/16” -0” unless otherwise stated. Single Blower DHD30/36 Series Dual Blower DHD48 Series Model 29 7/8” (75.9 cm) 24” 18” ” 35 7/8” (91.1 cm) (61 cm) (45.7 cm) (30. 47 7/8” (121.6 cm) 10 English... -
Page 11: Cabinet Layout Dimensions
Installation Requirements Cabinet Layout Dimensions Tolerances: +1/16” -0” unless otherwise stated. Electrical access (top and back of hood) * hood 30" min. bottom to (76.2 cm) cooking surface Min. Width of E (Upper-Cabinet Cutout, Appliance Width) Model DHD 30” (76.2 cm) 36”... -
Page 12: Installation Instructions
Installation Instructions Meeting Electrical Codes • The owner shall verify that all electrical requirements are met by the installer. • The electrical installation (incl. minimum supply-wire size and grounding) must comply with the National Electric code ANSI/NFPA (or latest revision), and local codes. Obtain a copy of the ANSI/NFPA standard from: National Fire Protection Association 1 Batterymarch Park... -
Page 13: Installing The Electrical Source
Installation Instructions Installing the Electrical Source In compliance with local codes, install an electrical junction box near the hood’s wiring access holes. 1. In the cabinet or wall, drill 7/8” holes through Suggested Junction Box Area which to pass the electrical wiring. 2. -
Page 14: Planning The Ductwork
• Ductwork must not interfere with floor joists or wall studs. • On dual-exhaust models, the two 8” exhausts may be merged into one 10” duct using Dacor Transition Kit AHT10. • Fasten all joints with sheet-metal screws, and seal with certified duct/foil tape. - Page 15 Installation Instructions Planning the Ductwork, cont. Ductwork Equivalent Lengths For each new elbow and transition, you must subtract “equivalent lengths” from your total maximum duct run length to compensate for wind resistance. Piece Subtract 8” 90° Elbow 7 feet 8” 45° Elbow 3 feet 10”...
-
Page 16: Planning The Mounting Location
Installation Instructions Planning the Mounting Location Holding brackets and hardware are provided to support the hood so you can permanently anchor it to the wall. The illustrations below show the purpose of the holding brackets and the support behind the wall. •... -
Page 17: Marking The Exhaust-Duct Centerlines
Installation Instructions Marking the Exhaust-Duct Centerlines These measurements/marks help center and level the hood, and mark the duct cutouts. Have a marking tool, tape measure, and level ready. Top-Exhaust Rear-Exhaust Centerline Centerline Cooktop Position the hood as it will be when installed (e.g., for a top-vent installation, set the hood with the vents on top). -
Page 18: Installing The Support Brackets
Installation Instructions Installing the Support Brackets CRITICAL: To avoid alignment issues during final installation, the brackets must not be over/under/ off the centerline. Step 4 Bracket 2 1/8" Mounting block placement (attached to studs inside wall behind hood) Line Stud Hood Area indicates hood top... -
Page 19: Rotating The Blowers For Rear Exhaust
Installation Instructions Rotating the Blowers for Rear Exhaust IMPORTANT: Perform this procedure before hang the hood. WARNING • Ensure the electrical service meets the hood’s specifications. • Observe all local codes during installation. Consult the local building department if needed. •... - Page 20 Installation Instructions Rotating the Blowers for Rear Exhaust, cont. Removing Components, cont. 4. Carefully set the hood on its back to access the bottom. 5. Find the end of the cable assembly plugged into the bottom left of the blower, then squeeze and L-Bracket unplug the connector.
- Page 21 Installation Instructions Rotating the Blowers for Rear Exhaust, cont. Re-orienting the Blower(s) The blower(s) must be correctly positioned. Set the hood on its top. Left Side Standing at the rear of the hood and looking Rear down at the blower, insert the blower so its I/O Bottom port faces right, and its exhaust port is against the Blower edge...
-
Page 22: Assembling The Filters
On dual-exhaust models, the two 8” duct exhausts 2" (5.1 cm) can be transitioned into one 10” duct. 13 3/4" Assemble the Dacor transition kit #AHT10 (sold (34.9 cm) separately) before you hang the hood. This 3/4" transition kit fits over the top/rear ventilation exits. -
Page 23: Hanging The Hood
Installation Instructions Using the Optional Dual-to-Single Transition Kit #AHT10, cont. Installing the AHT10 Transition Kit (top-/rear-vent configuration) NOTE The transition kit does not include the sheet-metal screws needed to install the hood. Rear-Vent Top-Vent 1. Center the transition kit over the duct collars. 2. -
Page 24: Hardwiring The Hood
Installation Instructions Hanging the Hood, cont. 5. (If needed) Mark the top of the hood if the Hanging configuration calls for the hood to be secured at slots the top. 6. Remove the hood from the wall. 7. Drill the pilot or anchor holes. (If using anchors, insert them into the anchor holes.) 8. - Page 25 Installation Instructions Hardwiring the Hood, cont. 3. With the provided green screw, attach the ground wire to the ground screw (next to the main power Neutral (white) switch inside the hood above the filters). IMPORTANT: Use a #10 O-ring at the end of the Hot (black) ground wire.
-
Page 26: Inserting Light Bulbs
3. Verify that the electrical connections are correct. 4. Re-run Verifying the Setup. If the hood still does not work, contact Dacor Customer Assurance (see Pg. 3). Do not make your own repairs. Dacor will will not pay for service needed to correct unauthorized repairs. -
Page 27: Wiring Diagram
Installation Instructions Wiring Diagram DHD30/36/48 English 27... - Page 28 Dacor ∙ 14425 Clark Avenue, City of Industry, CA 91745 ∙ Phone: (800) 793-0093 ∙ Fax: (626) 403-3130 ∙ www.dacor.com...
Need help?
Do you have a question about the DHD30M967 and is the answer not in the manual?
Questions and answers