
Related Manuals for ADIATEK coral 85


Summary of Contents for ADIATEK coral 85
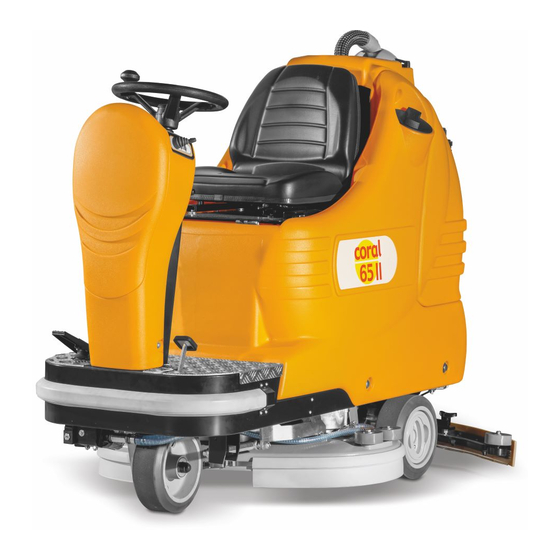
- Page 1 65 coral 65 II coral 85 11 2016 Use and maintenance Attention! Please read the instructions before use. COD. 65308002...
- Page 2 TECHNICAL DESCRIPTION coral 65 coral 65 II coral 85 Cleaning width 33.5 1070 Squeegee width 3300 3300 4250 Working capacity, up to sqft/h 35521 35521 45747 2 x 345 2 x 345 2 x 430 Brushes diameter 2 x 14...
-
Page 3: Table Of Contents
INTRODUCTORY COMMENT Thank you for having chosen our machine. This floor cleaning machine is used for the industrial and civil cleaning and is able to clean any type of floor. During its advance movement, the combined action of the brushes and the detergent solution removes the dirt which is aspirated through the rear suction assembly, giving a perfectly dry surface. -
Page 4: General Rules Of Safety
GENERAL RULES OF SAFETY − Every 200 working hours have a machine check by an authorized service department − Before using the machine, check that all panels and coverings are The rules below have to be followed carefully in order to avoid injury to the operator and damage to the machine. -
Page 5: Legend Panel Of Controls
LEGEND PANEL OF CONTROLS DISPLAY 16. SIGNAL LAMP UP/DOWN BRUSHES SIGNAL LAMP MANUAL MODE ON 17. PUSH BUTTON UP/DOWN BRUSHES PUSH BUTTON CONNECTION MANUAL MODE 18. SIGNAL LAMP STARTING BRUSHES ROTATION SIGNAL LAMP MODE BREAK WASHING ON 19. PUSH BUTTON WATER OPENING (SOLENOID VALVE) or PUSH PUSH BUTTON CONNECTION MODE BREAK WASHING BUTTON ADJUSTMENT... -
Page 6: Symbology Machine
SYMBOLOGY MACHINE Symbol denoting the switch for the water Symbol denoting the push button and the opening and the signal lamp that the water is signal lamp up/down of the squeegee. open. Symbol denoting the functioning of the Symbol denoting the switch and the signal lamp solution valve adjusting the flow of the of the suction motor. -
Page 7: Optional Accessories
OPTIONAL ACCESSORIES The optional accessories are: blinking light (3); 3SD dosing system (1); on-board battery charger (4); front light (2); squeegee “V”-type (5). BEFORE USE HANDLING OF THE PACKED MACHINE The machine is supplied with suitable packing foreseen for fork lift truck handling. -
Page 8: Battery Installation
To install into the compartment a battery box, it is necessary to: For batteries installation it is necessary to reach the battery Rotate the seat platform forward and hook the bar (2) into compartment as indicated under paragraph “ACCESS TO THE BATTERY position A. -
Page 9: Batteries Recharging With On-Board Charger (Optional)
CONNECTION BATTERIES' CONNECTOR AND SWITCHING ON OF THE MACHINE Once that the battery recharging has been completed: Disconnect the connector of the battery recharger from the battery connector (1). Connect instead the machine connector (2). BATTERIES RECHARGING WITH ON-BOARD CHARGER (OPTIONAL) Bring the machine on a levelled surface near to a single-phase socket with tension 230V, frequency 50Hz, nominal current 10A. -
Page 10: Setting Of The Battery Check Card
The machine, if not specified otherwise, is supplied with the battery check card set for lead batteries. To modify this setting, it is necessary Switch off and on the machine. Immediately after having switched on, when on the display (1) the writing Pb24 appears, press simultaneously the push buttons (2) and (3) up to the blinking of the writing. -
Page 11: Hour Meter
HOUR METER The lower part of the rubber is not much bent The machine is equipped with an hour meter located on the same Increase the pressure rotating the wing nut (6) clockwise. Check that display (1) of the battery charge level indicator. Keeping the button the wheels which adjust the height do not rest on the floor, in this (2) pressed, the first data indicates the working hours and after a few case adjust them as indicated in paragraph "Height adjustment". -
Page 12: Brushes Assembly
FLOOR CLEANING RECOVERY TANK Check that the cover of the suction filter (1) is correctly secured, after rotating the levers (2) and that the suction motor hose (3) is correctly connected to it. Verify also that the squeegee hose couplings (4/5) are correctly inserted into their seats and that the exhaust hose plug (6) placed in the rear part of the machine is well closed. -
Page 13: Starting Of The Machine
NOTE: when restarting with the work in mode 3SD, it is important that the solution valve (C) is closed, this to maintain the predetermined proportions water-detergent. NOTE: if the automatic dosing system is not being used for a long time, it is possible that the hoses of the detergent circuit are emptied and therefore at the first use, the detergent begins to come out onto the brushes with a certain delay compared to the water outlet. -
Page 14: Forward And Backward Movement
WORKING BRAKE To stop the machine during normal working situations, it is sufficient to release the accelerator pedal, because the machine has got an In manual mode every function of the machine has to be activated electronic brake system. To restart, press again the accelerator pedal. or deactivated manually. -
Page 15: Working In Manual Mode
WORKING IN MANUAL MODE WORKING ADJUSTMENTS The manual mode is useful when, in special cases, it is necessary to Both in automatic as in manual mode, during the first metres check: carry out separately only the washing with the brushes or only the that the squeegee adjustment guarantees a perfect drying result drying of the floor. -
Page 16: Electric Protection
ELECTRIC PROTECTION The machine is equipped with an electronic system of protection for all components that carry out functions of power or control. This device blocks the defective component and indicates on the display (1) the corresponding alarm from ”A1”, “A2” and on. To restore the functioning of the component, turn off and on again the machine acting upon the key switch. -
Page 17: Suction Filter Cleaning
BRUSHES CLEANING Disassemble the brushes and clean them with a water jet (for the brushes disassembly see under paragraph “BRUSHES DISASSEMBLY”). SQUEEGEE CLEANING Keeping the squeegee clean guarantees always the best drying result. For its cleaning it is necessary to: Take off the squeegee hose (5) from the coupling. -
Page 18: Squeegee "V" Type (Optnional)
SQUEEGEE “V” TYPE (OPTNIONAL) CLEANING SOLUTION TANK AND OUTER FILTER Alternatively to the standard squeegee, a “V”-shaped squeegee is available, especially indicated for floors with large joints. This squeegee is interchangeable with the standard one, same assembly on the machine, same adjustment in height, pressure and inclination. -
Page 19: Six-Monthly Maintenance
SIX-MONTHLY MAINTENANCE THE TRACTION MOTOR DOES NOT WORK Sit on the guiding place. Verify that the key switch (1) is positioned clockwise to switch SPLASH GUARD RUBBER CHECK on the machine. In presence of alarm signals it is necessary to switch off and on again the machine to restore the functionality. -
Page 20: The Machine Does Not Clean Properly
Check that the squeegee rubbers are clean (see under paragraph THE MACHINE DOES NOT CLEAN PROPERLY “SQUEEGEE CLEANING”). The brushes do not have the suitable bristle dimension: contact Check the adjustment of the height and the inclination of the the authorized technical assistance. squeegee (see under paragraph “ADJUSTMENT OF THE The brushes have got worn bristles. - Page 21 It is equipped with anchor points which permit the blocking of the abrasive pad during work. The pad is recommended to clean smooth floors. MACHINE CODE QUANTITY DESCRIPTION coral 65 coral 65 II 48903020 Brush PPL 0,6 Ø 345 Normal floors. 48903030 Brush PPL 0,9 Ø 345 Smooth floors with small joints and persistent dirt.
Need help?
Do you have a question about the coral 85 and is the answer not in the manual?
Questions and answers