Table of Contents
Advertisement
Advertisement
Table of Contents

Subscribe to Our Youtube Channel
Related Manuals for Arcam RCUBE


Summary of Contents for Arcam RCUBE
- Page 1 iPod Speaker System kleer c e r t i fi e d...
-
Page 2: Important Safety Instructions
Important Safety Instructions 6. Heat This product is designed and manufactured to meet strict quality and safety standards. However, you should Locate the equipment away from naked flames or heat- be aware of the following installation and operation producing appliances such as radiators, stoves or other precautions. - Page 3 Important Safety Instructions Safety and Standards Compliance 12. Abnormal smell This equipment has been designed to meet the IEC/EN If an abnormal smell or smoke is detected from the 60065 international electrical safety standard. This device equipment, turn the power off immediately and unplug the equipment from the wall outlet.
-
Page 4: Table Of Contents
Playing from a Line-Level Source ......E-14 Playing from a Headphone Jack ......E-15 The rCube is intuitive and easy to use. This Using Video Outputs ..........E-16 handbook gives you all the instructions you rCube goes where you go ........E-17... -
Page 5: What's In The Box
PC or Mac from your iPod, iPhone® or iPad® component video enabled displays Other accessories may become available in future — please contact your Arcam dealer for the latest information. -
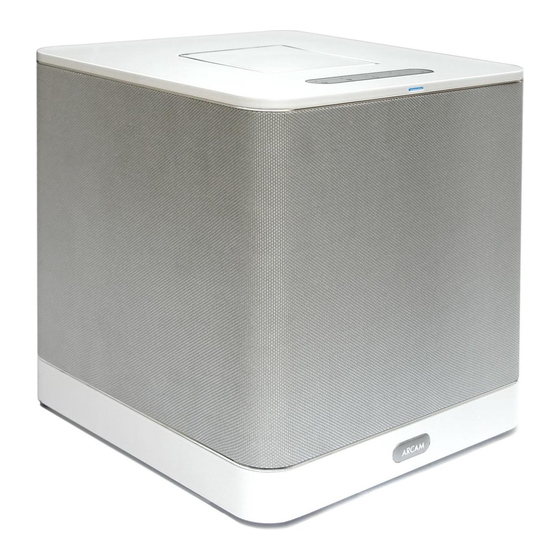
Page 6: Product Overview
Product Overview View from Back Rear Panel Connectors The rear panel contains the overall power switch and connectors for connecting power as well as CD players and TVs etc. See page E-7. View from Top iPod Dock and Handle (with dust cover) The iPod dock and integrated handle is protected by a dust cover. -
Page 7: Rear Panel
The natural acoustics near room walls reinforce the bass output of the The rear panel USB connector is for future rCube upgrades External analogue input via 3.5mm... -
Page 8: Connections Overview
Connections Overview Power Your rCube can be powered from the mains or from the integral rechargeable battery. Connect the power supply to power the unit Cube from the mains and/or to charge the battery. Connecting to external sources There are two types of sources that can be connected to the rCube’s AUX-in input: line-... -
Page 9: Top Panel
Both volume LEDs (- & +) are illuminated Reduces volume. Press and hold to VOLUME when the rCube is muted. Press any smoothly reduce the volume. DOWN volume button to release the Mute Increase volume. Press and hold to function. -
Page 10: Remote
The remote volume buttons duplicate the top panel volume and buttons. A short press of + or - will increase or decrease the rCube’s volume a small amount (there are 52 volume steps) or you can press and hold these buttons to ramp the volume up or down. - Page 11 Remote iPod control NOTE: these functions are only available Turn rCube on from standby or place STANDBY for docked iPods and iPhones. They are unit into standby from on. not available when an iPod is connected Mute the rCube volume.
-
Page 12: Carrying And Placing The Rcube
Carrying and Placing the rCube Carrying your rCube The rCube is designed to be easy to carry around the house; the hidden handle under the dust cover comfortably fits a hand. To lift your rCube, first make sure there is no iPod in the docking station and that the AC mains adaptor is disconnected. -
Page 13: Playing From An Ipod Or Iphone
LED glows green. Choose track and play Use your iPod controls or rCube remote to select a track and begin audio playback. Adjust volume Use the + and - volume buttons on the remote or on the top panel to adjust the volume to desired level. -
Page 14: Playing From A Line-Level Source
DC power input Note: some devices output line level from jack on the rear panel of the rCube. Switch the rCube on a 3.5mm stereo mini jack. If you have one by pressing its power rocker switch on the rear panel, the of these you will need a stereo male to male front LED will glow red (standby mode). -
Page 15: Playing From A Headphone Jack
Power up Plug the power supply into the AC mains wall supply and the DC power input jack on the rear panel of the rCube. Switch on the rCube by pressing power switch on the rear panel, and Headphone press the standby button on the top panel or on Source the remote. -
Page 16: Using Video Outputs
Plug the power supply into the AC mains wall supply and the DC power input jack on the rear panel of the rCube. Switch on the rCube by pressing power switch on the rear panel, and press the standby button on the top panel or on the remote. -
Page 17: Rcube Goes Where You Go
- 3 illuminated LEDs indicate 75% remaining; - 2 illuminated LEDs indicate 50% remaining; - 1 illuminated LED indicates 25% remaining. Storage If you need to store the rCube, you should ensure the rear power switch is in the off position. E-17... -
Page 18: Setting Up The Rwave Usb Transmitter
Turn on the rCube transmission. When the wireless LED on the rCube Plug in and switch the rCube to on by pressing the rear glows continuous green, the association has been made. panel rocker switch to the on position and pressing the The rWave remains in association mode for 30 seconds in top panel standby button, so that the power LED is blue. -
Page 19: Playing From The Rwave Usb Transmitter
Plug the power supply into the AC mains wall supply and the DC power input jack on the rear panel of the rCube. Switch on the rCube by pressing power switch on the rear panel, and press the top panel standby button. -
Page 20: Setting Up The Rwand Ipod Transmitter
Turn on the rCube transmission. When the wireless LED on the rCube Plug in and switch the rCube to on by pressing the rear glows continuous green, the association has been made. panel rocker switch to the on position and pressing the The rWand remains in association mode for 30 seconds top panel standby button, so that the power LED is blue. -
Page 21: Playing From The Rwand Ipod Transmitter
Plug the power supply into the AC mains wall supply and the DC power input jack on the rear panel of the rCube. Switch on the rCube by pressing power switch on the rear panel, and press the top panel standby button. -
Page 22: Setting Up Rcube-To-Rcube Transmission
Wireless Range transmissions from the other. An rCube can normally receive from a Any music played on the transmitting rCube, from an iPod or transmitter situated in the same house. an external source, will be sent wirelessly to the second rCube. -
Page 23: Upgrading The Firmware
When the LED will stops flashing and glows continuously, the rCube is updated. To upgrade the rCube you will need a USB flash drive and a PC or laptop computer that can connected to the internet. Remove the memory stick It is now safe to remove the memory stick. - Page 24 ‘MUTE’ button on the remote or a volume control button to unmute the sound. The unit responds erratically or the rCube is powered on, if it is in standby mode press the P button on the < not at all to the remote control remote to turn it on.
-
Page 25: Specifications
Specifications Continuous power output (20Hz—20kHz at 0.5% THD), per channel Woofer channels, 4Ω, 100Hz—3.7kHz 35W/Ch Tweeter channels, 6Ω, at 1kHz 10W/Ch Harmonic distortion, 80% power, 1kHz 0.1% Inputs Line inputs: Nominal sensitivity 250mV—1.5V Input impedance 22kΩ Signal/noise ratio (CCIR, 45W) 90dB Amplifier output Nominal output level... -
Page 26: Warranty
Problems? If your Arcam dealer is unable to answer any query regarding this or any other Arcam product please contact Arcam Customer Support at the above address and we will do our best to help you. On-line registration You can register your product on-line at www.arcam.co.uk.
Need help?
Do you have a question about the RCUBE and is the answer not in the manual?
Questions and answers