
Related Manuals for ZENEC ZEM-W703MRM


Summary of Contents for ZENEC ZEM-W703MRM
-
Page 1: Instruction Manual
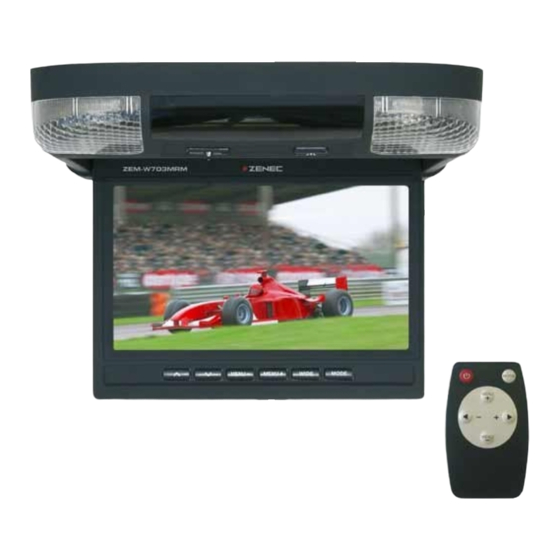
7” WIDE SCREEN TFT-LCD MOTORIZED ACTIVE MATRIX ROOF MOUNT MONITOR DOOR ZEM-W701RM MENU– MENU+ WIDE MODE MODEL NO: ZEM-W703MRM INSTRUCTION MANUAL... - Page 2 ZEM-W703MRM Vielen Dank für den Kauf dieses ZENEC – Produktes! Mit dem Kauf des ZEM-W703MRM haben Sie sich für ein technisch ausgereiftes Produkt entschieden, das Ihnen durch die Verwendung von hochwertigen Materialien und Bauteilen eine lange Lebensdauer garantiert. Bei dem ZEM-W703MRM von ZENEC handelt es sich um einen motorischen 7“ Breitbild TFT-LCD Aktiv-Matrix Deckenmonitor.
-
Page 3: Table Of Contents
Deutsch LIEFERUMFANG Abbildung Element Menge Deckenmonitor IR-Fernbedienung inkl. Batterie Montageplatte TA4×8/10/12 Schrauben CM2x4 Schrauben Bedienungsanleitung 3A Sicherung INHALTSVERZEICHNIS Sicherheitshinweise ....................4 Die Fernbedienung ..................... 4 Die einzelnen Tasten ..................... 5 Benutzen der Fernbedienung ..................6 Die Batterie ........................6 Bitte beachten ......................6 Der Deckenmonitor .................... -
Page 4: Sicherheitshinweise
Sie die defekte Sicherung gegen ein neues Exemplar mit identischen Werten austauschen. Sollte der Kurzschluss immer noch vorhanden sein, wenden Sie sich bitte an Ihren ZENEC – Händler. 6. Achten Sie bei der Installation des Monitors darauf, dass er den Fahrer des Fahrzeuges nicht vom Verkehrsgeschehen ablenkt oder ihm in irgendeiner Weise die Sicht versperrt. -
Page 5: Die Fernbedienung
Kontakt gekommen sind, sollten sorgfältig mit Wasser gereinigt werden. 14. Wenn Sie Fragen oder Probleme bei der Installation haben, wenden Sie sich bitte an einen ZENEC – Händler oder an den jeweiligen Landesvertrieb. Bedienen Sie den Monitor nur in einer Art und Weise, wie es in der Bedienungsanleitung beschrieben wird. -
Page 6: Benutzen Der Fernbedienung
BENUTZEN DER FERNBEDIENUNG ■ Richten Sie die Fernbedienung direkt auf den IR – Sensor des Gerätes. ■ Achten Sie darauf dass der Abstand zwischen der Fernbedienung und dem IR – Sensor nicht größer als 3 Meter ist. ■ Direktes Sonnenlicht oder sehr helles Licht verringern die Empfindlichkeit des IR – Signals. -
Page 7: Der Deckenmonitor
Deutsch DER DECKENMONITOR DIE EINZELNEN TASTEN 1. POWER – Taste Drücken Sie die POWER – Taste um das Gerät ein- bzw. auszuschalten. Wenn Sie das ■ Gerät eingeschaltet haben, leuchtet die POWER – Taste grün und das TFT-LCD – Display öffnet sich automatisch. - Page 8 3. UP/DOWN – Tasten ■ Drücken Sie eine der UP/DOWN – Tasten um die Hintergrundbeleuchtung des TFT-LCD – Displays zu verändern. ■ Wenn Sie sich im Menü befinden und einen Menüpunkt ausgewählt haben, können Sie durch drücken einer der Tasten den Wert entsprechend verändern. 4.
-
Page 9: Menüeinstellungen
Deutsch MENÜEINSTELLUNGEN ■ Drücken Sie die MENU – Taste um das Menü aufzurufen. ■ Durch wiederholtes drücken der Taste können Sie den Menüpunkt auswählen, welchen Sie verändern möchten. ■ Drücken Sie die UP/DOWN – Taste am Gerät oder die VOLUMEN +/- - Tasten auf der Fernbedienung um den jeweiligen Wert zu verändern. -
Page 10: Installation Des Gerätes
INSTALLATION DES GERÄTES Gelb: 12V Rot: ACC Schwarz: GND Ausgang Weiß: Türkontakt - Blau: Türkontakt + Gelb: 12V Schwarz: GND... -
Page 11: Anschluss Der Innenraumbeleuchtung
Deutsch ANSCHLUSS DER INNENRAUMBELEUCHTUNG Positiv geschaltetes System Gelb: 12V Schwarz: GND Rot: Türkontakt Schaltkreis der auftrennen originalen Innenraumbeleuchtung Negativ geschaltetes System Gelb: 12V Schwarz: GND Rot: Türkontakt Schaltkreis der auftrennen originalen Innenraumbeleuchtung... -
Page 12: Montage Des Gerätes
MONTAGE DES GERÄTES Schritt 1: ■ Befestigen Sie die Montageplatte unter Berücksichtigung der richtigen Schraubenlänge (Lieferumfang TA 4x8/10/12) am Dach Ihres Fahrzeuges (siehe folgende Skizze). Beachten Sie dass die Öffnung der originalen Innenraumbeleuchtung durch die Montageplatte nicht verdeckt wird. Dach des Fahrzeuges Montageplatte Schrauben *4 Schritt 2:... - Page 13 Deutsch Dach des Fahrzeuges Montageplatte CM2x4 Schrauben *4 Abdeckungen Schritt 7: ■ Überprüfen Sie noch einmal die Installation und alle Funktionen des Gerätes.
-
Page 14: Fehlersuche
Fernbedienung ist leer. neue Batterie in die 2. Die Fernbedienung ist Fernbedienung ein. defekt. 2. Wenden Sie sich an einen ZENEC – Händler um die Fernbedienung auszutauschen. Das Bild ist zu dunkel. 1. Die Umgebungstem- 1. Dieser Effekt ist typisch peratur ist zu niedrig. -
Page 15: Spezifikationen
Deutsch SPEZIFIKATIONEN Power Source: Car Battery (DC 10.6 – 16V) Operating Voltage: DC +12V Mechanism: Full-Automatic Open/Close Display Angle: 110° Operating Current: 1.5A, Typical Crystal Dome Light: 5W x 2 with door sensor connection Operating Temperature: 0°C to 45°C Storage Temperature: -30°C to +80°C... -
Page 16: Technical Features
The monitor is compatible with PAL and NTSC video streams - the internal video signal processing electronics automatically synchronize with PAL or NTSC video signals. Applications: The ZEM-W703MRM will work with any common video source unit, featuring an RCA composite video output, such as DVD - players, VCR’s or TV - tuner. -
Page 17: Box Contents
English BOX CONTENTS Appearance Parts Neme Quantity LCD Monitor IR Remote Control w/Battery Metal Mounting Plate TA4×8/10/12 CM2x4 Screw User’s Manual 3A Fuse CONTENT Safety Information ..................... 18 Remote Control ......................19 Remote Control Functions ..................19 Using the Remote Control ................... 20 Battery ........................ -
Page 18: Safety Information
SAFETY INFORMATION 1. The unit is designed for using with a DC +12V, negative ground battery power supply, it may not be connected and/or used differently. 2. Do not operate the unit in any way other than described in this manual. Failure to follow the instructions will invalidate your warranty. -
Page 19: Remote Control
English 13. Do not drop or hit the LCD panel with hard objects, as it may cause permanent damage to the unit. If you come into contact with any spilled LCD fluid, wash and clean affected areas with plenty of water and soap and seek medical attention immediately. 14. -
Page 20: Using The Remote Control
USING THE REMOTE CONTROL ■ Aim the remote control directly at the unit. ■ Maximum IR distance is 3 meters from the IR – sensor. ■ Direct sunlight or very bright light reduces sensitivity to the IR – remote. ■ Obstruction between the IR – sensor and remote control may disrupt IR – signal reception. -
Page 21: The Roof Mount Monitor
English THE ROOF MOUNT MONITOR BASIC OPERATIONS 1. POWER ■ At first, make sure the engine is running. Then press the power switch. The LED of the power switch will change to Green from Red and the LCD monitor will open automatically and turn on. - Page 22 3. UP/DOWN – Tasten ■ Under “MENU”, it is for increasing the system value. ■ Normally, it is for adjusting the brightness of screen backlight. 4. MENU +/- ■ The button can be used for selecting menu option (up/down choice). 5.
-
Page 23: Menu
English MENU ■ To adjust the picture, use the menu button to select the menu features you would like to adjust. ■ The values of selected feature can be adjusted by pressing the “+” and “–” button on the remote control or button on the panel. -
Page 24: Electrical Connections
ELECTRICAL CONNECTIONS... -
Page 25: Built-In Dome Light
English BUILT-IN DOME LIGHT... -
Page 26: Installation
INSTALLATION Step 1: ■ Select the screw from TA4X8/10/12 by length that applies to your vehicle, contained in the package contents. Screw the metal mounting plate to the car roof. Please remember not to cover the opening of original dome light. Step 2: ■... - Page 27 English Adhesive Step 7: ■ Please double check and make sure the unit is installed properly before operation.
-
Page 28: Troubleshooting
TROUBLESHOOTING Problem: Cause: Solution: No picture when 1. Power wire is 1. Check the power wire the monitor is turned on. connected improperly or and replace the fuse. fuse blown. 2. System cable is not on 2. Check system cable or right position. -
Page 29: Specifications
English SPECIFICATIONS Power Source: Car Battery (DC 10.6 – 16V) Operating Voltage: DC +12V Mechanism: Full-Automatic Open/Close Display Angle: 110° Operating Current: 1.5A, Typical Crystal Dome Light: 5W x 2 with door sensor connection Operating Temperature: 0°C to 45°C Storage Temperature: -30°C to +80°C... -
Page 30: Garantie
2 YEARS LIMITED WARRANTY Dear customer Thank you for purchasing this ZENEC product. It is advisable to keep the original packing material for any future transporting of the product. Should your ZENEC product require warranty service, please return it to the retailer from whom it was purchased or the distributor in your country. - Page 31 WARRANTY / GARANTIE ZENEC MODEL: ZEM-W703MRM Serial Number: ..........................Date of Purchase: ......................... Your name: ........................... Your address: ..........................City: .............................. State: ........ZIP or Postal Code ................ Country: ............................Dealer’s address & stamp...
Need help?
Do you have a question about the ZEM-W703MRM and is the answer not in the manual?
Questions and answers