
Related Manuals for Gorenje EC5112WG-B


Summary of Contents for Gorenje EC5112WG-B
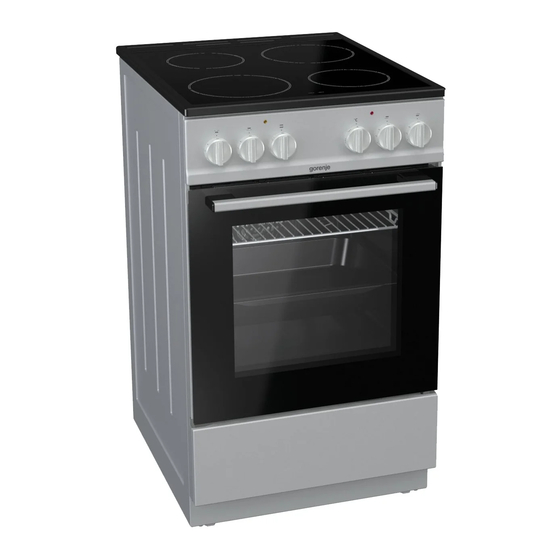
- Page 1 DETAILED INSTRUCTIONS FOR USE OF AN ELECTRIC FREE STANDING COOKER gorenje EC5141SD EC5111SG E5121WH EC5121WF EC5113WG EC5112WG EC5141WD EC5111WG EC5112WG-B E5121WH-B EC5121WG-B www.gorenje.com...
- Page 2 Instructions for use are also available at our website: http://www.gorenje.com GORENJE gospodinjski aparati, d.d. Partizanska cesta 12, SI-3320 Velenje, SLOVENIA info@gorenje.com Important information Tip, note...
-
Page 3: Important Safety Instructions
IMPORTANT SAFETY INSTRUCTIONS CAREFULLY READ THE INSTRUCTIONS AND SAVE THEM FOR FUTURE REFERENCE. This appliance may only be used by children aged 8 years and above and persons with reduced physical, sensory or mental capabilities or lack of experience and knowledge if supervision or instructions are provided to them concerning use of the appliance in a safe way and if they understand the hazards involved. - Page 4 CAUTION: possibility of tilting. WARNING: In order to prevent tipping of the appliance, stabilising means must be installed. Refer to the instructions for installation. WARNING: Before replacing the light bulb, make sure the appliance has been disconnected from the mains power, in order to prevent the hazard of an electric shock.
- Page 5 Make sure the lid is clean and that there is no liquid spilt on it before raising it. The lid may be lacquer-coated or glass. It may only be closed when the cooking zones have completely cooled down. If the supply cord is damaged, it must be replaced by the manufacturer, its service agent or similarly qualified persons in order to avoid a hazard.
- Page 6 Oven door become very hot during operation. A third glass is installed for extra protection, reducing the temperature of the outside surface (only with some models). Oven door hinges may be damaged when under excessive load. Do not place heavy pans on open oven door and do not lean against open oven door when cleaning the oven cavity.
- Page 7 APPLIANCE LID GRID Make sure the lid is clean and that there is no liquid spilt on it before raising it. The lid may be lacquer- coated or glass. It may only be closed when the cooking zones have completely cooled down. There is a safety latch on the grid.
-
Page 8: Using The Appliance
USING THE APPLIANCE These cooking zones are indicated with a red dot in the middle. After repeated heating and cleaning, this dot may disappear. BEFORE USING THE APPLIANCE FOR THE FIRST TIME In case of prolonged use of cast iron Upon receiving the appliance, remove all parts, plates, the area of the plate and the including any transport equipment, from the oven. -
Page 9: Energy Saving Tips
Make sure the cooking zone and the cookware If sugar or food with high sugar content bottom is clean and dry. This will allow better is spilled over a hot class ceramic hob, conduction of heat and prevent any damage to immediately wipe the hob or remove the heating surface. - Page 10 System Description System Description Suggested Suggested temperature temperature °C °C Cooking systems Cooking systems BOTTOM RAPID PREHEAT HEATER Use this function if you wish to The bottom heater, the round heat the oven to the desired heater, and the hot air fan will temperature quickly possible.
- Page 11 turn may condense on the oven door. This is a LARGE GRILL, GRILL normal phenomenon which will not affect the When grilling food with the large grill, the upper operation of the appliance. After the cooking heater and the grill heater fitted on the ceiling of the process, wipe the door and the door glass dry.
- Page 12 For even browning, make sure the biscuits are of the same thickness. Do not insert the deep baking tray into the first guide. Impale the meat on the skewer and tighten the screws. BOTTOM HEATER AND FAN Place the skewer handle on the front skewer support This is used for baking leavened but low-rising and insert the tip into the opening in the right hand...
- Page 13 Liquids containing salt, boiled-over liquids and moisture have detrimental effect on the cooking AQUA CLEAN zones. Always clean the cooking zones, Only the bottom heater will radiate heat. Use this Use regular cleaners and commercially available function to remove stains and food residues from the conditioners to maintain the cooking zones.
- Page 14 Use special glass ceramic cleaners for stubborn dirt. detergent. You can also use special detergents to Observe the manufacturer's instructions. Be sure to remove rough stains or burns. thoroughly remove any cleaner residues after the cleaning process as they may damage the glass USING THE „AQUA CLEAN“...
- Page 15 door. At the angle of 15° (regarding to the closed Place the wire guides with the catalytic inserts on the upper openings in the side walls of the oven “A“. door position), slightly close the door and pull it Press them into the snap lock at the bottom “B“. out from both hinges of the appliance.
- Page 16 Provide these steps in reverse order at returning the glass pane back. Slightly lift the supports on the left and right side of TROUBLESHOOTING TABLE the door (marking 1 on the support) and pull them away from the glass pane (marking 2 on the Problem/error Solution support).
- Page 17 The walls or furniture adjacent to the appliance INSTALLATION OF THE LID (floor, rear kitchen wall, side walls) have to be (depending on the model) temperature-resistant to at least 90°C. LEVELLING THE APPLIANCE AND ADDITIONAL SUPPORT (depending on the model) PREVENTION FROM TIPPING OVER (mm) Levelling the appliance and additional...
- Page 18 CONNECTING TO THE POWER MAINS CLAMP PROTECTION The electric range is a heat consumer, the The clamps should be protected by a clamp cover, installation location which must see additional equipment. Electric shock danger. correspond with local standards in force. A device disconnecting the appliance from mains, IMPORTANT NOTICE whose off contacts of all poles are in a minimum...
- Page 19 EC5112WG E5121WH-B EC5111SG EC5121WF EC5111WG EC5141WD EC5121WG-B EC5113WG EC5112WG-B EC5141SD E5121WH Glass baking dish Grid Shallow baking sheet Deep baking tray Rotisserie (meet skewer) Clamp protection ID 634239 We reserve the right to any changes and errors in the instructions for use.
-
Page 20: Cooking Test
COOKING TEST Tested in compliance with the EN 60350-1 standard. BAKING Temperature (°C) Dish Equipment Guide System Cooking time (from the (minutes) bottom) Cookies single level* Cookies shallow enamel- 2 and 3 140-150 25-30 two levels* coated baking sheet Cookies 2, 3, 4 three levels* Cupcakes... - Page 24 GORENJE EC5141SD, EC5111SG, E5121WH, EC5121WF, EC5113WG, EC5112WG, EC5141WD, EC5111WG, EC5112WG-B, E5121WH-B, EC5121WG-B 2017 05 01 IFU ES6EC GOR EN SAP 634239...
Need help?
Do you have a question about the EC5112WG-B and is the answer not in the manual?
Questions and answers