
Subscribe to Our Youtube Channel
Related Manuals for DigiTech 2112


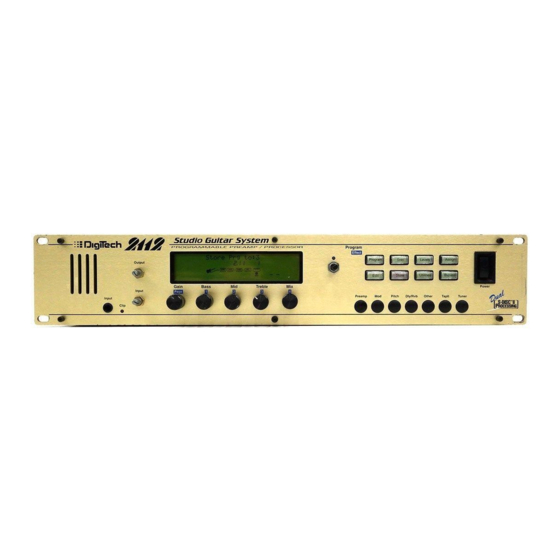
Summary of Contents for DigiTech 2112
- Page 1 OWNER’S MANUAL OWNER’S MANUAL Visit Digitech on the World Wide Web at http://www.digitech.com Visit Digitech on the World Wide Web at http://www.digitech.com...
- Page 2 WARNING C A U T I O N FOR YOUR PROTECTION, PLEASE READ THE FOLLOWING: R I S K O F E L E C T R I C S H O C K WATER AND MOISTURE: Appliance should not be used near water (e.g. near a bathtub, D O N O T O P E N washbowl, kitchen sink, laundry tub, in a wet basement, or near a swimming pool, etc).
-
Page 3: Declaration Of Conformity
President of DigiTech 8760 S. Sandy Parkway Sandy, Utah 84070, USA Effective December 15, 1996 European Contact: Your Local DigiTech Sales and Service Office or International Sales Office 3 Overlook Drive #4 Amherst, New Hampshire 03031, USA Tel (603) 672-4244... -
Page 4: Quick Start
UTPUT One foot controller to the Foot Controller jack found Set the 2112 output level to the 12 o'clock position and on the rear of the 2112. Make sure that connection is turn up the amplifier's main volume to the desired level. -
Page 5: Table Of Contents
2112 into a pair of Combo Amps ............12 2112 direct with the Programmable Speaker Cabinet Emulator .......13 Getting Around the Operating System . - Page 6 Wet/Dry Mix Knob Adjustment ............16 Program Levels .
- Page 7 DVANCED OPICS ECTION Using Modifiers ..............47 MIDI CC .
- Page 8 MIDI Basics ...............69 General Format .
-
Page 9: Introduction - Section
You may get some interesting results. Good luck, and thank you for choosing DigiTech. Your 2112 was carefully assembled and packaged at the factory. Before you proceed any further, make sure the fol- INCLUDED lowing items are •... -
Page 10: Warranty
1.The warranty registration card must be mailed within ten days after purchase date to validate this warranty. 2. DigiTech warrants this product, when used solely within the U.S., to be free from defects in materials and work- manship under normal use and service. -
Page 11: A Quick Tour Of The 2112
Parameter either locally or globally. Selection of Parameter. either Global or Local mode can be found on Page 11 of the Utilities Menu.When the 2112 is in Edit mode, the Page knob is used to scroll through the pages of the selected Module. - Page 12 15) Utility Button - Exits current mode and enters Utilities mode. A successive press will also return the 2112 to Program mode. 16) Bypass Button - Toggles Bypass status (On/Off). 17-23) FX Library Buttons: 17) [PreAmp] - Exits current mode and enters FX edit mode at the Preamp module.
-
Page 13: The Rear Panel
Analog Wah module. It is a balanced-TRS connector. 2) MIDI In - The MIDI In port allows the 2112 to 8) FX Return - This is the effects loop return. It is fed respond to incoming MIDI messages, including... -
Page 14: The Guitar Preamp
Programmable Cabinet Emulation Module Every Program in the 2112 has a set of Modifiers. Up to in the 2112. Whether it be live or in the studio, just... -
Page 15: The Solo Boost Button
6dB of boost.This feature is also ideal to use in 2112 has 2 user definable LFOs in each program that the studio (or live) to give you a little extra punch for can be assigned to any Parameter. -
Page 16: Basic Specs
ROGRAMMABLE For those of you that feel the need to add additional effects to the already extensive menu of sounds , the 2112 pro- vides a programmable line level mono programmable FX loop.The signal leaves the unit after the Wah section of the 2112 and returns just before the Dual distortion paths. -
Page 17: 2112 Architecture
2112 A RCHITECTURE Your 2112 contains 224 Programs . . . each program is comprised of up to 15 effect modules . . . each effect module contains a number of default effects (“defaults”) . . . each default is comprised of a number of different parameters. -
Page 18: Module Types
• Quarter (module type = 4th ) Dividing each S-DISC II’s processing power is what allows your 2112 to handle up to 15 effects at one time. The figure below represents how each S-DISC II can be divided to accommodate a wide variety of effect routing. -
Page 19: Making Connections
AKING ONNECTIONS Because of its flexibility, your 2112 can be connected in several different ways to meet the requirements of specific applications.The following diagrams offer some ways your 2112 can be connected. NOTE: In all the diagrams we have shown use of the external FX loop (this is of course, optional). -
Page 20: 2112 Into A Pair Of Combo Amps
2112.Then, if you prefer to use an additional effect unit in the signal path, you can utilize the programmable mono fx loop of the 2112. In doing this, you will want to run from the fx send of the 2112 into the selected effect unit. -
Page 21: 2112 Direct With The Programmable Speaker Cabinet Emulator
ROGRAMMABLE ABINET MULATOR To use the Fx loop, run from the Fx send of the 2112, ow that you have the indispensible Programmable into either input or Fx return of the selected effects unit. Cabinet Emulator of the 2112, chances are pretty good... -
Page 22: Getting Around The Operating System
PERATING YSTEM The menu structure of your 2112 has been specially designed to be easy to use.The display shows the information you need, but to make things even easier for you, illumination of the front panel buttons offers additional operating information. -
Page 23: Loadinga Program
OADING ROGRAM When you first turn on your 2112, it boots up in Program Mode and the display looks something like: Clean Comp Delay %kHz %kHz %kHz msdB msdB msdB LINK CHANGED LINK CHANGED LINK CHANGED LINK CHANGED COMP TUBE... -
Page 24: Getting Sounds
DJUSTMENTS For all you Nigel Tuffnels out there, the 2112 really can go to 100, if that is the sound you require. But we at Digitech suggest that you keep it a little lower than that (we would prefer that you purchase our products instead of hearing aids).The best setting for the input control is to use the <Input>... -
Page 25: Using The Tuner
UNER When using the Tuner of the 2112, it can be accessed one of two ways. Either by pressing the <Tuner> button on the front panel or using the optional Control One foot controller.The following, explains both modes of operation. -
Page 26: Storing/Naming Programs
TORING AMING ROGRAMS Before we get into editing programs and creating your own, let’s learn how to store changes so you won’t lose any modifications you’ll want to keep.The Store procedure allows you to rename, relocate and save any modifications you have made to Programs so that they can be accessed easily later. -
Page 27: Editing A Program
DITING A ROGRAM It is extremely easy to create custom Effect Programs because your 2112 gives you access to a complete library of pro- fessionally developed default effects (“Defaults”). • From Program mode, press the <Pitch> button.The display looks something like this:... -
Page 28: Comparing Changes
During the course of editing Programs, you may find that you want to compare the edited version of the Program to the original, stored version. Fortunately, your 2112 provides you with this valuable A/B feature in the Compare func- tion. -
Page 29: Storing/Naming Defaults
TORING AMING EFAULTS Before we get into editing Modules and creating your Defaults, let’s learn how to store changes so you won’t lose any modifications you’ll want to keep.The Store procedure allows you to rename, relocate and save any modifications you have made to Defaults so that they can be accessed easily later. -
Page 30: Editing A Module
ODULE Your 2112 comes loaded with pretty much all of the Factory Effect Defaults you’ll need right at your finger tips. In any given situation, however, you may want to tweak a module just a tad (or more than a tad).The parameters of each Effect Module are reached through a series of pages. -
Page 31: Effect Module Size And Type
IGITAL FFECT ODULE IZE AND With all of the work that these digital effect modules do for your sound, they have a tendency to work up an appetite. So, they consume their food from the FX pies chart referred to on page 4. Since some of these effect modules have a larger appetite than the others, they require more pie.To help divide up the pie, we have provided you with a chart below that tells you what size of effect block that each will fit in.This helpful chart will also let you know if the selected module is either a: Mono, Stereo, or Dual output configuration. -
Page 32: Effect Module And Defaults List
FFECT ODULES AND EFAULTS The following is a list of all the Effect Modules, and their respective Factory Defaults. REAMP ODULES Preamp • SatTube1 • S2PostDst • Bluesy Rhythm • SatTube2 • Fast Swell • Blues Lead • SatTube3 • Slow Swell •... -
Page 33: Phaser Modules
• SloVibrato • 5ths Down ETUNERS • 1&2OctsUp Dual Detuner LANGERS • -5Cents Quad Pitch Dual Flange • -12Cents • MajChord • HiSweep30% • +/-5Cents • MinChord • HiSweep70% • +/-10Cents • Oct/Dtn • LoSweep30% • Single Vox • 5th/OctDtn •... -
Page 34: Multi-Effect Modules
• 500ms/25% • Ratatat • SmphnyHall • 800ms/20% • Random • RichChmbr • 1SecEcho • Sanctuary • MaxRepeats Long Delay • SaltPalace • 1400ms/0% • 2.8sec/15% • CmntGarage • CombFilter • PlutoVerb Dual Delay • Slapback • PingPong • 300msEcho Dual Reverb •... -
Page 35: Equalizer Modules
• PercPlate, • Warm120ms • Sizzle • StudioAmb • 0msHPass1 • Smiley • StudioRoom • 0msHPass2 • InvrtPhase • WoodRoom • 0msHPass3 • FlutterRvb • 0msHPass4 31-Band Mono Graphic EQ • Very Thin • 0msLPass1 • Flat • CementRoom • 0msLPass2 •... -
Page 36: Effect Library
The days of having to sacrifice reliability for the great tonal characteristics of an old British or American tweed pre- amps are now just a thing of the past with the tube preamp distortion section of the 2112.The great thing about the 2112 is, you are not limited to just one preamp sound setting.You can have anything from Vintage Tweed to a British... -
Page 37: Solid State Distortions
BAND Included in every program of the 2112 Tube and Solid State distortion paths, is a 10-band graphic EQ with 12 dB boost or cut in 1 dB increments. Note: This EQ is separate from the Global/Local EQ and EQ effect modules used in Program mode. -
Page 38: Eq And Mix (Global And Local)
EQ and Mix changes on the fly.The Global/Local EQ and Mix selection section of the 2112 is located on the front panel of the 2112.The Global EQ can also be set to Local mode to control only the selected pro- gram.The Global/Local EQ and Mix selection is located in the 1st page of the utility section. - Page 39 EVERB Real life reverberation is the result of sound reflecting off surfaces in a room or hall. It can best be described as mil- lions of small echoes that decay over a period of time.The size of the room, the surface type of the walls, or the car- pet on the floor all contribute to the way real reverberation behaves and sounds.
- Page 40 hard, flat surfaces while higher DIFFUSION settings can be used to simulate the presence of irregular surfaces in the room such as natural rock masonry or man-made diffusers. Unlike flat surfaces, these materials reflect (diffuse) the sound in many directions because of the irregularity of the surfaces themselves.This builds smoothness over the reverb progression.
-
Page 41: Chorus & Flangers
Delay D Sets the length of time before hearing Delay Group C and Delay Group D. Ranges from 0 to 120 milliseconds. Out A - D Controls the output level of the Delay Groups. Ranges from Off to 100%. Bal A - D Controls the left/right balance of the Delay Groups. - Page 42 Aside from the more obvious speed and depth parameters (which adjust respectively how fast and far the sound goes out of tune), the 2112 allows you to use different waveforms.The waveform defines how it will move in and out of tune.The triangle waveform is very popular for slow, shallow chorus settings, while the sine waveform works nicely for faster, deeper settings.
- Page 43 produce radical new textures when used creatively.Try setting it slightly faster or slower than SPEED. Ranges from 0.06 to 2.0 Hz. Wander Depth Adjusts the intensity of the oscillation deviations produced by WANDER SPEED.WANDER DEPTH produces dramatic psycho-acoustic swirling effects when set higher than DEPTH2. Ranges from 0 to 10 milliseconds.
-
Page 44: Phasers
FDBACK Parameter is what gives flangers their distinctive voice. Flangers are capable of both positive and negative feedback loops, so experiment to find the sound you like best. Ranges from -99% to 99%. WvFrm Selects which waveform the LFO follows. Options for this control include sine, triangle, SP1 (Special 1), and SP2 (Special 2).The sine wave setting is probably the most easily recognized, but the smooth response of the triangle wave or the intensity of SP1 or SP2 typically pro- duce better results. -
Page 45: Rotary Speaker Simulator
2112 do it for you. Aside from speed and depth parameters, the tremolo also has an LFO waveform that determines the way a signal's volume is increased and decreased.While the Sine wave is probably the most common to the ear, the Triangle and... -
Page 46: Pitch Shifters
The Auto Panner's Speed typically doesn't get set as fast as the Tremolo since you usually want a sound to move smoothly back and forth in the stereo image.The 2112 auto panner is especially flexible since it can be used for either mono or stereo input sources.When used with a mono source, the signal pans back and forth as described... -
Page 47: Detuners
bling, octave division, and chromatic harmonies. Each Pitch Shifter has a 4-octave range, stepped in semitones from -24 to +24. Dtn A - B Controls the detuning amount for pitch-shifted voices A and B. As DTN moves away from zero, dissonance becomes more pronounced. Low DTN settings can be useful for thickening or enhancing the imaging of the source material. -
Page 48: Delays
"sampled" or recorded into memory, where it is held for the amount of time you specify with the delay time set- ting, after which the sample is replayed at the output.The 2112 delays have a feedback meter that is used to send a por- tion of the delayed signal back to the input to be re-recorded along with new source material.The feedback setting... - Page 49 the screen). Now turn the <4> "TapIt" parameter knob to activate. Now press the <TapIT> on the downbeat of each triplet.You can "TapIt" as often as you like to make sure you really nail that downbeat. The delay time will be automatically measured and since the Delay is set up so that DlyA=33%, DlyB=67% and DlyC=100% (DlyD is not used in this program), you'll hear a triplet delay that matches the beat of your music.
-
Page 50: Equalizers
Graphic EQs give you control of the levels for fixed or pre-selected frequencies (bands) that are evenly spaced.The 2112 offers 8 and 15 band stereo and mono GEQs and a 31 band mono GEQ.They all cover the complete range of frequencies, but the spacing between the 31 bands is much closer than the 8 bands, therefore offering more exact con- trol of the sound. - Page 51 Parametric EQs offer the added flexibility of letting you define the center frequency you want to adjust, and how many frequencies around that center frequency you want to affect. Some of the PEQ modules in the 2112 also include high shelf and low shelf EQ bands.
-
Page 52: Noise Gate
When using a guitar for example, it creates the swelling sound usually associated with volume pedal or a pinky fin- ger on the guitar's volume knob.The 2112 can take care of this for you so that you hands (or feet) are free to do more important things. -
Page 53: Multi Effect Modules
In today’s music industry, it seems that every album on the charts, whether it be Country, Rock, Industrial, or Alternative, are using the DigiTech Whammy technology in some shape or form.Whether it be a subtle chorus Detune, or an all out 2 octave Whammy Dive, this thing is a definite attention getter, and first-call studio effect. At this rate, the Whammy effect could possibly log-in as much studio time as Chet Atkins. -
Page 54: Auto Wah
(6 octaves down), to 24 (2 octaves up). Min Detune This parameter sets the minimum pedal level of detune effect. Ranges from: -50% (down 50 cents), to 50% (up 50 cents). Max Detune This parameter sets the maximum pedal level of detune effect. Ranges from: -50% (down 50 cents), to 50% (up 50 cents). -
Page 55: Dvanced Opics Ection Using Modifiers
Low Frequency Oscillator (LFO) or MIDI Continuous Controller and external footswitch and pedal infor- mation. Every Program in your 2112 has a set of Modifiers. Up to 16 Modifier links can be assigned to control any parameter. There are five types of Modifiers that can be linked to a parameter: •... -
Page 56: Setting Up An Lfo And A Dynamic Modifier
• Use the <2> knob to scroll through the different ETTING UP A YNAMIC ODIFIER modifiers that can be linked to the Parameter you • Enter Assign Mode by pressing the <Assign> button. want assigned. The possibilities are: MIDI CC’s (CC): 0-127 & ChP (aftertouch) •... -
Page 57: Midi Channels
In this day and age where the role of the Guitarist has taken on so many new responsibilities, his or her equipment has to be fast, and has to be able to communicate with other devices at the drop of a hat. So, we at Digitech have given the 2112 all of the MIDI goodies that your heart may desire. -
Page 58: Sysex Dumps
SysEx Device channel or Program maps. the Program to be dumped, and, when dumping to anoth- er 2112, the Program location where you want the To perform a SysEx Bulk Dump of all 2112 Programs, do Program dumped. the following: To initiate an individual patch dump from the 2112, do •... -
Page 59: Cc Controlled Program Changes
Factory or User pro- grams to be changed. On power up, this map will default to the normal MIDI map.This simply means that the 2112 will respond to the MIDI receive map within the Utilities menu. Send CC information on CC 31. -
Page 60: Resetting To Factory Settings
THER TILITY UNCTIONS These are the extra Utility functions included in the 2112 that make your programming life a little easier. • Press <Utilities> and scroll to page 2 of the Utility ACTORY ESET page using the <Page> knob.The display reads:... -
Page 61: Ontrol Ne Ection Configuring The Pedalboard
ONFIGURING THE EDALBOARD The optional Control One foot controller can help you get the most out of your 2112. Since the Control One talks to the 2112 using a proprietary communication protocol, it offers better response time and capabilities not available with convention MIDI pedalboard controllers. -
Page 62: Expression Pedal Names
The Foot Controller setup menu contains all the setup options necessary to use the 2112 with the optional DigiTech Control One foot controller.The submenus included under the Foot Controller setup are located on pages 10 and 11 of the utilities menu and they include: •... -
Page 63: Assigning Functions
Type: Bright Clean Gain LINK CHANGED LINK CHANGED LINK CHANGED LINK CHANGED COMP TUBE GATE L/R OUTS FACTORY USER SEAMLESS DIGITAL PAGE CLIP L/R OUTS • Turn the <4> knob to select the gain parameter, then Press the <Assign> button once.The display reads: Gain Exp 1 Min[ 56]Max LINK CHANGED... -
Page 64: Programs To Footswitches
The footswitches on the Control One can be assigned to do several functions.This is done through the Foot J12FC:Bank FS=Tog CCTran Controller menus in the Utilities section of the 2112. These functions include: LINK CHANGED... -
Page 65: Cc Transmit Channel
CC Transmit Channel - This option allows you to set the MIDI channel on which CCs will be sent out the 2112 MIDI Out port to other MIDI devices. If you are using the Control One for the 2112 only, you don't need to worry about setting up this option. -
Page 66: Other Pedalboard Tidbits
TUBE GATE L/R OUTS FACTORY USER move to the next Bank Up in the 2112, as well as access DIGITAL CLIP L/R OUTS the Tune Mode by simply pressing and holding the footswitch until the Tuner appears in the display. -
Page 67: Ppendix Ection Factory Program List
2112 F ACTORY ROGRAM OUNTRY ONES Go For It! ..... .Cfg-1 Country Picken ....Cfg-7 Clean Comp Delay . - Page 68 17 D YNAMICS FFECTED ROGRAMS Hit-Me-Hard Phase ....Cfg-2 Ducked Delay ....Cfg-4 Soft: Reverb Hard: Chorus .
-
Page 69: Program Descriptions
To help all of you Tone and Effect connoisseurs along the way, this list gives you a brief description all 100 Factory Programs of the 2112. Go For It! - Pure and rich uneffected Tube Preamp tones right out of the box. - Page 70 70’s British Stack - A 1959-type tone when used with two 4X12 speaker cabinets. Twin Combo - The only closer emulation of a Twin would require that the 2112 have a tweed front panel. Fuzz Me Tender - A heavy 60’s Fuzz face emulation that Jimi himself would be proud to use.
- Page 71 Electro Acoustic Det/Rev - Ideal for an Electric-Acoustic Guitar with Dual Detune and Dual Reverb effects. PEQ Chorus/Delay - When PEQ boost is needed, this is the one that also has Chorus and Delay modules. 12-String - When you don’t have the budget for a 12-String, let the 2112’s 12-String emulator lend a hand.
- Page 72 Just a Phase - A heavily effected Phaser with Auto panner and Dual Delay modules for acoustic guitar. Moving Detune/Reverb - Plenty of Detune and Reverb to thicken up acoustic guitar tracks. 17 D YNAMICS FFECTED ROGRAMS Hit-Me-Hard-Phase - A Clean tone with a Dynamic modifier linked to the phaser speed. So, the harder you pick, the faster the phaser speed.
-
Page 73: Effect Configuration Chart
FFECT ONFIGURATION HART GATE GATE GATE L/R OUTS L/R OUTS L/R OUTS L/R OUTS DUAL S-DISC II GATE GATE GATE L/R OUTS L/R OUTS L/R OUTS L/R OUTS L/R OUTS DUAL S-DISC II GATE GATE GATE L/R OUTS L/R OUTS L/R OUTS L/R OUTS L/R OUTS... -
Page 74: Harmony Interval Charts
ARMONY NTERVAL HARTS Interval Major Minor Harm.Minor Mel.Minor Dorian Mixolydian Lydian üOct ü7th ü6th ü5th ü4th ü3rd ü2nd ¨2nd ¨3rd ¨4th ¨5th ¨6th ¨7th ¨Oct Lydian Minor Whole Hlf-Whl Whl-Hlf Major Int. Int. Int. Int. Blues Int. Int. Int. Aug. Pent. -
Page 75: Specifications
2112 S PECIFICATIONS A/D Converter: 20 bit, 64 x oversampled delta-sigma stereo D/A Converter: 20 bit 64 x oversampled Sampling Frequency: 44.1 kHz Frequency Response 20~20kHz +/- 0.5 dB DSP S ECTION Static-Dynamic Instruction Set computer 2 (S-DISC II ® ) Digital Signal Path Width: 24 bits (144.5 dB) -
Page 76: Midi Implementation Chart
MIDI I MPLEMENTATION HART Function... Transmitted Recognized Remarks Basic Default 1-16 1-16 Memorized Channel Channel Default Mode 2, Mode 4 Mode Messages Mode2, Mode 4 Memorized Altered Note Number True Voice Velocity Note ON Note OFF After Key's Touch Ch's Pitch Bender Control Change... -
Page 77: Sysex Implementation Guide
MIDI System Exclusive communication allows a user to control a device directly through MIDI in a very powerful and flexible manner. Much care has gone into creating and testing this documentation but DigiTech can not guarantee 100% accuracy, nor can DigiTech be held responsible for presets and data lost in a product from System Exclusive Information use. -
Page 78: General Format
In the following section, SYS_HEAD refers to a valid System Exclusive header.The System Exclusive header starts with the System Exclusive status byte, and includes all bytes through the DigiTech device type. F7(h) is the System Exclusive ‘Message End’ byte. All SysEx numbers in the format definition of each procedure are given as hexadecimal values, along with this symbol (h) for clarification. -
Page 79: Request Bulk Dump (49H)
The Receive One Program procedure is used to load a program into the 2112.The number of program bytes to be received (n) is different for each program. If the 2112 is sent a Receive One Program procedure where the program number is not a valid RAM destination, it will be ignored. -
Page 80: Receive Parameter Value (18H)
Effect Module’s Position Effect Parameter’s Position Parameter Value The Receive Parameter Value procedure is used to load Parameter Values into the 2112. Please refer to the Parameter Charts for more information. REQUEST ALL CURRENT PARAMETER VALUES (23h) SYS_HEAD, 23(h), ww1, ww2, F7(h) When ww= 7F(h) All module’s parameters will be requested. -
Page 81: Respond Module Configuration-26(H)
Code echoed for the Key Scan received. (00(h) if key is invalid) The Receive Key Accepted procedure is sent from the 2112 in response and acceptance of a Receive Scan Code Key or Receive Hold Scan Code Key procedure but is ignored if received by the 2112. -
Page 82: Reset Device (21H)
ID # zz= index map max = 5 FX ID # = 255 The following are codes for each of the buttons or keys on the 2112. Numbers are given as hexadecimal values. Key Label Hex equivalent Key Label... -
Page 83: Fx Modules And Parameter Codes
FX M ODULES AND ARAMETER ODES The Following chart shows all effect modules and their respective parameters with SysEx Effect I.D. numbers attached. FX # FX Name EditPage P# Parameter Name FX # FX Name EditPage P# Parameter Name 128(h) Compressor Page 1 00(h) On/Off 3F(h) GEQ 8... - Page 84 22(h) 16.0kHz Page 2 03(h) Level 23(h) 18.0kHz 04(h) Phase L 05(h) Phase R 41(h) St GEQ 8 Page 1 00(h) On/Off Page 3 06(h) Loshlv Freq 01(h) FX Type 07(h) Level 02(h) Default Page 4 08(h) Band1 Freq Page 2 03(h) Level 09(h)
- Page 85 0D(h) DlyC Page 2 03(h) FX Level 0E(h) DlyD 04(h) Dry Level Page 6 0F(h) DlyE 05(h) Balance 10(h) DlyF Page 3 06(h) Speed 11(h) DlyG 07(h) Depth 12(h) DlyH 08(h) Feedback Page 7 13(h) Spread 09(h) Waveform Page 4 0A(h) OutL 21(h) StDual Cho...
- Page 86 02(h) Default 01(h) FX Type Page 2 03(h) FX Level 02(h) Default Page 2 03(h) FX Level 04(h) Dry Level 04(h) Dry Level 05(h) Balance 05(h) Balance Page 3 06(h) DetnA Page 3 06(h) ShftA 07(h) DetnB 07(h) DtnA 08(h) DetnC 08(h) ShftB...
- Page 87 02(h) Default 1B(h)Quad Dly(1400ms)Page 1 00(h) On/Off Page 2 03(h) FX Level 01(h) FX Type 04(h) Dry Level 02(h) Default 05(h) Balance Page 2 03(h) FX Level Page 3 06(h) Shft 04(h) Dry Level 07(h) 05(h) Balance 08(h) OutL Page 3 06(h) Delay Time 09(h)
- Page 88 Page 6 11(h) OutRA 08(h) Depth 11(h) OutRB 09(h) Flange Feedback 13(h) OutRC Page 5 09(h) WvFrm 14(h) OutRD 0A(h) Flange Delay Page 6 0B(h) Delay Time 32(h) Alog Dly(370ms) 0C(h) Delay Feedback 34(h) Alog Dly(700ms) 0D(h) Tapit (ignore) 36(h) Alog Dly(1400ms) Page 1 00(h) On/Off...
- Page 89 05(h) Balance Page 3 06(h) Delay A Page 3 06(h) Reverb Type 07(h) Delay B 07(h) Decay 08(h) Delay C Page 4 08(h) Density 09(h) Delay D 09(h) Diffusion Page 4 0A(h) Out A Page 5 0A(h) Blend 0B(h) Bal A 0B(h) OutL 0C(h)
-
Page 90: Sysex Program Dump Example
ROGRAM XAMPLE For those of you that are reluctant to stick your feet in the SysEx water, we have included a simple example of a SysEx Program jump. It takes you set by step through all of the operation commands of a typical SysEx procedure. <<SysEx Header>>... - Page 92 International Distribution: 3 Overlook Drive, Unit 4 Amherst, New Hampshire 03031 U.S.A. FAX (603) 672-4246 DigiTech™, 2112™, and S-DISC™II are registered trademarks of the Harman Music Group Incorporated Copyright © 1997 the Harman Music Group Incorporated Printed In U.S.A. 3/97 Manufactured in the U.S.A.
Need help?
Do you have a question about the 2112 and is the answer not in the manual?
Questions and answers