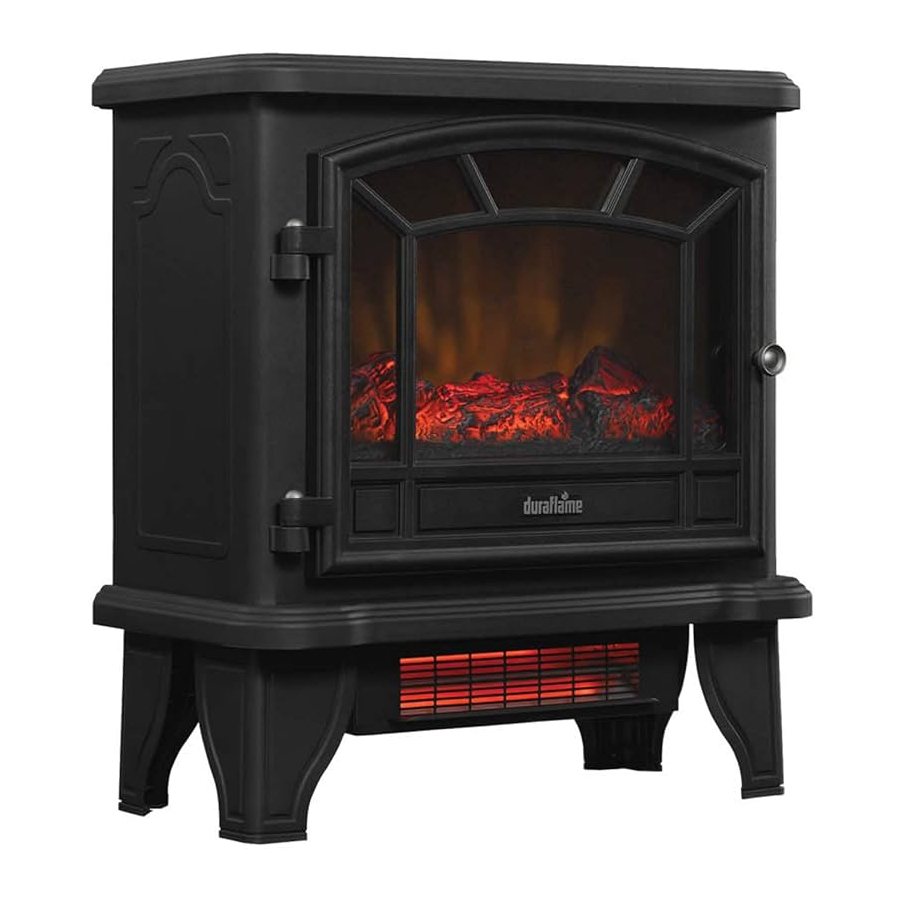
Twin-Star International duraflame DFI-550-22 Manual
- Manual (23 pages)
Advertisement
- 1 GETTING STARTED
- 2 PRODUCT SPECIFICATIONS
- 3 INSTALLATION INSTRUCTIONS
- 4 CARE AND MAINTENANCE
- 5 OPERATION INSTRUCTIONS
- 6 BULB REPLACEMENT
-
7
TROUBLESHOOTING GUIDE
- 7.1 No power, buttons do not light up
- 7.2 Stove does not turn on manually
- 7.3 Flames are not moving
- 7.4 Flames are not visible
- 7.5 Flames are not bright
- 7.6 Heater is not turning off
- 7.7 Heater is not turning on
- 7.8 Not producing enough heat
- 7.9 Unit blows cool or cold air
- 7.10 Noise with heater on
- 7.11 Noise with flames on and heater off
- 7.12 Power cord gets warm
- 8 EXPLODED VIEW
- 9 BATTERY REPLACEMENT
- 10 CUSTOMER SERVICE
- 11 IMPORTANT INSTRUCTIONS
- 12 Documents / Resources
GETTING STARTED
- The serial number is located on the back of the stove, the serial number is necessary for product warranty registration and customer service.
Back of the Stove

- Go to www.tsicustomerservice.com for product warranty registration. For registration use the MODEL NUMBER: DFI-550-22. If you are unable to complete registration save your proof of purchase for warranty purposes.

PRODUCT SPECIFICATIONS
| VOLTAGE | 120VAC, 60 Hz |
| AMPS | 12.5 Amps |
| WATTS (max.) | 1500 Watts |
INSTALLATION INSTRUCTIONS
Tools Required for Assembly

Leg Assembly
- Align the 2 mounting tabs into the bracket.
![]()
- Slide the legs outward to lock in place. When locked in position the screw hole from step 3 will be aligned.
![]()
- Fasten the legs to the base using the included screws, 1 per leg
![]()


CARE AND MAINTENANCE
- Clean the trim using a soft cloth, slightly dampened with citrus oil based product and buff with a clean soft cloth.
- DO NOT use brass polish or household cleaners as these products will damage the metal trim. Citrus oil based products can be obtained at supermarkets or hardware stores.
- Periodic cleaning/vacuuming of the filter is recommended.
![]()
Electrical outlet wiring must comply with local building codes and other applicable regulations to reduce the risk of fire, electrical shock and injury to persons.- Warning: Disconnect power before attempting any maintenance or cleaning to reduce the risk of fire, electrical shock or personal injury.

OPERATION INSTRUCTIONS

NOTE: Please operate the remote transmitter at a slow measured pace. Press the remote control buttons with an even motion and gentle pressure. Repeatedly pressing buttons in rapid succession may cause the transmitter to malfunction.
| Function | Icon | Description |
| POWER |  | The Power button supplies power to all of the functions of the stove and will illuminate the flame effect. This switch must be lit for any of the functions to work. |
| FLAME |  | Use +or -to increase or decrease the flame brightness leavels. |
| HEATER |  | Our stove consists of a infrared type heater. The HEATER button turns the heater ON and OFF. This button will be lit when the heater function is activated. |
| TEMPERATURE |  | The Temperature control knob helps regulate the ambient temperature level. The further the knob is rotated clockwise, the higher the set point temperature. Turning the knob counter-clockwise will lower the set point temperature. |
BULB REPLACEMENT
Tools Required for Assembly

- Unplug the stove. Remove the screws holding the stove back panel in place. Remove the back panel to access the light bulb.

- Pinch the spring clip to loosen the spindle, and gently turn and pull the rubber gromet out of the spinner motor shaft. Remove the spindle and set aside.

- Remove light bulb and replace. Reverse steps 2 and 1; Replace spindle and re-install stove back panel into position; be careful to not overtighten the screws.


TROUBLESHOOTING GUIDE
| Problem | Root Cause | Corrective Action |
|
|
|
|
|
|
|
|
|
|
|
|
|
|
|
|
|
|
|
|
|
|
|
|
|
|
|
|
|
|
|
|
|
|
|
|
|
|
|
|
|
|
|
|
|
EXPLODED VIEW
| Part | Part Name | Part Number |
| 1 | Thermostat Knob | P05-S |
| 2 | Control panel | Y15-S165-P85 |
| 3 | Main PCBA | Y15-S165-P15 |
| 4 | Legs | SL-550-BLK |
| 5 | Emberbed | Y15-S45-P02 |
| 6 | Flame Generator Drive Motor | P10-Q-S |
| 7 | Remote control | P129 |
Note, the scale and size of your parts may be different depending on your exact model

BATTERY REPLACEMENT
NOTE: Do not mix old and new batteries.
Do not mix alkaine, standard (carbon zinc), or rechargable (nicad, nimh, etc.) batteries.


- Always purchase the correct size and grade of battery most suitable for the intended use.
- Replace all batteries of a set at the same time.
- Clean the battery contacts and also those of the device prior to battery installation.
- Ensure the batteries are installed correctly with regard to polarity (+ and -).
- Remove batteries from equipment which is not to be used for an extended period of time.
- Remove used batteries promptly.
Do not ingest batteries.
Non-rechargeable batteries are not to be recharged.
Batteries are to be inserted with the correct polarity.
Exhausted batteries are to be removed from the product.
CUSTOMER SERVICE
www.tsicustomerservice.com
For Customer Service Call 1-800-318-9373
Questions? Our experts are standing by assist you at our help line, we can help you with assembly, and, if necessary replace damaged/missing parts. Assistance is available 7 days a week/24 hours a day/ 365 days per year.

Before contacting Customer Service please have this information available:
- Serial Number
- Model Number
- Sales Receipt or Proof of Purchase
IMPORTANT INSTRUCTIONS
When using electrical appliances, basic precautions should always be followed to reduce the risk of fire, electrical shock, and injury to persons including the following:
- Read all instructions before using this appliance.
- This appliance is hot when in use. To avoid burns, do not let bare skin touch hot surfaces. If provided, use handles when moving this appliance. Keep combustible materials, such as furniture, pillows, bedding, papers, clothes and curtains at least 3 feet (0.9 m) from the front of this appliance.
![]()
In order to avoid overheating, do not cover the heater. ![]()
Never leave the heater operating unattended. Extreme caution is necessary if unsupervised children or invalids are nearby.- The appliance is not to be used by children or persons with reduced physical, sensory or mental capabilities, or lack of experience and knowledge, unless they have been given supervision or instruction.
- Always unplug this appliance when not in use.
- Do not operate any heater with a damaged cord or plug or after the appliance malfunctions, or if it has been dropped or damaged in any manner.
- If the supply cord is damaged, it must be replaced by the manufacturer, its service agent or similarly qualified persons in order to avoid a hazard.
- Do not use outdoors.
- This heater is not intended for use in bathrooms, laundry areas and similar indoor locations. Never locate this appliance where it may fall into a bathtub or other water container.
- Do not run cord under carpeting. Do not cover cord with throw rugs, runners or the like. Arrange cord away from traffic areas and where it will not be tripped over.
- To disconnect this appliance, turn controls to the off position, then remove plug from outlet.
- Do not insert or allow foreign objects to enter any ventilation or exhaust opening as this may cause an electric shock or fire, or damage the appliance.
- To prevent a possible fire, do not block air intakes or exhaust in any manner. Do not use on soft surfaces, like a bed, where opening may become blocked.
- This appliance has hot and arcing or sparking parts inside. Do not use it in areas where gasoline, paint or flammable liquids are used or stored. This stove should not be used as a drying rack for clothing. Christmas stockings or decorations should not be hung in the area of it.
- Use this appliance only as described in the manual. Any other use not recommended by the manufacturer may cause fire, electric shock or injury to persons.
- Connect to properly grounded outlets only, See Fig.1.This heater is for use on 120 volts. Do not use a 2 prong adapters. Always plug heaters directly into a wall outlet/receptacle. Never use with an extension cord or relocatable power tap (power strip).
![]()
![]()


SAVE THESE INSTRUCTIONS
Documents / Resources
References
Download manual
Here you can download full pdf version of manual, it may contain additional safety instructions, warranty information, FCC rules, etc.
Download Twin-Star International duraflame DFI-550-22 Manual
Advertisement


Need help?
Do you have a question about the duraflame DFI-550-22 and is the answer not in the manual?
Questions and answers