Table of Contents
Advertisement
Quick Links
Advertisement
Table of Contents

Related Manuals for Miele ExpertLine PLW 8683 CD


Summary of Contents for Miele ExpertLine PLW 8683 CD
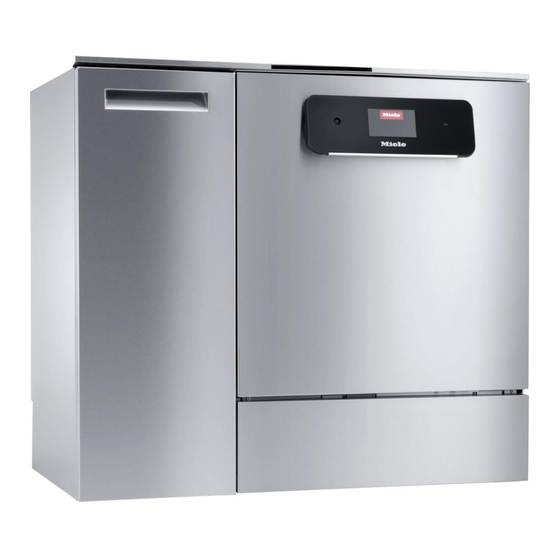
- Page 1 Operating instructions Washer-disinfector for laboratory glassware and utensils ExpertLine PLW 8683 CD en-GB To avoid the risk of accidents or damage to the appliance, it is essential to read these instructions before it is installed and used for the first time. M.-Nr.
-
Page 3: Table Of Contents
Contents Notes about these instructions ....................Applicable symbols ........................Symbols and conventions used in this document..............Definition of terms ........................Guide to the appliance........................ Machine overview Machine with steel door ................Machine overview Machine with glass door................Control panel..........................10 Sensor controls on the control panel .................. - Page 4 Contents Height-adjustable upper baskets....................45 Wash pressure measurement ..................... 47 Areas of application........................48 Preparing the load items ......................48 Preparing the load items ......................49 Checks before starting a programme ..................50 After reprocessing ......................... 51 Laboratory glassware and utensils....................51 Chemical processes and technology..................
- Page 5 Contents Maintenance ..........................82 Periodic checks..........................82 Routine checks ..........................83 Cleaning the filters in the wash cabinet..................83 Cleaning the spray arms....................... 85 Cleaning the machine ........................86 Checking the load carriers ......................87 Filter change........................... 88 Replacing the coarse filter....................... 88 Replacing the HEPA filter ......................
-
Page 6: Notes About These Instructions
Notes about these instructions Applicable symbols Symbol For warnings, see “Warnings and safety notes” Mandatory sign, see “Warning and safety notes” Observe the operating instructions VDE symbol EMC symbol of the VDE Do not dispose of electrical machines in house- hold waste;... -
Page 7: Symbols And Conventions Used In This Document
Notes about these instructions Symbols and conventions used in this document Warnings Warnings contain information which is important for safety. This alerts you to the potential danger of injury to people or damage to property. Read these warning notes carefully and observe the procedural in- structions and codes of practice they describe. -
Page 8: Guide To The Appliance
Guide to the appliance Machine overview Machine with steel door Side unit Top machine spray arm Canister for process chemicals Water connections for baskets and mobile units Drying unit Lower machine spray arm Rails for baskets and mobile units Rear: Door lock –... -
Page 9: Machine Overview Machine With Glass Door
Guide to the appliance Machine overview Machine with glass door Door lock Data plate Module slot for XKM communication Salt container module Canister for process chemicals Test point for performance tests Rails for baskets and mobile units (top, front right; may be visible with lid re- Side unit moved) Drying unit... -
Page 10: Control Panel
Start/Stop button For switching the machine on and off For starting or cancelling a programme Service interface sensor control (door lock) Testing and transmission point for Miele Opening (unlocking) or closing (locking) Customer Service the door button (language selection) button (cancel or back) -
Page 11: Sensor Controls On The Control Panel
Guide to the appliance Sensor controls on the control panel Most of the sensor controls on the control panel are backlit with LEDs (light-emitting di- odes). These have the following meaning during operation. Sensor control Status The display language can be changed. ... -
Page 12: Appropriate Use
- Process chemicals which are tailored to the result of the repro- cessing - Load carriers which are tailored to the load items Observe the information issued by the manufacturer of the load items. For further areas of application or additional programmes, please con- tact Miele Customer Service. -
Page 13: Intended User Group
- They must have sufficient expertise in how to reprocess the load items. - They must be instructed in how to use the machine by Miele Cus- tomer Service, by a customer service team specially trained and au- thorised by the manufacturer or by a person who has already re- ceived instruction. -
Page 14: Foreseeable Misuse
Appropriate use Foreseeable misuse Improper use can be caused by incorrect loading, unsuitable load items, e.g. medical devices, or unsuitable (process) chemicals. Failure of the operator to comply with routine checks and regular ser- vice intervals. Failure to observe the specified installation requirements. -
Page 15: User Profiles
User profiles Daily operators For day-to-day use, operators must be instructed on the basic func- tions and how to load the machine and must also be trained regularly. They must have a basic knowledge of machine reprocessing of labor- atory glassware and utensils. Day-to-day work is carried out using the user level and in the ... -
Page 16: Warnings And Safety Notes
by Miele Customer Service or a qualified service technician author- ised by the manufacturer of the machine. A Miele service contract is recommended to ensure full compliance with the normative and regu- latory provisions. Incorrect repairs can cause considerable danger to users. - Page 17 The ma- chine may only be put back into operation once it has been success- fully repaired by Miele Customer Service or by an appropriately quali- fied specialist. Personnel operating the machine should be trained regularly. Un- ...
-
Page 18: Quality Assurance
Warnings and safety notes There may be a risk of slipping if liquid is spilt on the floor depend- ing on the type of flooring and footwear being worn. Keep the floor dry where possible and take care to clean up any liquid spills straight away. -
Page 19: Safety With Children
met, it is strongly recommended that all the relevant factors for the process, such as cleaning agents, water quality, etc., are discussed with Miele. If the cleaning result is subject to particularly stringent require- ments, e.g. in chemical analysis, the operator must carry out regular quality control to ensure that required standards of cleanliness are be- ing achieved. -
Page 20: Symbols On The Machine
Only use original spare parts and accessories from the manufac- turer, which are suitable for the application they are required for. Model designations are available from Miele. Only use original load carriers from the machine manufacturer. Us- ing load carriers made by other manufacturers or making modifica- tions to original accessories can result in an unsatisfactory cleaning and disinfection result. -
Page 21: Operation
Operation Operation via control panel The machine is usually operated via the control panel, which has an in- tegrated touch display and various sensor controls. The sensor controls are backlit with LEDs and are only displayed in context, i.e. if they can be operated in conjunction with the display. Otherwise, they are not visible and cannot be selected. -
Page 22: Switching On
Operation Switching on The machine must be connected to the electrical supply. Press the On/Off sensor control until the Miele logo appears on the display. 08:15 Machine Programmes Settings functions Help As soon as the machine is ready for operation, the display changes and shows the menu selection. -
Page 23: Switching Off
Operation Switching off Press the On/Off sensor control for a few seconds. The machine then goes into Standby mode for approx. 1 minute before it switches off completely. Standby/Off If the machine has not been used for approx. 10 minutes, it can be set to Standby mode or switched off automatically. - Page 24 Operation Inputs on the In these operating instructions, the descriptions for operating the display menus are shown as follows: Input path The input path describes the sequence to follow to access the menu level in question. The listed menu options have to be selected indi- vidually on the touch display.
-
Page 25: Selecting The Language
Operation Setting numerical Numerical values can be entered in 2 different ways. values Time 08:15 Firstly, you can place a finger on the numbers highlighted in colour and change them by swiping up or down. Time 08:15 12:30 ... -
Page 26: System Messages
Operation System messages Start filling dispensing paths? Change canister. Empty status detected. System messages are indicated by the information symbol . These give information about current processes and the status of the ma- chine. If there is more than one system message, they are shown one after the other and –... -
Page 27: Help Button
Operation Help button Refill salt. Then start the “Cold water rinsing” programme. Help If the button appears at the bottom of the display, you can display Help assistance for operation or troubleshooting. If required, tap the button and allow the machine to guide you through the process Help step by step. -
Page 28: Commissioning
Commissioning Installation and connection Before commissioning, the cleaning machine must be securely in- stalled, and the water inlet and drain hoses and the mains cable cor- rectly connected. Follow the instructions in “Installation”, “Water connection” and “Electrical connection” as well as the instructions in the installation plan for the cleaning machine. - Page 29 Commissioning Setting the date Set today’s date. Date 08:15 2027 April 2026 March 2025 February 2024 2023 January Set the date in the order of year, month and day. The order is pre- defined. Press to save the setting. ...
- Page 30 Commissioning Setting the tem- The temperature can be shown on the display in °C (degrees Celsius) perature units or °F (degrees Fahrenheit). Temperature unit 08:15 °C °F °C Temperature display in Celsius. °F Temperature display in Fahrenheit. Select the temperature unit you want. ...
- Page 31 Individual water connections can be subsequently deac- tivated, e.g. if no connection options are available for them. Following commissioning, the water connections can be reinstated by Miele Customer Service. Select one of the available water connections, e.g.: ...
- Page 32 Commissioning Configuring dis- In the next step, you have to select whether you want to configure the pensing systems dispensing systems present during commissioning or at a later time. The configuration includes activating or deactivating individual dis- pensing systems and setting the dispensing concentration. ...
- Page 33 Commissioning Tip: Further information and setting options can be found at tended settings Maintenance/Service Dispensing systems Commissioning Your machine has been successfully commissioned once you see the completed following message: Set-up successfully completed Confirm the message by pressing ...
-
Page 34: Opening And Closing The Door
Opening and closing the door Comfort door lock The door of the wash cabinet is equipped with a Comfort door locking mechanism. When the door is closed, the Comfort door locking mechanism automatically pulls the door into the closed position and thus ensures it is sealed. -
Page 35: Opening The Door Using The Emergency Release
Opening and closing the door Opening the door Danger of scalding, burning and chemical burns! using the emer- If the emergency release is operated during a programme sequence, gency release hot water and process chemicals can escape. Only open the door using the emergency release when strictly ne- cessary. -
Page 36: Water Hardness
Water hardness Water softening In order to achieve excellent cleaning results, the machine requires a supply of soft water with a low calcium content. Hard mains water results in the build-up of calcium deposits on the load items and on the wash cabinet walls. - Page 37 Water hardness Test strip Water hardness Settings on the display 4 green zones < 3 °dH 3 °dH or lower 1 red zone > 4–7 °dH 7 °dH 2 red zones > 7–14 °dH 14 °dH 3 red zones > 14–21 °dH 21 °dH 4 red zones > 21 °dH *) Contact your local water supplier, enquire about the degree of hardness and set this on the display.
- Page 38 Water hardness Settings Water hardness can be set between 0 and 9,0 mmol/l (0–50 °dH). The water hardness is preset to 2,5 mmol/l (14 °dH) ex-works. °dH °f mmol/l Display °dH °f mmol/l Display 0 0 0 0 1 2 1 2 4 2 3 5 3...
-
Page 39: Reactivation Salt
Water hardness Reactivation salt The water softener must be reactivated at regular intervals. Special re- activation salt is required for this. Reactivation is carried out automat- ically during a programme sequence. If the water hardness is consistently less than 0.7 mmol/l (4 °dH), salt is not required for the water softener. - Page 40 Water hardness The container takes approx. 1.4–2 kg of salt, depending on the type of salt and the remaining fill level. Never fill the container with water. The container could overflow when filled with salt. Add salt into the container until the funnel is full but still closes eas- ...
- Page 41 Water hardness Machine with glass The salt container cap is located at the bottom of the wash cabinet door next to the spray arm. Open the door. Remove the load carrier. Turn the salt container cap in the direction of the arrow as far as ...
-
Page 42: Salt Refill Indicator
Water hardness Clean any excess salt from around the opening of the container, fo- cusing especially on the container’s seal. Do not use running water to rinse away salt residues as this can cause the container to over- flow. Close the container. -
Page 43: Cancelling Machine Lock Due To Lack Of Salt
Water hardness Reactivation noti- Cycles bef. reactivation 08:15 fication You can set how many programme cycles in advance you want to be notified of the upcoming reactivation, see Extended settings Maintenance/Service Note reactivation Cancelling ma- If the salt in the water softener has been used up, a fault appears on chine lock due to the display and the machine is locked to prevent further use. -
Page 44: Load Carrier
(if available). Miele offers suitable load carriers for all areas of application defined in “Appropriate use”, such as mobile units, baskets, modules, inserts and special irrigation connectors. Contact Miele for more information. -
Page 45: Height-Adjustable Upper Baskets
Load carrier Height-adjustable upper baskets Height-adjustable upper baskets can be adjusted between 3 positions with 3 cm between each position to accommodate load items of dif- ferent heights. To adjust the height, the brackets with rollers on the side of the upper basket and the water connector at the back of the basket have to be moved. - Page 46 Load carrier Move the roller brackets on both sides to the centre position and screw them tight. Place the stainless steel plate over the openings in the water inlet pipe so that one of the outer openings is covered. Screw the stain- less steel plate to the top or bottom with 2 screws.
-
Page 47: Wash Pressure Measurement
To measure the wash pressure, replace the blind stopper with a Luer Lock adapter. Suitable Luer Lock adapters, such as the E 447, are available from Miele. Carry out the measurement. Close the test point again with the blind stopper after the measure- ... -
Page 48: Areas Of Application
Areas of application Preparing the load items Contaminated load items pose a health risk. Contaminated load items can result in various hazards to health, which can lead to infections, poisoning, injuries or more depending on the type of contamination. When working with contaminated load items, ensure that all neces- sary measures are taken to protect personnel. -
Page 49: Preparing The Load Items
Suitable load carriers and irrigation connectors as well as other ac- cessories are available from Miele. Preparing the load items Danger of explosion due to flammable gases. -
Page 50: Checks Before Starting A Programme
Areas of application Open available taps and valves or remove them according to the manufacturer’s instructions and place the individual parts in suitable small parts baskets. Remove all stoppers, corks, labels, sealing wax residue, etc. If necessary, rinse the load items briefly with water so that larger ... -
Page 51: After Reprocessing
Reprocessing pipettes requires specially adapted mobile injector units or injector modules. Suitable load carriers and irrigation connectors as well as other ac- cessories are available from Miele. Please note the following when loading: - Place petri dishes or similar items in the appropriate insert with the soiled side facing downwards. -
Page 52: Chemical Processes And Technology
This section is intended as a guide. If unforeseen interactions occur during reprocessing or if you have any queries on this subject, please seek advice from Miele. General information Problem... - Page 53 - Damage to elastomers and plastics in the ma- without de-foaming agent using the chine ganic programme. - Damage to certain plastics (e.g. polycarbonate - Contact Miele for advice. and plexiglass) in the load items being pro- cessed...
- Page 54 Chemical processes and technology Soiling Problem Measures The following substances can damage elast- - Depending on usage, wipe the lower door seal omers (hoses and seals) and plastics inside the on the machine periodically with a lint-free machine: cloth or sponge. Clean the wash cabinet and accessories without load items using the - Oils, waxes, aromatic and unsaturated hydro- Organic...
-
Page 55: Adding And Dispensing Chemical Agents
In this instance, please con- tact Miele Customer Service for advice. Contact Miele for information about suitable process chemicals. The safety data sheets for the process chemicals must be easily ac- cessible during operation of the machine. -
Page 56: Cleaning Agent
The dispensing of rinsing agent is deactivated at the factory. To activate it, please contact Miele Customer Service. Rinsing agent dispensing should be activated if demineralised water is not being used in the programme section. -
Page 57: Dispensing Systems
Dispensing systems in the door are exempt from monitoring. Colour coding on the suction lances Liquid process chemicals from external canisters are dispensed via suction lances. Colour coding can be helpful for correct dispensing. Miele uses and recommends the following: - Blue: for cleaning agent - Red:... -
Page 58: Replacing The Canister
Adding and dispensing chemical agents Replacing the canister Risk of damage due to unsuitable cleaning agents. Using unsuitable cleaning agents, such as a cleaning agent for a do- mestic dishwasher, will mean that the reprocessing result is not as expected. - Page 59 Adding and dispensing chemical agents Replace the empty canister with a full one. Push the suction lance into the opening of the canister and secure the lid. Feed the suction lance into the canister until it reaches the bottom. ...
-
Page 60: Setting The Dispensing Concentration
Adding and dispensing chemical agents Selecting the can- Available for machines with fill level measurement. ister volume If a suction lance for a 10 l container is used in a smaller container or if a large container is only about half full, the following prompt appears on the display of machines that measure the fill level in the canisters (factory-fitted equipment variant): ... -
Page 61: Operation
Operation Selecting a programme Always select the programme depending on the type of load and de- gree and type of soiling, or on infection prevention issues. - You can find a list of all programmes along with application descrip- tions in “Programme overview”. - All released programmes are available for selection. -
Page 62: Starting A Programme
Operation Starting a programme Selecting and Before starting the programme, you can activate or deactivate the ad- deselecting addi- ditional functions that are displayed to the right of the programme tional functions name by tapping them. Programme 08:15 Drying AutoOpen Universal... -
Page 63: Starting The Programme Using A Timer
Operation Starting the pro- The start of a programme can be delayed, for example, to benefit from gramme using a economy rates of electricity at night. You can set a start time at which timer the programme should start ( ) or a finish time by which the pro- Start at gramme should end at the latest (... -
Page 64: Programme Sequence Indicator
Operation Changing the timer Tap Timer Re-enter the start or finish time. Deleting the timer Press the Start/Stop sensor control. Do you want to start the programme or delete the timer? Delete Start You will then be asked whether you want to start the programme im- mediately ( ) or whether you want to delete the timer ( Start... -
Page 65: End Of Programme
Operation - Conductivity as limit value, if conductivity is monitored in the wash block, and as actual value, if conductivity is also measured (equip- ment variant) - Drying as setpoint and actual value (equipment variant) End of programme After a programme has ended normally, the LED of the Start/ Stop sensor control will go out and the following will appear on the display: ... -
Page 66: Batch Control
Operation If is activated, the cycle must first be documented on Batch control the display before the programme information can be displayed. Batch control If you carry out batch controls, you can document the results in the cycle protocols of the machine. For this purpose, the function must be activated and a user ID must be set up for each authorised operator, see ... - Page 67 Operation PIN code 08:15 Enter your personal PIN code, see “PIN code”. If the PIN code is repeatedly entered incorrectly, the process will be cancelled and the result will not be documented. Instead, the failed result documentation will be recorded in the cycle protocol. ...
-
Page 68: Interrupting A Programme
Operation Interrupting a programme A programme that is in progress may only be interrupted if strictly ne- cessary, e.g. if the load items are moving significantly. To interrupt the programme, the door of the wash cabinet must be opened. Tip: The option to interrupt a programme must be enabled, see ... - Page 69 Operation Programme can- The programme stops and a fault message appears on the display. celled due to a Take appropriate steps to resolve the fault, depending on its cause, fault see “Problem solving guide”. Cancelling a pro- A programme that is in progress may only be cancelled if strictly ne- gramme manually cessary, e.g.
-
Page 70: Machine Functions
Machine functions Menu structure The Machine functions menu includes relevant functions to sup- port daily routine tasks. The factory settings are indicated by a tick . A description of how to configure settings is provided after the overview. Machine functions Filter interval Filter combination *) Coarse filter... -
Page 71: Filter Interval
Machine functions Filter interval The machine is equipped with several filters and a filter system, sub- sequently referred to as filters, which require regular maintenance. Re- usable filters must be cleaned and disposable filters replaced. For more information on cleaning or replacing the filters, see “Maintenance”. -
Page 72: Dispensing Systems
Machine functions Dispensing systems The dispensing systems for liquid media can only dispense reliably if the dispensing system has been purged of air and contains no depos- its. Filling dispensing The dispensing systems need to be topped up in the following situ- paths ations: - If the dispensing system is being used for the first time. -
Page 73: Rinsing Dispensing Paths
Machine functions Rinsing A dispensing system must be rinsed in the following situations: dispensing paths - If a dispensing system was accidentally filled with the wrong me- dium. - If deposits have formed in the dispensing paths or in the canisters which could completely or partially clog the systems. -
Page 74: Autoclose
Machine functions Select an option. AutoClose This can be used to determine whether the door should be drawn into the final closed position by the automatic door lock immediately after closing or whether it should remain slightly open. In its final closed position, the door is mechanically locked and can be unlocked and opened again by pressing the door button . -
Page 75: Documentation
Machine functions Documentation Internally stored protocols can be output retrospectively from the ma- chine. To do this, the machine must be connected to a network or to a printer, see WiFi / LAN The menu is saved under the following input path. ... -
Page 76: Settings
Settings Menu structure Basic parameters for machine control are stored in the Set- tings menu. The factory settings are indicated by a tick . A description of how to configure settings is provided after the overview. Settings Display brightness Volume Buzzer tones Keypad tone Welcome tone ... -
Page 77: Display Brightness
Settings Display brightness You can also set the brightness of the display. The menu is saved under the following input path. Settings Display brightness Select the menu option. Display brightness Display brightness 08:15 Darker Brighter Adjust the brightness of the display and press OK to save the set- ... -
Page 78: Welcome Tone
Settings Select the menu option. Volume Select either . The volume is set in the Keypad tone Buzzer tones same way for both options. Buzzer tones 08:15 Quieter Louder Set the volume. If you select , the sound can be switched off entirely. You can switch it on again if required by selecting (displayed instead of Press OK to save the setting. -
Page 79: Lighting
Settings Lighting Available for machines with glass door. Machines with glass doors are equipped with wash cabinet lighting that allows the reprocessing procedure to be monitored. The lighting can be switched on and off as required. The menu is saved under the following input path. Settings ... -
Page 80: Process Documentation
Power fail- ure safe storage of graphical information is not available. Adding cycle num- Miele Customer Service can add subsequent cycle numbers, e.g. in bers the event of software updates or if the machine controls are replaced. -
Page 81: Communication Modules
The interface can be used to permanently archive cycle protocols us- ing documentation software, apps or a report printer. In addition, fur- ther digital offers are available if you are connected to the Miele cloud. Please contact Miele for further information on software, the Miele cloud and suitable printers. -
Page 82: Maintenance
Maintenance Periodic checks The machine should be serviced every 2000 hours of operation, or at least once every 12 months, by Miele Customer Service or a suit- ably qualified specialist. Maintenance covers the following points and functional checks: - Replacement of wear parts - Electrical safety check compliant with national rules and regulations (e.g. VDE 0701, VDE 0702 in Germany) -
Page 83: Routine Checks
Maintenance Routine checks Before the start of each working day, the operator must carry out a number of routine checks. The following need to be checked: - Filters in wash cabinet - Machine spray arms and spray arms of load carriers - Wash cabinet and door seal - Dispensing systems - Load carriers, e.g. - Page 84 Maintenance Press the catches together and pull the coarse filter up and out to remove it. Remove the fine filter which sits loosely between the coarse filter and the microfine filter. Remove the surface filter last. Clean the filters. ...
-
Page 85: Cleaning The Spray Arms
Also check that the spray arms can turn easily. Immobile or blocked spray arms must not be used again. In this case, contact Miele Customer Service. Cleaning the To clean the machine, the spray arms of the machine, mobile units... -
Page 86: Cleaning The Machine
Door seals which are no longer tight or which have suffered damage must be replaced with new ones by Miele Customer Service. Remove any soiling from the door sides and hinges. Regularly clean the groove in the plinth panel under the door with a ... -
Page 87: Checking The Load Carriers
Cleaning the wash The wash cabinet is generally self-cleaning. However, should a build- cabinet up of deposits occur in the cabinet, please contact Miele Customer Service for advice. Cleaning the Clean the stainless steel surface with a damp cleaning cloth and ... -
Page 88: Filter Change
Maintenance Filter change The air filters for the machine’s internal drying unit have a limited ser- vice life. For this reason, the filters must be replaced regularly. Change coarse filter. Change HEPA filter. Then reset filter interval Then reset filter interval (see machine functions). -
Page 89: Replacing The Hepa Filter
If possible, the HEPA filter should be replaced during maintenance by HEPA filter Miele Customer Service. If you need to change the filter yourself, pro- ceed as follows: Open the drawer in the side unit and remove the filter grille and the ... -
Page 90: Process Validation
The test programmes interrupt the programme cycle automatically at specified points. The interruption is indicated by a buzzer and mes- sage on the display. Miele Customer Service can set the duration of the interruption to between 10 seconds and approx. 42 minutes. Dur- ing this time period, measurements can be made or the door can be opened to obtain a sample. - Page 91 Maintenance The following test programmes can be selected: Laboratory The programme cycle is stopped in each wash block immediately before the wash water is drained away. Validation The programme cycle is interrupted at the following points: – Before the wash water is drained away in the final wash block –...
- Page 92 Maintenance Activating the test Test programmes are only valid for one programme cycle. To carry fur- programme ther tests, a test programme must be selected again beforehand in each time. The menu is saved under the following input path. Extended settings ...
-
Page 93: Troubleshooting
Danger due to unauthorised repairs. Unauthorised repairs can expose the user to considerable risk. Repairs may only be carried out by Miele Customer Service or a suitably qualified spe- cialist. To avoid unnecessary customer service visits, check that the fault has not been caused by incorrect operation when a fault message first appears. -
Page 94: Maintenance And Testing
Contact Miele Customer Service if there are leaks in the dispensing hose or there is a fault with the suction lance. Highly viscous (thick) process chemicals can affect the dispenser monitoring and lead to inaccurate data. In this instance, please contact Miele Customer Service for advice. -
Page 95: Insufficient Salt/Water Softener
Troubleshooting Insufficient salt/Water softener Problem Cause and remedy The salt supply in the water softener has been used up. Re- Refill salt - machine will be dis- activation is no longer possible. The machine will be locked abled shortly. for further use with the next reactivation. Refill with reactivation salt. -
Page 96: Cancellation With Fault Number
If the same fault message appears again: Make a note of the fault message. Switch the machine off using the On/Off sensor control. Contact Miele Customer Service. Please also read the notes regarding the following fault numbers: Problem Cause and remedy... - Page 97 Remove any kinks from the dispensing hoses and check the hoses for leaks. Position the dispensing hoses so that they cannot kink. Vent the dispensing systems. If you identify any leaks in the dispensing hoses or defects on the suction lances, contact Miele Customer Service.
-
Page 98: Door
The load items are flecked. The rinsing agent container is empty. Refill the container. The rinsing agent concentration is set too low. Contact Miele Customer Service and have the dispensing concentration reset. The cleaning results are un- Load carriers were not suitable for the load items. - Page 99 Troubleshooting Problem Cause and remedy Adjust the programme parameters to suit the task. Soiling has been left to dry on the load items for too long. Soiling should not be left on the load items for more than 6 hours before machine reprocessing.
-
Page 100: Spray Arm Monitoring/Conductivity/Wash Pressure
Troubleshooting Problem Cause and remedy Stainless steel items are The stainless steel is of insufficient quality for machine re- showing signs of corrosion. processing. Only use stainless steel items made of high quality stain- less steel and follow the instructions of the manufacturer regarding machine reprocessing. -
Page 101: Noises
Troubleshooting Problem Cause and remedy This is not a fault! Conductivity block repetition: The measured conductivity in the running wash block was too high. The wash block is repeated. Possible causes: – Carry-over of conductive substances during the repro- cessing process Check the reprocessing process. -
Page 102: Problem Solving Guide
Problem solving guide Cleaning the drain pump and non-return valve If water has not been pumped away at the end of a programme there may be a foreign object in the drain pump or blocking the non-return valve. Remove the filter combination from the wash cabinet, see ... -
Page 103: Cleaning The Water Intake Filters
The large-surface filter is available from Miele Customer Service. IMPORTANT UK, Australia and New Zealand For the UK, Australia and New Zealand a non-return check valve is... -
Page 104: After Sales Service
After sales service Contacting Customer Service Repairs may only be carried out by Miele Customer Service or an authorised technician. Unauthorised repairs can expose the user to considerable risk. To avoid unnecessary customer service visits, you should check whether this fault can be remedied yourself using the instructions in “Problem solving guide”... -
Page 105: Installation
*INSTALLATION* Installation Setup and alignment Further information can be found in the installation plan. The install- ation plan is available online. Unauthorised access poses a risk. Settings in the machine, e.g. parameters for dispensing process chemicals, may be changed as a result of unauthorised access via the machine display. -
Page 106: Hose Holder
Freestanding machines or machines positioned in a niche must be equipped with machine lids. Lids with a depth of 603 mm or with a depth of 700 mm with addi- tional side wall extension are available from Miele. Levelling out un- The machine must be stable and horizontal. -
Page 107: Lids
*INSTALLATION* Installation Lids Fitting lids The lids must be screwed to the machine. The side with the screw threads on the underside belongs at the front; the side with the brack- ets for the locking screws protruding downwards at the rear. Installation instructions are included with lids that can be pur- chased separately. -
Page 108: Electromagnetic Compatibility (Emc)
the continuous worktop through the holes in the front trim. Then re- fit the cover caps. Please contact Miele Customer Service to secure it at the sides to adjacent cabinetry. Venting the circu- The gaps between a built-in machine and adjacent cabinetry lation pump must not be sealed, e.g. -
Page 109: Electrical Connection
*INSTALLATION* Electrical connection All electrical connections must be carried out by a suitably quali- fied electrician in accordance with local and national safety regula- tions. - The electrical installation must be carried out in accordance with IEC 60364-4-41 or the local regulations. - The connection to the power supply must be via a suitably rated plug and socket and must comply with national regulations. -
Page 110: Plumbing
- The maximum permissible static water pressure is 1.000 kPa. - If water pressure is not within the specified range, please contact Miele Customer Service for advice. - Stopcocks with a ¾ inch screw thread must be provided on site for the connection. The valves must be easily accessible to allow the water inlet to be turned off when not in use. - Page 111 DI water inlet for For connection to 8,5-60 kPa, the machine must be equipped with a 8,5-60 kPa – un- feed pump for demineralised water. Installation is carried out by Miele pressurised Customer Service or a suitably qualified specialist. With an unpressurised demineralised water container, the outlet nozzle must be at least level with the top edge of the machine, see installation plan.
- Page 112 For this purpose, the machine must be technically adapted and the controls reset by Miele Customer Service. Please contact Miele Customer Service for further information. IMPORTANT UK, Australia and New Zealand. This appliance must be installed according to AS/NZS 3500.1 (Aus- tralia and New Zealand) or in accordance with water regulations (UK).
-
Page 113: Connecting The Drain Hose
*INSTALLATION* Plumbing Connecting the drain hose - The machine drainage system is fitted with a non-return valve, which prevents dirty water from flowing back into the machine via the drain hose. - The machine drain hose should be connected to a separate on-site drainage system for the machine only. -
Page 114: Programme Chart
Programme chart To adjust the programme parameters, see Extended settings Programme options Configure programmes General programmes Programme Application Very short programme for very lightly soiled load items and very Extra short low final rinse requirements: - To remove water-soluble soiling - Suitable to a limited extent for organic soiling - Not suitable for denatured residues such as protein - Not suitable for inorganic, acid-soluble residues such as metallic... -
Page 115: Programmes For Specific Soiling
Programme chart Programmes for specific soiling Programme Application Inorganic Programme for lightly soiled to moderately soiled load items and moderate to high final rinse requirements: - To remove inorganic, acid-soluble residues such as metallic salts Programme for moderately soiled to heavily soiled load items and Organic moderate final rinse requirements: - To remove concentrated organic residues, e.g. -
Page 116: Additional Programmes
Programme chart Additional programmes Programme Application Programme for pasteurising food, e.g. flavour profiles of drinks. The Pasteurise programme must be adapted to the individual pasteurisation para- meters (temperature and holding time) for the product to be pas- teurised and the load of the wash cabinet. The default settings of the programme are 70 °C (temperature) and 30 min (holding time). -
Page 117: Technical Data
Technical data Height With machine lid mm (adjustable + mm) Without machine lid mm (adjustable + mm) Width mm Depth With glass door + control panel mm + mm With steel door + control panel mm + mm With door open 1.200 mm Wash cabinet dimensions: Height mm Width... - Page 118 Machinery Directive 2006/42/EC UKCA mark (UK only) The Supply of Machinery (Safety) Regulations 2008 Manufacturer address Miele & Cie. KG, Carl-Miele-Straße 29, 33332 Gütersloh, Germany 1.500 * If installation site is above m, the boiling point of the wash water will be lower. In this case, the disinfection temperature...
-
Page 119: Caring For The Environment
Instead, please make use of officially designated collection and dis- posal points to dispose of and recycle electrical and electronic appli- ances in your local community, with your dealer or with Miele, free of charge. By law, you are solely responsible for deleting any personal data from the old appliance prior to disposal. - Page 120 Tel: (01) 461 07 10, Fax: (01) 461 07 97 E-Mail: info@miele.ae E-Mail: info@miele.ie, Internet: www.miele.ie Website: www.miele.ae Manufacturer: Miele & Cie. KG, Carl-Miele-Straße 29, 33332 Gütersloh, Germany Alteration rights reserved / Publication date: 2025-04-14 M.-Nr. 12 700 330 / 00...
Need help?
Do you have a question about the ExpertLine PLW 8683 CD and is the answer not in the manual?
Questions and answers