Table of Contents
Advertisement
Quick Links
Advertisement
Table of Contents

Related Manuals for Telstra TOUGH T90


Summary of Contents for Telstra TOUGH T90
- Page 2 Telstra T90 Telstra T90 Telstra T90 Telstra T90 Telstra T90 HSDP HSDP A Multi band 3G Mobile Phone A Multi band 3G Mobile Phone HSDP HSDP HSDP A Multi band 3G Mobile Phone A Multi band 3G Mobile Phone A Multi band 3G Mobile Phone...
- Page 3 PC Software Requirements PC Software Requirements PC Software Requirements PC Software Requirements PC Software Requirements Join Me PC Software included supports Windows 7, Vista (32 and 64 bit) and Windows XP with Service Pack 2 & 3 only. A limited version of Join Me is supplied that supports MAC OS 10.5 and above W W W W W arnings and Saf arnings and Saf arnings and Saf...
-
Page 4: Table Of Contents
Contents Contents Contents Contents Contents RF Safety Information ............................ 9 1 Welcome 1 Welcome 1 Welcome 1 Welcome 1 Welcome ........................................................................................................................................10 10 10 10 10 1.1 Handset Overview ........................... 11 1.2 How to use the manual ......................... 13 1.3 Keypad Functions ........................... - Page 5 4.3 How do I search my Contacts? ......................27 4.4 How do I add a Contact from a received call number? ..............27 4.5 How do I add a Contact from a received SMS (Text Message)? ............27 4.6 How do I set a dedicated ringtone or image to a Contact? ............... 28 4.7 How do I set Speed Dial numbers? ......................
- Page 6 5.18 Any key to answer ..........................40 5.19 Missed Calls Alert ........................... 40 5.20 Call Options when Connected to a Bluetooth device ..............41 6 Messages and Emails 6 Messages and Emails .............................................. 42 42 42 42 42 ....................... 6 Messages and Emails 6 Messages and Emails 6 Messages and Emails .......................
- Page 7 7.10 Set the Keypad Backlighting ........................ 54 7.11 Add a Greeting and Owner name ......................54 7.12 What is the PIN Code? ........................... 54 7.13 What is the Handset Lock Code? ......................55 7.14 Additional notes on PIN Codes ......................55 8 File Manager and External Memory 8 File Manager and External Memory 8 File Manager and External Memory ...................
- Page 8 12.8 Import Contacts from Microsoft Outlook ..................73 12.9 Export Contacts to Outlook ........................ 74 12.10 Use Join ME to send an SMS ....................... 75 12.11 Import Calendar events from Microsoft Outlook ................75 12.12 Use Join ME to connect to the Internet ................... 76 12.13 Connect to a Bluetooth Device ......................
- Page 9 14.17 CTM ................................ 89 15 Troubleshooting, Technical and Warranty Information 15 Troubleshooting, Technical and Warranty Information ......... 15 Troubleshooting, Technical and Warranty Information .................. 90 90 90 90 90 ......... 15 Troubleshooting, Technical and Warranty Information 15 Troubleshooting, Technical and Warranty Information .........
-
Page 10: Rf Safety Information
RF Safety Information RF Safety Information RF Safety Information RF Safety Information RF Safety Information The handset has an internal antenna located at the top of the phone. For optimum perfor- mance with minimum power consumption do not cover the antenna area with your hand. Hold the handset between thumb and finger in the middle of the device. - Page 11 1 W elc elc ome Congratulations on choosing the Telstra T90 handset. Please take a few minutes to read the user manual to help you get the most from your new mobile phone. Operation Operation Operation Operation Operation Quick Reference...
-
Page 12: Handset Overview
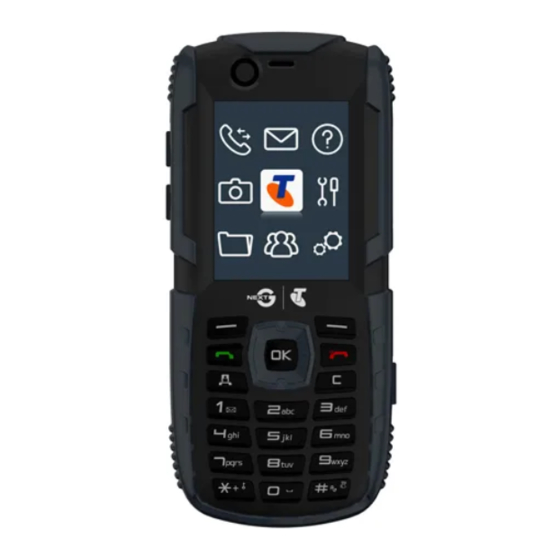
1.1 Handset Overview 1.1 Handset Overview 1.1 Handset Overview 1.1 Handset Overview 1.1 Handset Overview 1. Camera for Video Calling 2. Display Viewable Display 3. Four way navigation controller -Arrow Keys( 4. Left Soft Key (LSK) 5. Call Key, show Call History 6. - Page 13 Handset Overview Handset Overview Handset Overview Handset Overview Handset Overview External Antenna port Speaker Camera Charger/USB/ Volume keys Headset port Battery Cover Camera key Cover Lock L e f t L e f t R e a r R e a r R i g h t R i g h t L e f t...
-
Page 14: How To Use The Manual
1.2 How to use the manual How to use the manual How to use the manual How to use the manual How to use the manual The following instructional format is used in the manual: The following instructional format is used in the manual: The following instructional format is used in the manual: The following instructional format is used in the manual: The following instructional format is used in the manual:... -
Page 15: Keypad Functions
1.3 Keypad Functions 1.3 Keypad Functions 1.3 Keypad Functions 1.3 Keypad Functions 1.3 Keypad Functions K e y K e y K e y Corresponding Functions Corresponding Functions Corresponding Functions K e y K e y Corresponding Functions Corresponding Functions K e y K e y Corresponding Functions... -
Page 16: Information Bar Icons
1.4 Information Bar Icons 1.4 Information Bar Icons 1.4 Information Bar Icons 1.4 Information Bar Icons 1.4 Information Bar Icons 3G Signal Strength Battery Level Indicator GSM Signal Strength Alarm is set New SMS Message Missed Call SMS Memory is Full Missed Video Call New MMS Silent Mode... -
Page 17: Menu Quick Reference Guide
1.5 Menu Quick Reference Guide 1.5 Menu Quick Reference Guide 1.5 Menu Quick Reference Guide 1.5 Menu Quick Reference Guide 1.5 Menu Quick Reference Guide... - Page 18 Menu Quick Reference Guide Continued... Menu Quick Reference Guide Continued... Menu Quick Reference Guide Continued... Menu Quick Reference Guide Continued... Menu Quick Reference Guide Continued...
- Page 19 Menu Quick Reference Guide Continued... Menu Quick Reference Guide Continued... Menu Quick Reference Guide Continued... Menu Quick Reference Guide Continued... Menu Quick Reference Guide Continued...
-
Page 20: Getting Started
2 Getting Started 2 Getting Started 2 Getting Started 2 Getting Started 2 Getting Started 2.1 How do I remove the battery cover? How do I remove the battery cover? How do I remove the battery cover? How do I remove the battery cover? How do I remove the battery cover? Rotate the locking screw to the right to unlock the bat-... - Page 21 How do I insert the USIM card? How do I insert the USIM card? How do I insert the USIM card? How do I insert the USIM card? How do I insert the USIM card? Insert the USIM card with the gold contacts gold contacts gold contacts gold contacts...
-
Page 22: How Do I Insert The Battery
2.3 How do I insert the Battery? 2.3 How do I insert the Battery? 2.3 How do I insert the Battery? 2.3 How do I insert the Battery? 2.3 How do I insert the Battery? Insert the battery Insert the battery Insert the battery as shown with the contacts located against the gold springs. -
Page 23: How Do I Switch The Phone On Or Off
2.4 How do I switch the phone On or Off? How do I switch the phone On or Off? How do I switch the phone On or Off? How do I switch the phone On or Off? How do I switch the phone On or Off? Press and hold Press and hold the Press and hold... -
Page 24: Tips About Charging And Battery Life
2.6 Tips about charging and battery life 2.6 Tips about charging and battery life 2.6 Tips about charging and battery life 2.6 Tips about charging and battery life 2.6 Tips about charging and battery life Only use the AC charger and USB lead supplied. Insert the charger lead carefully carefully carefully... -
Page 25: Basic Operation
3 3 3 3 3 Basic Operation Basic Operation Basic Operation Basic Operation Basic Operation 3.1 How do I make a voice call? How do I make a voice call? How do I make a voice call? How do I make a voice call? How do I make a voice call? Enter the number on the keypad and press the key to make the call. -
Page 26: How Do I Navigate The Menu
3.4 How do I navigate the Menu? How do I navigate the Menu? How do I navigate the Menu? How do I navigate the Menu? How do I navigate the Menu? The Main Menu Main Menu Main Menu Main Menu is a grid of icons that are used to access key features on the phone. Main Menu From the Idle Screen Idle Screen... -
Page 27: Contacts
4 4 4 4 4 Contacts Contacts Contacts Contacts Contacts 4.1 How do I enter my Contacts? How do I enter my Contacts? How do I enter my Contacts? How do I enter my Contacts? How do I enter my Contacts? From the Idle Screen Idle Screen Idle Screen... -
Page 28: How Do I Search My Contacts
4.3 How do I search my Contacts? How do I search my Contacts? How do I search my Contacts? How do I search my Contacts? How do I search my Contacts? From the idle scr idle scr idle scre e e e e en idle scr en en en en press the D D D D D o o o o o wn Ar... -
Page 29: How Do I Set A Dedicated Ringtone Or Image To A Contact
4.6 How do I set a dedicated ringtone or image to a Contact? How do I set a dedicated ringtone or image to a Contact? How do I set a dedicated ringtone or image to a Contact? How do I set a dedicated ringtone or image to a Contact? How do I set a dedicated ringtone or image to a Contact? The contact needs to be stored on the handset in order to set a dedicated ring or image. -
Page 30: How Do I Update An Existing Contact
4.9 How do I update an existing Contact? How do I update an existing Contact? How do I update an existing Contact? How do I update an existing Contact? How do I update an existing Contact? Edit the existing contact: Menu Menu Menu Menu >... -
Page 31: Advanced Contact Options
4.11 Advanced Contact Options 4.11 Advanced Contact Options 4.11 Advanced Contact Options 4.11 Advanced Contact Options 4.11 Advanced Contact Options Menu Menu > Contacts Menu Contacts Contacts Contacts > Options Options Options Options Menu Menu Contacts Options O p t i o n O p t i o n O p t i o n O p t i o n... -
Page 32: How Do I Make A Voice Call
5 5 5 5 5 Calls Calls Calls Calls Calls 5.1 Ho How do I make a V w do I make a V w do I make a Voic w do I make a V oice C e Call? all? all? all? -
Page 33: Call Options During An Active Voice Call
5.4 C C C C C all options during an ac all options during an ac all options during an activ all options during an ac tiv tiv tive V e Voic oice C e Call all all all options during an ac Press the Left Soft Key Left Soft Key Left Soft Key... -
Page 34: How Do I Answer A Call
5.6 How do I answer a Call? How do I answer a Call? How do I answer a Call? How do I answer a Call? How do I answer a Call? When you receive an incoming call the phone rings, rings, rings, rings, lights up... -
Page 35: How To Use The Headphones (Personal Handsfree)
5.8 Ho How t w to use the headphone o use the headphone o use the headphone o use the headphones (P s (P s (P s (Per er er er ersonal Handsfr sonal Handsfr sonal Handsfr sonal Handsfre e e e e e) e) e) e) e) o use the headphone s (P sonal Handsfr... -
Page 36: Call Options During An Active Video Call
5.10 5.10 5.10 Call options during an active Video Call Call options during an active Video Call Call options during an active Video Call Call options during an active Video Call 5.10 5.10 Call options during an active Video Call Press the Left Soft Key Left Soft Key Left Soft Key for the following Options... -
Page 37: How Do I Answer A Video Call
5.11 5.11 How do I answer a Video Call? 5.11 How do I answer a Video Call? How do I answer a Video Call? How do I answer a Video Call? 5.11 5.11 How do I answer a Video Call? 3G coverage is required to make and receive video calls. - Page 38 Advise the operator which emergency service you require. Give your position and remain stationary to get the best coverage. Due to the nature of the cellular system the connection of emergency calls cannot be guaranteed. Never rely solely on any wireless device for essential communications ie. medical emergencies.
-
Page 39: Videophone Settings
Advanced Call Settings Advanced Call Settings Advanced Call Settings Advanced Call Settings Advanced Call Settings 5.13 5.13 Videophone Settings 5.13 Videophone Settings Videophone Settings Videophone Settings 5.13 5.13 Videophone Settings Menu Menu > Settings Menu Settings Settings > tab right to Call Settings Call Call... -
Page 40: Call Barring
Press Options Options Options Options to switch calls between Hold Options Hold Hold Hold Hold and Active: Active: Active: Active: Active: 03991234xx 03991234xx Active Active Options Options Hold Hold 03991234xx 03991234xx 03991234xx Active Active Active Press Options Options Options > Hold Hold Hold to switch calls 03996543xx... -
Page 41: Send My Number
5.17 5.17 Send my number 5.17 Send my number Send my number Send my number 5.17 5.17 Send my number Menu Menu > Settings Menu Settings Settings Settings > tab right to Call Call Call Call > Send my number Send my number Send my number Send my number... -
Page 42: Call Options When Connected To A Bluetooth Device
5.20 5.20 5.20 Call Options when Connected to a Bluetooth device Call Options when Connected to a Bluetooth device Call Options when Connected to a Bluetooth device Call Options when Connected to a Bluetooth device 5.20 5.20 Call Options when Connected to a Bluetooth device If the handset handset handset... -
Page 43: Messages And Emails
6 6 6 6 6 Messages and Emails Messages and Emails Messages and Emails Messages and Emails Messages and Emails How do I send a Text Message (SMS)? How do I send a Text Message (SMS)? 6.1 How do I send a Text Message (SMS)? How do I send a Text Message (SMS)? How do I send a Text Message (SMS)? Right Arrow... -
Page 44: How Do I View A Received Text Message (Sms)
6.2 How do I view a received Text Message (SMS)? How do I view a received Text Message (SMS)? How do I view a received Text Message (SMS)? How do I view a received Text Message (SMS)? How do I view a received Text Message (SMS)? The envelope icon envelope icon envelope icon... -
Page 45: How Do I Add Words To The Built In Dictionary (My Words)
When a word is highlighted press the # # # # # key key to raise the case. Eg Eg Eg Eg Eg. dave > # # # # # > Dave > # # # # # > DAVE. Select the desired word from the available list using the keys keys... -
Page 46: Special Characters And Sms Message Length
6.5 Special Characters and SMS Message Length Special Characters and SMS Message Length Special Characters and SMS Message Length Special Characters and SMS Message Length Special Characters and SMS Message Length Number of characters Number of characters Number of characters Number of characters Number of characters SMS Message count... -
Page 47: How Do I Send A Multimedia Message (Mms)
6.6 How do I send a Multimedia Message (MMS)? How do I send a Multimedia Message (MMS)? How do I send a Multimedia Message (MMS)? How do I send a Multimedia Message (MMS)? How do I send a Multimedia Message (MMS)? Use a Multimedia Message Multimedia Message Multimedia Message... -
Page 48: Mms And Sms Advanced Settings
My Place e e e e > MyEmail My Plac MyEmail MyEmail MyEmail provided by MyEmail Telstra. To set up an alternate provider using the native Email client: Menu > Messages > Menu > Messages > Menu > Messages > Menu > Messages >... -
Page 49: How Do I Receive An Email
Email client is configured for MyEmail MyEmail MyEmail provided by Telstra. To receive Emails from alternate providers configure the native Email Client with your personal settings: Menu > Messages > Menu > Messages > tab right to Email Menu >... -
Page 50: How Do I Set Up Automatic Email Retrieval
6.12 6.12 6.12 How do I set up automatic Email Retrieval? How do I set up automatic Email Retrieval? How do I set up automatic Email Retrieval? How do I set up automatic Email Retrieval? 6.12 6.12 How do I set up automatic Email Retrieval? Menu Menu Menu >... -
Page 51: Change The Profiles
7 7 7 7 7 Ho Ho w t w t o P o P er er er er er sonalise the Phone sonalise the Phone sonalise the Phone sonalise the Phone sonalise the Phone There are many ways to customise the handset such as changing the profiles, wallpaper, ringtones, setting up shortcuts etc. -
Page 52: Change The Shortcut Keys (Arrow Keys)
Voicecall ringtone Ring volume Message tone Warning Tone Videocall ringtone Ring type (vibrate) Keypad volume, Earpiece volume Keypad sounds The Car Kit profile is only engaged when the device is installed in a car kit and provides 2 extra features, Auto Answer and Backlighting Always on. Change the Shortcut Keys (Arrow keys) Change the Shortcut Keys (Arrow keys) 7.2 Change the Shortcut Keys (Arrow keys) -
Page 53: Change The Background Screen (Wallpaper)
7.3 Change the Bac Change the Bac Change the Bac Change the Backgr kground Scr ound Scr ound Scr ound Scre e e e e en ( en ( en (W W W W W allpaper) en ( allpaper) allpaper) allpaper) Change the Bac ound Scr... -
Page 54: Select Meeting Mode With A Single Key Press
7.6 Select Meeting Mode with a single key press 7.6 Select Meeting Mode with a single key press 7.6 Select Meeting Mode with a single key press 7.6 Select Meeting Mode with a single key press 7.6 Select Meeting Mode with a single key press Meeting Mode Meeting Mode Meeting Mode puts the handset in silent mode with vibrate on. -
Page 55: Set The Keypad Backlighting
7.10 Set the Keypad Backlighting 7.10 Set the Keypad Backlighting 7.10 Set the Keypad Backlighting 7.10 Set the Keypad Backlighting 7.10 Set the Keypad Backlighting Menu Menu > Settings Menu Settings Settings Settings > Keypad backlighting Keypad backlighting Keypad backlighting Keypad backlighting Menu Menu... -
Page 56: What Is The Handset Lock Code
7.13 7.13 7.13 What is the Handset Lock Code? What is the Handset Lock Code? What is the Handset Lock Code? What is the Handset Lock Code? 7.13 7.13 What is the Handset Lock Code? Menu > Settings > Menu > Settings > Menu >... -
Page 57: File Manager And External Memory
8 8 8 8 8 File Manager and External Memory File Manager and External Memory File Manager and External Memory File Manager and External Memory File Manager and External Memory 8.1 File Manager File Manager File Manager File Manager File Manager Menu Menu Menu >... -
Page 58: Installing Additional Memory - Microsd Card
8.2 Installing Additional Memory – MicroSD Installing Additional Memory – MicroSD Installing Additional Memory – MicroSD card Installing Additional Memory – MicroSD card card card Installing Additional Memory – MicroSD card Handset memory can be increased by inserting a Micro SD (HC) card up to 8GB. Micro SD cards up to 2GB are supported (FAT 16 format). -
Page 59: Alarms And Appointments
9 Alarms and Appointments 9 Alarms and Appointments 9 Alarms and Appointments 9 Alarms and Appointments 9 Alarms and Appointments Set Alarms Set Alarms 9.1 Set Alarms Set Alarms Set Alarms Menu Menu Menu > T T T T T o o o o o ols Menu Menu ols >... -
Page 60: Set Appointments Using The Calendar
9.2 Set Appointments using the Calendar Set Appointments using the Calendar Set Appointments using the Calendar Set Appointments using the Calendar Set Appointments using the Calendar Menu Menu Menu > T T T T T o o o o o ols ols >... -
Page 61: Imaging - Pictures And Videos
10 10 10 10 10 Imaging - Pictures and Videos Imaging - Pictures and Videos Imaging - Pictures and Videos Imaging - Pictures and Videos Imaging - Pictures and Videos 10.1 How to use the Camera 10.1 How to use the Camera 10.1 How to use the Camera 10.1 How to use the Camera 10.1 How to use the Camera... -
Page 62: How To Use The Video Camera
10.2 How to use the Video Camera 10.2 How to use the Video Camera 10.2 How to use the Video Camera 10.2 How to use the Video Camera 10.2 How to use the Video Camera Menu Menu Multimedia Multimedia Video Camera Video Camera Menu Menu... -
Page 63: Viewing Pictures And Videos
10.3 10.3 Viewing pictures and videos Viewing pictures and videos 10.3 10.3 Viewing pictures and videos 10.3 Viewing pictures and videos Viewing pictures and videos 1 . 1 . 1 . 1 . 1 . View the file directly from File Manager View the file directly from File Manager View the file directly from File Manager View the file directly from File Manager... -
Page 64: Music
11 11 11 11 11 Music Music Music Music Music To import music files onto the handset see the following sections: Import music files from your computer using Join Me (See Connectivity Connectivity Connectivity Connectivity Connectivity) Connectivity Connectivity Import music files from your computer or other device using Bluetooth (See Connectivity Connectivity Connectivity) Mass Storage mode... -
Page 65: Create A New Playlist
11.3 Create a new Playlist 11.3 Create a new Playlist 11.3 Create a new Playlist 11.3 Create a new Playlist 11.3 Create a new Playlist Method 1: Create a Playlist from File Manager Method 1: Create a Playlist from File Manager Method 1: Create a Playlist from File Manager Method 1: Create a Playlist from File Manager Method 1: Create a Playlist from File Manager... -
Page 66: Connectivity
12 12 12 12 12 Connectivity Connectivity Connectivity Connectivity Connectivity 12.1 12.1 Use the phone as a Mass Storage Device with a MicroSD Card Use the phone as a Mass Storage Device with a MicroSD Card 12.1 12.1 12.1 Use the phone as a Mass Storage Device with a MicroSD Card Use the phone as a Mass Storage Device with a MicroSD Card Use the phone as a Mass Storage Device with a MicroSD Card Menu >... -
Page 67: Installing Join Me
Please install the software before connecting your phone and follow the installation steps carefully. For installation support please consult our web site FAQ’s http://www.zte.com.au 12.3 12.3 Installing Join Me 12.3 Installing Join Me Installing Join Me Installing Join Me 12.3 12.3 Installing Join Me Please install the Join Me CD before... -
Page 68: Use Joinme To Copy Photos To Your Computer
12.4 12.4 12.4 12.4 12.4 Use Join ME to copy photos to your computer Use Join ME to copy photos to your computer Use Join ME to copy photos to your computer Use Join ME to copy photos to your computer Use Join ME to copy photos to your computer Transfer photos from the handset to your computer using Join Me: Make sure the phone is switched on and connected to the computer and... - Page 69 Copy files (eg Photos) from phone to computer using Join ME Copy files (eg Photos) from phone to computer using Join ME Copy files (eg Photos) from phone to computer using Join ME Copy files (eg Photos) from phone to computer using Join ME Copy files (eg Photos) from phone to computer using Join ME Media T Media T...
-
Page 70: Use Joinme To Transfer Music From A Computer
12.5 12.5 12.5 12.5 12.5 Use Join ME to transfer music from a computer Use Join ME to transfer music from a computer Use Join ME to transfer music from a computer Use Join ME to transfer music from a computer Use Join ME to transfer music from a computer Music files can be transferred onto the phone using Join Me. - Page 71 Copy files(eg Music) from the Computer to the handset using Join ME Copy files(eg Music) from the Computer to the handset using Join ME Copy files(eg Music) from the Computer to the handset using Join ME Copy files(eg Music) from the Computer to the handset using Join ME Copy files(eg Music) from the Computer to the handset using Join ME drag drag...
-
Page 72: Enter Contacts Using Join Me
12.6 Enter Contacts using Join ME 12.6 Enter Contacts using Join ME 12.6 Enter Contacts using Join ME 12.6 Enter Contacts using Join ME 12.6 Enter Contacts using Join ME Use Join ME to enter new contacts into the phone. O n t h e p h o n e b o o k t a b e n t e r O n t h e p h o n e b o o k t a b e n t e r O n t h e p h o n e b o o k t a b e n t e r... -
Page 73: Copy Contacts From The Phone To The Computer (Create A Backup)
12.7 Copy contacts from the phone to the computer (create a backup) 12.7 Copy contacts from the phone to the computer (create a backup) 12.7 Copy contacts from the phone to the computer (create a backup) 12.7 Copy contacts from the phone to the computer (create a backup) 12.7 Copy contacts from the phone to the computer (create a backup) 2. -
Page 74: Import Contacts From Microsoft Outlook
12.8 12.8 12.8 12.8 12.8 Import Contacts from Microsoft Outlook Import Contacts from Microsoft Outlook Import Contacts from Microsoft Outlook Import Contacts from Microsoft Outlook Import Contacts from Microsoft Outlook Launch Microsoft Outlook, have Join Me running and connected to the handset. Make sure you are on the Phonebook tab in Join Me, see image in 12.7 above. -
Page 75: Export Contacts To Outlook
12.9 12.9 12.9 Export Contacts to Outlook 12.9 12.9 Export Contacts to Outlook Export Contacts to Outlook Export Contacts to Outlook Export Contacts to Outlook Launch Microsoft Outlook, have Join Me running and connected to the handset. Make sure you are on the Phonebook tab in Join Me, see image in 12.7 above. -
Page 76: Use Join Me To Send An Sms
12.10 12.10 12.10 Use Join ME to send an SMS Use Join ME to send an SMS Use Join ME to send an SMS Use Join ME to send an SMS 12.10 12.10 Use Join ME to send an SMS Select the Message Message Message tab. -
Page 77: Use Join Me To Connect To The Internet
Connect to Internet Connect to Internet go online. default APN default APN Telstra Internet Telstra Internet The default APN default APN default APN is Telstra Internet Telstra Internet Telstra Internet. Please check with your service provider to confirm the correct APN. -
Page 78: Connect To A Bluetooth Device
12.13 12.13 12.13 12.13 12.13 Connect to a Bluetooth Device Connect to a Bluetooth Device Connect to a Bluetooth Device Connect to a Bluetooth Device Connect to a Bluetooth Device Bluetooth is used as a wireless connection for headsets, hands free car kits and computers. Not all applications or devices are supported. - Page 79 Send files from the handset to another device Send files from the handset to another device Send files from the handset to another device Send files from the handset to another device Send files from the handset to another device Menu Menu >...
-
Page 80: Dial Up Networking Using Usb Or Bluetooth
Connect Connect From the list of available devices select the required device and press OK OK to Connect Connect Connect. pass code pass code Enter the pass code pass code pass code specified in the user guide of the far end device (eg 0000 or 1234). When the devices are paired the handset reports the device has been added. - Page 81 Phone number Phone number Username and Password Username and Password blank blank Set the Phone number Phone number Phone number to *99# > The Username and Password Username and Password Username and Password must be blank blank blank > ‘Make this the default Internet connection’ can be unchecked (optional) > ‘Add a shortcut to this connection to my Desktop’...
-
Page 82: Pc Connection
The features described are dependant on external suppliers’ hardware and software and vary between platforms and components. Consult your system supplier for more information. 12.15 12.15 PC Connection PC Connection 12.15 12.15 12.15 PC Connection PC Connection PC Connection Menu > Settings > Menu >... -
Page 83: Gps And Assisted Gps (A-Gps)
13 13 13 13 13 GPS and Assisted GPS (A-GPS) GPS and Assisted GPS (A-GPS) GPS and Assisted GPS (A-GPS) GPS and Assisted GPS (A-GPS) GPS and Assisted GPS (A-GPS) A-GPS is an advanced positioning system developed for mobile phone applications. The hand- set can operate in Stand Alone GPS Mode Stand Alone GPS Mode Stand Alone GPS Mode which does not require a network signal or As-... -
Page 84: Other Facilities
14 14 14 14 14 Other Facilities Other Facilities Other Facilities Other Facilities Other Facilities 14.1 14.1 14.1 Browser Browser Browser Browser 14.1 14.1 Browser Menu Menu Menu Menu Menu > T T T T T o o o o o ols ols >... -
Page 85: Stopwatch
14.2 14.2 Stopwatch 14.2 Stopwatch Stopwatch Stopwatch 14.2 14.2 Stopwatch Menu > T Menu > T Menu > To o o o o ols > St Menu > T Menu > T ols > St ols > St ols > St ols >... -
Page 86: Currency Conversion
14.5 14.5 14.5 Currency Conversion Currency Conversion Currency Conversion Currency Conversion 14.5 14.5 Currency Conversion Menu Menu Menu > T T T T To o o o o ols ols > C C C C C ur ur ur ur urr r r r r enc ency C y Conv onver er er er ersion... -
Page 87: Voice Recorder
14.8 14.8 V V V V V oic 14.8 oice R e Rec ec ec ec ecor or or or order 14.8 14.8 Menu > Multimedia > V Menu > Multimedia > Voic Menu > Multimedia > V oice r e rec ec ec ec eco r o r o r o r o rder (use O der (use O der (use O... -
Page 88: Network Settings
14.11 14.11 14.11 Network Settings Network Settings Network Settings Network Settings 14.11 14.11 Network Settings Menu Menu Menu > Settings Settings Settings Settings > tab right to Handset Handset Handset Handset > Network settings Network settings Network settings Network settings Menu Menu Settings... -
Page 89: Access Point Settings
14.13 Ac 14.13 Acc c c c c e e e e e s s s s s s P 14.13 Ac s Point Set oint Set oint Set oint Settings tings tings tings 14.13 Ac 14.13 Ac oint Set tings Menu >... - Page 90 14.17 14.17 14.17 C C C C C TM 14.17 14.17 Menu Menu tings tings Handset > C Handset > C Menu Menu Menu > Set Settings tings tings > tab right to Handset > C Handset > C Handset > CTM CTM (Cellular Text Telephone Modem) is a text based communications protocol to offer sup- port to hearing and speech impaired people.
- Page 91 15 T 15 T 15 T r r r r r oub oub le le le le le sho sho oting, oting, oting, oting, T T T T T ec ec ec ec ec hnic hnic hnic al and W hnic al and W al and W...
- Page 92 Symptom Symptom Symptom Symptom Symptom Resolution Resolution Resolution Resolution Resolution I cannot connect to I cannot connect to I cannot connect to I cannot connect to I cannot connect to Check: Menu > Settings > Handset > PC Connection > USB Check: Menu >...
- Page 93 Symptom Symptom Symptom Resolution Resolution Resolution Symptom Symptom Resolution Resolution The handset switches The handset switches The handset switches The handset switches The handset switches An alarm or calendar event switches the handset on on automatically on automatically on automatically on automatically on automatically automatically.
- Page 94 15.3 T 15.3 T 15.3 Tec ec ec ec echnic hnic hnical P hnic al P al Par ar ar ar aramet al P amet ameter er er er ers s s s s amet 15.3 T 15.3 T hnic al P amet Network Compatibility...
- Page 95 15.4 15.4 Support Information 15.4 Support Information Support Information Support Information 15.4 15.4 Support Information · For Warranty Service directions please consult the ZTE website at http://www.zte.com.au · All calls for PIN number enquiries, Network problems, Next G Services, BigPond account information, Web Access, Account and Billing Information, USIM card registration and general enquiries should be directed to your Service Provider.
- Page 96 16 16 16 16 16 Environmental Statement Environmental Statement Environmental Statement Environmental Statement Environmental Statement The ZTE handset is made using the latest manufacturing techniques and environmental stan- dards to reduce waste and hazards to the environment. However at the end of life of the equip- ment the manufacturer recommends that you return the handset and accessories to the near- est re-cycling depot or send it to our recycling agent below.
- Page 97 17 17 17 17 17 General Safety and Maintenance Information General Safety and Maintenance Information General Safety and Maintenance Information General Safety and Maintenance Information General Safety and Maintenance Information The handset contains delicate electronic circuitry, magnets and battery systems. You should treat it with care and pay attention to the following points: Handle the handset with care.
- Page 98 Only use original replacement batteries. At high volume, prolonged listening to audio Do not attempt to dismantle the handset or devices can cause hearing loss. any of its accessories. Do not leave the handset discharged or dis- Do not place the handset close to the edge connected for a long time, otherwise your of a table in case it moves when set on vi- personal data may be lost.
- Page 99 Index Index Index Index Index Access Point Settings......88 Contacts......... 26, 27, 29 AGPS........... 82 Copy photos........68 Alarms..........58 CTM Mode..........89 Answer a Call......... 24, 33 Dial Up Networking......79 Any key to answer........ 40 Display Brightness.......53 Appointments........58 Download Location....... 57, 88 Background Screen......
- Page 100 Make a Call........24, 31 RF Safety & SAR Information....9 Make a Video Call........34 Ringtone..........52 Make Videos.........61 Safety Information.........96 Mass Storage Device......65, 81 Send a Text Message.......24, 42 Meeting Mode........53 Send my number........40 MicroSD Memory Cards......57 Set the Time.......... 23 Microsoft Outlook........
Need help?
Do you have a question about the TOUGH T90 and is the answer not in the manual?
Questions and answers