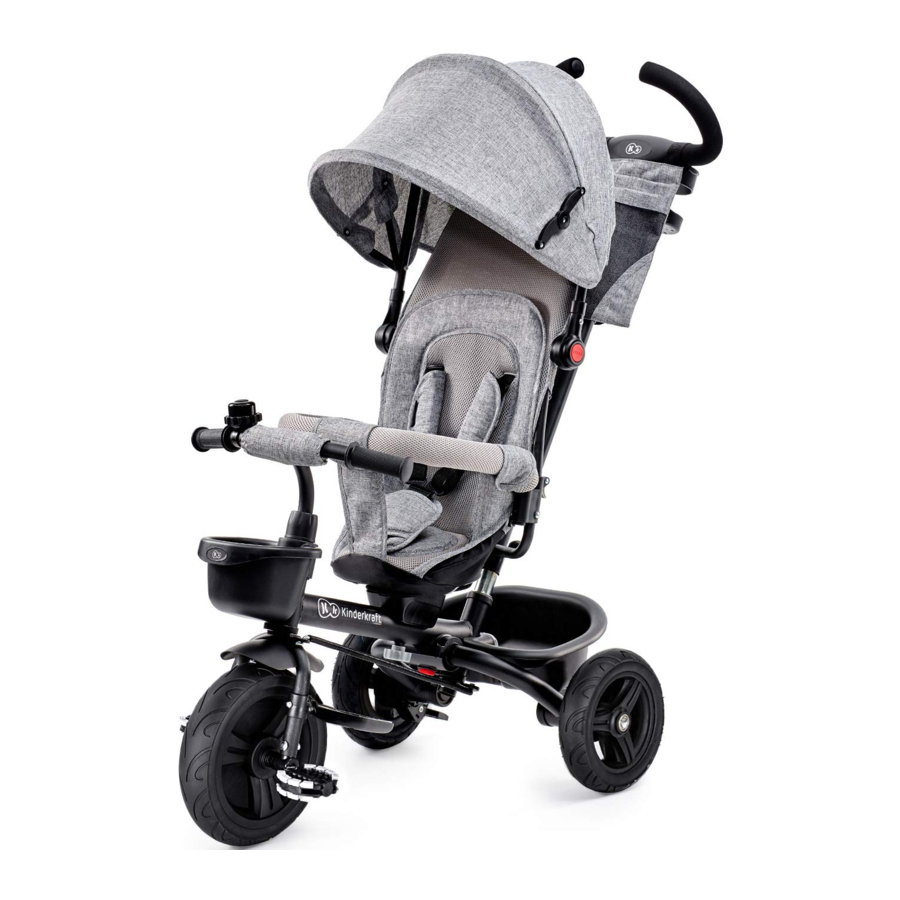
Kinderkraft AVEO Manual
- User manual (42 pages) ,
- User manual (32 pages) ,
- User manual (40 pages)
Advertisement
Main parts
- Frame with seat base
![]()
- Rear wheels
![]()
- Front wheel
![]()
- Front fork with securing bolts
![]()
- Mudguard with screw
![]()
- Handlebar
![]()
- Handlebar bolt cover
![]()
- Assembly key
![]()
- Bell with securing bolt
![]()
- Rear basket
![]()
- Seat with nut
![]()
- Guard rails
![]()
- Backrest
![]()
- Seat cover
![]()
- Hood
![]()
- Parent handle
![]()
- Cup holder
![]()
- Cable
![]()
- Front basket
![]()
- Assembly key
![]()
- Bag
![]()


Trike assembly
Before starting assembly of the trike, remove all plastic and securing elements.
- Take the frame with seat base (1) and insert the rear wheels (2) as shown in figure A until you hear a distinctive "click".
![]()
- Affix the mudguard (5) to the front fork (4) using the screw in the mudguard (figure B).
![]()
Make sure that the notch in the mudguard is in the place shown in the picture. Tighten the screw with the assembly key (8).
![]()
- Remove the bolts and nuts mounted in the fork (4) marked in figure C. Slide together the elements on the front wheel (3) as shown in the picture. Connect the elements of the front wheel with the fork as shown in figure C, and then tighten the previously loosened bolts using the assembly key (8).
![]()
- Unscrew the securing bolt from the fork (4) as marked in figure D1. Pass the fork with the front wheel through the frame (1).
![]()
The notch in the mudguard must be facing towards the direction of travel. Next, put the front basket (19) on as shown in figure D2.
![]()
Note the position of the openings on the frame – they must be parallel to the protruding elements at the back of the basket.
![]()
![]()
- Slide the handlebar bolt cover (7) onto the handlebar (6) as shown in figure E.
![]()
- Place the handlebar onto the fork mounted on the frame, and then secure it with the bolt using the assembly key (20) as shown in figure F, and slide the cover (7) onto the tightened bolt.
![]()
- Installation of the cable (18).
![]()
Make sure that the end of the cable with the nut is positioned in the rear part of the trike as shown in figure G. Insert the end without the nut into the designated opening shown in figure G1. Loosen the nut from the rear end of the cable and insert it into the opening located in the rear part of the trike as shown in figure G2. Next, tighten the nut using the assembly key (20).
![]()
- Unscrew the nut from the bolt located under the seat (11). Slide the bolt through the seat base, which is located on the frame, and tighten it with the bolt as shown in figure H.
![]()
Make sure the nut is tight and the seat does not turn.
![]()
- Before inserting the backrest (13) into the seat base, make sure that the lock latches are in the position as shown in figure I 1.1. Insert the backrest into the holes as shown in figure I. Next, lock the backrest by lowering the latches (figure I 1).
![]()
![]()
- Insert the side guards (12) into the openings as shown in figure J.
![]()
- To put the cover (14) on the seat (figure K), open the fabric on the backrest using the zipper. Pass the straps at the back of the cover through the holes in the backrest, and then fasten the zipper. Slide the side seat guards through the side covers (figure K1). To install the seat cover, first stretch it over the top part of the seat. Put the crotch strap over one of the side covers and connect them until you hear a "click".
![]()
![]()
- Before installing the hood (15), connect the affixing elements with the hood frame on both sides until you hear a "click". Slide the plastic parts of the hood onto the side elements of the backrest (13) as shown in figure L.
![]()
- To install the rear basket (10), loosen the securing bolt in the rear part of the frame (1). Place the basket on the frame and secure it with the bolt as shown in figure M.
![]()
- To affix the parent handle, open the plastic plug at the back of the frame as shown in figure N. Next, insert the parent handle (16) into the opening as shown in figure N1, then press the pin at the bottom of the handle and push it in until you hear a "click", ensuring the lower pin is concealed.
![]()
![]()
- Affix the bag (21) on the parent handle (16) using the hook-and-loop closure, and slide the cup holder (17) onto the element at the back of the parent handle as shown in figure O.
![]()
- To affix the bell (9), unscrew the bolt using the assembly key (8), then slide the bell onto the handlebar (6) and secure it with the bolt (figure P).
![]()


Adjustment
Hood position – press the black buttons on both sides of the hood and set it in the desired position.
Footrests – depending on the child's development level, the footrests can be folded so that the child can ride the trike by themselves.

Whenever the parent handle is affixed and the footrest is open, the wheel lock must be disengaged so that the pedals rotate freely without moving the wheel (the drive is disengaged). If the lock is engaged, the child's feet may be crushed or injured! After removing the parent handle, fold the footrest and connect the wheel lock so that the pedals set the wheel in motion (the drive is engaged).
Brake – the trike has a rear wheel brake. Press the brake with your foot. When you hear the locking sound, the brake is activated. It unlocks after the brake lock is lifted.
To fully unlock the rear wheels, raise the brake as high as possible.
Safety harness – adjust the length so that it holds the child securely, but does not block the child's movements.
Seat position – the saddle can be rotated to the rearward facing position. To do this, unscrew the nut and set the desired position. After tightening, make sure the seat is securely fastened.
Folding the rear wheels – lift the trike slightly and first slide the red lock and then the red button under the frame, and turn the rear wheels forward.
Changing the seat position – unscrew the nut from the bolt under the seat, and then position it to face away from or towards the direction of travel. Screw the nut onto the bolt underneath the seat.

Make sure the nut is tight and the seat does not turn.
Older children may ride without the backrest – slide the seat cover off, remove the backrest by unlocking the levers on its sides, then turn the armrests 90° backwards and slide them out.
Adjustment of the length of the parental handle – extend and secure in a comfortable position.
Maintenance and cleaning
 | Do not wash. Clean the product gently with a damp cloth and a mild detergent |  | Wash at max. 30°C, gentle process |
 | Do not bleach |  | Do not iron |
 | Do not dry in a tumble dryer |  | Do not dry clean |
Seat cover, backrest, and handlebar cover: Remove from the frame. Wash at a maximum of 30°C on a gentle cycle. Do not bleach. Do not tumble dry. Do not iron. Do not dry clean. Hood: Do not wash. Do not bleach. Do not tumble dry. Do not iron. Do not dry clean. Clean with a clean, damp cloth and mild soap.
Allow to air dry. Do not submerge in water. Frame: Clean the metal frame using a soft, clean, damp cloth and mild soap.
Storage
Store the product out of reach of children.
Warranty
The full text of the Terms and Conditions of the Warranty is available on the website WWW.KINDERKRAFT.CO
SAFETY INSTRUCTIONS AND PRECAUTIONS
 Attention:
- Compliance with the user manual ensures safe use of the toy. Read the user manual carefully before using the bike and keep it for future use. Recommended for children from the age of 9 months
- Use personal protective equipment such as helmets, gloves, elbow pads and knee pads. This product is intended for outdoor use. Do not use in road traffic.
The kids cruiser bike should not be used near motor vehicles, streets, swimming pools, hills, roads, stairs or on uneven ground. - Use the toy on flat, obstacle-free surfaces.
- To avoid serious injuries, continuous adult supervision is necessary.
- To avoid falls and collisions causing injury to the user or others, parents/guardians should draw children's attention to the safety precautions to be taken. Before using the product, it is important to explain to children how to use it safely.
- The person using the product must always wear shoes.
- Assembly must always be carried out by an adult. Before each use, check that the item is not damaged or worn and that all assembly and fastening parts are in good condition. Ensure that the bolts and nuts retain their auto-locking properties. Check that the assembly is complete and in good condition. If you notice that some parts are missing or damaged, do not use the product, but contact your retailer.
- Be careful when riding bicycles, you should know how to ride to avoid falls or collisions that could cause injury to the user or a third person.
- The safest areas for the persons using the bicycle are those with little or no vehicular traffic, such as private areas, playgrounds, schoolyards, and school playgrounds.
- Maximum user weight − 25 kg
- Keep the packaging or dispose of it in accordance with local regulations.
- For the safety of children, do not leave parts of the packaging freely accessible (plastic bags, cardboard boxes, etc.). Risk of suffocation!
Documents / Resources
References

Download manual
Here you can download full pdf version of manual, it may contain additional safety instructions, warranty information, FCC rules, etc.
Advertisement


Need help?
Do you have a question about the AVEO and is the answer not in the manual?
Questions and answers