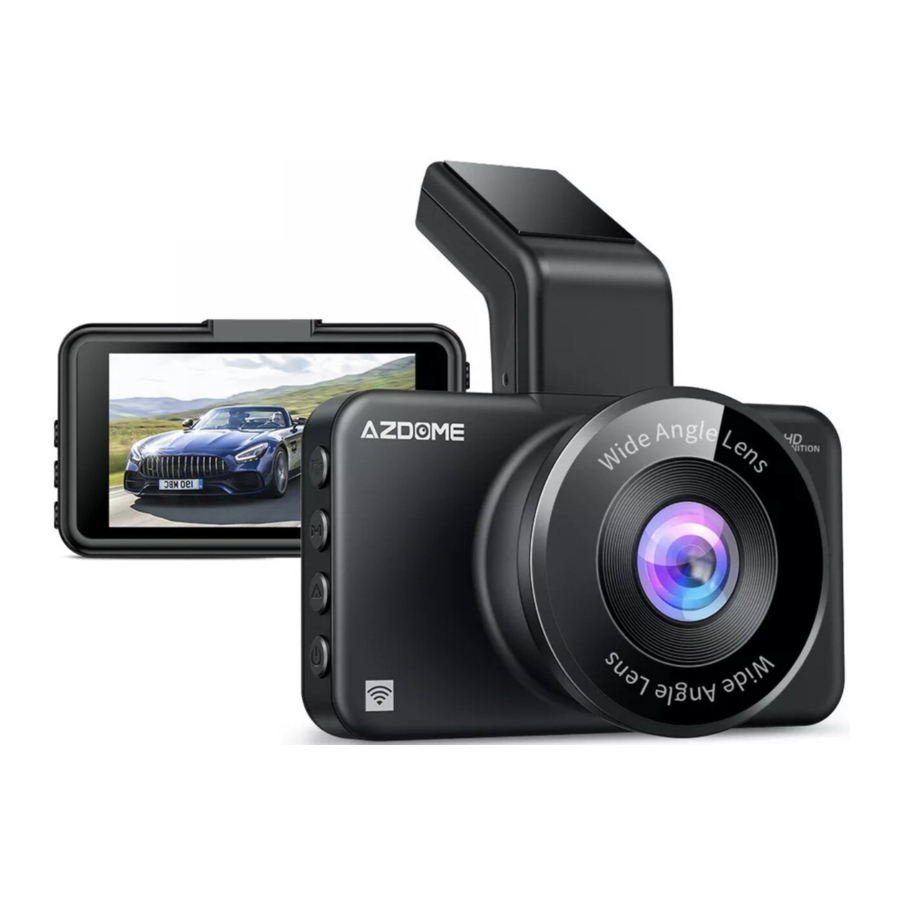
Azdome M17 Manual
- Manual (18 pages) ,
- Owner's manual (21 pages) ,
- User manual (49 pages)
Advertisement
Introduction
This instruction manual contains information on how to operate your dashcam. Before using your dashcam, we recommend that you read through this manual to ensure correct usage.
To improve the performance of the product, the contents of this manual are subject to change without prior notice.
 Note:
Note:
- A U3 type microSD card (Not included) is required to use this Dash Cam. Be sure to format your microSD card with your dash cam for the first time use.
- Please ALWAYS connect with power when using.
- The Dash Cam has one Automatic Start / Stop Technology.
It will automatically power on and record automatically once power is available. It will power on once the ignition has been turned on in most vehicles. When power is cut off, the Dash Cam will perform an automatic shutdown process.
Packing List
Check the box for each of the following items before installing the dash cam.

Note:
To improve the performance of the product, the contents of this manual are subject to change without prior notice.
Product Specification
| Model | M17 |
| Screen Size | 3.0 IPS Inch |
| Lens | 150°wide angle lens |
| Lens Aperture | F=2.0 |
| Video Code | H.265,MP4 |
| Video Resolution | 1296P(Default)/ 1080P/ 720P |
| Video Effective Pixel | 2 Mega Pixels |
| Photo format | JPG |
| Photo resolution | 2M/5M/8M/12M |
| Language | English, Español, Русский, 简体中文, Deutsch, Italiano, Indonesian, Polski, Français, 日本語, Nederlands, Magyarország |
| Memory Card | Micro SD Card Class 10, U3 Speed, Max Support 128 GB (Not included) |
| G-sensor | Built-in 3-Axis Impact Accelerometer Gravitational Sensor to lock & protect current video. |
| Frequency | 60 Hz, 50 Hz |
| WiFi | Support, please download APP "AZDOME" |
| Loop Recording | Support |
| Parking Mode | Support |
| Fatigue Driving Reminder | Support |
| Record Audio | Support |
| TYPE-C Port | Charging |
| Power Interface | 5V 1.5A |
| Operating Temperature | -20°C to 70°C (-4°F to 158°F) |
| Working Humidity | 15~85% |
Product Diagram

- Micro AV IN (For 5PIN VGA Rear Camera, Not Recommended)
- Type-C Charging Port 1
- Type-C Charging Port 2
- Bracket
- TF Card Slot
- Up Button
- Menu Button
- Down Button
- Screen
- OK/Record Button
- Mode Button
- Lock Button
- Power Button
- Lens
- Speaker
- Microphone
- Reset Button
- Red Light: Charging Status Indicator
Green Light: Working Status Indicator
Button Controls
| Button | Operation and Function |
 |
|
 | Press once to enter menu setting (Disabled in recording mode) |
 |
|
 |
|
 |
|
 | In recording mode, press once to lock the video as an emergency one. |
 |
|
| Reset | Reboot the device and restore default settings |
Get Started
Install the Memory Card
- Insert a card with the golden contacts facing the LCD display side of the dash cam.

- To remove the card, gently push it until it clicks and pull it out of the slot.


Note:
- Do not insert or remove the TF card when the dash cam is powered on to avoid breakage of the card.
- Please use a class 10 micro SD card from 32 GB to 128 GB.
- Format the memory card before use.
Format the Memory Card
- Press
![]() to enter setting interface.
to enter setting interface. - Press
![]() to locate Micro SD card set up, press
to locate Micro SD card set up, press ![]() to enter Micro SD card format.
to enter Micro SD card format. - Press
![]() to locate "OK", press
to locate "OK", press ![]() to confirm formatting.
to confirm formatting.
 to enter setting interface.
 to locate Micro SD card set up, press
  to enter Micro SD card format.
Dash Cam Installation

- Insert the Micro SD card into the Micro SD slot of the dash cam and format your SD card for the first time use.
- Slide the mount into the mount installation slot.
- Turn off the car engine.
- Stick the car mount together with the camera onto your windshield.
- Connect the USB charging cable to the Type-C port of the dash cam. Run the cable along the edge of the windshield. Tuck away in the seams and extend it all the way to the USB port of the car charger.
Be sure to keep it away from the airbag area. - Adjust the dash cam to keep the lens level with the ground.
- Start the engine to check if the dash cam works properly.
Using AZDOME Dash Cam
The camera is designed to power up and record automatically when it receives power. Then saves the video record and turns off automatically when the car shuts off.
- Auto Power ON/OFF:
- Plug car charger to cigarette lighter socket.
- When the car engine is on, dash cam will turn ON and start recording automatically.
When the car key is turned to LOCK position, dash cam automatically saves the recording and turns OFF.
- Manual Power ON/OFF
Manually Turn ON: Press the power button once.
Manually Turn OFF: Press and hold the power button for at least 2 seconds.
Note:
- Please ALWAYS connect with power when using.
- Please set the right time before using the dash cam.
- Some trucks/cars's 12V cigarette outlet is always HOT, which means it provides constant power even when the car is turned off and locked. If this is the case for your vehicle, then the auto ON/OFF feature will not work. And if you leave the camera continuously recording when the car is turned off, then it will drain your car/truck's battery and you might not have enough power to start your car for next time. To remedy this situation, you can do one of the two options:
- Hardwire your dash cam to your car's fuse box with AZDOME 3-Lead Auto Trigger Hardwire Kit.
- Change the connection in the fuse box for your 12V outlet to socket which only supplies power when car key is turned to ACC or ON position.
- Format The Memory Card
- Press
![]() to enter setting interface.
to enter setting interface. - Press
![]() to locate Micro SD card set up, press
to locate Micro SD card set up, press ![]() to enter Micro SD card format.
to enter Micro SD card format. - Press
![]() to locate" OK", press
to locate" OK", press ![]() to confirm formatting.
to confirm formatting.
- Press
- Menu Setting
- Press
![]() to enter menu setting.
to enter menu setting. - Press
![]() to locate the item you want to set.
to locate the item you want to set. - Press
![]() to confirm your setting.
to confirm your setting. - Press
![]() again to exit menu setting.
again to exit menu setting.
- Press
- Playback Mode
Press![]() to shift between Video / Photo / Lock Video playback mode.
to shift between Video / Photo / Lock Video playback mode. - Video Playback
- Press
![]() to select files.
to select files. - Press
![]() to delete selected file.
to delete selected file. - Press
![]() to play / pause the selected file. Press and hold
to play / pause the selected file. Press and hold![]() to fast -forward/rewind.
to fast -forward/rewind. - Press
![]() one more time to exit video playback.
one more time to exit video playback.
- Press
- Photo Playback
- Press
![]() to select files./
to select files./ - Press
![]() to delete selected file.
to delete selected file. - Press
![]() to view the selected file.
to view the selected file. - Press
![]() one more time to exit photo playback.
one more time to exit photo playback.
- Press
- Lock Video Playback
- Press
![]() to select files.
to select files. - Press
![]() to play/pause the selected file. Press and hold
to play/pause the selected file. Press and hold ![]() to fast forward / rewind./
to fast forward / rewind./ - Press
![]() one more time to exit video playback.
one more time to exit video playback.
- Press
- Video Playback
 to confirm your setting.
 one more time to exit photo playback.
 Note:
Cannot delete protected files on the dash cam.
Playing Video Files Using Your Smartphone
Check real-time video using your smartphone
- Search for the AZDOME app in the Google Play Store or Apple AppStore and install it on your smartphone.
![]()
![itunes.apple.com]()
![]()
![play.google.com]()
![]()
- Turn on WiFi of the dash cam. Press
![]() button to turn on WiFi ofdash cam. (Please ALWAYS connect to power supply.)
button to turn on WiFi ofdash cam. (Please ALWAYS connect to power supply.) - Turn on WiFi of your phone and connect: Go to Phone's Settings > WiFi > Select WiFi of the dashcam. After it's connected to the WiFi, it will say 'No internet Connection' which was normal. Because dash cam WiFi is ONLY for video/photo transfer function, NOT made to broadcast footage over the cloud or internet, please ignore the prompt.
WiFi Name SSID: M17 _**********
Default PASSWORD: 12345678 - After installing the AZDOME APP, please register with your email onthe registration screen to log in. If you are unable to receive the ver ification code, click 'Skip Login' in the top right corner to enter the next page and click'Add Dashcam'.

- Please click 'Screen Dashcam' to proceed. Ensure the dash cam is connected to a 5V/1.5A power supply and is turned on.

- Make sure your phone is connected to the WiFi of the dash cam and click 'Next' to proceed. There will show dash cam model M17 when connec ted successfully. Touch the connected dash cam to go into 'Live Video Preview' interface.


 button to turn on WiFi ofdash cam. (Please ALWAYS connect to power supply.)


Download the video files into your smart phone
- Go to' Live Video Preview' interface. Please STOP recording first, then press the' Dashcam Albums' to get Photo, Video, Emergency files.

- Select the video files to download into your phone, then you canfind these downloaded video files in' Local Video' in 'Mine' menu of the original APP interface. However, it will take a little time to download a video file.


The app won't show the live video on your phone. It only shows a picture of the beach?
The cellular data will cause the live video not to be viewed. If the APP won't show the live video, please disable the' AZDOME' cellular data of your phone. Sure that the Local Network of the ' AZDOME' is turned on.

- For Latest iOS System: Setting→AZDOME→Click' Wireless Data'→Select' WLAN'.
- For Older iOS System: Setting→AZDOME→Disable the 'Cellular Data'.
Note:
- WiFi Direct lets you directly connect your smartphone to your dash cam via WiFi within a range of 10FT.
- Once it is connected to the AZDOME APP it will automatically update the date/time.
- The AZDOME is available for devices running Android 5.0 and higher, or iOS 9.0 and higher.
What is a WiFi Feature?
The WiFi feature has been designed so you can pair your dash camera wirelessly with your smartphone and access your recording instantly from the dash cam. Here you can view, download and share your videos easily with your friends and family. Just like how you would connect your Bluetooth speaker to your smartphone for wireless music play, the same way dash cameras use WiFi signal (instead of a Bluetooth) to pair your smartphone with AZDOME M17.
Can I watch the videos around my car remotely?
NO. AZDOME M17 dash cam is NOT made to broadcast footage over the cloud or internet. It is NOT a cloud or an IP camera and it is NOT meant to do that. You can get live video and footage on AZDOME dash cam's APP as long as you stay within the 10FT range from the dashcam.
What is the WiFi Range?
The WiFi signal range is about 10FT when there are NO obstructions in the middle. Please NOTE that just like your home WiFi network, you dont have WiFi signal outside your home, the same way, WiFi range is 10FT from this small device.
For Android phones:
When installing the AZDOME APP, it will have two pop-up prompts, select' While using the APP' to allow AZDOME to access this device's location, and select' Allow' to allow AZDOME to access photos and media on your device.
There is one extra step you will have to take for the first time.
Once you connect to the WiFi of M17, it will say' No Internet'. Which is fine. Wait about 10-15 seconds until you see the below pop up or notification. You just have to tap on the pop up notification that will show up in few seconds to select that you still want to stay connected even though there is NO Internet.
Once you select this OK, you are set to go.

For iPhone:

Scan the QR code to get the whole process about WiFi

Function Description
Resolution
Allow to choose the desired video resolution. Higher resolution result in smoother videos, but also take more storage space.
1296P(2304*1296) Default, 1080P(1920*1080), 720P(1280*720)
Loop Recording—1min(Default)/ 2mins/ 3mins
Allow the dash-cam to continuously record.
Please notice: the dashcam will keep deleting the oldest files automatically when memory card gets full so that it can keep recording over and over. Here select the length of video file for the loop recording.
Sound Record―On(Default)/Off
On: The video file will have sound.
Off: The video file will have no sound.
Exposure
To adjust video exposure setting for either brighter or darker video according to your preference.
ADAS―On/Off(Default)
To use ADAS function:
- Turn on ADAS in the menu setting, enter the ADAS mode.
- On a straight road, gently adjust the front lens so that the two greenlines coincide with the road placed in the middle of the road. When the blue lines coincide with the road and the green lines disappear, the calibration is successful.
Note:
ADAS is only an auxiliary function, the accuracy rate can only reach 90% at most, and the accuracy will decrease at rainy days, evenings, or on complex road scenes. It is recommended to calibrate once every other time or when the accuracy of ADAS broadcast is low.
G-Sensor-Off/Low(Default)/Middle/High
G- sensor is a 3-axis impact gravitational accelerometer, designed to detect physical and gravitational forces on the dash cam. Once G-sensor has triggered due to physical or gravitational impact force on the camera, the current video file will be locked as an emergency file soit won't be deleted by loop cycle function.
Parking Mode— Off(Default)
This function will ONLY work when AZDOME Type-C OBD/JYX05 3Lead Hardwire Kit is installed properly, and the output current of Hardwire Kit needs to reach 1.5 A. Then Select [Connected] and sele ct parking mode. This parking mode has two options to choose from.
Collision Detection Parking Mode
- When you turn OFF the car's engine and turn the key to the lock position. Then the camera will STOP the continuous video recording and it will go into the impact detection mode and the camera will turn OFF after 10 seconds.
- Now while the camera stays in impact detection mode, if someone hits your car and if the impact reaches the set G-Sensor level, then the camera will turn ON > then it will start to record 1-min continuous video, save & lock that video in EMR folder > then the camera will turn OFF.
- Now when you start your car for the next time, the camera will automatically go back into normal video mode to automatically start the continuous video recording.
Time-Lapse Parking Mode
- When you turn OFF the car's engine and turn the key to the lock position. Then the camera will STOP the continuous video recording and it will go into the timelapse 1fps recording mode automatically.
- Now while this timelapse is being recorded, if someone hits your car and if the impact reaches the set G-Sensor level, then the camera will start to lock the current looping timelapse video clip, save & lock that video in Lock folder > then return to the timelapse 1fps recording.
- Now when you start your car for the next time, the camera will automatically STOP the timelapse parking mode. Then it will go into normal video mode automatically to start the continuous video recording.
Parking Time —2H(Default)/8H/12H/24H
Set the time of the parking mode after parking.
The Parking Mode and Parking Time functions will only work if the AZDOME Type-C OBD/JYX05 3-Lead Hardwire Kit is properly installed. If you connect the car charger, the settings will not be displayed.
Note:
AZDOME's custom-designed Type-C OBD/JYX05 3-lead hardwire kit is required to use the parking modes. Not included in the packaging. On Amazon search: AZDOME Type-C OBD/JYX05 3-lead hardwire kit
Language ― Multilingual, default English.
Allow to choose your desired language for dash-cam system.
Volume ― Off/ Low/ Middle/ High(Default)
To switch on/ off or adjust the beep sound.
Screen Save ― Off/1min(Default)/ 3mins/ 5mins
Once chose a time duration and turned on this function, the. dashcam will automatically show a black background after the set time, while the camera still stays ON. Please notice that this function only turns off the screen, to prevent from distracting the driver.
Frequency ― 50HZ/ 60HZ(Default)
According to the power supply specification used in your country Frequency-60HZ-Used in USA, North America
Frequenc y-50HZ-Used in Europe, most Asian Countries.
Date/Time
Set your local date and time.
Date/Time Stamp — On(Default)/Off
On: The recording time will be shown on the video or photo
WiFi— On(default )/Off
Turn On/Off the WiFi of the dash cam.
WiFi Name SSID: M17 _************
Default PASSWORD: 12345678
Fatigue Warning ― Off(Default)/1 hour/2hours/4hours.
Once chose a time duration and turn on this function, the dash cam will make sounds to alert.
Format SD Warning ― Off/15days/30days(Default)/60days
Once chose a time duration and turn on this function, the dash cam will pop up" Please format SD card" to avoid too much locked files to use loop recording.
Format SD Card ― OK /Cancel
Allow to format the inserted memory card, all data will be deleted.
Default Settings
Allow to restore all settings to factory default settings
Firmware Version
To check the current firmware in the dash cam. You'll need this necessary information to check if newer version firmware is available to update. On the computer visit the AZDOME website
(www.azdomevip.com > Support > Download) to check for M17 Firmware.
Playing Video Files Using Your Computer
- Remove the microSD card from the dashcam.
- Insert the card into the microSD card reader and connect it to a computer.
![]()

- You should be able to see drive "D" or "E" other name depending on the pre-installed hard drives. Once you find the added flash drive, double click it, then you will see the file folders- Video / Lock / Photo
Video: The loop recording video files that can be overwritten. Lock: The video file will be locked so it will NOT be deleted by loop recording function.
Photo: The photos
Then simply double click on the video to play them. We recommend VLC Media player. You can get it free at www.videolan.org .


FAQ
Camera does not turn ON?
- Use the Type-C USB Cable and your smart phone's USB charger.
Now plug it into your home's 110V wall outlet. - When you plug it in, the camera should turn ON. If NOT, then press the Power Button Once to see if it turns ON? If it still does NOT turn ON, then remove the memory card.
- Keep the camera plugged in. Now Press the RESET bution
(Located at the botiom) ONCE with a pen's tip or a paper clip. Now the camera should turn ON. If it still doesn't turn ON, then please CONTACT US.
Camera turns ON / OFF frequently automatically?
Please reset your camera. Try updating the firmware again to see if this fixes the issue. If still having issue, please reach out to customer care.
Error/Message" Card Full"
Format card by going into system setings > format > OK > Select Format > 0K. Then Go to Video Mode setings > Loop Recording > Choose either 1-min, 2-min, 3-min. This will allow loop cycle function to be turn ON and it will keep recording over and over.
NOTE: Formating will delete all the data from the memory card.
My oldest video files are missing?
Your AZDOME D ash Cam has Loop Cycle Recording. When it is set to either 1, 2 or 3-mins, it will delete oldest files and record newer files over and over when the memory card is full.
To test again: Set the date and time correctly, then FORMAT the memory card, then do the continuous recording test again and check if all videos are present.
Camera gets HOT?
It is normal for your camera to run slightly hot. Due to it is recording video at high speed, the dash cam may be hot dur ing u sing. (no more than 158°F/70ºC).
Video is fuzzy?
Please make sure the lens of the camera is clean and there is no dirt or grease on the windshield also. If the lens is out of focus, we are extremely sorry in advance. This can be a manufacturing defect. Please send us an email with a screenshot or a sample video so we can get this resolved for you ASAP.
Camera Locks many videos automatically?
Please make sure you change your G-sensor setting. If you choose higher setting then it can trigger even with smaller bump. This setting depends on type of car or truck you are driving and how much vibration your car/truck is creating based on suspensions and road condition.
Camera showing "Memory Error"?
- Please make sure memory card is at least Class 10, U3 and purchased from trusted vendor such as Walmart, target, best buy, Ship & Sold by Amazon etc. (there are many fake cards out there Online, remember if it s cheap, its fake.)
- Now go to camera
![]() s system setings and FORMAT your memory card. (make sure to backup your videos first before formating the memory card.) Atier formating memory card, please press and hold power bution to turn the camera off.
s system setings and FORMAT your memory card. (make sure to backup your videos first before formating the memory card.) Atier formating memory card, please press and hold power bution to turn the camera off.
Now unplug power cable, and re-plug the power cable, camera should now turn ON automatically and start recording. - If you still get the same memory card error message, your camera's memory card assembly has become defective. Please contact us by emailservice@azdomevip.com.
CUSTOMER SERVICE

Defective or damaged item?
Inaccurate description?
Missing parts or accessories?
Performance or quality not adequate?
Wrong item was sent?
service@azdomevip.com
Contact us before returning the item.
We will help you resolve any issue asap.
Response in just 12 hours

Scan this QR code using the WhatsAPP camera to add me on WhatsAPP
 WhatsAPP Contact
Documents / Resources
References
![itunes.apple.com]() AZDOME on the App Store
AZDOME on the App Store![play.google.com]() Google Play
Google Play![www.azdomevip.com]() AZDOME Official Store| The Best Dash Cam for Car with 24/7 guards
AZDOME Official Store| The Best Dash Cam for Car with 24/7 guardsVLC: Official site - Free multimedia solutions for all OS! - VideoLAN
Download manual
Here you can download full pdf version of manual, it may contain additional safety instructions, warranty information, FCC rules, etc.
Advertisement


Need help?
Do you have a question about the M17 and is the answer not in the manual?
Questions and answers