Advertisement
Advertisement
Table of Contents

Related Manuals for Reflecta RPS 10S


Summary of Contents for Reflecta RPS 10S
- Page 1 RPS 10S User’s Manual...
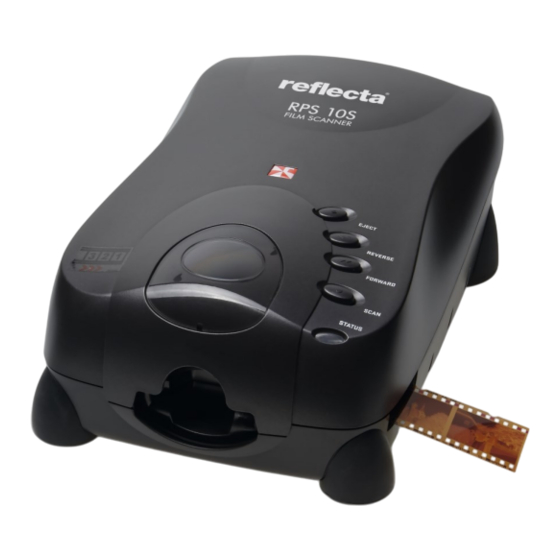
- Page 2 Many thanks for purchasing the reflecta RPS 10S. Please check the package content before getting started. For Quick Installation please refer to Quick Installation Guide. (Ref. Pg. 4) Important! Save the original box, receipt and packing material for future shipping needs.
- Page 3 Safety Instructions Danger from electricity If the appliance or the power supply unit is defective or damaged, do not attempt to open the appliance or repair it yourself. Opening the housing will invalidate the warranty. Contact us or your specialist dealer. The device may only be used in a dry environment. Always switch the appliance off and unplug it when not in use Choking hazard The appliance is not a toy! Keep the appliance, accessories and packaging material away...
- Page 4 INSTALLING – Scan Software CyberViewX Download CyberViewX to operate the scanner from this link: www.downloads.reflecta.de Once downloaded, go to the folder where you saved the download, un-zip the folder and double click the file to install. Follow the onscreen prompts to complete the installation process.
-
Page 5: General Information
GENERAL INFORMATION Inserting Film Strips Supported Film Types: Only film strips of 35 mm film - type 135: • up to 40 frames 24x36 mm (full-format) – minimum length 3 frames • up to 80 frames 18x24 mm (half-format) – minimum length 6 frames Insert the film strip starting with the highest frame number from the left entrance of the scanner’s film feeder. -
Page 6: Inserting Slides
GENERAL INFORMATION Inserting Slides Supported Slide Types: Mounted slides with outer dimensions of 50 x 50 mm. All standard slide mounts with a thickness of up to 3.2 mm. Insert the slide into the slot on the front of the unit, with the glossy side facing up. -
Page 7: How To Scan
HOW TO SCAN STEP 1 – Turn on the scanner Acquire Driver For PC Users: Open CyberView X from Start – All Programs –CyberView X For MAC Users: Open Macintosh Hard drive – Applications –CyberView X.app or from the Apple menu Go –... - Page 8 STEP 2 – Select Film Type Select the film type to be scanned – Positive , Negative or B&W (negatives). STEP 3 – Optional Prescan (To be used if you wish to pre-edit the images before final scan) Select the “Prescan Current Frame“ to Prescan the slide currently loaded into the scanner STEP 4 –...
- Page 9 STEP 5 – Set Scan Preference Set your scan preference by clicking this button.
- Page 10 There are four major parts of the CyberView X user interface: 1. Main Window Area [Fixed Window] 2. Preview Window Area [Fixed Window] 3. Active Frame Setting Area [Floating Window] 4. Thumbnail Panel Area [Floating Window] Main Window Area [Fixed Window] Menu Commands - Scan Prescan - Prescan Current Frame: Pre-scan the existing slide.
- Page 11 HOW TO SCAN ….Continued Setting Scan Preferences Select Scan - Preference - Scan Setting or click the cog wheel icon on the toolbar to enter the Scan Settings area. “Prescan Resolution“ - Default pre-scan resolution, if you select the optional prescan to pre-edit slides before scanning the higher the pre-scan resolution the larger sample you have to work with for pre-editing before the final scan.
- Page 12 CONFIGURING SCAN SETTINGS ….Continued Advanced Settings Magic Touch Is a powerful dust and scratch removal technology that does away with the hassle of learning complex and tedious software techniques. Being hardware-based, it works seamlessly with the scanning process to ensure the best possible results when bringing images into the computer. Dust, scratches and other flaws are intelligently detected and eliminated, restoring the image to its original beauty.
- Page 13 HOW TO SCAN ….Continued STEP 6 – Scan To scan a single image - Choose “Scan Current Frame”. - Scan Current Frame > Scan the current slide or film frame already - Scan Selected to File > Scan the selected frame(s) of a film strip using the “Thumbnail Panel”.
-
Page 14: User Interface
USER INTERFACE I. Main Window Area Menu Commands - Preview... - Page 15 Main Scan Settings Prescan resolution: the ‘500 dpi’ setting generates a larger preview image, when the display is in full screen mode. Directory: Specify a file path for saving the scans. Base file name: Specify a file name to be added to each scan to be added to each scan.
-
Page 16: Advanced Settings
Advanced Settings Auto Exposure sets the exposure of the scan to a medium value, taking into account shadows and highlights to a medium value. Auto Color ensures balanced coloring, eliminates colour casts and reduces age-related fading. Auto Contrast automatically adjusts the setting for the white and black points. Does not produce the desired results with all subjects, e.g. - Page 17 Default Scanning Area Manual crop area setting: This allows you to configure a smaller than standard 35mm scan area. It cannot be set outside the 36.5 x 24.3 mm maximum scanning area. Returns you to the main software interface and saves your settings Reset: Restores all settings back to the factory default.
- Page 18 Image Adjustment – These tools are ONLY available in PRESCAN MODE ONLY 1. Variations: Generates different views of image with options to make changes to highlights, mid-tones, etc.
- Page 19 2. Color Balance To adjust the brightness, contrast, saturation, and color (CMY or RGB) of the image. Comparisons between before and after adjusted images are shown for reference. Example: If a previewed image appears too dark, use the “Brightness” slider in the “Color Balance” window to adjust the image by selecting the slider in the center and moving it to the right.
- Page 20 3. Curves and Levels Adjust image settings by moving Curve and Levels settings. Comparison between before and after adjustment is displayed for reference. Example: When the previewed image appears to be too dark, adjustments with the Input slider in the Curves and Levels window can be made to correct the image.
- Page 21 Menu Commands – Windows 1. Exposure Setting: To adjust the exposure time (R, G, B) press ”Reset” to restore to the default setting. Menu Commands – Help About: Displays system information (including operation system, CPU), product information (including product name, model name, hardware version, software version, device information including interface and optical resolution).
- Page 22 Function Bar Diagram In order to optimize scanned image quality, please select your film type and brand from the toolbar: Negative, Positive (also known as Slide film) Black and White NOTE: This model can only scan negatives that have been cut into individual frames mounted into slide mounts II.
- Page 23 Preview Window Preview the image you pre-scan, you can select the measurement unit “in“-“cm“- “px“ by clicking the upper-left corner. Status Line In the lower left hand corner, the color level (RGB: red, green, blue) Displays the RGB (Red, Green, Blue) values in the image at the current pointer location [ex: I].
- Page 24 Thumbnail Panel Area [Floating Windows] Images only appear here in Prescan mode ONLY, scan to file goes directly to the hard drive, this window remains blank as does the main CyberView window. Displays thumbnail view of pre-scanned images. By default all pre-scanned images are selected.
- Page 25 SCAN DPI SETTINGS - Additional Information Image sizes based on 36 x 24 mm area (your file sizes will differ based on cropping area) Color Color File Size Color Color File Size Scan Resolution Pixel Dimensions Depth Mode TIFF (no compression) Depth Mode TIFF (no compression)
-
Page 26: Technical Support
Transporting the device For safety purposes, follow the procedure below before transporting the scanner (i.e. before moving the scanner from one location to another or packing and shipping the unit). reflecta GmbH Merkurstrasse 8 72184 Eutingen / Germany e-mail: service@reflecta.de...
Need help?
Do you have a question about the RPS 10S and is the answer not in the manual?
Questions and answers