Advertisement
Table of Contents
Advertisement
Table of Contents

Subscribe to Our Youtube Channel
Related Manuals for Reflecta x66-Scan


Summary of Contents for Reflecta x66-Scan
- Page 1 Multi-Format Scanner User‘s Manual...
-
Page 2: Table Of Contents
User‘s Manual For correct usage please read these instructions carefully and keep it a safe place for future reference! Contents 1. Preface..................1 2. Safety Precautions..............1 3. Package contents............... 2 4. Description of parts..............3 Product Indicator ..............4 6. 120 holder loading method............5 127 holder loading method ............. -
Page 3: Preface
1. Preface Thank you for buying this product! Please read this instruction carefully before using this product. 2. Safety Precautions • Do not attempt to disassemble or modify any part of the machine. • Do not touch the inside of the scanner after the product falls or suffers other damage to avoid injury . -
Page 4: Package Contents
3: Package contents • Film scanner • 120 Film Holder (for 120 film, positive \ negative \ B&W) • 127 Film Holder (for 127 slides, 4x4 cm) • Negative Film Holder (for 135 film strips, 24x36 mm frames) • Positive Slide Holder (for mounted slides, 5x5 cm) •... -
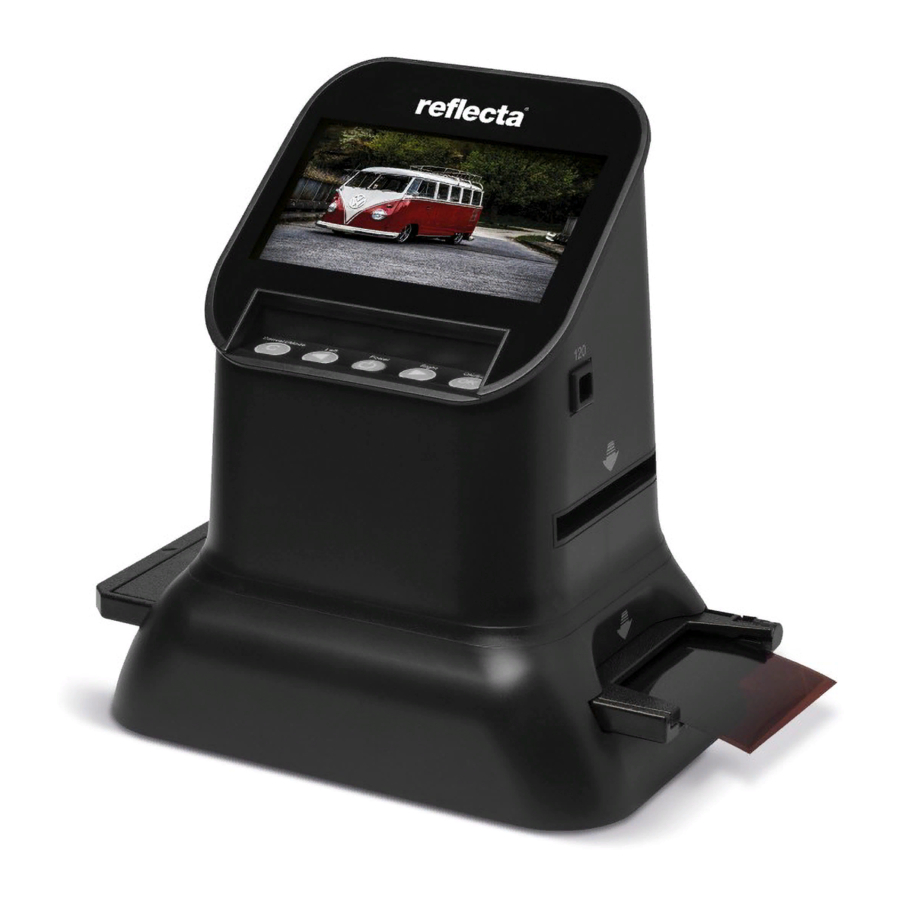
Page 5: Description Of Parts
4. Description of parts 120 Film Holder 127 Film Holder Film Scanner Positive Slide Holder USB cable X66-Scan Multi-Format Scanner Negative Film Holder User Manual Adapter User Manual Cleaning brush • When Using the cleaning brush to clean the backlight, please insert... -
Page 6: Product Indicator
5. Product Indicator Display screen Mode key Enter key Left key Focus button Power key Right key... -
Page 7: Holder Loading Method
6. 120 Holder loading method a. Hold up the film toward the light. Face the glossy side of the film to yourself. b. Take 120 holder out. c. Take the 120 holder with the label facing up and insert the film strip from the right side. Center the image you want in the window. -
Page 8: Holder Loading Method
127 older oading method a. Take the 127 film holder with the markings facing up. b.Take 120 film holder and open it, put 127 film holder into 120 film holder and close 120 film holder c.Take the negative and insert it from the right side into the closed 120 film holder d. -
Page 9: Positive Slide Holder
Positive Slide Holder Take mounted slides with the glossy side up. Open the slide holder at the marked spot on the top. With the slide holder laid open place the slide into recessed area in the holder - the slide should fit perfectly. -
Page 10: Negative Film Holder
Negative Film Holder Take the film strip with the glossy side showing up. Open the negative holder at the marked spot on the top. With the negative holder laid open place the negative into holder so the notches line up with the notches on the holder. -
Page 11: Operation Guide
10. Operation Guide 1. Introduction of Menu Capture Film Type 1 Language mode 4 Playback mode 2 USB mode 5 Film Type 3 Capture mode 6 Format 7 Resolution 2. Capture Picture 2.1 Before scanning please make sure the inner backlight panel is clean. - Page 12 2.2 In main menu mode press OK/ENTER enter Film Type mode, then press OK/ENTER to chose negative, slide or B&W.Then press "OK/Enter" to enter negative, slide or B&W submenus. Film Type Negative Film ENTER 1. When the focus button is pressed 120, press OK/Enter to enter 127/120 negative, press ◄...
- Page 13 2. When the focus button is pressed 135, press OK/Enter to enter size 126/135 negative, press ◄ or ►to select the required of the frame. 126KPK 126KP 126KPK 126KPK...
- Page 14 Or in main menu, press ◄ or ►, until Capture mode, then press OK/ENTER, enter the Film format selected in Film Type Capture OK/Enter Convert/Mode OK/Enter 2.3 Before pressing to capture picture, you can press OK button to set Exposure. ENTER Press ENTER to set exposure compensation or sharpness (SHP).
- Page 15 3.How to playback captured pictures In main menu, press ◄ or ► until playback mode, press OK/ENTER to the picture auto-playback mode, press again to stop auto playback and you can view captured pictures manually, you can press ◄ or ► to view. Playback ENTER press OK/ENTER again enter picture editing mode, you can rotate, delete,...
- Page 16 1 Current picture rotate 90 digrees clockwise 2 Current picture rotate 90 digrees counter clockwise 3 Deleting the current picture from memory card 4 Exit the submenu edit mode, back 5 Saving the current edited picture 6 Exit the submenu edit mode, back to scan 4.
- Page 17 Format the media? Format is successful! Note: After using this function, all the information on the SD card will be deleted ! 6. Connect to computer Under main menu mode, press ◄ or ► until USB MSDC, press OK/ENTER after successfull connecting to computer, you can transfer the captured pictures.
- Page 18 7. Resolution Under main menu mode, press ◄ or ► until Resolution, press OK/Enter to enter into Resolution choosing mode, you can choose 14M or 22M (M=Megapixels) Resolution...
-
Page 19: Product Specification
11: Product Specification Function : Film scanner Interface: USB 2.0 Display: Colour 4.3" TFT LCD Exposure Control : Automatic / Manual (-2.0 EV~ +2.0EV) White Balance : Automatic Resolution : Maximum 22 Megapixels Film types : 135 / 126 / 127 / 120 File format : JPEG HDMI out:... -
Page 20: Declaration
12: Declaration Please Note: In the course of continuous product improvement, specifications and appearance of the device can change without prior notice. reflecta GmbH Merkurstraße 8 72184 Eutingen / Germany E-Mail: service@reflecta.de www.reflecta.de...
Need help?
Do you have a question about the x66-Scan and is the answer not in the manual?
Questions and answers