Table of Contents
Advertisement
Advertisement
Table of Contents

Related Manuals for Reflecta DigitDia 6000


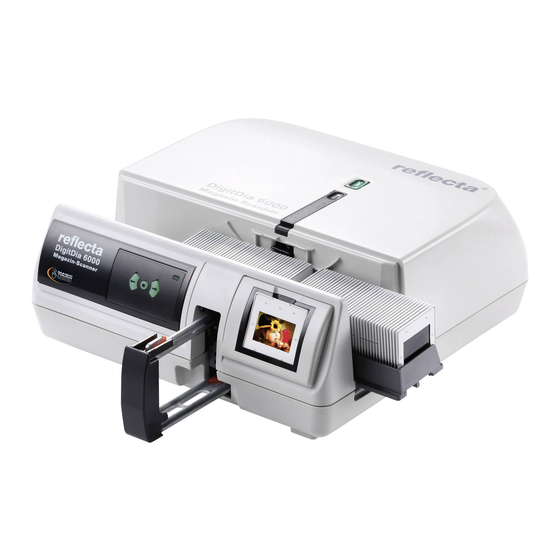
Summary of Contents for Reflecta DigitDia 6000
- Page 1 Manual CyberView X5...
- Page 2 FEDERAL COMMUNICATIONS COMMISSION (FCC) STATEMENT This Equipment has been tested and found to comply with the limits for a class B digital device, pursuant to Part 15 of the FCC rules. These limits are designed to provide reasonable protection against harmful interference in a residential installation.
-
Page 3: Table Of Contents
TABLE OF CONTENTS Getting Started Quick Installation Guide (QIG) Installing Software and Driver Installing Hardware Loading the slides into the Magazine Loading the Magazine into the Scanner Additional Features One Button Scan How to Scan Slides STEP 1 - Acquire Driver STEP 2- Select Film Type STEP 3 - Optional Prescan STEP 4 - Set Scan Settings... -
Page 4: Getting Started
GETTING STARTED Check the package content before getting started. For Quick Installation please refer to Quick Installation Guide. (Ref. Pg. 6) Important! Save the original box, receipt and packing material for future shipping needs. Package Contents Slide Scanner. Magazine. Power Adapter USB Cable Scansoftware CyberView Application Software... - Page 5 Operating Ambient Temperature Range 50º to 104ºF (10º to 40ºC) Note: Do not turn on the scanner unless it is within this temperature range. If the scanner has been stored or transported outside of this temperature range then wait till it has acclimatized before turning it on.
-
Page 6: Installing Software And Driver
INSTALLING SOFTWARE AND DRIVER for PC (Windows) User Windows Systems installation during driver installation a warning dialogue box may appear, if this is the case please select “install this driver anyway.” Notice: 1. In “Found New Hardware Wizard” window, select “Search automatically or Browse computer for driver software. -
Page 7: Installing Hardware
INSTALLING SOFTWARE AND DRIVER Before Installing the Scanner Driver... If you choose to use the provided application for image editing, install the applica- tion software (ex: Adobe® Photoshop® Elements) by inserting the application CD into the computer’s CD/DVD drive. Follow the instructions that will be displayed in a window that opens automatically. -
Page 8: Loading The Slides Into The Magazine
Loading slide(s) into the magazine General Recommendations: y) especially for cardboard frames and framed slides up to 2-3.2mm inch thickness. Braun Paximat S (grey) for framed slides up to 2 mm Paximat Magazine (Black tray) for framed slides up to 2mm thickness. CS Magazine for CS/CS2-framed slides. - Page 9 Loading slide(s) into the magazine CS Magazine a. Locate the numbering sequence text on the CS slide magazine indicating the slide order. The numbers should be facing up and starting from the left. b. Hold the slide right side up, facing forward so the image is NOT reversed. Rotate the slide as illustrated and Insert each slide, one at a time, into the magazine.
- Page 10 Loading slide(s) into the magazine LKM Magazine a. Locate the numbering sequence text on the front of the LKM slide magazine indicating the slide order. The numbers should be facing forward and starting from the right b. Hold the slide right side up, facing forward so the image is NOT re- versed.
- Page 11 Fi ng orange Adapter 1. Push the adapter from the front onto the transport arm. Pay a en on of correct orienta on of the adapter.
- Page 12 1. When using CS, LKM and Paximat Slide Tray you have to move the adapter back. Therefore gently press down the adapter… 4. … and push it to the end posi on 5. When using UNIVERSAL Slide Magazines you have to move the adapter to the front of the transport arm.
- Page 13 oad the magazine into the scanner (Continued) Compact Magazine (embossed letters facing up and the white stripe near the front panel of the scanner). CS Magazine Slide order numbers printed on magazine facing towards the back of the scanner. Numbering Paximat Magazine ( white and grey) Slide order numbers printed on top of magazine on the right hand side towards the front of the scanner.
- Page 14 LKM Magazine Turn the slide tray around so the numbers face the front of the device, before inserting Numbering Universal Magazine NOTE: Use only Universal Magazines with the DIN 108 label. Other magazines may result in problems and VOIDing the warranty. Pull out the slide transport arm fully.
-
Page 15: Additional Features
Additional features Manual Control Panel a. You can advance or reverse the slide by pressing the navigation button and scan manually with the scan button to enable one button scan function. r Panel Please Note: When installing your new scanner onto a Windows system that already has an- other USB Flatbed scanner or All-in-one Scan/Copier/Printer device installed, it may be necessary for you to disconnect the other scanner from the USB port for the Film scanner to work properly, One Button Scan... - Page 16 d. Single Slide Scanning Load the empty magazine into the tunnel FIRST until it touches the slide transport arm completely. Slide the magazine forward to be sure that the rst slot of the magazine. Press the eject button [I] to make the slide holder open exposing the loaded slide.
-
Page 17: How To Scan Slides
HOW TO SCAN SLIDES – (For PC User) Open CyberView from Start – All Programs –CyberView (For MAC User) Open Macintosh Hard drive – Applications –CyberView STEP 2 – Select Film Type lm type to be scanned - Positive, Negative or B&W (Black and White). STEP 3 –... -
Page 18: Step 4 - Set Scan Settings
STEP 4 – Set Scan Settings a. Resolution The default scanning resolution is 1000dpi, additional resolution options are listed below. Notice: Higher scanning resolutions result in greater scanning time and hardisk space requirements. b. Color Depth The Film Scanner color depth is 48 bit true color The scanning software has the capability of selecting 8 bit color mode or 16 bit color mode when scanning, This will produce 24 or 48 bit color images, 8 bits or 16 bits per Red, Green and Blue color channels... -
Page 19: Step 5 - Set Scan Preferences
STEP 5 – Set Scan Preferences Select Scan - Preference - Film Type - Scan Setting “Prescan Resolution“ - Default pre-scan resolution. “Using default real scan resolution“ - Enables default scan resolution setting. “Color Depth“ – Default color depth while scanning. “Scan Mode“... - Page 20 4. Options - Use Film Index: Use the number assigned to the slide based on it’s position in the cartridge. c start number le type , “TIF” or “JPG”. (TIF uncompressed or JPG Compressed- ers the least amount of compres- sion Advanced Setting nd the correct exposure to get the widest...
- Page 21 Default Scanning Area set” setting to move the image position of slide. Magic Touch / Auto Color Enable / disable Magic Touch and Auto Color adjustment to scans. Magic Touch is a powerful dust and scratch removal technology that does away with the hassle of learning complex and tedious software techniques.
-
Page 22: Step 6 - Scan
STEP 6 – Scan To Scan a Single slide - Choose “Scan Current Frame” to scan the slide loaded into the scanner or “Multi-Scan…” to input the number of slides to be scanned based on their location in the magazine. 1. -
Page 23: User Interface
USER INTERFACE... - Page 24 Menu Commands - Preview 1. Zoom In: Magnify image. 2. Zoom Out: Reduce image. 3. Rotate 90 Left: Turn the image 90° counter clockwise. 4. Rotate 90 Right: Turn the image 90° clockwise. 5. Flip Horizontal: Flip the image horizontally. 6.
- Page 25 2. Color Balance To adjust the brightness, contrast, saturation, and color (CMY or RGB) of the image. Comparisons between before and after adjusted images are shown for reference. Example: If a previewed image appears too dark, use the “Brightness” slider in the Color Balance”...
- Page 26 3. Curves and Levels Adjust image settings by moving Curve and Levels settings. Comparison between before and after adjustment is display reference. Example: When the previewed image appears to be too dark, adjustments with the Input slider in the Curves and Levels window can be made to correct the im- age.
- Page 27 Menu Commands - Windows Exposure Setting: To adjust the exposure time (R, G, B) press ”Reset” to restore to the default setting. Menu Commands - Help Update: About: Displays system information (including operation system, CPU), product rmware ver- sion, software version, device information including interface and optical resolution).
-
Page 28: Preview Window Area
Function Bar Diagram lm type and brand from the toolbar: Negative Positive (also known as Slide) Black and White Prescan: lm, press drop down for more options. Scan: lm, press drop down button for more options. Image Adjustment : Press drop down button for more options. Backward One Frame: lm back one frame. - Page 29 Function Bar Diagram lm type and brand from the toolbar: Negative Positive (also known as Slide) Black and White Prescan: lm, press drop down for more options. Scan: lm, press drop down button for more options. Image Adjustment : Press drop down button for more options. Backward One Frame: lm back one frame.
-
Page 30: Active Frame Setting Area
III. Active Frame Setting Area [Floating Windows] adjustments. Normal mode [ex: I] to input the basic parameter to scan (including scan lm size, color depth). Advanced mode [ex: II]to input the parameter of scan and output (including scan resolution, size, color depth and output resolution, size, scan mode). The “Active Frame Setting”... -
Page 31: Thumbnail Panel Area
IV. Thumbnail Panel Area [Floating Windows] le goes directly to the hard drive, this window remains blank as does the main Cyberview window. Displays thumbnail view of pre-scanned images. By default all pre-scanned images are selected. Note the small check mark below each image. When scanning more than 6 frames (6 at a time are viewable in the thumbnail panel) you may scroll to view more by clicking on the right arrow button. -
Page 32: Technical Support
TECHNICAL SUPPORT CyberView...
Need help?
Do you have a question about the DigitDia 6000 and is the answer not in the manual?
Questions and answers