Advertisement
Quick Links
Advertisement

Related Manuals for Walker Edison Twin over Twin Solid Wood Bunk Bed BWTOTMS


Summary of Contents for Walker Edison Twin over Twin Solid Wood Bunk Bed BWTOTMS
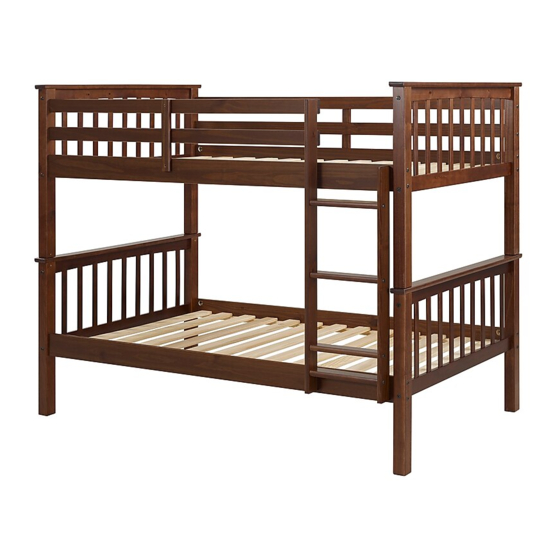
- Page 1 Twin over Twin Solid Wood Bunk Bed BWTOTMS LOT: AAYYWW-XXX...
- Page 2 Set up a clean and soft workplace to avoid damage during assembly. You can use the box and internal protections as cover. It also helps to double-check if you have got all the pieces and parts before diving in assembly. Minutes Tools Needed Grab a...
- Page 3 Instruction Manual Follow the information on the warning labels found on the bunk bed and on the packaging. Do not remove the warning label from the bed. e r t h t i 74 - 75 in. L x 37½ - 38½ in. W x 7½ in. e r t 74 - 75 in.
- Page 4 Model BWTOTMSGY LOT: 000/2024 Distribution By: Date: 09/2024 Walker Edison Furniture Company Rev. 08/2024-V1 COD. 1553 W 9000 S, West Jordan, UT 84088 United States CANFER compliant / conforme au CANFER TSCA Title VI compliant / conforme au titre VI de la TSCA TSCA Title VI certied / certié...
-
Page 5: Hardware List
Hardware List Part Size Name Quantity 1/4”x 0mm Bolt 7 10 x 0mm Bolt 7 5 x 0mm Bolt 10 10 x 0mm Wooden Dowel 10 4 x 0mm Wooden Dowel Screw 4 5 x 0mm Screw 4 3 x 0mm Hex Key The hardware quantities listed above are required for proper assembly. - Page 6 Assembly Options Options A-B Options A - Twin over Twin Bunk Bed Options B - Conversion into Two Single Twin Beds...
- Page 7 Step 1 Let’s start! Insert ooden owels (E) into Front ide ail (9), Back ide ail (10), Back Guard Rail (12), Front Guard Rail (14) and Step (18).
- Page 8 Step 2 Insert Wooden dowels (E) into Headboard (6) Headboard ( With Label) (20). Dica To keep your product looking its best andscratch-free, try assembling it on a soft surface like carpet or a blanket. This helps prevent any accidental scratches and keeps your furniture in top shape!
- Page 9 Step 3 the lower headboard ecure eadboard (6) using Screw (B) and Hex Key (K). Insert Bottom Rail (7) in the headboard and crew (G)
- Page 10 Step 4 the pper eadboard ecure (3) in the eadboard (6) using (B) and Hex Key (K). Repeat to secure (4). Insert the Upper Rail (8) in the headboard and crew (G)
- Page 11 Step 5 Secure eadboard (With Label)(20) using Screw (B) and Hex Key (K). Insert the Upper Rail (8) in the headboard and crew...
- Page 12 Step 6 Secure Back ide ail (10) and Front ide ail (9) to (2) and (1) using Screw (A), Barrel ut (L), Screw (B) and Hex Key (K).
- Page 13 Step 7 Repeat th step to the other lower headboard.
- Page 14 Step 8 Secure Slat Set (19) using Screws (H) and a phillips screwdriver. Presure can be applied (9 and 10) to 2" ensure that (19) fit evenly between INSTALL SLAT WITH SPACER TAPE FACING UP. 2"...
- Page 15 Step 9 Secure eadboard Back ide ail (10), Back uard ail (12) and Front ide rail (9) using Screw (A), Barrel nut (L), Screw (B) and Hex Key (K).
- Page 16 Step 10 Repeat th step to assemble (With Label)(20).
- Page 17 Step 11 Secure Slat Set (19) using Screws (H) and a phillips head screwdriver. Presure can be applied (9 and 10) to 2" ensure that (19) fit evenly between INSTALL SLAT KIT WITH SPACER FACING UP 2"...
- Page 18 Step 12 op unk ottom unk using ood owel (D) and crew (H)
- Page 19 Step 13 adder. Secure Step (18) Ladder eft ide (26) using Screw (C) and Hex Key (K).
- Page 20 Step 14 Secure adder to ront ide ail (9) using Screw (C) and Hex Key (K).
- Page 21 Step 15 Secure ront uard ail (14) to (3) using Screw (B) and Hex Key (K). secure adder eft ide (26) using Screw (C) and Hex Key (K).
- Page 22 Step 16 Support Brace (15) to Back Guard Rail (12) and to Back Side Rail (10) using Screw (H). secure Front Guard Rail (14) Back Side Rail (9) using Screw (H). 37" 937mm 29" 735mm...
- Page 23 Step 17 Options B - Conversion intoTwo Single Twin Beds...
- Page 24 Step 18 Loosen the appropriate hardware and remove the ladder from the bunk bed assembly.
- Page 25 Step 19 Loosen the appropriate hardware.
- Page 26 Step 20 Carefully lift the upper bunk off of the lower bunk.
- Page 27 Step 21 Loosen the appropriate hardware of the upper bunk so that the guardrails and leg assemblies are no longer connected to the bed assembly.
- Page 28 Step 22 Secure Back ide ail (10) and Front ide ail (9) (3) and to (4) using Screw (A), Barrel ut (L), Screw (B) and Hex Key (K). Repeat this step to the other ( ). Options B - Final Assembly...
- Page 29 You did it! Enjoy your new Bunk Bed! 200 lbs 90 kg 200 lbs 90 kg 200 lbs 90 kg 200 lbs 90 kg Congratulations on your new piece of furniture! We would love to hear about it and see it. Please leave us a review or post a picture with #mywalkeredisonhome...
- Page 31 Lit Superposé Simple sur Simple en Bois Massif Litera Doble sobre dos Camas Individuales de Madera Maciza BWTOTMS LOT: AAYYWW-XXX Pour usage résidentiel seulement Visite notre site Web pour obtenir les instructions les plus récentes, des conseils d'assemblage, signaler des dommages ou commander des pièces.
- Page 32 électriques, règle-les sur le mode le plus lent. Fais attention à toi ! Les outils électriques peuvent provoquer des fissures ou endommager les meubles, mais aussi les autres composants s’ils sont mal utilisés. Les dommages causés par un outil électrique ne sont pas couverts par la garantie Walker Edison. Utilice las herramientas eléctricas con cuidado.
-
Page 33: Manuel D'instructions
L'utilisation de matelas gonables ou d'eau est interdite. Des pièces de rechange, y compris les barres de protection supplémentaires, peuvent être obtenues auprès de n'importe quel revendeur Walker Edison Furniture Company ou en nous contactant en ligne sur le site www.walkeredison.com. - Page 34 Model BWTOTMSGY LOT: 000/2024 Distribution By: Date: 09/2024 Walker Edison Furniture Company Rev. 08/2024-V1 COD. 1553 W 9000 S, West Jordan, CANFER compliant / conforme au CANFER UT 84088 United States TSCA Title VI compliant / conforme au titre VI de la TSCA TSCA Title VI certied / certié...
- Page 35 Liste de composants / Lista de hardware Partie Taille Quantité Parte Tamaño Nombre Cantidad 1/4”x 0mm 7 10 x 0mm 7 5 x 0mm Cheville 10 10 x 0mm Espiga Cheville 10 4 x 0mm Espiga 4 5 x 0mm Tornillo 4 3 x 0mm Tornillo...
- Page 36 Options A-B Options d'assemblage / Opciones de montaje Opciones A-B Options A - Lits superposés Opciones A - Litera Options B - eux lits simple Opción B - os camas individuales...
- Page 37 Étape / Paso 1 (FR) Commençons! Insérez les hevilles (E) dans les pièces avant (9), arrière (10), de protection arrière (12), de protection avant (14) et (18). (ESP) ¡ ! Inserte las (E) en elantero (9), trasero (10), protector trasero (12), protector delantero (14) y Escalón (18).
- Page 38 Étape / Paso 2 (FR) Insérez les (E) dans la ête de lit (6) et la ête de lit ( ) (20). (ESP) Inserte las (E) en la abecera (6) abecera ( ) (20). Dica Para mantener su producto con el mejor aspecto y sin arañazos, Pour que ton produit conserve pruebe a montarlo sobre una...
- Page 39 Étape / Paso 3 (FR) Assemblage de la ête de lit inférieure. Fixez le dans la ête de lit (6) à l'aide de (B) et de la clé hexagonale (K). (ESP)
- Page 40 Étape / Paso 4 (FR) Insérez le ied avant gauche (3), le ied arrière gauche (4) dans la ête de lit (6) et fixez-le avec des oulons (B) et une clé Allen (K). Insérez le supérieur (8) dans la tête de lit et fixez la is (G). (ESP) Inserte el ie delantero izquierdo (3) y el ie trasero izquierdo (4) en la abecera (6) y fíjelos con los ernos (B) y la llave Allen (K).
- Page 41 Étape / Paso 6 (FR) (ESP) Étape / Paso 7 (FR) Répétez cette étape pour assembler l’autre tête de lit inférieure. (ESP) Repita este paso para ensamblar el otro cabecero inferior.
- Page 42 Étape / Paso 8 (FR) Fixez l'ensemble de attes (19) à l'aide de is (H) et d'untournevis cruciforme. (ESP) Fije el conjunto de istones (19) con ornillos (H) y un destornillador Phillips. (FR) Une pression peut être appliquéesur (9 et 10) pour garantir que 2"...
- Page 43 Étape / Paso 9 (FR) Fixez le arrière (10) à la tête de lit supérieure, le de protection arrière (12) au (4) et le avant (9) au (3) à l'aide de l A), de l'écrou cylindrique (L), de l (B) et de la clé hexagonale (K).
- Page 44 Étape / Paso 11 2" 2"...
- Page 45 Étape / Paso 12 (FR) Insérez la supérieure dans la inférieure à l'aide d'une cheville en bois (D) et d'une is (H). (ESP) Inserte la litera superior en la litera inferior usando la (D) y fije el ornillo (H). Étape / Paso 13 (FR) Montage de l'échelle.
- Page 46 Étape / Paso 14 (FR) Fixez l'échelle au avant (9) à l'aide de la (C) et de la clé hexagonale (K). (ESP) Asegure la escalera al frontal (9) usando el ornillo (C) y la llave hexagonal (K). Étape / Paso 15 (FR) Fixez-le au avant (14) et au...
- Page 47 Étape / Paso 16 (FR) Fixez-le au upport (15), au arrière (12) et au arrière (10) à l'aide de la is (H). Respectez les dimensions indiquées! Répétez l'opération pour fixer le avant (14) et le (9) à l'aide de la vis (H). Respectez les dimensions indiquées! (ESP) Fije al oporte 15), al protector trasero (12) y al...
- Page 48 Étape / Paso 17 (FR) Options B - Conversion en deux lits simples (ESP) Opción B - Conversión en dos camas individuales...
- Page 49 Étape / Paso 18 (FR) Desserrez le matériel approprié et retirez l'échelle de l'ensembledu lit superposé. (ESP) Afloje los herrajes correspondientes y retire la escalera del conjunto de la litera.
- Page 50 Étape / Paso 19 (FR) Desserrez le matériel approprié. (ESP) Afloje el hardware apropiado.
- Page 51 Étape / Paso 20 (FR) Soulevez délicatement la couchette supérieure de la couchette inférieure. (ESP) Levante con cuidado la litera superior de la litera inferior.
- Page 52 Étape / Paso 21 (FR) Desserrez le matériel approprié de la couchette supérieure afin que lesgarde-corps et les assemblages de pieds ne soient plus connectés à l'assemblage dulit. (ESP) Afloje los herrajes correspondientes de la litera superior de modo que las barandillas y los conjuntos de patas ya no estén conectados al conjunto de la cama.
- Page 53 Étape / Paso 22 (FR) Fixez le arrière (10) et le avant (9) à la (3) et au (4) à l'aide de la (A), de l'écrou cylindrique (L), de la (B) et de la clé hexagonale (K). Répétez cette étape pour assembler l'autre tête de lit ( (ESP) Fije el...
- Page 54 Vous l'avez fait ! Profitez de votre nouveau lit superposé ! ¡Lo lograste! ¡Disfruta de tu nueva litera! 200 lbs 90 kg 200 lbs 90 kg Vous l'avez fait ! Profitez de votre nouveau lit superposé ! Vous l'avez fait ! Profitez de vos nouveaux lits ! 200 lbs 90 kg 200 lbs...
- Page 55 Assembler des meubles peut parfois être compliqué. Notre équipe de service client, située dans l'Utah, est là pour obtenir des informations sur les produits, aider pour l'assemblage d'un produit ou pour tout autre problème de support client. Appelle-nous Envoie-nous les e-mails à Visite notre site accueil au client à...
Need help?
Do you have a question about the Twin over Twin Solid Wood Bunk Bed BWTOTMS and is the answer not in the manual?
Questions and answers