Gozney Tread, GOZ-1893 Manual
- Technical manual (86 pages) ,
- Technical manual (310 pages)
Advertisement
Introduction

If you smell gas:
Shut gas off to the appliance.
Extinguish any open flame.
If odour continues, keep away from the appliance and immediately call your fire department.
Do not store or use gasoline or other flammable liquids or vapors in the vicinity of this or any other appliance.
An LPG cylinder not connected for use shall not be stored in the vicinity of this or any other appliance.
This instruction manual contains important information necessary for the proper assembly and safe use of the appliance.
Read and follow all warnings and instructions before assembling and using the appliance. Keep this manual for future reference.
Never operate this appliance in enclosed areas. Failure to follow these instructions could result in fire or explosion which could cause property damage, personal injury or death.
Do not leave the appliance unattended.
Never operate this appliance within 1.5m of any structure, combustible material or other gas cylinder.
Never operate this appliance within 7.5m of any flammable liquid.
This appliance is not intended for commercial use
Do not fill the cooking vessel beyond the limitation of the door dimensions.
Heated liquids remain at scalding temperatures long after cooking process. Never touch cooking appliance until liquids have cooled to 45oC or less.
If a fire should occur, keep away from the appliance and immediately call your fire department. Do not attempt to extinguish an oil or a grease fire with water.
This appliance must be kept away from flammable materials during use.
Use outdoors only.
Do not modify the appliance.
Always replace the quick-connect cover when the gas hose is disconnected.
GENERAL ADVICE
Tread gets extremely hot and should not be used by children. Do not allow children near the device during or after operation. Tread can stay hot for a few hours after use.
Do not use under any apartment or balcony or deck.
This appliance is for cooking purposes only. It must not be used for other purposes, for example heating a room.
Tread is to be used outdoors only. Tread shall not be used in a building, garage, or any other enclosed area.
Tread shall not be used on a boat or within a recreational vehicle or any other form of confined area.
Assembly and operation of the oven should be carried out by a competent person.
The use of alcohol, prescription or non-prescription drugs may impair the consumers ability to assemble or operate the device safely.
Do not use any plastic or glass utensils within Tread.
Use heat-resistant gloves when operating the oven.
Do not insert items into Tread that are bigger than the dimensions of the oven mouth.
Do not over fill Tread or cover the burner.
Do not move Tread whilst in operation. Allow Tread to cool to 115°F (45°C) before moving or storing.
Do not operate Tread in strong winds. Winds can extinguish the flame and also cause irregular air pressure resulting in the flame and heat coming out the back of Tread. Use a wind break in open areas but keeping over 45cm away from the device.
Do not pour water on to the cooking stone as this will likely crack it and could be dangerous because of oil and grease.
Do not wear loose flammable clothing or sleeves near Tread.
Parts sealed by the manufacturer or the agent shall not be manipulated by the user.
Leave oven to cool for at least 20 minutes before attempting to move or touch the oven.
For replacement parts "/contact us at enquiries@gozney.com / inquiries@ gozney.com
Product Overview - What's in the Box


GAS SPECIFICATION
| Gozney Group Ltd, Bobbys, Third floor, The Square, 2-12 Commercial Rd, Bournemouth BH2 5LP | |
| Appliance Name: | Gozney Tread |
| Model/Type No.: | GOZ - 1893 Gozney |
| Trade name: | Gozney |
LPG Configuration
| Injector Size (mm) | 0.98 |
| BTU / Hour | 12,500 |
| Gas Type | Propane |
| Gas Pressure | 11 "W.C. |
Read the instructions before using the appliance.

accessible parts may be very hot. Keep young children away.
Do not use spirit or petrol for lighting or re-lighting!
Use outdoors only.
SAFETY CONSIDERATIONS
This appliance must be installed on a secure level base prior to use.
This appliance will become very hot, do not move it during operation. Allow to cool to 115°F (45°C) before moving or storing
Keep away from children and pets.
This appliance is for outdoor use only.
The Tread unit and the burner must always be well ventilated.
Do not move or leave Tread unattended whilst in use.
Do not operate Tread in strong winds. Wind can extinguish flame.
Do not burn wood in this oven.
Do not wear flammable loose garments or sleeves.
Do not cover oven mouth when there is an active flame, this will cause damage to the oven.
This oven is not intended to be installed in or on recreational vehicles.
Product may contain sharp edges! Please use caution.
NEVER cover slots, holes, or passages in the oven bottom or cover an entire dock with material such as aluminium foil. Doing so blocks air flow through the oven and may cause carbon monoxide poisoning. Aluminium foil linings may trap heat causing a fire hazard
In the event of rain, snow, hail, sleet, or other forms of precipitation while cooking with oil or grease, cover the cooking vessel immediately and turn off the appliance burners and gas supply. Do not attempt to move the appliance or cooking vessel. Do not place empty cooking vessel on the appliance while in operation.
Contact your local municipality for any building codes applicable to the use, installation and operation of outdoor barbecue appliances.
FIRE
Most fires are caused by a build up of grease, or (if using gas) an improper gas connection. In the event of a fire ensure all people and pets are kept as far away as possible.
Use a fire extinguisher if possible, but if water is the only fire retardant available, thoroughly soak the area around the appliance. When spraying water on Tread itself, do not use a strong jet of water, as this may cause splashing of burning grease, resulting in a further spreading of the fire.
When cooking with oil or grease, have a type BC or ABC fire extinguisher readily available. In the event of an oil or grease fire, do not attempt to extinguish with water. Immediately call the fire department. A Type BC or ABC fire extinguisher can, in some circumstances, contain the fire.
The installation must conform with local codes or, in the absence of local codes, with the National Fuel Gas Code, ANSI Z223.1/NFPA 54, Storage and Handling of Liquefied Petroleum Gases, ANSI/ NFPA 58; or Natural Gas and Propane Installation Code, CSA B149.1; Propane
Storage and Handling, CSA B149.2 CARBON MONOXIDE
Carbon Monoxide is a highly poisonous gas which can be produced when the device isn't receiving enough ventilation.
We therefore recommend using gas fuels in a well ventilated area away from direct wind and to never cover the oven mouth when there is an open flame present.
It is difficult to know if your device is producing Carbon Monoxide as it is an odourless and colourless gas.
It can, however cause these symptoms when you are exposed to it:
- Tightness across the forehead
- Headache
- Weakness
- Dizziness
- Nausea
- Vomiting
- Coma, intermittent convulsions
- Depressed heart action, slowed respiration
If the exposure has been severe it may cause death.
Please follow local regulations and install a CO alarm if necessary.
SETUP & ACCESSORIES
Installing The Burner Guard

When fitting the burner guard ensure the stone is central. This may need adjusting accordingly.
Moving the Oven
Use both handles on the topside of the oven to carry it.
Do not move Tread whilst in operation or when it is still hot.
Do not pick the unit up by one handle. Ensure you use both handles when moving tread.
Always allow at least 20 minutes to cool after use before attempting to move Tread oven.
Do not use the front flue to lift the oven.
Do not use the mouth of the oven as a lifting point.
Do not use the clips at the back as a lifting point.
Remove anything loose and all transit packaging in the oven before moving.
Always plan the route you are going to take, remove any obstacles on your path and ensure the oven will fit through the intended route.
Ensure the area you are moving the oven to fits with the guidelines on the following page.
Be sure that you have the capability to safely move the oven and set it in place. Failure to do so could cause serious bodily injury.

OVEN PLACEMENT
When deciding where to place Tread ensure the area is large enough to accommodate the oven with 50mm (2") around the base of the dock for air intake. It is important nothing is blocking this area as this will affect the performance of Tread.

When placing your oven it is important to maintain proper clearances from combustible construction. Ensure Tread has 0.3m (1ft) clearance (back and sides) and 1m (3ft 3") clearance (front) from any combustible construction.
Under no circumstances is the oven to be placed under or on top of any combustible structure.
Always keep the area around the oven clear of any combustible materials, gasoline and other flammable vapors and liquids.
We recommend the height of the floor to be around the level of the bottom of the users elbow (usually around 1.2m/3ft 11" from the ground).
Ensure the surface the oven is being placed on is completely level, stable and capable of easily holding the weight of the oven - 14kg (30.9lbs).

Never operate the oven in high winds or if the wind is blowing into the oven mouth.
Wind should be taken into consideration when choosing a location. The oven should be orientated so that the mouth is facing away from the wind. Avoid using the oven in windy conditions, it is important to have wind breaks situated around the oven to stop the wind from blowing the flame down into the dock. If you see fire coming from the dock, turn the oven off from either the gas bottle or control dial. Never operate the oven in high winds.

Optional Accessories
Not included and must be purchased separately.
For more details visit the Gozney website. www.gozney.com.
TREAD MANTLE
Whether you're cooking Neapolitan pizza, roasting vegetables or smoking meat, Tread Mantle makes moving food in or out of the oven simple.
Easily slotting onto the oven, the Mantle arm is made from ceramic coated, food grade aluminum alloy for extra heat and scratch resistance.

TREAD ROOF RACK
Whether you're chopping toppings, serving Neapolitan pizza or need somewhere to put your cast iron pan, Tread roof rack provides a workspace for this.
Hooking and latching onto the ovens handles, the tread roof rack turns the oven into a central table for all your needs.

TREAD BAG
Designed to carry the tread oven with all accessories fixed to the sides of the bag, stored in the pockets or through the loops. Whilst giving complete protection from rain, wind, frost, UV, salt, insects and wildlife, the Tread bag remains breathable to let moisture escape when it needs to. Tread on the move.

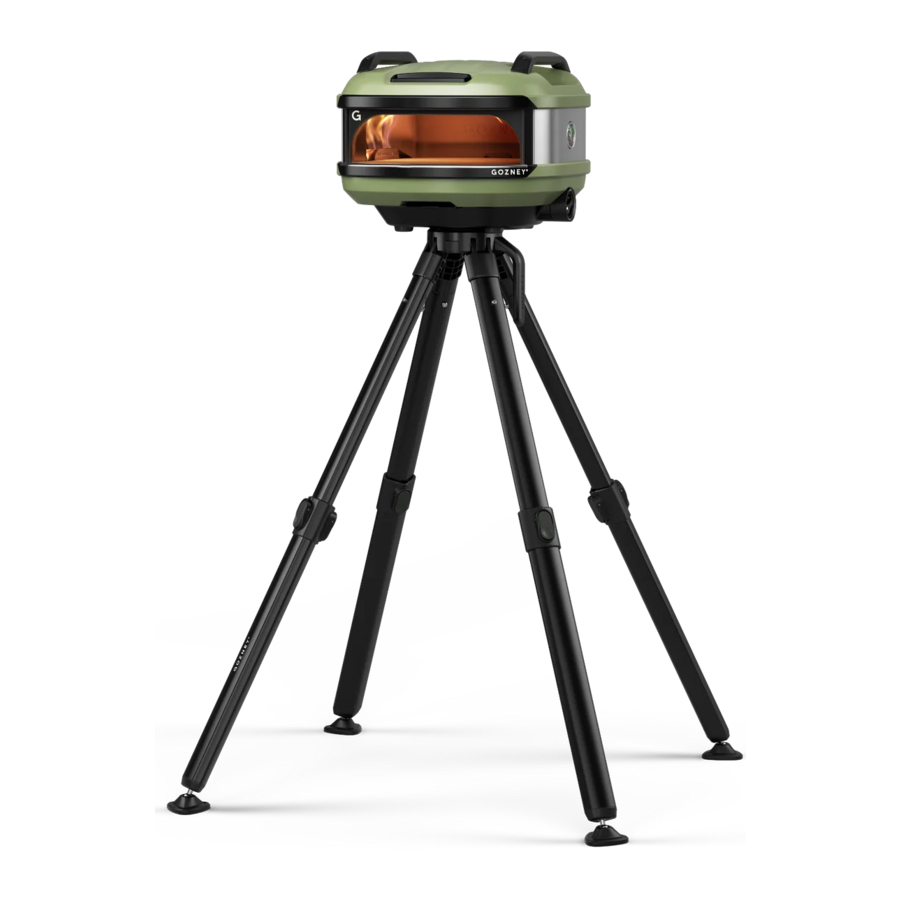
TREAD VENTURE STAND
Raise your cooking game and your oven with the Tread Venture Stand allowing you to use Tread at the optimal height when out and about, either floor standing or on a raised surface.
Weighing just 4kg (8.8lbs) the Venture Stand collapses down to an easy portable size and is fitted to tread with an innovative quick release mechanism.

FIRING UP GAS
Connecting to Gas
Check that the gas you are using is specified on the data plate page.
The gas cylinder used must have a safety collar to protect the valve assembly. Do not use a cylinder that is rusty, dented or has a damaged valve.
We recommend using a 9kg gas bottle as a minimum in conjunction with Tread.
Connect the regulator to the gas canister, following the instructions for your regulator accordingly. Do not force the regulator as this could damage the gas bottle.
If at any point you smell gas: Shut off the gas from the cylinder, turn off the switch on Tread and extinguish any open flames.
If odour continues, move away from Tread and gas supply then contact your gas supplier or fire service.
Ensure that the LPG cylinder or regulator valve is closed.
The cylinder supply system shall be arranged for vapor withdrawal.
The burner ignition is capable of being accomplished by a paper book match. A lighting rod assembly for use with a paper book match should be used.

Gas Safety
Prior to use, check the oven, burner and venturi for blockages (e.g. food residue or insect nests - Wasps, Bees or Ants.) If an insect nest is found they can be dangerous and must be cleaned out thoroughly. Please refer to the cleaning and maintenance section for guidance.
Should the appliance extinguish for any reason, turn off the control dial and the cylinder gas valve. Wait 5 minutes before attempting to relight the appliance.
Some foods produce flammable fats and juices. Therefore the Tread oven should be attended at all times whilst being used. Damage caused by fat and grease fires is not covered by warranty. If a grease or fat fire should occur, immediately turn off burner knob and the gas cylinder valve until the fire is out. Remove all food from the appliance.
A leak test must be carried out prior to using the appliance for the first time and whenever the gas cylinder is refilled or whenever the gas hose and regulator have been disconnected from the gas cylinder or appliance. For instructions on how to test for gas leaks.
Remove all packaging before attempting to light the gas burner.
Please take a moment to review all of the safety requirements before operating the appliance when using gas.
If the appliance is not in use, the gas must be turned off at the supply cylinder.

Use only the gas pressure regulator supplied with this appliance or Gozney approved alternative. This regulator is set for an outlet pressure of 11 w.c. (2.75kPa).
 Tread must be isolated from the gas supply piping system by closing its individual manual shutoff valve during any pressure testing of the gas supply piping system at test pressures equal to or less than ½ psi (3.5 kPa).
Remove the cap from the gas inlet before connecting the hose. Make sure it is free of damage and debris.
Do not disconnect any gas fittings while the appliance is operating.
Check all gas hose lines and connections for cuts, cracks and other damage before each use. If there is excessive abrasion or wear it just be replaced with a Gozney approved hose assembly before use.
Cylinders must be stored outdoors out of the reach of children and shall not be stored in a building, garage, or any other enclosed area.
Keep the fuel supply hose away from heated surfaces or direct sunlight.
Do not use any additional flammable substance whilst operating with gas.
Do not touch! Tread can get extremely hot when in operation. Be sure to wear protective gloves when operating the oven. Young children should be kept away.
Keep the cylinder outdoors in its upright position.
Do not connect multiple gas canisters to Tread or store a spare within the same vicinity.
A regulator which complies with EN16129 /EN12864/ANSI Z21.18/CSA 6.3 or UL 144 must fit between the gas canister and the oven.
Do not position the gas canister under the oven.
Never use a naked flame to check for gas leaks.
Maximum length of hose cannot exceed 1.5m (4ft 11"). In Finland, hose length cannot exceed 1.2m (3ft 11").
National requirements state how often to replace the hose. Please review this for your area.
Make sure the flexible tube is not twisting when the appliance is in operation.
Do not spray aerosols in the vicinity of the appliance while it is in operation.
Do not use or store flammable materials in or near this appliance
Do not place articles on or against this appliance. Do not modify this appliance.
Do not use an adaptor at the cylinder connection.
The LP gas supply cylinder to be used must be constructed and marked in accordance with the specifications for LP gas cylinders, U.S. Department of Transportation (DOT) or the Standard for Cylinders, Spheres and Tubes for the Transportation of Dangerous Goods, CAN/CSA-B339;
Place dust cap on cylinder valve outlet whenever the cylinder is not in use. Only install the type of dust cap on the cylinder valve outlet that is provided with the cylinder valve
Never fill the cylinder beyond 80 percent full.
Do not store a spare LPG cylinder under or near this appliance.
If the information above is not followed exactly, a fire causing death or serious injury could occur.
INSTALLING THE IGNITOR BATTERY
Before using the gas burner for the first time you'll need to install an AAA battery into the ignition module. Unscrew the cap and place the battery in (negative end first) before returning the cap to its original position in the dock. You're now ready to connect the gas bottle to the oven.


CONNECTING THE GAS HOSE

To attach the quick connection gas hose to your Tread pull the collar back on the connector and place the hose onto the gas inlet. When you release the collar it should return to its original position freely. This connection must be tested for leaks before using the oven.
Inspect the hose before each use of the appliance. If there is evidence of abrasion, wear, cuts, or leaks, the hose must be replaced prior to the appliance being put into operation. Any replacement hose assembly or pressure regulators shall be that specified by
Gozney, for more details visit the Gozney website. www.gozney.com. Keep the gas hose away from any heated surface(s).
Be cautious of placement as poor placement increases the hazard of tripping over the hose and tipping the supply cylinder.

If you plan on storing tread with the gas hose disconnected, ensure cap is installed over the gas inlet to prevent debris entering the inlet.
CLOCKWISE/ANTICLOCKWISE REGULATOR
Ensure the gas bottle is turned off. Align the regulator and the gas bottle threads and carefully begin to tighten ensuring the threads aren't crossed. Continue to tighten until a tight fit has been made. This connection must be tested for leaks before using the oven.


Testing For Leaks

You should always check for gas leaks every time you disconnect and reconnect a gas fitting. Never ignite burners when leak checking.
To test for leaks, apply a mixture of soapy water with a brush to the highlighted areas and any cracks along the hose. If a leak is present the solution will bubble.
If there is a leak at the hose to oven connection, remove and re-connect the quick connector and check for leaks by applying a soap-and-water solution to the highlighted areas with a brush. If a leak persists turn off the gas and DO NOT OPERATE THE OVEN.
If there is a leak at the valve connection, remove LPG cylinder. Do not operate oven. Use a different LPG cylinder and re-check for leaks with the soap-andwater solution.
Ignition
To light the gas burner: Position yourself to the side of the oven, press the control dial inwards and turn the dial to the 9 o'clock position until you hear a clicking sound and the burner ignites. This can take up to 10 seconds. Hold the control dial in this position for up to 30 seconds to disengage the Flame Failure Device, then release. The burner should stay lit. Wait 3 minutes for any gas to disperse and then repeat this process if it does not. The flame should be yellow/orange in colour and roll along the top of the
If ignition does not occur in 5 seconds, turn the burner control off, wait 5 minutes, and repeat the lighting process.


First Firing
On your first firing we highly recommend putting the burner on a medium to low flame for 30 minutes to help cure the oven before moving to a high flame.


On subsequent firings after curing, you can bring the oven up to the desired temperature from ignition. If the oven has been dormant for an extended period, you should cure the oven again as if it was a first firing.

Troubleshooting Gas Burner
| Problem Observed | Possible Reasons | Solution |
Flame looks too small |
|
|
Failure to ignite |
|
|
Noisy Flame |
|
|
If the problem persists after trying the following solutions please contact Gozney for further support.
Disconnecting Gas

CLOCKWISE/ANTICLOCKWISE REGULATOR
After cooking, be sure to turn off the gas from the gas canister first before turning of Tread. This will allow any gas left in the burner or pipe to be used up safely. Three minutes after turning the gas off it will be safe to remove the regulator and turn the control dial back to the off position.

General Maintenance
Maintenance
CLEANING THE VENTURI

If your burner's flame is overly yellow or making more noise than usual you may have debris blocking the venturi. When the oven is turned off, disconnect it from the gas and let it cool. Make sure Tread is on a soft surface that won't cause scratches before gently rolling it onto its side. DISCONNECT THE GAS. Use the torx screwdriver provided to loosen the 4 screws and remove the bottom panel. The base panel will stay attached with the wiring looms. Take care when doing this. Use a vacuum cleaner with a long plastic nose to remove any debris. It's good practice to check the inside of the dock for debris regularly.
Take care not to damage any of the wiring looms when removing the base panel

Cleaning The Oven
INTERNAL
The best way to clean the inside of Tread is to burn off any food debris or soot that is left behind. When the oven is over 650˚F it will start self cleaning and any burnt on food will burn off after a period of three hours.

If there is any soot or debris left, wait for the oven to cool down and use a soft brush to dislodge, being careful not to apply too much pressure and damage the oven. Use a vacuum cleaner with a plastic attachment to remove the loose debris from the oven.

EXTERNAL
For the exterior of Tread ensure the oven is cool and use a non caustic bleach free cleaning spray on the dirty areas. Clean the area with warm soapy water and a sponge or non abrasive dish cloth and then wipe clean with paper towels.
Avoid spraying directly onto the thermometer or control dial.
Do not use abrasive cleaning products or abrasive sponges, cloths etc.
When the oven isn't in use it should be kept under cover away from rain. If you are placing a cover directly on Tread, ensure it's completely cooled down before covering.
When using the oven again after a long period of disuse, we recommend firing the oven as if it is a first firing.

Replacing The Thermometer Probe
Only when the oven is cold, using a 13mm spanner, remove the m8 nut and remove the thermometer. Replace it with the new one and re tighten the M8 nut.


Documents / Resources
References
Download manual
Here you can download full pdf version of manual, it may contain additional safety instructions, warranty information, FCC rules, etc.
Advertisement


Need help?
Do you have a question about the Tread and is the answer not in the manual?
Questions and answers