Carrera digital 124 / 132 Manual
- Assembly and instructions (101 pages) ,
- Assembly and operating instructions manual (100 pages) ,
- Assembly instructions manual (77 pages)
Advertisement
- 1 Safety instructions
- 2 Introduction
- 3 Contents of package
- 4 Important Information
- 5 Assembly instructions
- 6 Electrical connection
- 7 Change the playing mode
- 8 Coding/decoding of the cars to the according speed controller
- 9 Display and range of functions
- 10 Training mode
- 11 Racing modes
- 12 Display Settings
- 13 Troubleshooting
- 14 Technical specifications
- 15 Summary of accessories
- 16 Documents / Resources
Safety instructions
- This toy is not suitable for children under the age of 3 because of small parts that can be swallowed and a functional risk of getting caught!
- The transformer is not a toy! Do not short-circuit the transformer's connections! Note to parents: Regularly inspect the transformer for damage to the cable, plug or housing! Only operate the toy with recommended transformers! The transformer may no longer be used if it is damaged! Only operate the racetrack with a transformer! If play is interrupted for longer periods, it is recommended to separate the transformer from the power supply. Do not open transformer or speed controller housings!
- Regularly check the track and cars for damage to cables, plugs and housings! Replace defective parts.
- The car racetrack is not suitable for outdoor operation or operation in wet locations! Keep away from liquids.
- Do not place any metal parts onto the track to avoid short-circuits. Do not place the track in the immediate vicinity of delicate objects, as these could be damaged by cars hurled from the track.
- Pull the plug before cleaning the racetrack! Only use a damp cloth for cleaning, no solvents or chemicals. When it is not in use, store the track in a dry and dust-protected location, preferably in the original cardboard box.
- Do not operate racing-track in face or eye level!
Introduction
If you have any queries, please contact a specialist dealer or the Carrera service hotline +49 911 7099-145 or visit our websites
www.carrera-toys.com
www.carreraclub.com
Please take note that the electronic lap counter is only functioning in combination with item 30344 Black Box Carrera DIGITAL 124 / DIGITAL 132.
The lap counter can be used with Carrera DIGITAL 124 / DIGITAL 132 cars and with PRO-X cars.
Contents of package

1 Standard straight
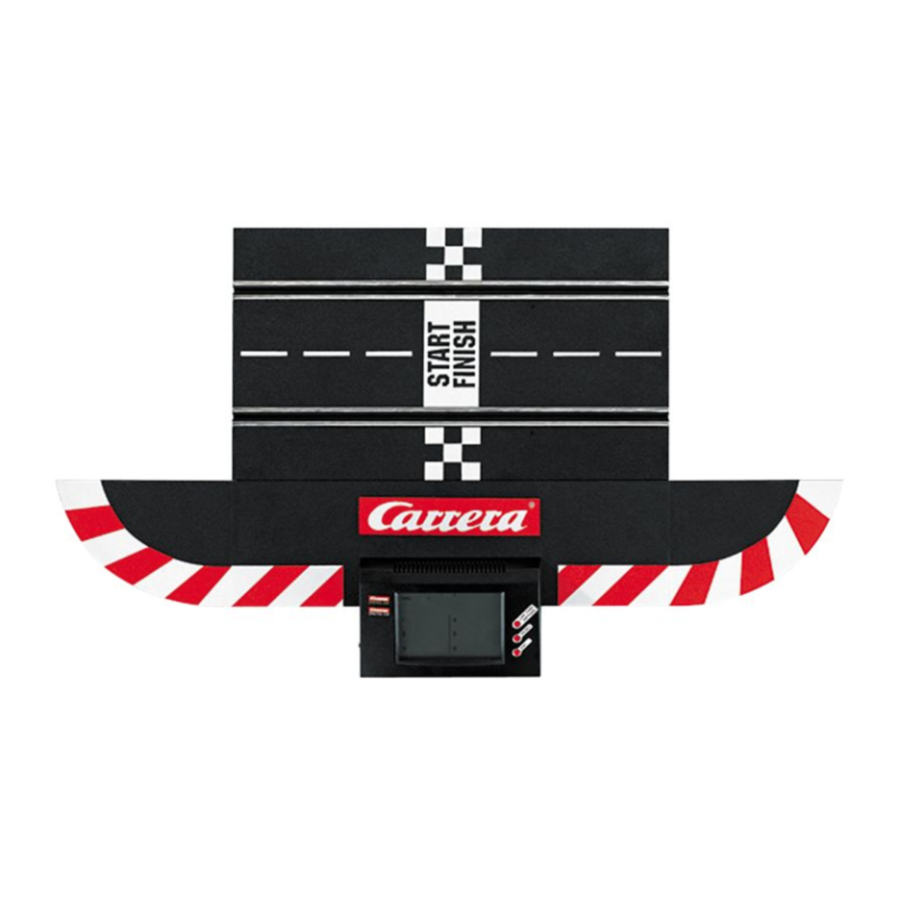
1 Standard straight with DIGITAL 124 / DIGITAL 132 electronic lap counter
1 End piece right
1 End piece left
2 Guide keels
2 Guide keel stickers
8 Track section interlocks
Operating instructions
Please check the contents for completeness and possible transport damage. The packaging contains important information and should also be retained.
Important Information
Please note that Evolution (analog system) and Carrera DIGITAL 132 (digital system) involve two separate and completely independent systems. We hereby expressly indicate that both systems must be kept separate when setting up the track, i.e. no connecting rail from Evolution may be used together with the connecting rail and Black Box of the Carrera DIGITAL 132, even if only one of the two connecting rails (Evolution connecting rail or Carrera DIGITAL 132 connecting rail and Black Box) is attached to the current supply. Furthermore, no other Carrera DIGITAL 132 components (switches, electronic lap counter, pit stop) may be built into an Evolution course, i.e. via analog operation.
Non-compliance with the above information may result in damage or destruction of the respective Carrera DIGITAL 132 components. In this case no warranty may be claimed.

Assembly instructions

For installation into an existing Carrera DIGITAL 124 / DIGITAL 132 layout a standard straight  is contained in the delivery quantity to make up the distance.
Please note when installing the electronic lap counter  that the Black Box
  must be in immediate proximity in order to attach it to the Carrera DIGITAL 124 / DIGITAL 132 Black Box (Art. No. 30344) using a cable connection
  .
.
The electronic lap counter is initialized by switching on the Black Box.

 Before assembling please insert the connecting clips in the track as shown in figure 1. Stick tracks together on a flat base. Move the connecting clips according to figure 2 in direction of the arrow until they audibly snap in. The connecting clip may also be inserted later. The connecting clips can be removed into both directions by simply pressing down the clamped nose (see fig. 3).

Fastening: To fasten the track sections on a board, it is necessary to use the track section fasteners (Item no. 85209, not contained in the package).
Note:
Carpeting is not a suitable foundation on which to build the track because of static charging, formation of fluff and ready inflammability.
Electrical connection

Insert the standard straight with the Carrera DIGITAL 124 / DIGITAL 132 electronic lap counter into the track layout as described above.
Connect the electronic lap counter with the Black Box as shown in Fig. .
Note: To avoid short-circuits and electrocution, the toy may not be connected using foreign devices, plugs, cables or other objects foreign to this toy. The Carrera DIGITAL 124 / DIGITAL 132 car racetrack only works properly with an original Carrera DIGITAL 124 / DIGITAL 132 transformer.
Change the playing mode

DIGITAL 132 ⇔ PRO-X
To change the playing mode, switch off the Black Box, push the start button and switch on Black Box simultaneously fig. .
- LED 1 and 2 light = Carrera DIGITAL 132 mode (basic setting)
- LED 1 lights = PRO-X mode
Coding/decoding of the cars to the according speed controller
Attention!
None of the programming steps may exceed 1 second per click.

Place car on the track, push lane-change-button twice fig. , lift car at the front, put car back again fig. , while car´s lights are flashing push lane-change-button twice fig. . Programming is confirmed by a tone. All settings are saved until new programming is carried out.
Coding of PRO-X cars

 | Car and speed controller 1 |
 | Car and speed controller 2 |
 | Car and speed controller 3 |
 | Car and speed controller 4 |
For all cars with lighting (independent on how the car is encoded)
 | 4th switch at the top „light on" |
 | 4th switch at the bottom „light |
Advice: It is pointed out that the speed is influenced by supplementary magnets when the Carrera DIGITAL 132 vehicle is used in autonomous mode. Furthermore, the vehicle's speed must be individually adjusted to the track's layout.
 | Autonomous car lowest speed |
 | Autonomous car at medium speed |
 | Autonomous car at highest speed |
 | Only in connection with Pit Stop |
Coding PRO-X vehicles with Guide Keel Stickers

Coding Vehicles with Guide Keel Stickers: The guide keel of the vehicle to be clocked must be glued with the sticker (provided in the set) as shown in Fig. in order for the Carrera DIGITAL 124 / DIGITAL 132 electronic lap counter to record the individual PRO-X vehicles. The coding of the guide keel sticker which is required in order for the electronic lap counter to perform measurements must correspond to the respective vehicle coding (cf. Instructions "Vehicle Coding")

False start: If a car's speed controller is actuated during the traffic light phase, this is rated as false start. The vehicle that has caused the false start will travel a short distance and the LED on the relevant vehicle or hand control will flash. The race is not released and the start has to be repeated.
Display and range of functions

Range of functions
Training mode
Lap races possible from 0 – 9999 laps (factory setting 50 laps)
Time races from 00:00:00'01 – 99:99:99:999 hours (hh: mm: ss'ms) (factory setting 00:05'00''00)
The electronic lap counter Carrera DIGITAL 124 / DIGITAL 132 disposes of a memory function. Once the values of the factory setting are changed the altered values remain displayed until having been reset.
Signal tone and fanfare horn may be switched on and off by activating the switch (ON/OFF).
Training mode
Training mode
The training mode is used for training and the starting positions for the race and can be started without setting the laps or time.
The training mode is set as follows:
- Switch on the Black box (ON/OFF switch).
- The driving mode having been set (2 LED = Carrera DIGITAL 132 / 1 LED = PRO-X) is displayed before the middle LED permanently lights and a short signal is audible.
- The Carrera DIGITAL 132 electronic lap counter automatically switches on in training mode.
- Press the start button of the Carrera DIGITAL 132 Black Box once – all of the LEDs are constantly lit.
- Place the pre-coded car/s on the connecting track (see fig. in "Assembly instructions" section)
- Then press the start button again – the starting sequence is initiated, the LEDs are lit and acoustic signals can be heard.
- The training run begins with elapse of the starting sequence and the overall time ("TIME") and counting begins.
- The display shows the following information:
- Allocation of the individual cars (1-6)
- Total time of training race next to "TIME"
- Lap time currently driven "LAP TIME"
ATTENTION!
Single lap times exceeding 09:59:999 cannot be displayed, illustration see fig.
This does not affect the total time illustration under "TIME".
While pushing BUTTON 1 during measuring, further information can be retrieved.

- Press „BEST TIME" 1x – best lap time. Only beating the current best time will again be displayed.
- Press "TIME" 2x – displaying the leading car (POS 1) and the other cars´ time lag to the leading car
< 1 lap:
display of time difference "+ m: ss: ms" to the leading car
> 1 lap:
display of lap difference to the leading car „+ L 00001 - Press „POSITION" 3x – current positioning of individual cars
- Press „LAPS" 4x – laps already driven
- Press 5x – change back to the current training race
- For finishing the training race, push BUTTON 3 ("ESC") once during the race. You will return to the main menu (the word "TRAINING" flashes)
Racing modes
Racing mode
- For being able to switch to the racing mode after the electronic lap counter Carrera DIGITAL 124 / DIGITAL 132 has automatically turned on via the Black Box, please push BUTTON 3 ("ESC").
- The next display indication allows you to switch between the training- and the racing mode while pushing BUTTON 1 ("CHA").
- Confirm selection of the racing mode (the word "Race" flashes) by BUTTON 2 ("SEL"), the word "LAP" flashes.
- You have the choice between
![]() lap race and
lap race and ![]() time races.
time races.
Lap Races
- If you like to start a lap race ("LAP") please confirm by pushing BUTTON 2 ("SEL").
- After confirmation you may set the number of laps you like to complete (it is possible to set lap races from 0000 to 9999 laps, factory setting 0050 laps).
- Basically you have to set the 1's place first, then the 10's place and the 100's place and finally the 1000's place (display cursor flashes on each place). By pushing BUTTON 1 ("UP") you increase the number. In order to change to the next places please push BUTTON 2 ("SEL") and set the value as described. In case the preset number of laps shall not be changed, please confirm by pushing BUTTON 2 ("SEL") until the lap display disappears.
- After having set the number of laps push the start button of the Black Box once – alle LEDs will flash permanently.
- Place the pre-coded car/s on the connecting track (see figure in "Assembly instructions" section)
- Then press the start button again – the starting sequence is initiated, the LEDs are lit and acoustic signals can be heard.
- The lap race starts after the start sequence has proceeded.
- The total time "TIME" starts to run. Once the leading car has passed through, its total time is displayed and updated upon each passing.
- The display shows the following information:
- Allocation of the individual cars (1-6)
- Total time of the leading car next to "TIME"
- Lap time currently driven "LAP TIME" While pushing BUTTON 1 during measuring, further information can be retrieved.
- Press "BEST TIME" 1x – best lap time. Only beating the current best time will again be displayed
- Press "TIME" 2x – displaying the leading car (POS 1) and the other cars´ time lag to the leading car
< 1 lap: display of time difference "+ m: ss: ms" to the leading car
> 1 lap: display of lap difference to the leading car "+ L 00001" - Press "POSITION" 3x – current positioning of individual cars
- Press "LAPS" 4x – laps still to go
- Press 5x – change back to the current race
- As soon as all cars have finished the last lap a signal indicating the end of the race is audible and the display starts to flash.
- For returning to the main menu push BUTTON 3 once („ESC")
Time Racing
- To measure the time of a time race please follow steps 1 – 3 (see "Display and range of functions").
- To start a time race after mode selection lap race ("RACE") push BUTTON 1 ("CHA") for changing from the lap race mode ("LAP") to the time race mode ("TIME").
- Confirm selection of time race ("TIME") by BUTTON 2 ("SEL").
- After confirmation the seconds´ position of the time display will flash (factory setting 00:05:00 min.).
- Basically you have to set the seconds first, then the minutes and finally the hours (display cursor flashes on each position). By pushing BUTTON 1 ("UP") you increase the number. In order to change to the next positions please push BUTTON 2 ("SEL") and set the value as described. In case the preset racing time shall not be changed please confirm by pushing BUTTON 2 ("SEL") until the ltime display disappears.
- After having set the requested time for the race push the start button of the Black Box once – alle LEDs will flash permanently.
- Place the pre-coded car/s on the connecting track (see figure in "Assembly instructions" section)
- Then press the start button again – the starting sequence is initiated, the LEDs are lit and acoustic signals can be heard.
- The time race starts after the start sequence has proceeded.
- The total time "TIME" starts to run backwards.
- The display shows the following information:
- Allocation of the individual cars (1-6)
- Total time still to be driven "TIME"
- Lap time currently driven "LAP TIME" While pushing BUTTON 1 during measuring, further information can be retrieved
- After the total time set has expired the race is finished. A signal will be audible and the display starts to flash.
- For returning to the main menu push BUTTON 3 once ("ESC")
Display Settings
- Contrast-Setting Display
Switch off Black Box. Keep Button 1 (Lap Time Option) pushed while switching on the Black Box until the display changes according to figure.
Line "TIME" (1) indicates the corresponding software version. The display´s contrast can be changed (max. 20) by "CHA " and "CHA ".
![]()
- Display Check
Switch off Black Box. Keep Button 3 (ESC) pushed while switching on the Black Box until the display changes according to figure.
![]()
- Factory Setting
For resetting all data please switch off Black Box. Keep Button 2 (RESET) pushed while switching on the Black Box until the display changes according to figure.
![]()


Troubleshooting
In case of any malfunctions, please check the following:
- Has the connection to the power supply been established correctly?
- Have transformer and speed controllers been connected correctly?
- Are the track connections faultless?
- Are the racetrack and track slots clean and free of any foreign objects?
- Are the sliding contacts in order and do they make contact with the track slot?
- Are the cars correctly coded to the according speed controller?
- The track's current feed will be switched off automatically for 5 seconds, if there is an electrical short circuit: this will be notified by audible and visual signals.
- Are the cars placed on the track in running direction? In case of non-functioning push the running direction switch which is on the car´s bottom.
Note:
During operation small car parts as spoilers or mirrors may get off or brake due to being original detailed parts of the car model. To avoid this it is possible to remove them before operation.
Technical specifications
Technical specifications:
Output voltage
Toy transformer
 GB
GB
... 14,8V  20,7 VA – 51,8 VA.
... 18,0V 21,6 VA – 54,0 VA.
USA
... 14,8V 20,7 VA – 42,0 VA
... 18,0V 21,6 VA – 43,2 VA
Summary of accessories


- 20598
- 20568
- 20578
- 20593
- 20563
- 20573
- 20592
- 20562
- 20572
- 20591
- 20561
- 20571
- 20551
- 20567
- 20577
- 20590
- 20560
- 20509
20601 - 20517
- 20588
- 20611
- 20589
- 20612
- 20516
- 30342
- 30344
- 20587
- 20597
- 20600
- 20569
- 20574
- 20564
- 20594
- 20575
- 20565
- 20595
- 20576
- 20566
- 20596
- 20579
- 20580
- 20599

30340 DIGITAL 124 / DIGITAL 132 Speed controller

30341 DIGITAL 124 / DIGITAL 132 Rail for Pit Stop extension

30342 DIGITAL 124 / DIGITAL 132 Electronic lap counter incl. connecting section and 1 straight

30343 DIGITAL 124 / DIGITAL 132 · Lane change sections (left) 2 x

30344 DIGITAL 124 / DIGITAL 132 Black Box

30345 DIGITAL 124 / DIGITAL 132 Lane change sections (right) 2 x

30346 DIGITAL 124 / DIGITAL 132 Pit Stop Lane

30347 DIGITAL 124 / DIGITAL 132 Double lane change section

30348 Speed controller extension set

20366 Guide keels 2x, double sliding contacts 8x

30326 (EU · CH · BR) · 30329 (UK)
30330 (AUS) 14,8 V  51,8 VA
30327 (USA) · 30331 (J) 14,8 V 42 VA
DIGITAL 132 Transformer Subject to technical changes
Stadlbauer Marketing + Vertrieb Ges.m.b. H. · Magazinstraße 4 · 5027 Salzburg · Austria
www.carrera-toys.com · www.carreraclub.com
Documents / Resources
References
Carrera: Der Spezialist für Rennbahnen & RC-Spielzeug
Carrera Club - Die Carrera Community für Slotcars, Rennbahnen, Events und vieles mehr
Download manual
Here you can download full pdf version of manual, it may contain additional safety instructions, warranty information, FCC rules, etc.
Advertisement


Need help?
Do you have a question about the digital 124 and is the answer not in the manual?
Questions and answers