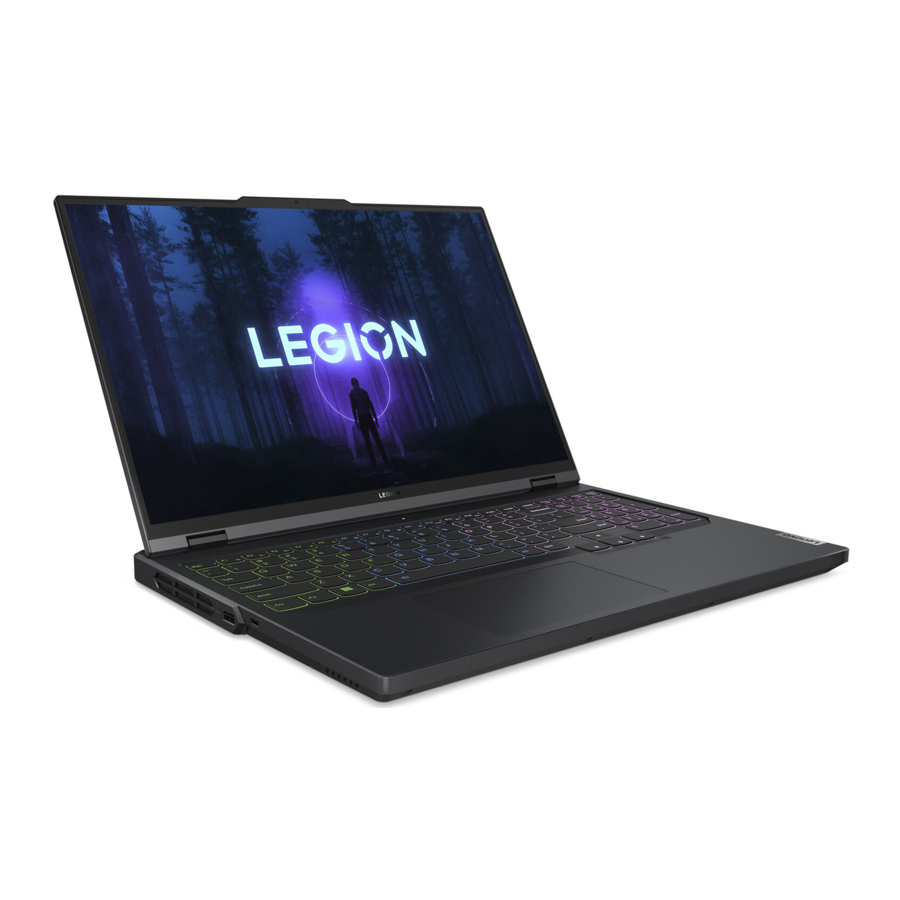
Lenovo Legion Pro 5i / 5 Manual
- Hardware maintenance manual (72 pages) ,
- User manual (36 pages) ,
- User manual (56 pages)
Advertisement
- 1 About this guide
- 2 Meet your product
- 3 Get started with your device
- 4 Explore your unit
- 5 Frequently asked questions
- 6 Function descriptions for Lenovo hotkeys
- 7 Help and support
- 8 Documents / Resources
About this guide
- This guide applies to Lenovo product model(s) listed below. Illustrations in this guide may look slightly different from your product model.
| Model name | Machine type (MT) |
| Legion Pro 5 16IRX9 | 83DF |
| Lenovo Legion Pro 5 16IRX9 D1 |
- This guide may contain information about accessories, features, and software that are not available on all models.
- This guide contains instructions that are based on the Windows operating system. These instructions are not applicable if you install and use other operating systems.
- Microsoft makes periodic feature changes to the Windows operating system through Windows Update. As a result, the operating system related instructions may become outdated. Refer to Microsoft resources for the latest information.
Meet your product
Front

| No. | Description |
| 1 | Microphones |
| 2 | Camera |
| 3 | Camera light |
| 4 | Screen |
Microphones
The microphones are the PC's built-in sound input devices. They capture your voice and ambient sound and convert them into digital form. Microphones are essential components when you use your PC for video conferencing or voice recording.
Camera
The built-in camera captures visible light and converts it to digital signals. It is used for video recordings and video conferencing.
Camera light
The camera light indicates whether the camera is activated.
Table 1. Camera light statuses and descriptions
| Camera light status | Description |
| On | The camera is activated. |
| Off | The camera is not activated. |
Screen
The screen of the built-in display is the area where text, graphics, and videos are displayed.
Base

| No. | Description |
| 1 | Power light |
| 2 | Power button |
| 3 | Keyboard |
| 4 | Touchpad |
| 5 | Antennas |
Power light
The power light indicates the current power state of the PC: whether it is powered on, powered off, in sleep mode, or in hibernation mode.
Table 2. Power light status and description
| Light status | Power state |
| Solid on | Powered on |
| Blinking slowly | In sleep mode |
| Off | Powered off or in hibernation mode |
The color of the power light can indicate the PC's active operation mode.
Table 3. Power light colors and the PC's active operation modes
| Light color | Operation mode |
| White | Balance mode |
| Blue | Quiet mode |
| Red | Performance mode |
| Purple | Custom mode |
If the PC's power button includes an embedded fingerprint sensor, the power light turns solid green to prompt you to enroll or scan your fingerprint.
Power button
Press the power button to turn on your PC.
Note: By default, on a Windows PC, pressing the power button when the PC is turned on will put the PC into sleep mode.
Keyboard
The keyboard is the PC's built-in input device for typing characters. It also includes keys that can make you more productive when interacting with the PC, apps, and the Windows operating system.
Table 4. Productivity keys
| Key | Location on the keyboard | Function |
| Function keys (F1 through F12) | In the top row | Executing predefined commands or functions for selected apps |
| Hotkeys | In the top row |
|
| Fn key | In the lower-left corner |
|
| Windows key | In the lower-left corner | Used with certain keys to change some frequently used Windows settings |
Hotkeys share keys with function keys. To toggle the functions for these keys, hold down the Fn key or turn on the FnLock switch.
Note: Keyboard layout varies by language and geographical location. The keyboard on your PC may look slightly different from the product illustrations of this publication.
Related topics
"Hotkeys"
"Function descriptions for Lenovo hotkeys"
Touchpad
The touchpad is the PC's built-in pointing device, which provides the basic functionality of an external mouse. Slide your finger on the touchpad to move the pointer on the screen and tap or double-tap to select or execute a screen item.
The touchpad also supports Windows multi-finger gestures, which provide shortcuts to frequently used apps and functions.
Antennas
The antennas transmit and receive radio waves to allow data to be transferred between your PC and a Wi-Fi network device or a Bluetooth device.
Note: The antennas are hidden inside the PC.
Left

| No. | Description |
| 1 | Air vents (outlet) |
| 2 | USB Standard-A connector |
| 3 | Multi-purpose USB Type-C connector |
Air vents (outlet)
The air vents allow hot air to be discharged out of the PC.

When the PC is operating, do not place it on a bed, sofa, carpet, or other flexible surfaces. Otherwise, the air vents will be blocked and the PC may overheat, reducing performance or causing the PC to be unresponsive or even shut down.
USB Standard-A connector
The USB Standard-A connector is used to connect storage or peripheral devices that follow the USB specification for data transfer and device interconnection.
Multi-purpose USB Type-C connector
This multi-purpose USB Type-C connector is used to connect:
- Storage or peripheral devices that follow the USB specification for data transfer and device interconnection
- Display devices
Note: When connecting display devices, you need to use appropriate cables and adapters (if needed) according to the connection capabilities of the display device.
Right

| No. | Description |
| 1 | Combo audio jack |
| 2 | Camera switch |
| 3 | State light |
| 4 | USB Standard-A connector |
| 5 | Air vents (outlet) |
Combo audio jack
The combo audio jack is used to connect single-plug headsets, headphones, or external speakers.
Camera switch
This toggle switch is used to enable or disable the built-in camera.
Note: This switch is designed for privacy protection. If you don't need to use the camera, slide the switch to the off position to prevent any apps from using the camera.
State light
The state light indicates the current power state of the PC: whether it is powered on, powered off, in sleep mode, or in hibernation mode.
When the PC is powered on, this light can also indicate low battery by blinking rapidly.
Note: The status of the state light is synchronized with that of the power light. The state light is usually located on the right or left side of the PC and is visible when the LCD lid is closed.
Table 5. State light status and description
| Light status | Power state | Battery charge level |
| White (solid on) | Powered on | 21%–100% |
| White (blinking rapidly) | Powered on | 1%–20% |
| White (blinking slowly) | In sleep mode | / |
| Off | Powered off or in hibernation mode | / |
USB Standard-A connector
The USB Standard-A connector is used to connect storage or peripheral devices that follow the USB specification for data transfer and device interconnection.
Air vents (outlet)
The air vents allow hot air to be discharged out of the PC.
When the PC is operating, do not place it on a bed, sofa, carpet, or other flexible surfaces. Otherwise, the air vents will be blocked and the PC may overheat, reducing performance or causing the PC to be unresponsive or even shut down.
Rear

| No. | Description |
| 1 | Air vents (outlet) |
| 2 | Ethernet connector |
| 3 | Multi-purpose USB Type-C connector |
| 4 | HDMI connector |
| 5 | USB Standard-A connector |
| 6 | USB Standard-A connector (always-on connector) |
| 7 | Power connector |
| 8 | Charging light |
Air vents (outlet)
The air vents allow hot air to be discharged out of the PC.
When the PC is operating, do not place it on a bed, sofa, carpet, or other flexible surfaces. Otherwise, the air vents will be blocked and the PC may overheat, reducing performance or causing the PC to be unresponsive or even shut down.
Ethernet connector
The Ethernet connector connects a cable modem or router to the PC to establish wired Internet access.
Multi-purpose USB Type-C connector
This multi-purpose USB Type-C connector is used to connect:
- Storage or peripheral devices that follow the USB specification for data transfer and device interconnection
- Display devices
Note: When connecting display devices, you need to use appropriate cables and adapters (if needed) according to the connection capabilities of the display device.
Related topics
"Use a power delivery compliant USB Type-C charger with the computer"
HDMI connector
The HDMI connector is used to connect an external display device, such as a television, a projector, or a monitor.
USB Standard-A connector
The USB Standard-A connector is used to connect storage or peripheral devices that follow the USB specification for data transfer and device interconnection.
Always-on connector
A USB connector with a battery icon (![]() ) supports the always-on function. The PC can supply power to a USB device connected to this type of connector even when the PC is shut down, in sleep, or in hibernation mode.
) supports the always-on function. The PC can supply power to a USB device connected to this type of connector even when the PC is shut down, in sleep, or in hibernation mode.
The always-on function can be turned on and off in:
- The PC's firmware setup utility, or
- Lenovo Vantage or Lenovo PC Manager
Power connector
Use this connector and the included ac power adapter to connect your PC to an electrical outlet.
Charging light
The charging light indicates whether the PC is plugged into an electrical outlet. When the PC is plugged into an electrical outlet, the color of the light indicates whether the battery is fully charged (or will shortly be fully charged).
Table 6. Charging light statuses and descriptions
| Light status | Plugged in? | Battery charge level |
| Off | No | / |
| On, amber | Yes | 1%–90% |
| On, white | Yes | 91%–100% |
Bottom

| No. | Description |
| 1 | Air vents (intake) |
| 2 | Speakers |
Air vents (intake)
The air vents allow air to be sucked inside of the PC to cool the internal components.
When the PC is operating, do not place it on a bed, sofa, carpet, or other flexible surfaces. Otherwise, the air vents will be blocked and the PC may overheat, reducing performance or causing the PC to be unresponsive or even shut down.
Speakers
The speakers are the PC's built-in sound output devices.
Features and specifications
| Dimensions | |
| Width | 363.4 mm (14.3 inches) |
| Depth | 260.35 mm (10.25 inches) |
| Thickness |
|
| ac power adapter | |
| Input | 100 V ac–240 V ac, 50 Hz–60 Hz |
| Output | 20 V dc, 15 A |
| Power | 300 W |
| Battery pack | |
| Capacity | 80 Wh Note: The battery capacity is the typical or average capacity as measured in a specific test environment. Capacities measured in other environments may differ but are no lower than the rated capacity (see product label). |
| Number of cells | 4 |
| Microprocessor | |
| To view the microprocessor information of your computer, type system information in the Windows search box and then press Enter. | |
| Memory | |
| Type | Double data rate 5 (DDR5), small outline dual in-line memory module (SODIMM) |
| Number of physical slots | 2 |
| Secondary storage device | |
| Type | Solid-state drive |
| Form factor |
|
| Number of slots | 2 |
| Bus | PCI Express |
| Screen | |
| Size | 406.4 mm (16 inches) |
| Display resolution | 2560 × 1600 pixels |
| Keyboard | |
| Backlight color | White, blue, or RGB |
| Shortcut keys |
|
| Modifier keys |
|
| Special keys or key group | Numeric keypad |
| Connectors and slots | |
| Power connector | Input:
|
| USB Standard-A connector |
|
| Multi-purpose USB Type-C connector |
|
| HDMI connector | Supported signaling protocol: Fixed-rate link (FRL) |
| Combo audio jack |
|
| Ethernet connector | 8P8C jack |
| Security | |
| UEFI/BIOS passwords |
|
| Network | |
| Ethernet | 2.5 Gbps |
| Wi-Fi | Wi-Fi 6E |
| Bluetooth |
|
Statement on USB transfer rate
Depending on many factors such as the processing capability of the host and peripheral devices, file attributes, and other factors related to system configuration and operating environments, the actual transfer rate using the various USB connectors on this device will vary and will be slower than the data rate listed below for each corresponding device.
| USB device | Data rate (Gbit/s) |
| USB 3.2 Gen 1 | 5 |
| USB 3.2 Gen 2 | 10 |
Operating environment
Maximum altitude (without pressurization)
3048 m (10 000 ft)
Temperature
- At altitudes up to 2438 m (8000 ft)
- Operating: 5°C to 35°C (41°F to 95°F)
- Storage: 5°C to 43°C (41°F to 109°F)
- At altitudes above 2438 m (8000 ft)
- Maximum temperature when operating under the unpressurized condition: 31.3°C (88°F)
Note: When you charge the battery, its temperature must be no lower than 10°C (50°F).
- Maximum temperature when operating under the unpressurized condition: 31.3°C (88°F)
Relative humidity
- Operating: 8% to 95% at wet-bulb temperature 23°C (73°F)
- Storage: 5% to 95% at wet-bulb temperature 27°C (81°F)
Avoid constant body contact with specific hot sections

When the computer is operating, it should be placed on a hard and flat surface with its bottom area not in contact with user's bare skin. Under normal operating conditions, the temperature of the bottom surface will remain within an acceptable range as defined in IEC 62368-1, but such temperatures can still be high enough to cause discomfort or harm to the user if directly touched for over 10s at a time. As such, it is recommended that users avoid prolonged direct contact with the bottom of the computer.
Get started with your device
Connect to a network
Connect to a Wi-Fi network
Ensure that you have a secure Wi-Fi network account and the required credentials.
- Select the network icon
![]() on the bottom right of your display.
on the bottom right of your display. - Select an available network, and then select Connect. If you want to be automatically connected to this Wi-Fi network the next time you start your computer, select Connect automatically before selecting Connect.
- Input your credentials if necessary, and then follow the on-screen instructions to connect to the disired Wi-Fi network.

Establish a wired connection
- Plug an Ethernet cable into the Ethernet connector on your computer.
- Plug the other end of the Ethernet cable into a network wall jack or a router.

Note: If your computer does not include an Ethernet connector, you can purchase a USB-C to Ethernet adapter from Lenovo at https://www.lenovo.com/accessories.
Unique Lenovo apps
Lenovo Vantage
Lenovo Vantage is a one-stop solution to help you update your computer, configure hardware settings, and access personalized support.
If your computer is pre-installed with Lenovo Vantage, type Vantage in the Windows search box to launch this app.
Notes:
- Available features may vary depending on your computer model.
- You can download the latest version of this app from Microsoft Store.
Work with Windows
The following table contains Windows frequently used settings. You can learn the basics and start working with Windows right away.
To configure settings, type the corresponding keywords in the Windows search box and select the best match. Follow the on-screen instructions to customize settings.
Table 7. Basic settings
| Functions | Descriptions | Search by keywords |
| Control Panel | View or change Windows settings, including hardware and software setup and configuration. | Control Panel |
| Connect to Wi-Fi networks | For models with a wireless LAN module, you can connect your computer to a Wi-Fi network. Click the network icon in the Windows notification area, and then select a network for connection. Note: The wireless LAN module on your computer may support different standards. For some countries or regions, use of 802.11ax may be disabled according to local regulations. | Wi-Fi |
| Connect to wired networks | For models with an RJ45 connector, you can use an Ethernet cable to connect your computer to a wired network. | Ethernet |
| Airplane mode | Airplane mode is a convenient setting to turn all wireless communications of your computer on and off. You may need to turn it on when boarding an airplane. | Airplane mode |
| Night light mode | Night light is a switch in Windows that you can turn on and off. When it is turned on, your screen shows warmer colors and the amount of emitted blue light is reduced. Enabling night light reduces the chances of developing eye fatigue or eye strain. Note: For more guidance on reducing eye fatigue or eye strain, go to https://www.lenovo.com/us/en/compliance/visual-fatigue. | Night light |
| Adjust color temperature | If night light mode is turned on, you can adjust the color temperature of the screen. Note: Selected Lenovo computers are low blue light certified using night light mode and color temperature settings available in the pre-installed operating system. These computers are tested with night light turned on and color temperature set to 48 or greater. | Night light |
| Windows Updates | Microsoft periodically releases feature and security updates to the Windows operating system. Updates that are applicable to your Windows version are downloaded automatically when your computer is connected to the Internet. When updates are downloaded, you are prompted to restart the computer to install these updates. You can also manually check if there are available updates for the installed version of Windows. Attention: Only use Windows Update to download and install updates. Updates downloaded from other sources may include security risks. | Windows Updates |
Windows help information
If the on-screen instructions cannot solve your problem, refer to the following to get the online Windows help information.
- Type Get Help or Tips in the Windows search box and then press Enter. When the app opens, type the problem description and select the matched result.
- Visit Microsoft support Web site: https://support.microsoft.com. Enter what you are looking for in the search box and get search results.
The Novo Button menu
The Novo Button menu can be displayed before the operating system starts. From the menu, you can choose to
- Open the BIOS/UEFI setup utility
- Open the boot device selection menu
- Open the Windows startup options screen
Note: From the Windows startup options screen, you can then choose to
Start your computer using a recovery drive
Reset your computer
Open advanced options screen
Open the Novo Button menu
- Turn on or restart the computer.
- Press F9 repeatedly.
The Fn key and hotkeys
Hotkeys
Look at the top row of the keyboard of your Lenovo computer and you'll find keys with printed icons. These keys are called hotkeys and they provide shortcuts to functions that you'll use frequently. The function that each hotkey provides is denoted by the icon printed on the key.
Hotkeys share keys with function keys (F1–F12) and other keys. Depending on the FnLock setting, you use hotkey functions by pressing the key directly or in combination with the Fn key.
Note: The FnLock switch does not apply to hotkeys not found in the first row of the keyboard. To use these hotkeys, always hold down the Fn key while pressing the key. See figure 1.

Related topics
"Function descriptions for Lenovo hotkeys"
The FnLock switch

The FnLock is an electronic switch that affects how you use hotkey functions. To turn it on and off, press Fn + Esc. See Figure 2.
Note: The Esc key is in the upper left corner of the keyboard. It has an LED that indicates the status of the FnLock switch.
A Lenovo keyboard usually contains hotkeys in the top row. These hotkeys share keys with the function keys (F1–F12) and other keys. For these dual-function keys, the icons or characters denoting the primary functions are printed on top of the icons and characters denoting the secondary functions. See Figure 3

- an icon or character denoting the primary function
- an icon or character denoting the secondary function
Table 8. FnLock and dual-function keys
| FnLock (Esc) LED | FnLock status | Pressing the hotkey alone | Pressing the hotkey while holding down the Fn key |
| Off | Disabled | Primary function | Secondary function |
| On | Enabled | Secondary function | Primary function |
Dual-function keys without printed icons
Some dual-function keys share keys with letter keys and numeric keys. Such keys do not have a dedicated printed icon. The following table lists the hidden functions for these keys.
| Key combination | Hidden function |
| Fn + B | Break |
| Fn + P | Pause |
| Fn + S | SysRq |
| Fn + K | ScrLk |
| Fn + Q | Switch operation modes |
| Key combination | Hidden function |
| Fn + R | Adjust display refresh rate |
| Fn + N | Show device information |
The Copilot key
The era of AI has arrived, and many Lenovo PCs now include a Copilot key on the keyboard. It is located either in the bottom or the top row of the keyboard and is marked with ![]() .
.
For Windows PCs with Copilot in Windows available and enabled, pressing the Copilot key opens Copilot in Windows. Otherwise, pressing the Copilot key opens Windows Search.
Note: Copilot in Windows may not be available in all geographical locations. In regions where Copilot in Windows is available, you may need to update your Windows operating system to version 23H2 or later through Windows Update for Copilot in Windows to become available.
Related topics
"I pressed the Copilot key on my keyboard, but neither Copilot in Windows nor Windows Search opened. What could be the potential cause?"
Interact with your device
Connect to an external display

Connect to a wired display
Connect your computer to the desired display with an appropriate cable.
- Connect one end of the display cable to the HDMI connector or a multi-purpose USB Type-C connector on your computer.
- Connect the other end of the cable to the display.
Connect to a wireless display
Ensure that:
- Both your computer and the display support Miracast technology.
- The display is connected to the same Wi-Fi network as your computer and is discoverable.
- Press Windows key + K.
The computer searches for wireless display devices and audio devices and lists the results. - Select the display you want to connect to, and then follow the on-screen instructions.
Change display settings
- Right-click on a blank area on the desktop, and then select Display settings.
Your computer shows the Display window. - Select the display for which you want to change the settings.
- Change the display settings as necessary.
Set the display mode
- Press
![]() or Fn +
or Fn + ![]() .
.
Your computer shows a list of display modes, with the current mode highlighted. - Select a display mode from the list.
Protect your privacy using the camera switch

The camera switch is a mechanical button that prevents any attempt from capturing your image, thus protecting your privacy. To disable the camera, slide the camera switch to the direction with  . When you want to use the camera again, slide the camera switch to the other direction.
If you slide the camera switch to during a video call, people on the video call will not be able to see you. If you slide the camera switch back to the opposite position, they will be able to see you again.
Note: After you slide the camera switch, or  is displayed on the screen to indicate that the setting is successful.
Explore your unit
Intelligent features
Your computer may be pre-installed with one of Lenovo Vantage, Lenovo PC Manager, or Legion Zone but not all. Most features described here can be enabled or disabled in one of these apps. Other features may be enabled in a standalone app.
Notes:
- Software features are subject to change. Please refer to your actual product.
- You may need to complete online updates to the apps for the features to take effect.
Super Resolution
By utilizing the capabilities and potentials of Intel processors, Super Resolution helps you play videos with a higher resolution than the original. It works especially well in cases where the source video has poor resolution.
For most players, Super Resolution can be enabled or disabled in Lenovo Vantage or Lenovo PC Manager, but for some specific players, you might need to enable this feature manually.
Smart Key

Smart Key ![]() provides a quick shortcut to Lenovo apps and service. Press Smart Key to open the launch panel.
provides a quick shortcut to Lenovo apps and service. Press Smart Key to open the launch panel.
Note: There is also a trick to Smart Key. Go to Preference on the launch panel, select ADD and choose your favorite app to associate with Smart Key. When it is done, press Smart Key twice in quick succession and your favorite app is opened.
Smart Noise Cancelling
Smart Noise Cancelling is a noise reduction feature available on some Lenovo product models. By filtering out input and output noises, Smart Noise Cancelling enhances your audio experience.

| Function | Description | Remarks |
| Microphone noise cancelling | Voice Recognition: Your computer captures multiple voices in a way that reflects their original spatial positions. |
|
| Only My Voice: This option requires you to record your voice so that your computer captures this voice only and tries to eliminate other voices. Note: To remove your voice record, select REMOVE MY VOICE. | ||
| Normal: Your computer focuses on the voice of the person facing it and reduces ambient sounds. | ||
| Multiple Voices: Your computer captures multiple voices from an expanded range in front of the computer. | ||
| Speaker noise cancelling | Your computer filters out other sounds to play only human voices. | These functions are not applicable to scenarios like listening to music and watching videos. |
| Meeting noise cancelling | When this function is selected, your computer uses special algorithms for noise reduction when you are using conferencing applications. |
Notes:
- Depending on its hardware, your computer may not support all the functions and options described above.
- You can view and customize this feature under Device Settings in Lenovo Vantage or Lenovo PC Manager.
Eye Care Mode
Eye Care Mode intelligently adjusts the color temperature of the screen and can reduce the chances of developing eye fatigue or eye strain.
Manage power
Use the information in this section to achieve the best balance between performance and power efficiency.
Rechargeable battery pack
Your computer includes a built-in, rechargeable battery pack that makes mobile computing a reality. When the computer is plugged into an electrical outlet, the battery charges. If you use the computer when you don't have access to an electrical outlet, the battery discharges to supply electricity that the computer system requires for operation.
You can charge the battery any time you want. The battery packs of Lenovo computers support multiple charging modes that are suitable for different power usage habits. You can switch the battery's active charging mode in Lenovo Vantage, Lenovo PC Manager or Legion Zone.
Battery charging is also affected by its temperature. The recommended temperature range for charging the battery is between 10°C (50°F) and 35°C (95°F).
Note:
You can check the battery temperature in Lenovo Vantage.
To maximize the life of the battery, once the battery is fully charged, it must discharge to 94% or lower before it will be allowed to recharge again.
Normal mode
Normal mode is the most basic charging mode. In normal mode, it typically takes 2 to 4 hours for the battery to charge from 0% to 100%.
Conservation mode
If your computer is constantly plugged into an electrical outlet, consider switching the battery charging to conservation mode. In conservation mode, the battery will not be fully charged. Instead, the battery's charge will be kept within 75%–80%. This is beneficial to the long-term health of the battery.
Note: If you want the battery to be fully charged before bringing the computer to work, disable conservation mode by switching the battery charging to normal or rapid charge mode.
Rapid charge mode
If you want the battery to be charged faster than in normal mode, switch the battery charging to rapid charge mode. The following table lists the typical time needed for batteries in rapid charge mode to be charged to 80% and 100% respectively.
Table 9. Reference charge time for batteries in rapid charge mode
| Mode | Time needed to charge from 0% to 80% | Time needed to charge from 0% to 100% |
| Rapid charge | Less than 30 mins | Less than 60 mins |
Overnight charge optimization
Some people follow a regular pattern when using their computers. They finish their workday with the computer at a low battery charge level. They plug in their computers at night and need the battery to be fully charged the next morning so they can unplug the computer and bring it to work. These activities happen at approximately the same time each day. If this sounds like you, consider enabling overnight charge optimization for the battery.
Overnight charge optimization affects battery charging during the night hours, the time when you're usually asleep. When it is enabled, the computer regularly adapts its charging behavior based on observation of when you plug in the computer at night and unplug it in the morning. During the nighttime, the battery is charged to a particular range and is kept within that range for an extended period, before being further charged to 100%. Overnight charge optimization ensures safe charging during the night and is beneficial to the long-term health of the battery.
Note: With overnight charge optimization enabled, if you break your routine one day by unplugging the computer much earlier than usual in the morning, you may find that the battery is not fully charged.
If the battery pack of your computer supports overnight charge optimization, it can be enabled in Lenovo Vantage or Lenovo PC Manager.
Recover full battery capacity
If your computer is constantly plugged in to an electrical outlet and the battery rarely discharges, the battery may not be charged to its full capacity even if the battery meter reports 100% charge. You can recover the battery's full charging potential simply by discharging and re-charging the battery.
- Unplug the computer and use it until the battery charge drops below 20%.
- Plug in the computer and charge the battery to 100%.
Use a power delivery compliant USB Type-C charger with the unit
The USB Type-C connector on the rear side of the computer conforms to the Power Delivery specification. If you did not carry the included ac power adapter with your computer, you have the option of using a qualified USB Type-C charger (purchased separately) that is also Power Delivery compliant to charge the computer in sleep or powered-off state. Lenovo branded USB Type-C chargers with the following listed maximum ratings are tested to work with the computer. Chargers of other brands with the same ratings should also work but are not thoroughly tested.
- 20 V, 4.75 A
- 20 V, 5 A
- 20 V, 6.75 A
- 20 V, 7 A
The rear USB Type-C connector is not designed as the primary power input connector. When the computer is operating, the power supplied by the USB Type-C charger may be insufficient. As a result, the computer may not operate at its full capacity and the battery charging may stop or is very slow. Use the included ac power adapter whenever possible.
When purchasing third-party USB Type-C chargers for use with the computer, choose a product that is safety approved or certified. A disqualified charger may cause damage to your computer or pose an electrical hazard. In many countries and regions, manufacturers or importers of electric chargers can submit their products to a certification authority or approved and recognized testing laboratories. Such a product usually carries a mark if it was tested to pass relevant quality and safety standards.
For some countries and regions, this certification process is even mandatory. If you live in mainland China, choose a charger with the "CCC" mark; for users in many European countries, choose one with the "CE" mark; for users in the United States and Canada, choose a Listed charger that carries a mark by one of the Nationally Recognized Testing Laboratories. (For example, the "UL Listed" mark). For people living in other countries and regions, consult a qualified electrical engineer for how to select a safety approved electric charger.
Related topics
"Multi-purpose USB Type-C connector"
Set power button behavior
By default, pressing the power button puts the computer to sleep mode. However, you can change the power button behavior in Windows Control Panel.
- Type Control Panel in the Windows search box and then press Enter. Open the control panel and view by large or small icons.
- Select the power options and then click choose what the power button does.
A power plan
A power plan is a collection of power-saving settings made available by an operating system. With a power plan, you can set idle time-outs for different hardware components to enter a low-power state. The default power plan and some of its idle time-out settings are listed below for computer models pre-installed with Windows.
The listed settings are active when the computer is connected to an electrical outlet. If your computer include a built-in battery pack, a different collection of time-out settings is set to take effect when the computer is operating on battery power.
- Default power plan: Balanced
- Turn off the display: after 5 minutes
- Put the computer to sleep: after 15 minutes
Note: To wake the computer from the sleep state, press the power button or any key on the keyboard.
Change or customize a power plan
This operation is applicable to computers with pre-installed Windows.
- Type power plan in the Windows search box and then press Enter.
- Customize a power plan of your preference.
Adjustable display refresh rate
Your eyes might not notice it but the content displayed on the computer screen refreshes constantly. Display refresh rate refers to the number of times per second the screen content refreshes itself and is measured in hertz (Hz).
A refresh rate of 60 Hz is adequate for most situations and is energy efficient. However, when viewing videos or playing video games, a higher refresh rate usually provides a smoother viewing experience.
The displays of some Lenovo computers support dual refresh rates. For such a computer, you can manually switch its display to work at either the higher or lower refresh rate. For Windows operation systems, the manual settings are usually found in Settings ➙ System ➙ Display. As a shortcut, you can also use the key combination Fn + R to switch the display refresh rate.
Note: Not all displays support dual refresh rates. If you cannot find settings to change the display refresh rate, the refresh rate of the display might be fixed or cannot be manually changed.
System operation modes
Lenovo has preset several modes in which your computer can operate. The maximum attainable performance, power consumption, and speed limit for the heat sink fan vary between the operation modes. Consider the following conditions when you want to switch operation modes.
- The environment where you use your computer
- The tasks running on your computer
You can switch the operation mode in the pre-installed app Lenovo Vantage, Lenovo PC Manager, or Legion Zone. As a shortcut, you can also use the key combination Fn + Q. The following table lists the available operation modes on your computer and the recommended conditions for each mode.
Table 10. Operation modes and their recommended usage conditions
| Icon | Operation mode | Recommended conditions |
 | Performance |
|
 | Balance | You plan to frequently switch between different computer tasks over a period time. |
 | Quiet |
|
Note: When the computer is operating on battery power or is plugged in using an under-rated power adapter, you may not be able to switch it to Performance mode. In Balance mode, the computer dynamically switches between Performance mode and Quiet mode based on the tasks that are running on the computer.
Change settings in UEFI/BIOS setup utility
This section introduces what is UEFI/BIOS and the operations you can perform in its setup utility.
What is UEFI/BIOS setup utility
UEFI/BIOS is the first program that runs when a computer starts. UEFI/BIOS initializes hardware components and loads the operating system and other programs. Your computer may include a setup program (setup utility) with which you can change certain UEFI/BIOS settings.
Open the UEFI/BIOS setup utility
- Turn on or restart the computer.
- When the Lenovo logo appears on the screen, press F2 repeatedly. Or enter Novo Button menu.
- Select UEFI/BIOS Setup.
Enable or disable Fool Proof Fn Ctrl
- Open the UEFI/BIOS setup utility.
- Select Configuration.
- Change the Fool Proof Fn Ctrl setting to Enabled or Disabled.
- Select Exit ➙ Exit Saving Changes.
When enabled, the Fn key and the Ctrl key can be used interchangeably for key combinations involving the Ctrl key. For example, you can press either Ctrl + A or Fn + A to select all text in a text editing application.
Select boot devices
Normally, the computer starts to a boot manager loaded from the secondary storage device of the computer. Occasionally, you may need to start the computer to a program or boot manager loaded from another device or a network location. After the system firmware initializes all devices, you can press an interruption key to display the boot menu and select a desired boot device.
- Turn on or restart the computer.
- Press F12.
- From the boot device menu, select a boot device to start the computer.
You can make a permanent change on boot devices in the UEFI/BIOS setup utility. Select the Boot menu; in the EFI section, select the desired boot device and move it to the top of the device list. Save changes and exit the setup utility for the change to take effect.
Change hotkey mode
- Open the UEFI/BIOS setup utility.
- Select Configuration ➙ Hotkey Mode and press Enter.
- Change the setting to Disabled or Enabled.
- Select Exit ➙ Exit Saving Changes.
Enable or disable always-on
For some Lenovo computers with always-on connectors, the always-on function can be enabled or disabled in the UEFI/BIOS setup utility.
- Open the UEFI/BIOS setup utility.
- Select Configuration ➙ Always On USB and press Enter.
- Change the setting to Disabled or Enabled.
- Select Exit ➙ Exit Saving Changes.
Set passwords in UEFI/BIOS setup utility
This section introduces the types of passwords that you can set in the UEFI (Unified Extensible Firmware Interface) or BIOS (Basic Input/Output System) setup utility.
Password types
You can set various types of passwords in the UEFI/BIOS setup utility.
| Password type | Pre-requisite | Usage |
| Administrator password | No | You must enter it to start the setup utility. |
| User password | The administrator password must be set. | You can use the user password to start the setup utility. |
| Master hard disk password | No | You must enter it to start the operating system. |
| User hard disk password | The master hard disk password must be set. | You can use the user hard disk password to start the operating system. |
Notes:
- All passwords set in the setup utility consist of alphanumeric characters only.
- If you start the setup utility using the user password, you can only change a few settings.
Set administrator password
You set the administrator password to prevent unauthorized access to the UEFI/BIOS setup utility.
Attention: If you forget the administrator password, a Lenovo authorized service personnel cannot reset your password. You must take your computer to a Lenovo authorized service personnel to have the system board replaced. Proof of purchase is required and a fee will be charged for parts and service.
- Open the UEFI/BIOS setup utility.
- Select Security ➙ Set Administrator Password and press Enter.
- Enter a password string that contains only letters and numbers and then press Enter
- Enter the password again and press Enter.
- Select Exit ➙ Exit Saving Changes.
Next time you start the computer, you must enter the administrator password to open the setup utility. If Power on Password is enabled, you must enter the administrator password or the user password to start the computer.
Change or remove administrator password
Only the administrator can change or remove the administrator password.
- Open the UEFI/BIOS setup utility using the administrator password.
- Select Security ➙ Set Administrator Password and press Enter.
- Enter the current password.
- In the Enter New Password text box, enter the new password.
- In the Confirm New Password text box, enter the new password again.
Note: If you want to remove the password, press Enter in both text boxes without entering any character. - Select Exit ➙ Exit Saving Changes.
If you remove the administrator password, the user password is also removed.
Set user password
You must set the administrator password before you can set the user password.
The administrator of the setup utility might need to set a user password for use by others.
- Open the UEFI/BIOS setup utility using the administrator password.
- Select Security ➙ Set User Password and press Enter.
- Enter a password string that contains only letters and numbers and then press Enter. The user password must be different from the administrator password.
- Enter the password again and press Enter.
- Select Exit ➙ Exit Saving Changes.
Enable power-on password
If the administrator password has been set, you can enable power-on password to enforce greater security.
- Open the UEFI/BIOS setup utility.
- Select Security ➙ Power on Password and press Enter.
Note: The administrator password must be set in advance. - Change the setting to Enabled.
- Select Exit ➙ Exit Saving Changes.
If power-on password is enabled, a prompt appears on the screen every time you turn on the computer. You must enter the administrator or user password to start the computer.
Set password for the secondary storage device
Permanent data is stored on secondary storage devices. Your computer may include one or more solid-state drive or hard disk drive as secondary storage device(s). You can set passwords for secondary storage devices in the setup utility to prevent unauthorized access to your data.
Attention: Be extremely careful when setting a hard disk password. If you forget the hard disk password, a Lenovo authorized service personnel cannot reset your password or recover data from the hard disk. You must take your computer to a Lenovo authorized service personnel to have the hard disk drive replaced. Proof of purchase is required and a fee will be charged for parts and service.
- Open the UEFI/BIOS setup utility.
- Select Security ➙ Set Hard Disk Password and press Enter.
Note: If your computer model includes more than one secondary storage device, you can set separate password for each device. If you start the setup utility using the user password, you cannot set hard disk password. - Follow on-screen instructions to set both master and user passwords.
Note: The master and user hard disk passwords must be set at the same time. - Select Exit ➙ Exit Saving Changes.
If the hard disk password is set, you must provide the correct password to start the operating system.
Change or remove hard disk password
- Open the UEFI/BIOS setup utility.
- Select Security.
- Change or remove the hard disk password.
To change or remove master password, select Change Master Password and press Enter.
Note: If you remove the master hard disk password, the user hard disk password is also removed.
To change user password, select Change User Password and press Enter.
Note: The user hard disk password cannot be removed separately. - Select Exit ➙ Exit Saving Changes.
Frequently asked questions
How do I partition my storage drive
Refer to https://support.lenovo.com/solutions/ht503851.
I pressed the Copilot key on my keyboard, but neither Copilot in Windows nor Windows Search opened. What could be the potential cause?
Your Windows operating system version is not up to date and does not include the necessary software components. Update your Windows operating system to version 23H2 or later using Windows Update and then try again.
Note: The Version 23H2 update may not be immediately available for your PC. You may need to periodically open Windows Update and manually check for updates to install the 23H2 update when it becomes available for your PC.
What should I do if my unit stops responding
Press and hold the power button until the computer turns off. Then restart the computer.
What should I do if I spill liquid on the computer?
- Carefully unplug the ac power adapter and turn off the computer immediately. The more quickly you stop the current from passing through the computer the more likely you will reduce damage from short circuits.
Attention: Although you might lose some data or work by turning off the computer immediately, leaving the computer on might make your computer unusable. - Wait until you are certain that all the liquid is dry before turning on your computer.
Do not try to drain out the liquid by turning over the computer. If your computer has keyboard drainage holes on the bottom, the liquid will be drained out through the holes.
Where can I get the latest device drivers and UEFI/BIOS?
- Lenovo Vantage, Lenovo PC Manager or Legion Zone
- Lenovo Support Web site at https://support.lenovo.com.
Why does my computer start automatically when I open the lid?
Your computer may have Flip to Start enabled. Many Lenovo notebook computers include a sensor that can detect the angle at which the lid is opened. When you open the lid, the sensor can detect this behavior. If Flip to Start is enabled, the computer will respond by starting up automatically.
If you don't like this feature, you can disable it. Flip to Start can be enabled and disabled in:
- Lenovo Vantage, Lenovo PC Manager or Legion Zone
- Firmware Setup Utility
Function descriptions for Lenovo hotkeys
Hotkey functions are denoted by the icons printed on the keys. The following table describes the functions for all Lenovo hotkeys. The keyboard of your Lenovo computer should only support a subset of the listed hotkeys. See Table 11.


Note: Hotkey functions may change if the associated app or the Windows operating system is updated.
Help and support
Self-help resources
Use the following self-help resources to learn more about the computer and troubleshoot problems.
| Resources | How to access? |
| Troubleshooting and frequently asked questions |
|
| Accessibility information | https://www.lenovo.com/accessibility |
| Reset or restore Windows |
|
Use Lenovo Vantage, Lenovo PC Manager or Legion Zone to:
| Use Windows Search. |
Product documentation:
|
|
Lenovo Support Web site with the latest support information of the following:
| Visit https://support.lenovo.com |
| Windows help information |
|
What is a CRU
Customer replaceable units (CRUs) are parts that can be replaced by the customer. A Lenovo computer may contain the following types of CRUs:
| Self-service CRU | Parts that can be replaced easily by customer themselves or by trained service technicians at an additional cost. |
| Optional-service CRU | Parts that can be replaced by customers with a greater skill level. Trained service technicians can also provide service to install or replace the parts under the type of warranty designated for the customer's machine. |
If you intend to install a CRU, Lenovo will ship the CRU to you. You might be required to return the defective part that is replaced by the CRU. When return is required:
- return instructions, a prepaid shipping label, and a container will be included with the replacementCRU; and
- you might be charged for the replacementCRU if Lenovo does not receive the defective CRU within thirty (30) days of your receipt of the replacement CRU.
For full details, see the Lenovo Limited Warranty at https://www.lenovo.com/warranty/llw_02.
CRUs for your product model
The table below lists the CRUs and CRU types that are defined for your product model.
| Part | Self-service CRU | Optional-service CRU |
| Power cord | X | |
| ac power adapter | X |
Notes:
- CRU replacement instruction is provided in one or more of the following publications and are available from Lenovo at any time upon your request.
the product User Guide
the printed publications that came with the product - Replacement of any parts not listed above, including the built-in rechargeable battery, must be done by a Lenovo-authorized repair facility or technician. Go to https://support.lenovo.com/partnerlocation for more information.
Call Lenovo
If you have tried to correct the problem yourself and still need help, you can call Lenovo Customer Support Center.
Before you contact Lenovo
Record product information and problem details before you contact Lenovo.
| Product information | Problem symptoms and details |
|
|
Note: The product name and serial number can usually be found on the bottom of the computer, either printed on a label or etched on the cover.
Lenovo Customer Support Center
During the warranty period, you can call Lenovo Customer Support Center for help.
Telephone numbers
For a list of the Lenovo Support phone numbers for your country or region, go to https://pcsupport.lenovo.com/supportphonelist.
Note: Phone numbers are subject to change without notice. If the number for your country or region is not provided, contact your Lenovo reseller or Lenovo marketing representative.
Services available during the warranty period
- Problem determination - Trained personnel are available to assist you with determining if you have a hardware problem and deciding what action is necessary to fix the problem.
- Lenovo hardware repair - If the problem is determined to be caused by Lenovo hardware under warranty, trained service personnel are available to provide the applicable level of service.
- Engineering change management - Occasionally, there might be changes that are required after a product has been sold. Lenovo or your reseller, if authorized by Lenovo, will make selected Engineering Changes (ECs) that apply to your hardware available.
Services not covered
- Replacement or use of parts not manufactured for or by Lenovo or nonwarranted parts
- Identification of software problem sources
- Configuration of UEFI/BIOS as part of an installation or upgrade
- Changes, modifications, or upgrades to device drivers
- Installation and maintenance of network operating systems (NOS)
- Installation and maintenance of programs
For the terms and conditions of the Lenovo Limited Warranty that apply to your Lenovo hardware product, see "Warranty information" in the Safety and Warranty Guide that comes with your computer.
Purchase additional services
During and after the warranty period, you can purchase additional services from Lenovo at https://pcsupport.lenovo.com/warrantyupgrade.
Service availability and service name might vary by country or region.
Documents / Resources
References
![www.lenovo.com]() Lenovo Accessories & Software - Shop Now | Lenovo US
Lenovo Accessories & Software - Shop Now | Lenovo US![www.lenovo.com]() Regulatory Compliance | Minimizing Visual Fatigue | Lenovo US
Regulatory Compliance | Minimizing Visual Fatigue | Lenovo US![support.microsoft.com]() Microsoft Support
Microsoft Support![forums.lenovo.com]() English Community-Lenovo Community
English Community-Lenovo Community![www.lenovo.com]() Product Accessibility | Regulatory Compliance | Lenovo US
Product Accessibility | Regulatory Compliance | Lenovo USOfficial Lenovo Laptop, Accessories & PC Support - Lenovo Support US
SupportPhoneList - Lenovo Support US
Lenovo Warranty Check | Device Warranty Lookup | Lenovo Support US
Download manual
Here you can download full pdf version of manual, it may contain additional safety instructions, warranty information, FCC rules, etc.
Advertisement


Need help?
Do you have a question about the Legion Pro 5i and is the answer not in the manual?
Questions and answers