Advertisement
Parts & Features

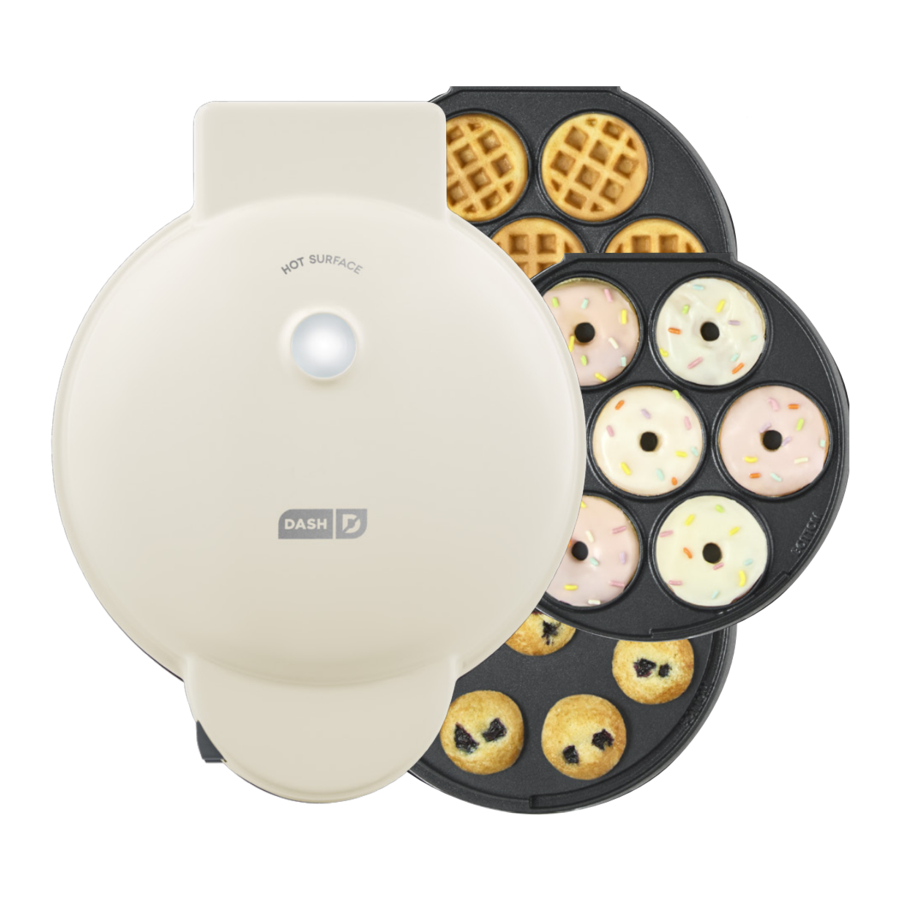
COOKING SURFACES

REMOVABLE PLATES

Before First Use
Before first use, remove all packaging materials and thoroughly clean the Treat Maker.

Never touch the Removable Plates or Cover while appliance is in use.

DO NOT lift the Cover with your arm positioned over the Removable Plates. They are hot and may cause injury.

Never touch the Removable Plates or the inside of the Treat Maker while it is plugged in and preheating or when it has not fully cooled.

Always lift and lower from the right side using the Cover Handle to avoid hitting the Release Tab.
Using the Treat Maker
- Choose two Removable Plates for cooking. Install the Removable Plates by sliding them into the Insertion Slots located at the top and bottom of the Treat Maker (photo A).
- Each Removable Plate is labeled either "Top" or
"Bottom." Slide each plate into its respective slot.
![]()
TOP
![]()
BOTTOM
Push down at the corner where the plate is labeled "Top" or "Bottom" until there is a slight click indicating that the plate is properly in place (photo B).

- To begin cooking, place the appliance on a stable and dry surface. Plug the cord into a power outlet. The Indicator Light will illuminate (photo C) signaling that the Treat Maker is heating up.
- Once the Removable Plates reach the optimal cooking temperature, the Indicator Light will automatically shut off (photo D) indicating that it's ready to begin cooking.

- Carefully lift the Cover by the Cover Handle and lightly grease both Removable Plates with a small amount of cooking oil (photo E).
- Pour batter onto the bottom Removable Plate (photo F) and close the Cover.


 NOTE:
NOTE:
Aerosol cooking sprays often contain soy lecithin, an additive that can cause nonstick surfaces to become sticky and hard to clean over time.

To ensure the longevity of your product, avoid aerosols and instead grease cooking surfaces using a silicone basting brush or a non-aerosol spray bottle.
- Once treats are cooked to preference, carefully remove from the bottom Removable Plate with a heat-resistant nylon or silicone cooking utensil (photo G).
- When finished cooking, unplug the Treat Maker and allow it to cool before moving, cleaning, or ejecting the Removable Plates (photo H).


 Do not use metal utensils to remove or place food on the Removable Plates as this will damage their nonstick coating. |
- To remove the Removable Plates, press the corresponding Release Tabs on the side of the Handle [there are Release Tabs at the bottom (photo I) and at the top (photo J)].


| Do not attempt to remove the Removable Plates until they have completely cooled. |
PIPING BAG INSTRUCTIONS FOR MINI DONUT PLATE
For best results when adding batter to donut molds, use a piping bag for added precision. When a piping bag isn't available, a Ziploc® bag can serve as a substitute.
To use a Ziploc® bag as a piping bag, take a large, clean Ziploc® bag and ensure it is completely dry.
NOTE: Fluted Ziploc® bags cannot be used for this purpose, only bags with straight 90° angled corners are suitable.
- Find a large cup at least the size of a standard pint glass. Insert one bottom corner of the Ziploc® bag into the glass such that the bag lines the glass (photo A).
- Carefully pour or spoon batter into the bag. Only fill the bag about halfway to ensure there is enough space to grip the bag while piping (photo B).

- Grasp the excess plastic of the bag and pull it out of the glass. Make a fist around the excess plastic to grip the bag, squeezing to push all batter down into the corner of the bag and to push out any excess air from the top of the bag (photo C).
- Use scissors to cut a small tip off of the corner of the Ziploc® bag. Start with a small cut and gradually increase the size if needed, depending on the thickness of the batter (photo D).

- Hold the bag over each donut mold and gently squeeze the bag to pipe batter into each mold. For each mini donut, start from the top and pipe in a circular motion. Fill each mold about three-quarters full. For even cooking and best results, fill the middle donut mold last (photo E).


To ensure even browning, carefully flip the donuts with a toothpick midway through cooking.
Cleaning & maintenance
Always allow the appliance to cool completely before moving, cleaning, or storing. Do not submerge appliance in water or any other liquids. Never use abrasive cleaning agents to clean the appliance as this may damage the Treat Maker.
In order to keep the Treat Maker in pristine working order, thoroughly clean the appliance after each use. This will prevent the build-up of food or oil.
- Before removing the Removable Plates and after use, unplug the Treat Maker to allow it to cool completely.
- Allow the Removable Plates to cool before touching or running them under water.
- The Removable Plates are dishwasher safe, but hand washing is recommended to preserve the nonstick cooking surface.
- To hand wash the Removable Plates, use a damp, soapy cloth to wipe down. Thoroughly rinse the cloth and wipe again. If any food remains, apply a small amount of cooking oil and let sit for 5-10 minutes. Then scrub the Removable Plates with a sponge or soft-bristled brush to dislodge food. Use a damp, soapy cloth to wipe down Removable Plates. Rinse the cloth thoroughly and wipe again. If food still remains, apply cooking oil once more and let sit for a few hours before scrubbing again.
- Thoroughly dry the Treat Maker before storing.
Troubleshooting
While Dash products are durable, you may encounter one or more of the problems listed below. If the issue is either not solved by the solutions recommended below or not included on this page, please contact our Customer Support team at 1-800-898-6970 or support@bydash.com.
| ISSUE | SOLUTION |
| The light on the Treat Maker keeps shutting off. | This is normal. During the cooking process, the heating element will automatically turn on and off to regulate the temperature and ensure that the Removable Plates do not get too hot or cold. When this occurs, the Indicator Light turns on and off. |
| How do I know when the Treat Maker is heated and ready to use? | When the Treat Maker reaches the optimal temperature, the Indicator Light shuts off and that means it's ready to get cooking! |
| There is no On/Off Button. How do I turn the Treat Maker off and on? | To turn on, simply plug in the power cord. When finished cooking, turn off the Treat Maker by unplugging it. |
| When using the Treat Maker, the Cover gets very hot. Is this normal? | Yes, this is completely normal. When using the Treat Maker, always lift and lower the Cover by the Cover Handle. To prevent personal injury, DO NOT lift the Cover with your arm positioned over the Removable Plates. They are hot and may cause injury. |
| After using the Treat Maker a few times, food is starting to stick to the surface. What is happening? | There is probably a build-up of burnt food residue on the Removable Plates. This is normal, especially when cooking with sugar. Allow the appliance to cool fully. Then, use a damp, soapy cloth to wipe down the Plates. Thoroughly rinse the cloth and wipe again. If any food remains, apply a small amount of cooking oil and let sit for 5-10 minutes. Then scrub with a sponge or soft-bristled brush to dislodge food. |
| The Indicator Light will not turn on and the Removable Plates are failing to heat. |
|
RECIPE GUIDE
Follow us!
@bydash recipes, videos & inspiration
@unprocessyourfood | veg & vegan-friendly meals
Classic Waffle Bites
Prep Time: 5-7 minutes • Cook Time: 18-20 minutes • Serves: 26-28 waffle bites
Ingredients:
| 1 cup flour 1 tablespoon sugar 2 teaspoons baking powder ¼ teaspoon salt | 1 egg 1 cup milk 2 tablespoons melted butter or vegetable oil |
Directions:
- In a medium bowl, sift the flour, sugar, baking powder, and salt. In a separate bowl, whisk the egg, milk, and melted butter. Add the wet ingredients to the dry and mix until just incorporated.
- Insert the Waffle Bite Plates into the Treat Maker. Preheat and grease the cooking surfaces with a light coating of cooking oil. Pour ¼ cup of batter into each Waffle Bite mold and cook until golden brown. Repeat with the remaining batter.
- Serve with maple syrup for dipping and enjoy bite-sized deliciousness!
Chicken & Waffle Bites
Prep Time: 20-25 minutes • Cook Time: 20-25 minutes • Serves: 26-28 waffle bites
Ingredients:
For the Fried Chicken:
2 large boneless chicken breasts, cut into small pieces 2 cups butter milk
1 cup all-purpose flour
½ cup cornstarch
2 teaspoons garlic powder
2 teaspoons smoked paprika
1 teaspoon salt
½ teaspoon onion powder
½ teaspoon freshly ground black pepper 2 cups vegetable oil
For the Maple Honey Butter:
¼ cup unsalted butter, softened
1½ tablespoons honey
1 tablespoon maple syrup Pinch salt
For the Waffle Bites
1 cup flour
1 tablespoon sugar
2 teaspoons baking powder
¼ teaspoon salt
1 egg
1 cup milk 2 tablespoon melted butter or vegetable oil
Directions:
- In a large bowl, coat chicken pieces with buttermilk. Stir well to make sure the chicken is fully coated. Cover and refrigerate for 6 hours or overnight.
- For the maple honey butter, add softened butter, honey, maple syrup, and salt to a medium bowl and whisk until well combined. Set aside or refrigerate until needed. Bring to room temperature before serving.
- To cook chicken, combine flour, cornstarch, garlic powder, paprika, salt, onion powder, and black pepper in a wide bowl.
- In a deep skillet or saucepan, heat oil over medium-high heat. Remove the pieces of chicken from the buttermilk mixture, allowing the excess to drip off. Coat each piece in the flour mixture.
- Carefully add each piece to the skillet or saucepan, being careful not to overcrowd. Fry the chicken until golden, about 3-5 minutes per side, and transfer to a towel-lined plate. Repeat with remaining chicken. Set aside.
- To prepare waffle bites, follow the Classic Waffle Bites Recipe.
- Spread the maple honey butter over each waffle bite and top with a piece of fried chicken. Drizzle with additional honey as desired.
- Serve and enjoy this sweet and savory classic!
Mini Bacon corn muffins
Prep Time: 15-20 minutes • Cook Time: 12-14 minutes • Serves: 24-26 mini muffins
Ingredients:
For the muffins:
4 strips of bacon
¾ cup all-purpose flour
½ cup corn meal
¾ teaspoon salt
2 teaspoons baking powder
2 tablespoons brown sugar
¾ cup milk
1 egg
3 tablespoons melted butter
1 tablespoon reserved bacon fat
For the frosting:
8 ounces room temperature cream cheese
1 tablespoon honey
2 tablespoons hot sauce
1 bunch of chives
Directions:
- Preheat oven to 375°F. Place bacon on a baking sheet and bake in oven for 12 minutes.
- Remove from the oven and place bacon on a paper towel to drain. Then pour the bacon fat from the baking sheet into a glass container. Once bacon is cool, cut into small pieces for garnish.
- Combine all dry ingredients in a bowl. In a separate bowl, combine the egg, milk, butter, and bacon fat until mixed through. Mix the wet ingredients into the dry ingredients and stir until combined.
- Insert Mini Cupcake Plate into the Treat Maker. Preheat and grease the cooking surfaces with a light coating of cooking oil. Add 1 tablespoon of batter into each cupcake mold and bake until light brown, about 2-3 minutes.
- Carefully remove the muffins using silicone tongs and allow them to cool.
- Prepare the cream cheese frosting by mixing all ingredients. Transfer to a piping bag and pipe onto cooled corn muffins in a circular motion. Then top each muffin with a small piece of bacon.
- Serve and dig in whole hog!
Mini Blueberry muffins
Prep Time: 10-12 minutes • Cook Time: 20-24 minutes • Serves: 35-40 mini muffins
Ingredients:
| 1¼ cups all-purpose flour 1 teaspoon salt 2 teaspoons baking powder 6 tablespoons unsalted butter, softened | ¾ cup white sugar 1 egg 1 teaspoon vanilla extract 1/3 cup whole milk 1½ cups fresh blueberries |
Directions:
- In a bowl, combine flour and baking powder.
- Using a stand mixer or hand mixer, cream together butter and sugar.
- Add egg to butter mixture and mix well. Then add vanilla, salt, and flour mixture and mix on low speed until combined.
- Add milk and mix until batter is smooth. Then fold in blueberries.
- Insert Mini Cupcake Plates into Treat Maker. Preheat and grease the cooking surfaces with a light coating of cooking oil. Add 1 tablespoon of batter into each cupcake mold and cook for about 2-3 minutes.
- Carefully remove the muffins using silicone tongs.
- Serve warm and enjoy this homemade mini version of a coffee shop classic!
Mini cake donuts
Prep Time: 5-7 minutes • Cook Time: 20-22 minutes • Serves: 25-28 mini donuts
Ingredients:
| 1½ cups all-purpose flour 2 teaspoons baking powder ½ cup sugar ¼ teaspoon salt | 1 large egg ½ cup whole milk 1 teaspoon vanilla extract 4 tablespoons unsalted butter, melted |
Directions:
- In a large mixing bowl, mix flour, baking powder, sugar, and salt together.
- In a separate bowl, whisk together egg, milk, vanilla extract, and butter. Mix dry ingredients into the wet ingredients until well combined.
- Insert Mini Donut Plates into Treat Maker. Preheat and grease the cooking surfaces with a light coating of cooking oil. Follow Piping Bag Instructions. Pipe batter into donut molds until each mold is about ¾ full.
- Bake for 1½ minutes. To achieve even brownness on both sides, open and use a toothpick to flip donuts and bake for another 2-3 minutes or until desired brownness.
- Use tongs to remove donuts and transfer to a cooling rack.
- Serve plain or top with glaze of choice and enjoy 360° of deliciousness!
Potato & Cheddar Bites
Prep Time: 10-12 minutes • Cook Time: 20-25 minutes • Serves: 20-25 bites
Ingredients:
| 2 pounds baking potatoes—peeled, coarsely shredded and squeezed dry (about 4 medium potatoes) 2 large eggs, lightly beaten 3 tablespoons all-purpose flour 1½ teaspoons kosher salt 1 teaspoon baking powder ¾ cup shredded extra-sharp yellow cheddar cheese, plus more for topping | 3 tablespoons melted unsalted butter, plus more for brushing ½ cup crumbled cooked bacon, plus more for topping {optional} 1/3 cup chopped chives, plus more for topping Sour cream, for topping |
Directions:
- Preheat the oven to 200°F. Insert the Waffle Bite Plates into the Treat Maker. Preheat and grease the cooking surfaces with a light coating of cooking oil.
- In a large bowl, mix the potatoes with the eggs, flour, salt, baking powder, ¾ cup of cheese, and butter. Fold in the ½ cup of bacon and chives.
- Spread 1-2 tablespoons of potato mixture onto each Waffle Bite Mold. Close and cook until golden and crisp, about 5-7 minutes. Season with salt.
- Transfer to a rack in the oven to keep warm. Repeat with the remaining potato mixture.
- When ready to serve, top with sour cream, crumbled bacon, cheddar, and chopped chives. Enjoy as a breakfast side or as a stand-alone snack!
Chocolate Frosted Cake Donuts
Prep Time: 5-7 minutes • Cook Time: 20-22 minutes • Serves: 25-28 mini donuts
Ingredients:
1½ cups all-purpose flour
1/3 cup cocoa powder
2 teaspoons baking powder
¼ teaspoon salt
1 large egg
½ cup sugar
¼ cup sour cream or Greek yogurt
1 teaspoon vanilla extract
3 tablespoons butter, melted
2/3 cup whole milk
For Chocolate Glaze:
¾ cup confectioners' sugar
3 tablespoons cocoa powder
½ teaspoon vanilla extract
2½ tablespoons half and half

Directions:
- Mix flour, cocoa powder, baking powder, and salt in a medium bowl.
- In a separate bowl, whisk together the egg, sugar, vanilla extract, milk, and melted butter. Mix in half the flour mixture then half the Greek yogurt. Repeat until batter has a smooth texture.
- Insert Mini Donut Plates into Treat Maker. Preheat and grease the cooking surfaces with a light coating of cooking oil.
- Follow Piping Bag Instructions. Pipe batter to donut molds until about ¾ full.
- Bake for 2-3 minutes, or until desired doneness.
- Allow to cool completely on a cooling rack.
- To prepare chocolate glaze, whisk together all ingredients in a small bowl until creamy and smooth.
- Dip top of donuts into the glaze and place on a cooling rack until coating is firm.
- Serve and get ready to go loco for cocoa!
MORE RECIPE IDEAS
| RECIPE IDEA | INGREDIENTS | COOKING TIME |
| Protein Waffle | Classic Waffle Recipe, 1 scoop protein powder | 4-6 min |
| Cornbread Waffle | ¼ cup cornbread batter | 6-8 min |
| Mashed Potato Bite | 3 tablespoons mashed potatoes | 5 min |
| S'more Biscuit | 1 refrigerated biscuit dough, sliced lengthwise 2 squares milk chocolate 5 mini marshmallows | 5-7 min |
| Grilled Cheese | 2 slices white or wheat bread, buttered 2 slices American Cheese | 5 min |
| Chocolate Chip Cookie | 2 tablespoons cookie dough | 5-7 min |
| Waffle Omelette | 1 egg beaten 2 tablespoons chopped veggies 1 tablespoon grated Swiss cheese | 5 min |
| We want you to Feel Good about your Dash products! Sign up for our Feel Good Rewards program at bydash.com/feelgood to DOUBLE your warranty, part of our commitment to quality and customer satisfaction. |
Сustomer support
We're here to help! Our customer support teams in the US and Canada are at your service Monday - Friday.
Contact us at 1 (800) 898-6970 orsupport@bydash.com.
We're here to help! Our customer support teams in the US and Canada are at your service Monday - Friday. Contact us at 1 (800) 898-6970 or support@bydash.com.

STOREBOUND, LLC – 1 YEAR LIMITED WARRANTY
Your StoreBound product is warranted to be free from defects in material and workmanship for a period of one (1) year from the date of the original purchase when utilized for normal and intended household use. Should any defect covered by the terms of the limited warranty be discovered within one (1) year, StoreBound, LLC will repair or replace the defective part. To process a warranty claim, contact Customer Support at support@bydash. com for further assistance and instruction. A Customer Support agent will assist you by troubleshooting minor problems. If troubleshooting fails to fix the problem, a return authorization will be issued. Proof of purchase indicating the date and place of purchase is required and should accompany the return. You must also include your full name, shipping address, and telephone number. StoreBound will not ship to a PO Box. StoreBound will not be responsible for delays or unprocessed claims resulting from a purchaser's failure to provide any or all of the necessary information. Freight costs must be prepaid by the purchaser.
All replacement inquiries are to be submitted to support@bydash.com or contact Customer Support at 1-800-898-6970. There are no express warranties except as listed above.
REPAIRS

Risk of electric shock! The Dash MultiMakerTM is an electrical appliance.
Do not attempt to repair the appliance yourself under any circumstances. Contact Customer Support regarding repairs to the appliance.
TECHNICAL SPECIFICATIONS
Voltage 120V ~ 60Hz FOOD
Power Rating 800W
Stock#: DIM813_20240429_V1
IMPORTANT SAFEGUARDS
PLEASE READ AND SAVE THIS INSTRUCTION AND CARE MANUAL.
When using electrical appliances, basic safety precautions should always be followed, including:
- Read all instructions before use.
- Remove all bags and packaging from appliance before use.
- Never leave appliance unattended when in use.
- Make sure the appliance is cleaned thoroughly before using.
- Do not use appliance for other than intended use. For household use only. Do not use outdoors.
- Only use the appliance on a stable, dry surface.
- Do not place appliance on or near a hot gas burner, hot electric burner, or in a heated oven.
- Extreme caution must be used when moving an appliance containing hot oil or other hot liquids.
- This appliance can be used by persons with reduced physical, sensory, or mental capabilities or lack of experience of knowledge, if they have been given supervision or instruction concerning use of the appliance in a safe way and understand the hazards involved.
- This appliance is not a toy. Do not let children use this appliance. Close supervision is necessary when any kitchen appliance is used by or near children.
- Do not use metal utensils on the Cooking Surface as this will damage the nonstick surface.
![]()
Hot surfaces! Never touch the Cooking Surface or Cover while appliance is in use. Always lift and lower the Cover by the Handle.- DO NOT lift the Cover so that your arm is over the Cooking Surface as it is hot and may cause injury. Lift from the side.
- DO NOT use the Treat Maker near water or other liquids, with wet hands, or while standing on a wet surface.
- To prevent the risk of fire, electric shock, or personal injury, do not put cord, plug, or appliance in or near water or other liquids. The Maker is NOT dishwasher safe.
- Do not let the cord touch hot surfaces or hang over the edge of tables or counters.
- Refrain from using attachments that are not recommended by the appliance manufacturer, as this may result in fire, electric shock, or personal injury.
- Unplug the appliance and allow to cool prior to moving, cleaning, storage, and when not in use. To unplug, grasp the plug and pull from the outlet. Never pull from the power cord.
- DO NOT remove the Removable Plates until the Treat Maker has completely cooled. Failure to do so may result in injury.
![]()
The Treat Maker will still heat up if plugged in without any Removable Plates in place. Always have the Removable Plates properly in place in the Maker before plugging it in.- Never use abrasive cleaning agents to clean the appliance as this may damage the Treat Maker and the nonstick Removable Plates.
- The Removable Plates are dishwasher safe on the top rack, but we recommend hand washing to preserve the life of the product. Let the Removable Plates cool before removing and/or washing.
- Do not operate this appliance with a damaged cord, damaged plug, after the appliance malfunctions, is dropped, or damaged in any manner. Return appliance to the nearest authorized service facility for examination, repair, or adjustment.
- For maintenance other than cleaning, please contact StoreBound directly at 1-800-898-6970 Monday – Friday or by email at support@bydash.com.
- StoreBound shall not accept liability for damages caused by improper use of the appliance.
- Improper use of the appliance can result in property damage or even in personal injury.
- This appliance has a polarized plug (one blade is wider than the other). To reduce the risk of electric shock, this plug will fit in a polarized outlet only one way. If the plug does not completely fit in the outlet, reverse the plug. If it still does not fit, contact a qualified electrician. Do not attempt to modify the plug in any way.
- A short power supply cord is to be provided to reduce the risk resulting from becoming entangled in or tripping over a longer cord. An extension cord may be used if care is exercised in its use. If an extension cord is used, the marked electrical rating of the extension cord should be at least as great as the electrical rating of the appliance. If the appliance is of the grounded type, the extension cord should be a grounding 3-wire cord. The extension cord should be arranged so that it will not drape over the countertop or tabletop where it can be pulled on by children or tripped over unintentionally.

Documents / Resources
References
Download manual
Here you can download full pdf version of manual, it may contain additional safety instructions, warranty information, FCC rules, etc.
Advertisement


Need help?
Do you have a question about the Multimaker and is the answer not in the manual?
Questions and answers