Dash DPM200 - Pocket Sandwich Maker Manual & Recipes
- Instruction manual (15 pages) ,
- Instruction manual (15 pages)
Advertisement
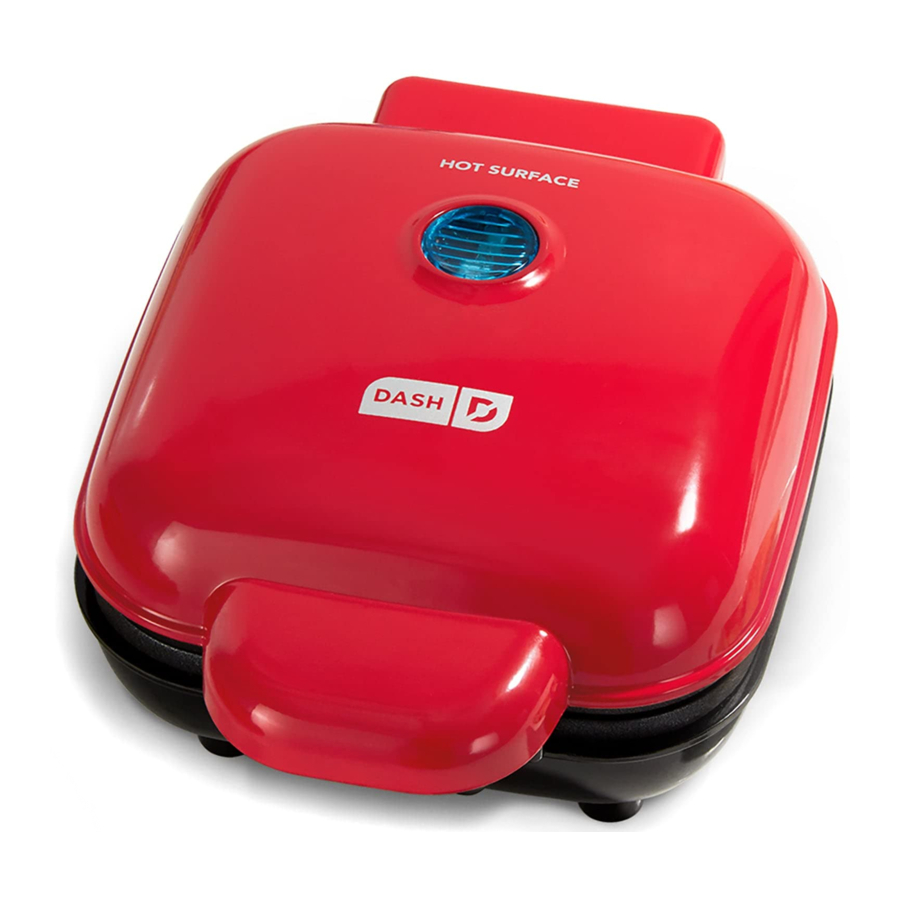
Parts & Features

USING YOUR Pocket Sandwich Maker
Before first use, remove all packaging material and thoroughly clean your Pocket Sandwich Maker.
Never touch the Cooking Surface or Cover while appliance is in use.

DO NOT lift the Cover so that your arm is over the Cooking Surface as it is hot and may cause injury.

Always lift and lower the Cover by the Cover Handle. Lift from the side.

- Place your Dash Pocket Sandwich Maker on a stable and dry surface. Plug the cord into a power outlet. The blue Indicator Light will illuminate (photo A), signaling that the Pocket Sandwich Maker is heating up.

- Once the Cooking Surface reaches its optimal temperature, the Indicator Light will turn off. Carefully lift the Cover by the Handle (photo B).
![]()
- Spray both Cooking Surfaces with a little cooking spray or basting brush with butter (photo C).

- Place your ingredients on the Cooking Surface (photo D). Close Cover and Latch.

- After a few minutes, or until your pockets are crisped and golden, lift the Cover (photo E). Remove your pockets from the Cooking Surface with a heatresistant nylon or silicone cooking utensil (photo F).

Note: DO NOT use metal utensils to remove or place food on the Cooking Surface as this will damage the nonstick Cooking Surface. - Once finished, unplug the appliance and allow to cool before moving or cleaning. Wrap the cord around the base and store.


DO NOT lift Cover so that your arm is over the Cooking Surface as it is hot and may cause injury. Lift from the side.
CLEANING & MAINTENANCE
Always allow the appliance to cool completely before moving, cleaning, or storing. Do not submerge appliance in water or any other liquids. Never use abrasive cleaning agents to clean your Pocket Sandwich Maker as this may damage the appliance.
In order to keep your Pocket Sandwich Maker in pristine working order, thoroughly clean the appliance after each use. This will prevent the build-up of food or oil.
- Unplug Pocket Sandwich Maker and allow it to cool completely.
- Using a damp, soapy cloth, wipe down the Cooking Surface, its edges and the Cover. Thoroughly rinse the cloth and wipe again.
- Thoroughly dry the Pocket Sandwich Maker before storing.
- If there is food burned onto the Cooking Surface, pour on a little cooking oil and let sit for 5 to 10 minutes. Scrub the Surface with a sponge or soft bristled brush to dislodge food. Use a damp, soapy cloth to wipe down the Cooking Surface. Thoroughly rinse the cloth and wipe again. If any food remains, pour on cooking oil and let sit for a few hours, then scrub and wipe clean.
- Never use abrasive cleaning agents to clean your appliance as this may damage the Pocket Sandwich Maker and its nonstick Cooking Surface.
TROUBLESHOOTING
The blue Indicator Light on the Pocket Sandwich Maker keeps shutting off.
This is normal. During the cooking process, the heating element will automatically turn on and off to regulate the temperature and ensure that the Cooking Surface does not get too hot or cold. When this occurs, the Indicator Light turns on and off.
How do I know when the Pocket Sandwich Maker is heated and ready to use?
When the Pocket Sandwich Maker reaches the optimal temperature, the blue Indicator Light will turn off and that means you're ready to get cooking!
There is no on/off button.
How do I turn the Pocket Sandwich Maker off and on? To turn on, simply plug in the power cord. When you're done cooking, turn off the Pocket Sandwich Maker by unplugging it.
When using my Pocket Sandwich Maker, the Cover gets hot.
Always lift and lower the Cover by the Cover Handle. To prevent personal injury, DO NOT lift the Cover so that your arm is over the Cooking Surface as it is hot and may cause injury. Lift from the side.
After using my Pocket Sandwich Maker a few times, food is starting to stick to the surface. What is happening?
There is probably a build-up of burnt food residue on the Cooking Surface. This is normal, especially when cooking foods with sugar. Allow the appliance to cool fully, pour on a little cooking oil and let sit for 5–10 minutes. Scrub the Cooking Surface with a non-abrasive sponge or soft bristled brush to dislodge food. Use a damp, soapy cloth to wipe down the Cooking Surface. Rinse the cloth and wipe again. If food remains, pour on cooking oil and let sit for a few hours, then scrub and wipe clean.
My Pocket Sandwich Maker is making a hissing sound while it's cooking. Is this normal?
If you overfill the Pocket Sandwich Maker, it will make a noise as extra steam is released.
The Indicator Light will not turn on and the Cooking Surface is failing to heat.
Ensure that the power cord is plugged into the power outlet.
Check to make sure the power outlet is operating correctly.
Determine if a power failure has occurred in your home, apartment, or building.
Tips & tricks

For soft or jelly-like sandwich fillings, use medium sliced white or whole wheat bread. For small amounts of filling use thinner bread.

Add butter to the Cooking Surface for extra flavor or use a basting brush on the bread slices before grilling.

Get fancy! Suggested garnishes for sandwiches include: Lettuce, parsley, mint, stuffed olive halves, onion, tomato etc...

A teaspoon of sugar sprinkled on the outside makes toasted sandwiches crispier (especially for sandwiches with fruit fillings).
Recipe Guide

Follow us!
@bydash | recipes, videos, & inspiration
@unprocessyourfood | veg & vegan-friendly meals
| Bacon, Tomato & Cheese Pocket | 2 slices bread 1 slice tomato, sliced thin 1 slice Swiss cheese 1 slice bacon |
| Quesadilla Pocket | 4" tortilla (corn or flour) 1/4 cup shredded Mexican cheese blend 2 tbsp salsa |
| Cinnamon Bun | 1 piece refrigerated cinnamon roll dough dusting of powdered sugar |
| Meat Pie / Empanada | 4 triangles refrigerated crescent roll dough 1/4 cup seasoned ground beef filling (beef, tomato sauce, sofrito, chopped onions) |
| Cheesy Biscuit Pocket | 1 large biscuit, sliced in half lengthwise 1 slice sharp Cheddar cheese |
| Stuffed Mac & Cheese Pocket | 2 slices bread 2 tbsp macaroni & cheese 1 tbsp butter, to coat bread |
| Breakfast Sunshine Pocket | large English muffin, buttered 1 egg, scrambled 1 turkey sausage sliced thin 1 slice American cheese |
| Pizza Pocket | 2 slices bread 3 slices pepperoni 1/4 cup mozzarella, shredded marinara sauce for dipping |
| Ham & Cheese Pocket | 2 slices bread 1 slice ham 1 slice Swiss cheese |
| Nutella® & Banana Pocket | 2 slices bread 1/4 banana, sliced thin 1 tbsp Nutella® |
| PB & J Pockets | 2 slices bread 1 tbsp peanut butter 1 tbsp organic jam |
| Tuna Melt Pocket | 2 slices bread 2 tbsp tuna salad 1 slice provolone |
| Baked Brie Pocket | 2 slices bread 1 slices Brie, very thinly sliced and 4" in length 1 tbsp raspberry jam |
Customer support
Dash values quality and workmanship and stands behind this product with our Feel Good Guarantee™. To learn more about our commitment to quality, visit bydash.com/feelgood.
We're here to help! Our customer support teams in the US and Canada are at your service Monday - Friday.
Contact us at 1 (800) 898-6970 or support@bydash.com.

REPAIRS

Risk of electric shock! The Dash Pocket Sandwich Maker is an electrical appliance.
Do not attempt to repair the appliance yourself under any circumstances.
Contact Customer Support regarding repairs to the appliance.
TECHNICAL SPECIFICATIONS
Voltage 120V ~ 60Hz
Power Rating 420W
Stock#: DPM200_20210412_V6
Important Safeguards
 IMPORTANT SAFEGUARDS: PLEASE READ AND SAVE THIS INSTRUCTION AND CARE MANUAL.
When using electrical appliances, basic safety precautions should always be followed, including:
- Read all instructions before use.
- Remove all bags and packaging from appliance before use.
- Never leave appliance unattended when in use.
- Make sure the appliance is cleaned thoroughly before using.
- Do not use appliance for other than intended use. For household use only. Do not use outdoors.
- Only use the appliance on a stable, dry surface.
![caution]() ATTENTION: This appliance cannot be used with an external timer or a separate remote control.
ATTENTION: This appliance cannot be used with an external timer or a separate remote control.- Do not place appliance on or near a hot gas burner, hot electric burner, or in a heated oven.
- Extreme caution must be used when moving an appliance containing hot oil or other hot liquids.
- This appliance can be used by persons with reduced physical, sensory, or mental capabilities or lack of experience of knowledge, if they have been given supervision or instruction concerning use of the appliance in a safe way and understand the hazards involved.
- This appliance is not a toy. Do not let children use this appliance. Close supervision is necessary when any kitchen appliance is used by or near children.
- Do not use metal utensils on the Cooking Surface as this will damage the nonstick surface.
![]()
Hot surfaces! Never touch the Cooking Surface or Cover while appliance is in use. Always lift and lower the Cover by the Cover Handle.- DO NOT lift the Cover so that your arm is over the Cooking Surface as it is hot and may cause injury. Lift from the side.
- When using your Pocket Sandwich Maker, your food may leak while it is cooking. Do not touch these liquids and be careful not to overfill the Sandwich Maker: failure to do so may result in burns.
- DO NOT use the Pocket Sandwich Maker near water or other liquids, with wet hands, or while standing on a wet surface.
- To prevent the risk of fire, electric shock, or personal injury, do not put cord, plug, or appliance in or near water or other liquids. The Pocket Sandwich Maker is NOT dishwasher safe.
- Do not let the cord touch hot surfaces or hang over the edge of tables or counters.
- Refrain from using attachments that are not recommended by the appliance manufacturer, as this may result in fire, electric shock, or personal injury.
- Unplug the appliance and allow to cool prior to moving, cleaning, storage, and when not in use. To unplug, grasp the plug and pull from the outlet. Never pull from the power cord.
- Never use abrasive cleaning agents to clean your appliance as this may damage the Pocket Sandwich Maker and its nonstick Cooking Surface.
- Do not operate this appliance with a damaged cord, damaged plug, after the appliance malfunctions, is dropped, or damaged in any manner. Return appliance to the nearest authorized service facility for examination, repair, or adjustment.
- For maintenance other than cleaning, please contact StoreBound directly at 1-800-898-6970 Monday – Friday or by email at support@ bydash.com.
- StoreBound shall not accept liability for damages caused by improper use of the appliance.
- Improper use of the appliance can result in property damage or even in personal injury.
- This appliance has a polarized plug (one blade is wider than the other). To reduce the risk of electric shock, this plug will fit in a polarized outlet only one way. If the plug does not completely fit in the outlet, reverse the plug. If it still does not fit, contact a qualified electrician. Do not attempt to modify the plug in any way.
- A short power supply cord is to be provided to reduce the risk resulting from becoming entangled in or tripping over a longer cord. An extension cord may be used if care is exercised in its use. If an extension cord is used, the marked electrical rating of the extension cord should be at least as great as the electrical rating of the appliance. If the appliance is of the grounded type, the extension cord should be a grounding 3-wire cord. The extension cord should be arranged so that it will not drape over the countertop or tabletop where it can be pulled on by children or tripped over unintentionally.

1-800-898-6970 | @bydash | bydash.com

Documents / Resources
References
Download manual
Here you can download full pdf version of manual, it may contain additional safety instructions, warranty information, FCC rules, etc.
Download Dash DPM200 - Pocket Sandwich Maker Manual & Recipes
Advertisement


Need help?
Do you have a question about the DPM200 and is the answer not in the manual?
Questions and answers