Dash DEWS100 - Serve & Preserve Electric Wine Set Manual
- Instruction manual (13 pages)
Advertisement
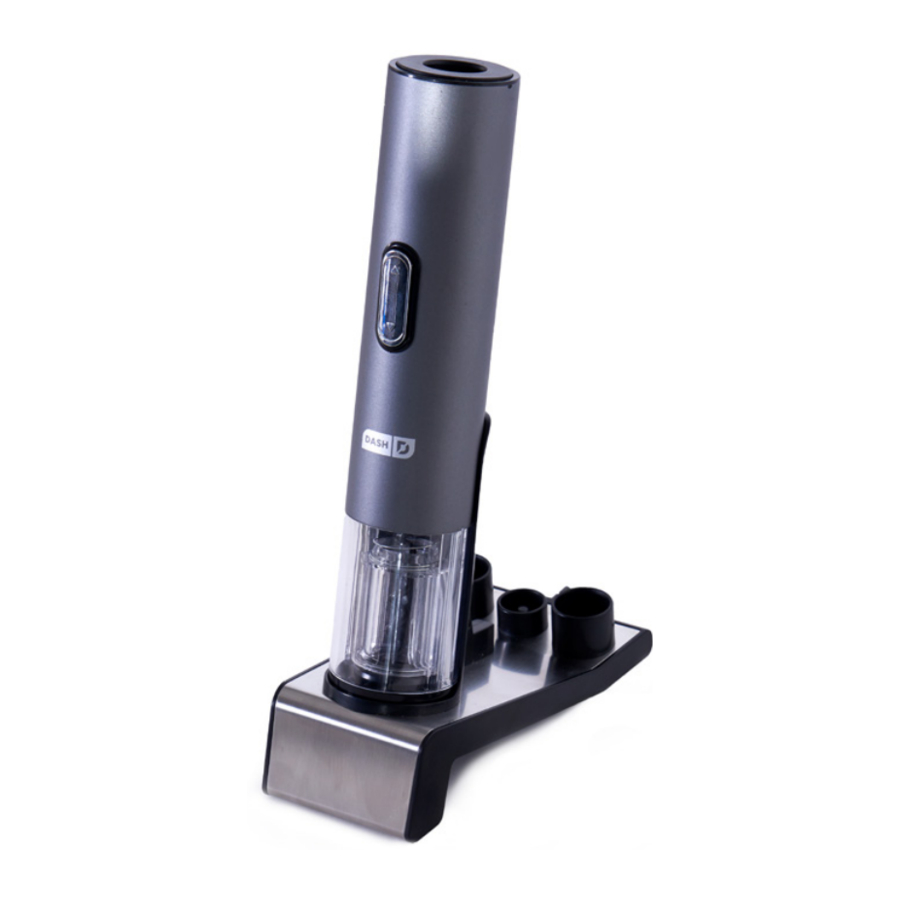
PARTS & FEATURES


USING YOUR DEVICE
CHARGING THE UNIT
NOTE: It is recommended that the Wine Opener and Vacuum Wine Preserver Unit is charged for at least 12 hours before using it for the first time. Please follow the instructions for charging the unit below:
- Connect the Power Plug into the Power Socket at the back of the Charging Base.
- Place the Wine Opener and Vacuum Wine Preserver onto the Charging Base. Ensure that the arrows on the Unit and Base align with each other so that the electrical connections are made correctly.
- Plug in the Charging Base. The LED Indicator Light will illuminate blue, indicating that the battery is charging. It will take 10-12 hours to fully charge the battery.
- To stop charging, remove the plug from the outlet. Remove the Power Plug from the Charging Base.
- The Wine Opener can be used to open up to 30 bottles when fully charged.
NOTE: This Wine Opener has intelligent light features:
- When battery power is low, the LED Indicator Light will flash blue when connected to a power source.
- When the unit is completely charged, the LED Indicator Light will be solid blue.
OPENING WINE BOTTLES
- Before extracting the cork, please remove any seal from the bottle using the Foil Cutter provided (photo A).

- Place the Wine Opener on top of the wine bottle making sure that it remains as upright as possible at all times. If you hold the Wine Opener at an angle to the bottle it will not remove the cork properly (photo B).

- Hold the Wine Opener and bottle firmly. Press and hold the
![]() Button (photo C). The corkscrew spiral will turn in a clockwise direction and enter the cork, then gradually remove it from the bottle.
Button (photo C). The corkscrew spiral will turn in a clockwise direction and enter the cork, then gradually remove it from the bottle.
When the Cork Remover mechanism stops, the cork will be visible through the transparent window and the blue LED Indicator Light will go off.

- Lift the Wine Opener away from the bottle. To remove the cork simply press and hold the
![]() Button and the spiral will turn in a counterclockwise direction and release the cork (photo D).
Button and the spiral will turn in a counterclockwise direction and release the cork (photo D).

- Return the Wine Opener to the Charging Base when not in use, so as to protect the mechanism (photo E).


 Button (photo C). The corkscrew spiral will turn in a clockwise direction and enter the cork, then gradually remove it from the bottle.


NOTE: This Wine Opener is designed for use with traditional corks, but it may be used with synthetic corks as well.
Synthetic corks are smaller and do not expand like normal cork so sometimes they may stick on the spiral. If this happens, hold the cork firmly with a small pair of pliers. Press and hold the  Button and allow the cork to be slowly released.
SEALING WINE BOTTLES
- Place the wine bottle on a flat surface. lnsert a Wine Stopper into the wine bottle (photo A).

- Hold the Wine Stopper and wine bottle neck securely in one hand and place the Non-Slip Mouth of the Vacuum Wine Preserver on the Wine Stopper (photo B).
Please use light, steady pressure on the stopper when using the Vacuum Wine Preserver.

- Keep the Vacuum Wine Preserver as straight as possible and in line with the wine bottle (photo C).

- Push down on the Wine Stopper using light, steady pressure (photo D).

- The Wine Preserver removes the air from the bottle while making a light vacuum sound, and the blue LED Indicator Light on the top will light up.
The motor will stop working after 15 seconds. The blue LED Indicator Light on top will turn off and a beep will sound when the motor stops (photo E).

- Do not release the Wine Preserver until the unit stops.
Remove the Wine Preserver and replace on its charging base until it is needed again (photo F).


NOTE: The Non-Slip Mouth may attach itself to the wine stopper. In this case, hold the wine stopper and the neck of the bottle securely in one hand and tilt the Wine Preserver away from the Wine Stopper to break the suction. This should prevent air from re-entering the bottle. If in doubt, repeat the above operating process.
SUGGESTION: For more than half a bottle of wine remaining, one session should suffice. For less than half a bottle we suggest you repeat the above process a 2nd time.
SETTING DATE INDICATORS
- Use the
![]() symbol to indicate the date when the bottle was sealed with your Wine Preserver (photo A).
symbol to indicate the date when the bottle was sealed with your Wine Preserver (photo A).

- Gently swivel the silver ring to left or right until the correct date is in line with the
![]() symbol (photo B).
symbol (photo B).

 symbol to indicate the date when the bottle was sealed with your Wine Preserver (photo A).

REMOVING WINE STOPPERS
- Firmly hold the bottle in one hand and gently ease the Wine Stopper away from the bottle with the other hand.
- Store the Wine Stoppers in a clean, safe place until next required.
CLEANING & MAINTENANCE
- We recommend that you return your Wine Opener and Wine Preserver to the Charging Base so that it is fully charged and available to use at any time.
- Wipe the Wine Opener and Vacuum Wine Preserver Set and Charging Base with a soft, dry cloth.
- Wine Stoppers can be handwashed with warm soapy water and air-dried. Wine Stoppers are NOT dishwasher safe.
CUSTOMER SUPPORT
Dash values quality and workmanship and stands behind this product with our Feel Good Guarantee. To learn more about our commitment to quality, visit bydash.com/feelgood.
Our customer support teams in the US and Canada are at your service Monday - Friday during the times below.
Contuct us at 1 (800) 898-6970 or support@bydash.com
Hey Hawaii! You can reach our customer service team from 5AM to 5PM.
And also, Alaska, feel free to reach out from 6AM to 6PM.

REPAIRS

Risk of electric shock! The Dash Serve & Preserve Electric Wine Set is an electrical appliance.
Do not attempt to repair the appliance yourself under any circumstances.
Contact Customer Support regarding repairs to the appliance.
TECHNICAL SPECIFICATIONS
Voltage 6V DC 80mA
Power Rating 0.48W
Stock#: DEWS100_IM_200626_v3
Made in China
This product has passed food safety testing in accordance with FDA guidelines.

IMPORTANT SAFEGUARDS
IMPORTANT SAFEGUARDS: PLEASE READ AND SAVE THIS INSTRUCTION AND CARE MANUAL. When using electrical appliances, basic safety precautions should be followed, including:
- Read all instructions.
- Remove all bags and packaging from appliance before use.
- Never leave appliance unattended when in use.
- Make sure the appliance is cleaned thoroughly before using.
- This Wine Opener and Wine Preserver Set is intended for household use only.
- This Wine Opener and Wine Preserver Set is intended to extract the corks from standard wine bottles.
- Do not operate the Wine Opener and Wine Preserver Set with a damaged AC/DC Adapter or Charging Base. If the AC/DC Adapter is damaged it must be replaced by the manufacturer or a suitably qualified person.
- Do not place the appliance near an open flame, cooking or heating appliance, or hot surface.
- This appliance is not intended for use in wet or damp conditions.
- Ensure that the power cord is positioned so that it will not get damaged or cause a trip hazard.
- Use only the AC/DC Adapter and Charging Base supplied with the appliance.
- Do not immerse the appliance in water or any other liquid.
- For indoor use only. Do not expose the Wine Opener and Wine Preserver Set or Charging Base to rain or other extreme conditions.
- Never force the Wine Opener and Wine Preserver Set onto a bottle or attempt to speed up the mechanism. The Cork Remover will work best when it is operated at its intended speed.
- Do not touch or adjust the Wine Opener and Wine Preserver Set mechanism or the corkscrew spiral. Only hold the Cork Remover by its plastic housing.
- This appliance contains a re-chargeable battery. Do not dispose of the product on a fire as this may cause an explosion.
- This appliance is not intended for use by persons (including children) with reduced physical, sensory or mental capabilities, or lack of experience and knowledge unless they have been given supervision or instruction concerning use of the appliance by a person responsible for their safety. Children should be supervised to ensure that they do not play with the appliance.
![shock hazard]() To avoid electric shock do not open the casing. There are no user serviceable parts inside.
To avoid electric shock do not open the casing. There are no user serviceable parts inside.![]()
The corkscrew is sharp. Keep body parts (e.g. fingers) and utensils away from the operating end of the Wine Opener.- This Wine Set contains rechargeable batteries. Before you dispose of your Wine Opener and Wine Preserver, you should remove the batteries and dispose of them responsibly. To take out the battery pack remove the screws from the rear cover. Dispose of the rechargeable batteries and product responsibly.
- The WEEE directive (Waste Electrical and Electronic Equipment; 2002/96/EC) has been put in place to ensure that products are recycled using best available treatment, recovery and recycling techniques to ensure human health and high level environment protection. Your product is designed and manufactured with high quality materials and components, which can be recycled and reused.
- Do not mix products bearing the crossed out bin symbol with your general household waste. Please recycle where facilities exist. Check with your Local Authority or retailer for recycling advice.
 To avoid electric shock do not open the casing. There are no user serviceable parts inside.
1-800-898-6970 | @bydash | bydash.com

Documents / Resources
References
Download manual
Here you can download full pdf version of manual, it may contain additional safety instructions, warranty information, FCC rules, etc.
Download Dash DEWS100 - Serve & Preserve Electric Wine Set Manual
Advertisement


Need help?
Do you have a question about the DEWS100 and is the answer not in the manual?
Questions and answers