Advertisement
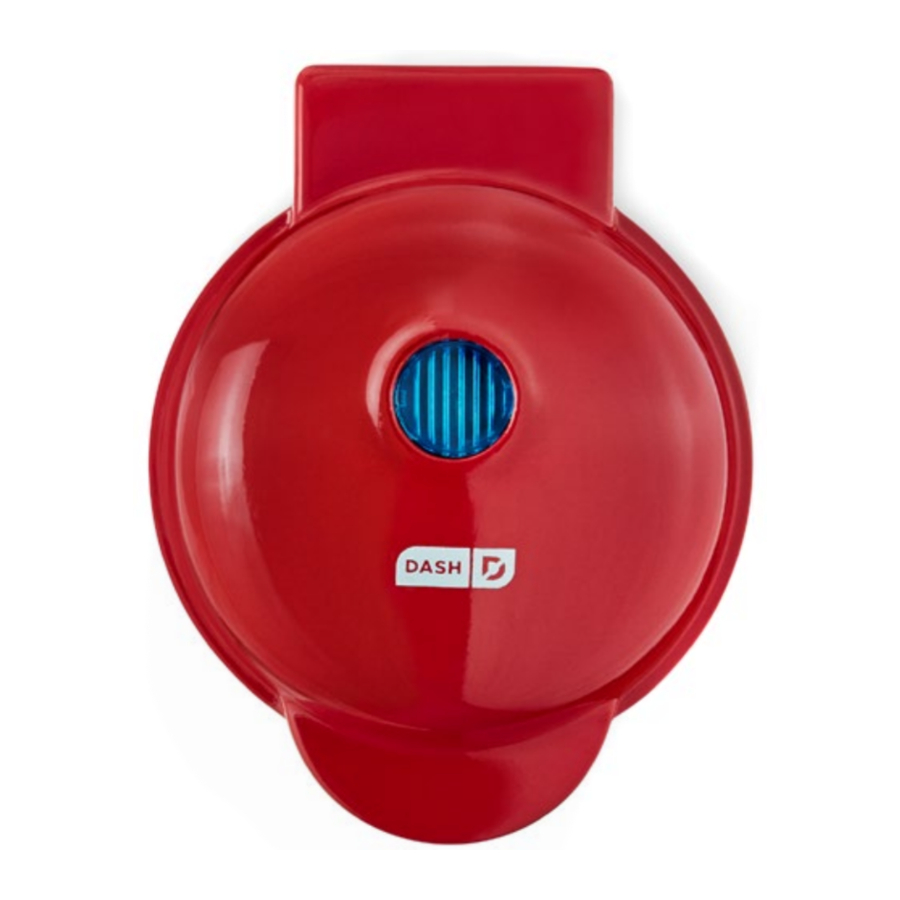
PARTS & FEATURES

BEFORE USING YOUR DEVICE
Before first use, remove all packaging material and thoroughly clean your Mini Pie Maker.
- Carefully unpack your Mini Pie Maker. Remove all packaging materials.
- Clean both Cooking Surfaces of the Mini Pie Maker with a damp cloth or sponge.
- Wipe dry with a soft cloth. NEVER IMMERSE THE MINI PIE MAKER OR CORD IN WATER OR ANY OTHER LIQUID.
- Position the Mini Pie Maker on a dry, level, heat-resistant surface.
- It is recommended to operate this appliance on a separate outlet and circuit from other appliances to avoid overloading the circuit.
USING YOUR DEVICE
- Place the appliance on a stable and dry surface and lift the Cover to open the Mini Pie Maker. Spray both Cooking Surfaces with a small amount of cooking spray (photo A).

- Plug the cord into a power outlet. The Indicator Light will illuminate blue, signaling that the Mini Pie Maker is heating up. Do not leave your Mini Pie Maker unattended when plugged in.
- Once the Cooking Surfaces reach the optimal cooking temperature, the Indicator Light will automatically shut off.
NOTE: Always preheat the Mini Pie Maker before adding crusts or the surface will not heat evenly. - Use your Crust Cutter to shape your dough (photo B). Use any pie crust recipe or a refrigerated pre-made pie crust. If using a refrigerated crust, follow the package instructions for preparation, and allow it to soften at room temperature as directed.

- The side of the Crust Cutter labeled Pie Base is for cutting the base of your pie. The side indicating Pie Top is for cutting the top circle of your pie. The top circle will be smaller than the base (photo C).

- Place the Pie Base side of the Crust Cutter on one section of your rolled-out dough (photo D). Press down to cut the dough.

- Place the Pie Top side of the Crust Cutter on another section of your rolled-out dough (photo E). Press down to cut the dough. NOTE: If you ever misplace your Crust Cutter, the bottom diameter is 4.75" and the top diameter is 4.1".

- The Pie Base side of your Crust Cutter will cut out short sections in the edge of your dough. These show where you will overlap the edge of your crust in the lower Cooking Surface. Overlapping or "scalloping" the edge in the lower Cooking Surface will help you mold the base of your pie.
- Place the larger circle of dough in the lower Cooking Surface of your Mini Pie Maker (photo F).

![]()
Move quickly and be careful when placing the pie crust onto the pre-heated Cooking Surface, as the surface will be hot. - "Scallop" or overlap the cut sections so that the pie base fits neatly in the lower Cooking Surface. Press down gently on the edges of the crust so that they lay against the top of the lower Cooking Surface (photo G).

- Add your desired fillings (photo H).
NOTE: The approximate amount of filling necessary is 1/3 cup, which will rise above the edge of the Pie Maker to help the pie achieve a rounded top shape. For denser fillings, or meats and fillings that tend to expand during the cooking process, use less than 1/3 cup to avoid spillage.

- Place the top circle of dough for your pie to enclose the filling (photo I).

- Close the Cover and press firmly to close the pie (photo J).

TIP: Using a brush to add some egg wash around the edges of your pie before you close the Cover will help the crust remain tight and crisp up while cooking.
NOTE: During the cooking process, the heating element will automatically turn on and off to regulate the temperature and ensure that the Cooking Surface does not get too hot or cold. When this occurs, the Indicator Light turns on and off (photo K).

- Actual cooking time will vary depending on ingredients and type of pie being prepared. As a general guideline, most recipes require on average 3-5 minutes of cooking time per batch. It is okay to open the Cover to check for doneness.
- In order to check if your pie is finished cooking, carefully lift the Cover of the Mini Pie Maker using oven mitts or a pot holder. Always lift using the Cover Handle. Check and see if the crust is dry and lightly brown (photo L). If so, your pie is done. If not, carefully close the Cover and allow your pie to cook, checking on it occasionally to avoid burning.

- Once the pie is cooked, first unplug your Mini Pie Maker. Allow the appliance and your pie to cool for a few minutes, as the pie and Mini Pie Maker will be very hot.
- Carefully remove your pie with a heat-resistant nylon or silicone cooking utensil. It is easier to remove the pie with 2 heat-resistant nylon or silicone cooking utensils.
- The actual size of your finished pie will be around 4 inches in diameter and about 2 inches deep.
NOTE: Do not use metal utensils to remove or place food on the Cooking Surface as this will damage the non-stick surface. If making more than one pie per use, allow the Mini Pie Maker to cool for at least 5 minutes before making another pie. Use caution as the plates will still be warm.
We recommend using a wooden, nylon, or silicone tool to press the bottom dough into the maker if it is still warm.


CLEANING & MAINTENANCE
Before cleaning, unplug from outlet and allow to cool.
Clean the interior and exterior surfaces of the Mini Pie Maker with a damp cloth or sponge. Wipe dry with a soft cloth. NEVER IMMERSE THE MINI PIE MAKER OR CORD IN WATER OR ANY OTHER LIQUID.
To remove fillings or crust baked onto the Cooking Surfaces, pour a small amount of cooking oil onto the hardened food. After 5 minutes, wipe with a paper towel or dry cloth. A clean kitchen brush or even a toothbrush works well to remove stubborn foods.
NEVER USE ABRASIVE CLEANERS OR SCOURING PADS TO CLEAN THE MINI PIE MAKER, AS THOSE MAY DAMAGE THE SURFACES.
To store, be sure all parts are clean and dry. Store appliance in its box or in a clean, dry place.
Never store it while it is hot or wet. Never wrap cord tightly around the appliance; keep it loosely coiled.
TIPS & TRICKS
- Bring your pie crust up to room temperature before cooking, so that both the crust and filling cook evenly.
- Add filling up to the top edge of the Mini Pie Maker before placing the top crust on your pie. As it cooks, the filling will push the top crust against the upper Cooking Surface for an even finish.
- Use any pie crust recipe or a refrigerated pre-made pie crust. Roll the crust out until it is thinner than a full size pie crust. If using a refrigerated crust, follow the package instructions for preparation, and allow it to soften at room temperature as directed.
- Do not stretch the dough before baking. Stretching will cause the dough to shrink and become misshapen during baking.
- Always pre-heat the Mini Pie Maker before adding pie crust, or the crust will not cook evenly. Be careful when adding pie crust as the Cooking Surface will be hot.
- Pies are very hot when you take them out of the pie maker. Use caution and allow to cool before serving or enjoying them.
- Place the crust circle directly in the center of your Mini Pie Maker's lower Cooking Surface. Once filled, place the top crust directly over the top of the filled pie, centering it carefully and using caution not to touch hot surfaces.
- If you are baking just the base of your pie, place the larger lower crust circle in the lower Cooking Surface of your Mini Pie Maker. Prick the crust evenly all over, then bake until golden brown, about 5 minutes. Remove from Mini Pie Maker and fill. Baked crusts work well for recipes such as Key Lime Pie.
- Use packaged, thawed puff pastry as another crust option. Using puff pastry allows the upper crust to rise more and make contact with the upper Cooking Surface for an even, golden brown finish. THIS REQUIRES A LITTLE LESS THAN 1/3 CUP OF FILLING TO AVOID SPILLING OR OVERFLOW.
RECIPE GUIDE
PUMPKIN PIE

Ingredients: (Makes 4 pies)
1 sheet premade pie crust or puff pastry dough
1 egg
1/3 cup sugar
½ tsp ground cinnamon
Pinch of freshly grated nutmeg
½ tsp ground ginger
¼ tsp ground cloves
¼ tsp salt
1 cup canned pumpkin purée
1 cup coconut milk or half 'n half
Directions:
Mix egg and sugar together with a hand mixer and add the spices and salt. Fold in pumpkin purée and coconut milk.
Plug in and pre-heat your Mini Pie Maker. Cut 4 circles from your pie crust using the Pie Base side of the Crust Cutter. Set the bottom pie crust into the lower Cooking Surface and gently overlap the edges so that the crust fits neatly in the Mini Pie Maker.
Pour in about ½ cup of pumpkin batter and cook for 8 minutes.
Repeat with remaining mixture. It will make 4 mini pies.
CHERRY PIE

Ingredients: (Makes 4 pies)
2 cups sour or dark sweet cherries
½ cup white granulated sugar
2 tbsp cornstarch or tapioca starch
½ tsp fresh lemon juice
¼ tsp lemon zest or 1/8 tsp almond extract
1 sheet premade pie crust or puff pastry dough (if using homemade dough, roll out thinly)
Directions:
Place cherries in a saucepan over medium heat. Cover the pan. Heat cherries until they release their juice and simmer for 10 minutes. Stir often.
In a bowl, whisk the sugar with cornstarch until smooth; pour the mixture into the hot cherries and juice, and thoroughly combine. Return to low heat, bring to a simmer, and cook until the filling has thickened, about 2 minutes; add lemon, remove from heat, let cool, and use as pie filling.
Plug in and pre-heat your Mini Pie Maker. Cut 2 circles from your pie crust using the Pie Base side of the Crust Cutter. Set the bottom pie crust into the lower Cooking Surface and gently overlap the edges so that the crust fits neatly in the Mini Pie Maker.
Cut 2 circles for the top crust using the Pie Top side of the Crust Cutter. Set the 2 smaller upper crusts aside. Equally fill the lower crust with the cherry filling, spooning about to 1 /3 cup of filling into the crust.
Top your pie with one of the smaller circles for the upper pie crust. Bake until brown, checking after around 4 minutes to see if the pie is almost done. Remove and cool completely. Repeat with the other crust circles to make up to 4 Cherry Pies.
RASPBERRY LEMON TARTS

Ingredients: (Makes 4 pies)
½ cup fresh lemon juice
2/3 cup sugar
3 large eggs, at room temperature
1/8 tsp salt
1 tbsp grated lemon zest
4 tbsp (½ stick) unsalted butter
1 sheet premade pie crust or puff pastry dough (if using homemade dough, roll out thinly)
Fresh raspberries
Directions:
In a medium saucepan, whisk the lemon juice, sugar, eggs and salt. Cook over medium heat, whisking constantly, for 1 minute. Add the zest, butter, and continue to cook, whisking constantly, until the lemon curd coats a spoon thickly, about 9 minutes. Immediately transfer the lemon curd to a bowl, and let it sit for 5 minutes.
Press plastic wrap onto the surface of the lemon curd and refrigerate until it is cold. It will thicken further as it cools. Lemon curd keeps in the refrigerator for 5 days.
Plug in and pre-heat your Mini Pie Maker. Cut 4 circles for the tart shell, using the Pie Base side of the Crust Cutter. Set a circle of cut dough into the lower Cooking Surface and gently overlap the edges so that the crust fits neatly in the Mini Pie Maker. With a fork, prick the crust bottom all over.
Close the Pie Maker and bake until the crust is golden brown on the outside and dry looking inside, 6 to 7 minutes. Remove and cool completely. Repeat with the other crust bottoms, making 4 tart shells.
Fill each tart shell with ¼ cup of the lemon curd. Arrange fresh raspberries to cover the lemon curd. Serve immediately.
BLUEBERRY PIE

Ingredients: (Makes 4 pies)
2 cups fresh blueberries
1/3 cup granulated sugar
½ tsp lemon zest
1 tsp fresh lemon juice
1 tsp tapioca flour or cornstarch
½ tsp ground cinnamon
1/8 tsp salt
1 sheet premade pie crust or puff pastry dough (if using homemade dough, roll out thinly)
Directions:
In large bowl, mix together the berries and lemon juice. In another bowl, mix the sugar, tapioca starch, cinnamon, and salt. Add the dry ingredients to the berries, and toss gently until evenly distributed.
Plug in and pre-heat your Mini Pie Maker. Cut 4 circles from your pie crust using the Pie Base side of the Crust Cutter. Set the bottom pie crust into the lower Cooking Surface and gently overlap the edges so that the crust fits neatly in the Mini Pie Maker.
Cut 4 circles for the top crust using the Pie Top side of the Crust Cutter. Set the 4 smaller upper crusts aside. Equally fill the lower crust with the blueberry filling, spooning about cup of filling into the crust.
Top your pie with one of the smaller circles for the upper pie crust. Bake until brown, checking after around 4 minutes to see if the pie is almost done. Remove and cool completely. Repeat with the other crust circles for 4 mini Blueberry Pies.
APPLE PIE

Ingredients: (Makes 4 pies)
1 lb Honeycrisp apples
2 tsp unsalted butter
½ tsp pumpkin pie spice
1 tsp fresh lemon juice
1 tsp cinnamon
3 tsp sugar
4 tsp corn starch
4 tsp water
1 sheet premade pie crust or puff pastry dough (if using homemade dough, roll out thinly)
Directions:
Peel, halve, and core the apples. Cut each half into 4 wedges. Cut the wedges crosswise into thin slices, making about 3 cups sliced apples.
In a medium skillet over medium-high heat, melt the butter. Add the apples, mixing to coat them with the butter. Mix in the pumpkin pie spice, cinnamon, sugar, corn starch, and water. Cook until the apples are wet, stirring often. Keep cooking, stirring, until the apples are tender and the liquid has evaporated, about 5 minutes in total. Mix in the lemon juice. Set the filling aside to cool.
Plug in and pre-heat your Mini Pie Maker. Cut 4 circles from your pie crust using the Pie Base side of the Crust Cutter. Set the bottom pie crust into the lower Cooking Surface and gently overlap the edges so that the crust fits neatly in the Mini Pie Maker.
Cut 4 circles for the top crust using the Pie Top side of the Crust Cutter. Set the 4 smaller upper crusts aside. Equally fill the lower crust with the apple filling, spooning about 1/3 cup of filling into the crust.
Top your pie with one of the smaller circles for the upper pie crust. Bake until brown, checking after around 4 minutes to see if the pie is almost done. Remove and cool completely. Repeat with the other crust circles for 4 mini Apple Pies.
SPINACH & FETA PIE

Ingredients: (Makes 4 pies)
1 10-oz package frozen chopped spinach
1 tbsp olive oil
¼ cup finely chopped onion
½ cup feta cheese, crumbled
1/8 tsp garlic powder (optional)
black pepper, to taste
1 sheet premade or homemade puff pastry dough, rolled out thinly
1 egg
Directions:
Cook the spinach according to package directions. When cool enough to handle, squeeze out most of the moisture. In a mixing bowl, pull apart the spinach to fluff it.
In a small skillet, heat the oil over medium-high heat. Sauté the onion until soft, about 4 minutes. Add the contents of the pan to the spinach. Add the feta, garlic powder, if using, and pepper.
Plug in and pre-heat your Mini Pie Maker. Cut 4 circles from your pie crust using the Pie Base side of the Crust Cutter. Set the bottom pie crust into the lower Cooking Surface and gently overlap the edges so that the crust fits neatly in the Mini Pie Maker. Cut 4 circles for the top crust using the Pie Top side of the Crust Cutter. Set the 4 smaller upper crusts aside. Equally fill the lower crust with the spinach filling, spooning about 1/3 cup of filling into the crust.
Top your pie with one of the smaller circles for the upper pie crust. Whisk together egg and 1 tbsp of water and brush lightly over the upper crust. Bake until brown, checking after around 4 minutes to see if the pie is almost done. Remove and cool completely. Repeat with the other crust circles for 4 mini Spinach & Feta Pies.
CHICKEN POT PIE

Ingredients: (Makes 4 pies)
¾ cup frozen carrots and peas
1½ tbsp butter
¼ cup finely chopped onion
3 tbsp all-purpose flour
½ tsp dried thyme
¼ tsp salt
Freshly ground pepper, to taste
1 cup chicken broth
¼ cup milk1
¾ cups cooked chicken, cut in ½ inch pieces
1 sheet premade pie crust or puff pastry dough (if using homemade dough, roll out thinly)
1 egg
Directions:
Cook the carrots and peas according to package directions. Drain and set aside.
In a medium saucepan, melt the butter over medium-high heat. Sauté the onion until soft, about 4 minutes. Mix in the flour, thyme, and salt. Cook, stirring, for 1 minute. While whisking, gradually add the broth and the milk. Continue whisking until the mixture thickens to resemble canned cream soup, about 5 minutes. Season to taste with pepper. In a mixing bowl, combine the chicken, cooked carrots and peas, and ¾ cup of the sauce.
Plug in and pre-heat your Mini Pie Maker. Cut 4 circles from your pie crust using the Pie Base side of the Crust Cutter. Set the bottom pie crust into the lower Cooking Surface and gently overlap the edges so that the crust fits neatly in the Mini Pie Maker.
Cut 4 circles for the top crust using the Pie Top side of the Crust Cutter. Set the 4 smaller upper crusts aside. Equally fill the lower crust with the chicken filling, spooning about 1/3 cup of filling into the crust.
Top your pie with one of the smaller circles for the upper pie crust. Whisk together egg and 1 tbsp of water and brush lightly over the upper crust. Bake until brown, checking after around 4 minutes to see if the pie is almost done. Remove and cool completely. Repeat with the other crust circles for 4 mini Chicken Pot Pies.
BREAKFAST PIE

Ingredients:: (Makes 2 pies)
4 slices bacon, finely chopped
4 eggs
1 tbsp cream
1 tbsp shallots, thinly sliced salt and pepper to taste
1 sheet premade pie crust or puff pastry dough (if using homemade dough, roll out thinly)
Directions:
Place chopped bacon into a heated fry pan and cook until crisp. Separately combine and lightly whisk eggs and cream. Set both aside.
Plug in and pre-heat your Mini Pie Maker. Cut 2 circles from your pie crust using the Pie Base side of the Crust Cutter. Set the bottom pie crust into the lower Cooking Surface and gently overlap the edges so that the crust fits neatly in the Mini Pie Maker.
Cut 2 circles for the top crust using the Pie Top side of the Crust Cutter. Set the 2 smaller upper crusts aside. Fill the lower crust with a sprinkle of chopped bacon and shallots, then add about 1/3 cup of breakfast filling.
Top your pie with one of the smaller circles for the upper pie crust. Whisk together egg and 1 tbsp of water and brush lightly over the upper crust. Bake until brown, checking after around 4 minutes to see if the pie is almost done. After cooking for 4 minutes, unplug and leave the Mini Pie Maker closed for 2 minutes or until eggs are cooked through. Remove and cool completely. Repeat with the other crust circles for 2 mini Breakfast Pies.
CUSTOMER SUPPORT
Dash values quality and workmanship and stands behind this product with our Feel Good Guarantee. To learn more about our commitment to quality, visit bydash.com/feelgood.
Our customer support teams in the US and Canada are at your service Monday - Friday during the times below.
Contact us at 1 (800) 898-6970 or support@bydash.com
Hey Hawaii! You can reach our customer service team from 3AM to 3PM.
And also, Alaska, feel free to reach out from 5AM to 5PM.

REPAIRS

Risk of electric shock! The Dash Mini Pie Maker is an electrical appliance. Do not attempt to repair the appliance yourself under any circumstances. Contact Customer Support regarding repairs to the appliance.
TECHNICAL SPECIFICATIONS
Voltage 120V ~ 60Hz Power
Rating 350W
Stock#: DPIE100_20190318_V12
IMPORTANT SAFEGUARDS
IMPORTANT SAFEGUARDS: PLEASE READ AND SAVE THIS INSTRUCTION AND CARE MANUAL.
When using electrical appliances, basic safety precautions should always be followed, including:
- Please read and save this instruction manual.
- When using electrical appliances, basic safety precautions should be followed including:
- Read all instructions.
- Remove all bags and packaging from appliance before use.
- Do not use appliance outdoors or for commercial purposes.
- Never leave appliance unattended when in use.
- Only use the appliance on a stable, dry surface.
- Make sure the appliance is cleaned thoroughly before using.
- Do not use appliance for other than its intended use. For household use only. Do not use outdoors.
- Close supervision is necessary when any appliance is used by or near children. Children should be supervised to ensure that they do not play with the appliance.
- Do not operate this appliance with a damaged cord, damaged plug, after the appliance malfunctions, is dropped, or damaged in any manner. Return appliance to the nearest authorized service facility for examination, repair, or adjustment.
- For maintenance other than cleaning, please contact StoreBound directly at 1-800-898-6970 from 9AM-9PM EST Monday-Friday or by email at support@bydash.com.
- Do not place appliance on or near a hot gas burner, hot electric burner, or in a heated oven. Extreme caution must be used when moving an appliance containing hot oil or other hot liquids. Always attach plug to appliance first, then plug cord into the wall outlet. To disconnect, turn any control to "off", then remove plug from wall outlet. Do not use appliance for other than intended use.
![burn hazard]()
![shock hazard]()
Refrain from using attachments that are not recommended by the appliance manufacturer, as this may result in fire, electric shock, or personal injury.- Do not let the cord touch hot surfaces, or hang over the edges of tables or counters.
- This appliance is not intended for use by persons (including children) with reduced physical, sensory, or mental capabilities, or lack of experience and knowledge unless they are provided with supervision and instruction concerning use of the appliance by a person responsible for their safety.
- Always be sure to unplug the appliance from the outlet prior to moving, cleaning, storage, and when not in use.
- StoreBound shall not accept liability for damages caused by improper use of the appliance.
- Improper use of the appliance can result in property damage or even in personal injury.
![shock hazard]() This appliance has a polarized plug (one blade is wider than the other). To reduce the risk of electric shock, this plug will fit in a polarized outlet only one way. If the plug does not completely fit in the outlet, reverse the plug. If it still does not fit, contact a qualified electrician. Do not attempt to modify the plug in any way.
This appliance has a polarized plug (one blade is wider than the other). To reduce the risk of electric shock, this plug will fit in a polarized outlet only one way. If the plug does not completely fit in the outlet, reverse the plug. If it still does not fit, contact a qualified electrician. Do not attempt to modify the plug in any way.- Turn the appliance OFF, then unplug from the outlet when not in use, before assembling or disassembling parts and before cleaning. To unplug, grasp the plug and pull from the outlet. Never pull from the power cord.
- A short power supply cord is to be provided to reduce the risk resulting from becoming entangled in or tripping over a longer cord. An extension cord may be used if care is exercised in its use. If an extension cord is used, the marked electrical rating of the extension cord should be at least as great as the electrical rating of the appliance. The extension cord should be arranged so that it will not drape over the countertop or tabletop where it can be pulled on by children or tripped over unintentionally. If the appliance is of the grounded type, the cord set or extension cord should be a grounding-type 3-wire cord.
![]()
Hot surfaces! Never touch the Cooking Surface or Cover while appliance is in use. Always lift and lower the Cover by the Cover Handle.- DO NOT lift the Cover so that your arm is over the Cooking Surface as it is hot and may cause injury. Lift from the side.
![burn hazard]()
![shock hazard]()
To prevent the risk of fire, electric shock, or personal injury, do not put cord, plug, or appliance in or near water or other liquids. The Mini Pie Maker is NOT dishwasher safe.- Never use abrasive cleaning agents to clean your appliance as this may damage the Mini Pie Maker and its non-stick Cooking Surface.
- DO NOT use the Mini Pie Maker near water or other liquids, with wet hands, or while standing on a wet surface.
- Allow Mini Pie Maker to cool completely before moving, cleaning, or storing.


Follow us!
@bydash | recipes, videos, & inspiration
@unprocessyourfood | veg & vegan-friendly meals

1-800-898-6970 | @bydash | bydash.com

Documents / Resources
References
Download manual
Here you can download full pdf version of manual, it may contain additional safety instructions, warranty information, FCC rules, etc.
Advertisement


Need help?
Do you have a question about the DPIE100 and is the answer not in the manual?
Questions and answers