Table of Contents
Advertisement
Advertisement
Chapters
Table of Contents

Related Manuals for Hasselblad FLEXTIGHT X1


Summary of Contents for Hasselblad FLEXTIGHT X1
- Page 1 User Manual Flextight X5 / X1 English – v/1.3...
-
Page 2: Table Of Contents
Table of contents Warnings and Restrictions System Requirements Parts and components Front panel Back panel and cutaway view Setting up the Scanner Environmental Requirements Elec trical Requirements Installation Procedure, FireWire Inter face Operating Instructions Resolutions True Resolutions Calibrating the Scanner Focus Calibration White Calibration for Ref lec tives The Light Tubes Cleaning the Ex ternal Surface of the Scanner... - Page 3 The Flextight X1 and the Flextight X5 satisfy the demand Removal and both utilize Hasselblad’s unique FlexColor for image quality and speed requirements from profes- software and 3F – Flexible File Format. These features pro- sional photographers and production environments alike.
-
Page 4: Warnings And Restrictions
Warnings and restrictions • Read all of the included documentation before attempting to install and use the scanner. • Do not touch the originals and/or the original holder while scanning. • Do not start scanning or previewing until an original holder with an original has been mounted. • The original holder is only to be mounted or removed when the drum is in the load position. • When you turn on the scanner, the drum will roll to the load position, if it is not there already. Do not touch the scanner while the drum is rotating. • Do not place your fingers or any other object into the scanner while it is connected to power. • Before servicing or opening the scanner, the power supply must be disconnected from the mains (unplugged). It is not sufficient simply to press the on/off button. • Install the scanner in a location where children can not get to it. It contains small openings and moving parts that can cause injury. System requirements Below are the basic hardware requirements for the PC or Macintosh system to which the scanner is to be connected. For information about the processor, operating system, RAM and harddisk requirements please refer to the “Software Reference” manual, that comes with the FlexColor software. • Screen resolution of minimum 800 x 600 pixels with true colors (24-bits). • Mouse or other pointing device. • FireWire interface. Preventive maintenance All Flextight scanners should be serviced every 25,000 scans or every 12 months, whichever comes first. If a Feeder is mounted, the recommended number of scans is 15,000 provided that the feeder is mounted for all scans. Please note that previews are also counted as scans. Newer Flextight scanners have a counter installed so that the number of scans can be monitored from FlexColor. Please refer to the FlexColor manual to learn more about monitoring the number of scans. Failures or faults originating from lack of service and/or daily maintenance are not covered by the factory warranty. -
Page 5: Parts And Components
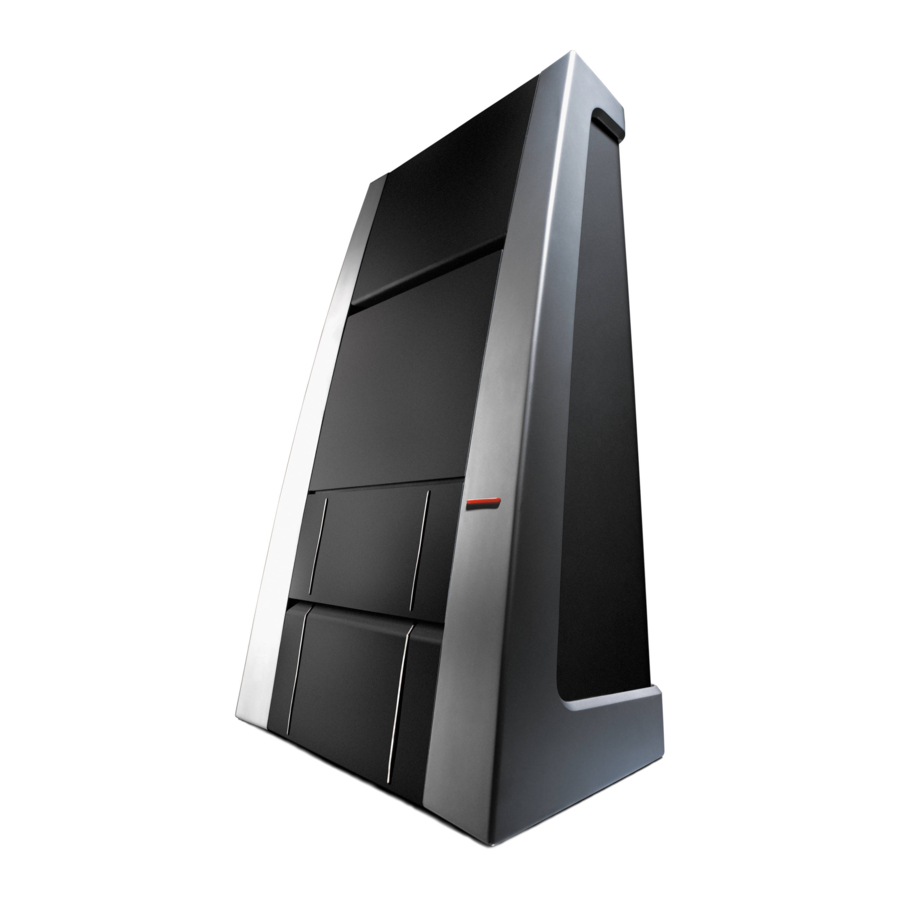
Parts and components − front panel F Power indicator (Green) A Feed table Remains lit when ready to scan. Flashes when first installed This must be in the lower position for normal scanning. to indicate that firmware must be loaded (it will be loaded When scanner is not in use you can return it to closed automatically when you run FlexColor). position to protect it from dust etc. Adjust to horizontal position when using the 35 mm slide mount holder. G Motor drive indicator (Yellow) B Light table Lights when the scanner is repositioning the optics to scan in a new format or when drum is repositioning. For viewing originals. The grid helps you to align your transparent originals. H Scan indicator (Red) C Transparency holder guide Lights when scanning. Do not touch the scanner while this indicator is lit. If the light is flashing when not scanning, Two rails that guide all the transparency holders and keep then an error has occurred - please contact your Flextight them in a straight orientation. dealer for assistance. D Original holder clasp I Start/stop scan button All original holders slide into a slot here and are held in With this button you can initiate a 3F scan. Parameters are place by a magnetic clasp. - Page 6 Parts and components − cutaway view F Upper light source A Power cable socket Illuminates reflective originals. Flextigh X5 only. Connect the power cable into this socket. G Prism-module B FireWire interface sockets Focuses the light from various angles and thereby removes Socket for FireWire cable (max. 6 m) for computer con- or heavily reduces dust and scratches in the scanned image. nection. The second socket allows connection to another Flextigh X5 only. device (hard disk, printer etc.) in the FireWire chain. H Lower light source C CCD housing Illuminates transparent originals. Movable platform holding the CCD sensor. I Drum D Spindle Rotates the original into the scanner and transports it past For positioning of the CCD housing and optics housing for the optical scan line. the appropriate resolution and original size. J Original holder E Optics housing In this case, a transparency holder is shown in the Movable platform holding the optics that focuses the image mounted position and with the retaining flap held open.
-
Page 7: Setting Up The Scanner
IMPORTANT: Make sure that the wall socket you are planning to use meets the electrical requirements outlined earlier. Plug the Flextight X1 / X5 power supply into a wall socket. Note that the power supply may emit a low buzzing sound when plugged in. - Page 8 For horizontal positioning lift the table free from the hinges and push. Closed Horizontal Normal...
-
Page 9: Operating Instructions
Operating instructions 1. It is assumed that the scanner and FlexColor software have been properly installed. 2. If not already done, lower the feed table A to normal position. 3. Press the red power button F on the front of the scanner to switch it on. -
Page 10: Resolutions
lines printed on the holder to line up the image. Handle the clear plastic layer only by the edges to avoid fingerprints. Curl the plastic layer back and slip the front edge into Flextight’s foil holder. 9. Lay the top layer of the holder down flat over the original. For the reflective holder, note the four metal pegs (the top two are shown as A and •... -
Page 11: Calibrating The Scanner
Calibrating the scanner The Flextight X5 scanner requires two types of calibration The Flextight X1 only requires one: • Both scanners require focus calibration. Focus calibration adjusts the positioning of the scanners’ optics for each zoom level. If your scans appear unfocused or are slightly the wrong size, then you may need to make a new focus calibration to adjust the zoom mechanism. The focus calibration is stored in the scanners flash PROM, so it is retained when you move the scanner to a new computer. See Focus Calibration on page 12 for more information. • White calibration is only required for reflective scans (it is done automatically for transparencies). During calibration, the scanner scans a white target to establish the white point along the full length of the scanners CCD. See White Calibration for Reflectives on page 13 for more information. Both of the calibration procedures are simple and are initiated from the FlexColor program. -
Page 12: Focus Calibration
Focus calibration The Flextight scanner uses an adjustable zoom and focus mechanism to optimize its scanning resolution for each of the original formats it can handle. If you suspect your scans are not as sharp as they should be, then you may need to calibrate your scanner. Note that you must not calibrate the scanner every day. It is intended that the scanner is calibrated not more than once every three months. In most cases, this procedure will never be necessary. Use procedure below to make Focus Calibration: 1. Locate the Focus sheet that came with your scanner. It is a 8 x 9 cm (3” x 3.5”) square of transparent black and white film. 2. Mount the film into the 6 x 6 original holder with the text reading normally as shown. -
Page 13: White Calibration For Reflectives
White calibration for reflectives The Flextight X5 scanner uses a white reference to make sure that all elements in the scanner’s CCD react consistently to light brightnesses. The scanner has been calibrat- ed at the factory, and the calibration data is stored in the scanner’s flash PROM. As the scanner ages, the properties of the light tubes may change slightly. Therefore, you must redo the white calibration every six months or so and immediately after changing the light tubes. Use the procedure below to make a White Calibration: 1. Find the white calibration sheet that came with the scanner. It is a square white piece of paper (219 x 219 mm (8.6” x 8.6”)). If you have lost the white calibration sheet, then you can use a flat (non-textured), perfectly white piece of paper of the same dimensions. -
Page 14: The Light Tubes
The light tubes The Flextight X5 contains two light tubes: one for illuminating reflective originals from above, the other for shining light through transparencies from below. The Flextight X1 has only one light tube for transparency scanning. NOTE! The two lamps are of different types and are not interchangeable. Replacing the light tubes If scans are suddenly coming out black (or all white if you are scanning negatives), then one of your light tubes may be defective. Make a preview using both types of scans (transparent and reflective) to find out which tube is affected. • If transparencies are not working, then the bottom tube may be burned out. • If reflectives are not working, then the top tube may be burned out. Follow the procedure below to replace a tube: (See Figure on next page) 1. Obtain the appropriate replacement lamp (ask your Flextight dealer). 2. Turn off and unplug the scanner from the primary power supply. 3. - Page 15 PULL OUT PRESS PRESS PULL OUT...
-
Page 16: Cleaning The External Surface Of The Scanner
Cleaning the external surface of the scanner The external surface of the scanner can be cleaned with a damp cloth. Be careful not to allow any moisture inside the scanner or on any of the connectors. Do not use alcohol or other solvents. Disposal If you need to dispose of the scanner, it must be delivered to an authorized waste plant for electronics equipment. Technical specifications Power Connector Power Consumption Max. 75 W during operation Power Requirements 100-240V AC, 1.3 A, 50-60 Hz Interface to Computer FireWire (IEEE 1394) Front Panel One multifunction switch (on/off switch) Status indicator LED’s Drum Force 1 kg (2.2 lbs) Operating Environment Operating Temperature: 10 - 35 °C (50 - 95 °F) Recommended Working Temperature: 10 - 25 °C (50 - 77 °F) Humidity: 20 - 80 % RH (no condensation) Storage Environment Temperature: 0 - 50 °C (32 - 122 °F) Relative humidity: 20 - 80 % RH (no condensation) Originals Transparencies: from 35 mm to 4 x 5 inches, < 1 mm thick Reflectives: up to 220 x 310 mm (A4 oversize), < 1 mm thick (X5 only) Standard 35 mm dias in frames (optional) Lamp type Reflectives Lamp (for Flextight X5): Part No. 10700022 Transparency lamp for Flextight X5: 10700032 Tranparency lamp for Flextight X1: 10700022 Dimensions Height: 645 mm (25.4”) Width: 385 mm (15.2”) -
Page 17: Fcc Notice
FCC Notice This equipment has been tested and found to comply with the limits for a Class A digital device, pursuant to Part 15 of the FCC Rules. These limits are designed to provide reasonable protection against harmful interference when the equipment is operated in a commercial environment. This equipment generates, uses, and can radiate radio frequency energy and, if not installed and used in accordance with the instruction manual, may cause harmful interference to radio communications. Operation of this equipment in a residential area is likely to cause harmful interfer- ence in which case the user will be required to correct the interference at their own expense. -
Page 18: Ce - Declaration Of Conformity
CE – Declaration of conformity ... - Page 19 CE – Declaration of conformity ...
-
Page 20: Flex Tight X1
© 2006 Hasselblad A/S. All rights reserved. Flextight X1 / X5 User’s Guide, Part No 75020123, revision 1.3 The information in this manual is furnished for informational use only, is subject to change without notice, and should not be construed as a commitment by Hasselblad A/S. Hasselblad A/S assumes no responsibility or liability for any errors or inaccuracies that may appear in this manual. Hasselblad A/S assumes no responsibility or liability for loss or damage incurred during or as a result of using Hasselblad software or products. Hasselblad, Imacon, FlexColor and Flextight are trademarks of Hasselblad A/S. Macintosh, Mac OS and FireWire are registered trade- marks of Apple Computer, Inc. - Page 21 Software Reference FlexColor 4.0 for Flextight Scanners by Hasselblad Imacon...
- Page 22 Hasselblad A/S assumes no responsibility or liability for any errors or inaccuracies that may appear in this manual. Hasselblad A/S assumes no responsibility or liability for loss or damage incurred during or as a result of using Hasselblad software or products.
- Page 23 Table of Contents Introduction What’s in this Manual Software compatibility FlexColor under Mac OS and Windows System Requirements The 3f File Format FlexColor Menus The FlexColor Menu The File Menu The Edit Menu The Image Menu The View Menu The Maintenance Menu The Window Menu The Main FlexColor Window Introduction...
- Page 24 Texture Tab CC (Color Correction) Tab Auto Tab Dot Tab ColorSync or ICM Tab The Preferences Window Introduction Scanner Tab Camera Tab 3f Tab Output Profiles General FlexColor Settings FlexColor ICC Profiles Generic ICC Output Profiles Editing ColorSync Color Profiles The Thumbnails Window Introduction Opening the Thumbnails Window...
- Page 25 The Gradations Window Introduction Using the Sliders Using the Gradations Color Picker Using the Curve Setting the Threshold for Lineart Scans Working with Presets Selective Color Correction Introduction Opening the Color Correction Window Using the Color Correction Window The Texture Window Introduction Using the Texture Window The Detail Window...
-
Page 27: Introduction
Batch scanning to create individual image files from each of several • crop and settings combinations Software compatibility The FlexColor software works with the entire range of Flextight scanners (except for the Flextight 4800) and all Hasselblad/Imacon cameras and camera backs. -
Page 28: Flexcolor Under Mac Os And Windows
FlexColor under Mac OS and Windows The CD that came with your scanner includes versions of FlexColor for both Macintosh and Windows-based systems. The interface is nearly identical on both platforms, with mostly superficial differences to conform with the interface guidelines of the two systems. Nearly all of the screen captures shown in this manual were taken from Mac OS X. - Page 29 - therefore you are free to move the FlexColor application to any location without losing access to these standard settings. Preferences file FlexColor uses the OS X standard format for preference files. The file name is dk.Hasselblad.FlexColor.plist.
-
Page 30: The 3F File Format
The 3f File Format When using the Scan 3f function (for scanners) or capturing an image with a digital camera back, FlexColor stores the image in Hasselblad’s unique 3f (flexible file format). The 3f file is an extended TIFF-file containing •... - Page 31 scanning or capture data when you save using the plug-in. To use your 3f files in other image-editing and DTP applications, you must apply the required settings and then save them as TIFF files. TIFF is a standard format that is supported by the vast majority of imaging and DTP programs.
-
Page 33: Flexcolor Menus
FlexColor Menus FlexColor commands are available via a standard menu bar. Each of them is described briefly below. Note that most menu entries also list a keyboard shortcut to the right of the entry. Try to remember and use these shortcuts to speed up your work. The FlexColor Menu Except for the Preferences entry the FlexColor menu functions are standard for all applications. -
Page 34: The File Menu
The File Menu The File menu includes entries that initiate scans and make settings for FlexColor. • Scan Preview: Takes a low-resolution preview scan. The preview image will be displayed in the main FlexColor window so that you can preview settings and crop the image for the final scan. All settings are previewed using the full 14-bit color depth to display results. -
Page 35: The Edit Menu
page 35 for more information. • Devices: Opens the Devices window. The window lists all connected devices allowing you to select which camera or scanner device you want to work with. Click on the one you prefer and click the Select button. If you have only a single scanner or camera connected this device is automatically chosen. -
Page 36: The Image Menu
• Undo: Reverses your most-recent actions - for example, a crop area modification or a change in the Setup window. You are able to step back through a long series of actions. • Redo: Reapplies the last action that you cancelled using the Undo command. -
Page 37: The View Menu
Modify When using the Modify... function to add settings from current settings the cropping will be maintained in the added settings. If the images in question have different sizes the cropping will be scaled accordingly. Approve Select a number of images and chose Approve. These images will appear in the top at the Thumbnail window if you have selected sort by approval. -
Page 38: The Maintenance Menu
The Maintenance Menu The Maintenance menu includes entries that are used for calibrating and upgrading the scanner. The functions of these entries will depend on the model of Flextight scanner you are using. • Focus Calibration: Opens the Calibration window, which calibrates the focus and sizing of the scanner. - Page 39 The Window menu opens and closes each of the image settings window available with FlexColor. Each window that is currently open shows a check mark to the left of its name. For more information about each of these windows, see the appropriate section later in this manual: Gradations window.
-
Page 41: The Main Flexcolor Window
The Main FlexColor Window Introduction The main FlexColor window displays your preview images and provides access to most of the scanning and editing functions available with FlexColor. Scan Controls Preview Makes a preview scan. A preview image will appear in the large area on the right. - Page 42 Save... (This button changes to a Scan... button when working with a preview scan in the preview window). Saves an image (as a standard TIFF file) from the 3f file currently displayed in the FlexColor window. All current crop, mode, color and image- enhancement settings will be applied to the saved image.
-
Page 43: Keyboard Shortcuts
Frame Use this pop-up menu to set the film format (size) of the original you are scanning. This setting mirrors the Frame setting on the General tab of the Setup window. See “General Tab” on page 38 for more information. Selecting the Customize... -
Page 44: Color Display
Auto Focus Indicator: Shows the current focusing level (indicated by a red or green horizontal line) compared to the standard focus calibration, which is represented by the horizontal line in the center of the indicator. Please note that a red line indicates a coarse deviation, and in this case it is recommended to perform a focus calibration. -
Page 45: Output Size Controls
information. Texture Button: Opens/closes the Texture window. See “The Texture Window” on page 101 for more information. Click this button to apply automatic settings for highlight and shadow points based on the histogram of your image inside the cropped area. Click on this button to return all correction windows (Gradations, Histogram, Color Correction, and Unsharp Mask) to their neutral settings. -
Page 46: Zoom Controls
crop area by dragging one of its corners, and the proportion of height to width will be maintained. Click on the lock to toggle its setting. Crop Button: Usually this button is gray, which indicates that the crop tool is active. When the crop tool is active, you are able to click and drag on the preview image to create and manipulate the crop area. -
Page 47: Orientation Controls
Fit to Window: Click this button to resize the preview to fit the actual window size. Detail: Click this button to open the Detail window. Use this window to show details of the image and/or a strongly magnified view of the preview image for reading color values of a specific pixel in your image. -
Page 48: Rotating Images
Rotating Images In some cases, your originals may be rotated so that they appear sideways in relation to the FlexColor preview window. You can use the rotate buttons to rotate the image 90° either clockwise or counter clockwise. Both the preview and the final image will be rotated. - Page 49 Overlay: This function is primarily for digital camera back users. It is possible to add an overlay to the preview. All the standard image file types such as TIFF, JPEG, GIF, and PNG can be used. To place the overlay simply drag the image file into the preview window.
-
Page 51: Custom Frames
Frame pop-up menu. To add or remove a frame either double-click it or select it and click the Exclude/Include button. The pre-defined frames in the list (defined by Hasselblad) are not editable and thus marked with a non-edit symbol to the left. - Page 52 When a frame is selected its current settings are displayed in the Frame Info section. Click the small triangle to the left to display the settings if not already displayed. • Click the New... button. The Create new Custom frame window appears.
- Page 53 If your scanner has a moveable optical system, you are able to specify both Width, Height and Vertical offset for transmission frames, but reflective frames are still limited to the few fixed widths because of the white calibration used in reflective mode. •...
- Page 54 • Now a number of sub-frames, one for each aperture, are added to the list, and you can edit the Width, Height and Vertical Offset values of each aperture. • To delete a custom frame from the list, select it and click the Delete... button.
-
Page 55: The Setup Window
The Setup Window Introduction The Setup window shows many settings that affect the image and the way in which the other tools in the FlexColor application work. All of the settings displayed in the window can be saved and loaded from your hard disk. -
Page 56: The Flexcolor Setup Philosophy
The FlexColor Setup Philosophy In the traditional prepress environment, where photographs are shot to film and then scanned, the professional scanner operator requires extensive education and experience to make all of the settings required to obtain good results. The operator examines each original and, applying his or her experience, enters a “best guess”... -
Page 57: Advanced Setup Management
After you have made changes to the current setup, save them by clicking on the Save button in the Setup window. To delete the current setup, thereby removing it from the Setup pop-up menus, click on Delete. The generic setups that ship with FlexColor are locked so that you can not accidentally modify, rename or delete them. -
Page 58: General Tab
General Tab The General tab of the Setup window affects the general behavior of the interface and identifies the setup file currently loaded. Mode Provides a pop-up menu for choosing the color space used when making your final scan. The following options are available: •... - Page 59 • Grayscale 16-bit: stores final images as 16-bit grayscale TIFF files. This preserves the full tonal range captured by the scanner, but creates files that many applications cannot read. To obtain a grayscale result, FlexColor combines information from all three RGB color channels. •...
- Page 60 Adaptive Light If your originals are very dark you can use this setting to increase the exposure time (older scanner models will increase light intensity). Film Type Use this pop-up menu to identify the type of original you are scanning. The following options are available: •...
-
Page 61: Contrast Tab
Contrast Tab The settings on the Contrast tab sheet are exactly the same as in the Gradations window (available from the Window menu). Changes made here in the Setup window will also change the settings in that window, and vice versa. See “The Gradations Window”... -
Page 62: Texture Tab
Texture Tab The settings on the Texture tab (except for the Color % setting) reflect those made in the Texture window (available from the Window menu). For more details about using the Unsharp Mask, Color Noise and FlexTouch functions, see “The Texture Window” on page 101. Color % These three fields (Red, Green, and Blue) control the amount of sharpening effect applied in each color channel. - Page 63 The matrix contains the same settings as the Color Correction window (available from the Window menu), and displays all of the settings you have made using that window. In many cases, it will be easier for you to make adjustments using the Color Correction window instead. See “Selective Color Correction”...
-
Page 64: Auto Tab
A full explanation on all of the applications of this tool would be complex and beyond the scope of this manual. If you would like to know more about color mapping, please speak with your printer or consult the electronic prepress section of your local library or book store. Auto Tab The Auto tab sheet has percentage settings for both Shadow and Highlight. -
Page 65: Dot Tab
shadow than normal. For example, if the Auto % for Highlight were set to -2, and you use the auto function on an image in which the highlight might normally be 200, then FlexColor will assign a highlight value of 204 (provided the shadow value were zero). - Page 66 The values in the three (RGB) columns control the maximum (for highlight) or minimum (for shadow). For RGB color, 8-bit values (0 to 255) are shown for each color. The Endpoints pop-up menu determines how the values for the color columns will be assigned when the input values exceed the defined limits.
-
Page 67: Colorsync Or Icm Tab
ColorSync or ICM Tab ICC color profiles define the color response of each device in your system. FlexColor uses these profiles to make calibrated, accurate, and high-quality color separations from your images. Under Mac OS, ICC profiles are controlled by Apples ColorSync technology and the setup tab for selecting ICC profiles in FlexColor is called ColorSync Under Windows 2000 and XP, ICC technology is referred to as “ICM”... - Page 68 For more information about using ICC profiles, see the online help for your operating system. For information about Apples ColorSync technology, check Apple’s web site at: http://www.colorsync.apple.com and/or http://www.apple.com. Input (Mac) This pop-up menu shows a list of input ICC profiles installed on your system.
- Page 69 Here you simply select the Devices view which gives you a list of registered devices. After selecting your camera or scanner in the list you can either assign a new default profile or switch back to factory default. The new standard settings installed with this release all use the device default profile (except for settings for scanning negatives, since they do not use device dependent profiles).
- Page 70 This pop-up menu lists all of the RGB profiles currently installed on your system. Choose a profile that represents the color space in which you work. (If you are using Adobe Photoshop, you can choose the space used by Photoshop). To see which space is used by Photoshop, start Photoshop and choose Edit ->...
- Page 71 CMYK This pop-up menu lists all of the output profiles currently installed on your system. Choose the profile specific for your output device, or select the closest of the generic profiles supplied with FlexColor. See “Generic ICC Output Profiles” on page 59 for more information about the generic profiles.
- Page 72 Embed Profile Mark this checkbox to embed a profile with your saved image. The embedded profile will always match the content of the file. If conversion is active the embedded profile will be the output profile corresponding to the current scan mode setting - either the RGB or the CMYK profile. If the convert checkbox is not checked the embedded profile will be the current input profile.
-
Page 73: The Preferences Window
The Preferences Window Introduction The Preferences window contains several miscellaneous settings that control the general functions of the scanner and the software. The Preferences window settings are universal for the FlexColor application, they are not saved with the other settings in the setup files. To open the window, select Preferences from the FlexColor menu. -
Page 74: Camera Tab
power saving available: • Power down after: the scanner is turned off, just as if you had pressed the on/off button on the scanners front panel. • Light off after: the scanner remains turned on, but the light is shut off. Use the sliders to make settings for how long the period of inactivity should be before activating the relevant power-saving function. - Page 75 Scan Size Use these settings to set general limitations for your 3f files. If you set the value in the Percentage of max. resolution field to ex. 50%, all 3f files will be scanned in half of the max. resolution available for the currently selected original holder.
-
Page 76: Output Profiles
Output Profiles The Output Profiles tab enables you to establish the default ColorSync/ ICC profiles used by FlexColor. Though output profile settings are saved with each setup, one of the options for each of them is to use the default setup established here. This way, you can make setups in which the output profile is assigned dynamically according to the program preferences. -
Page 77: General Flexcolor Settings
General FlexColor Settings The bottom of the Preferences window holds the following general FlexColor settings: Opening Saved Images After saving an image as a TIFF file, FlexColor is able to launch the application of your choice and open the saved image in that application. If you would like to use this feature, place a check in the Open saved images with checkbox, then click the Select... - Page 78 • If the Auto after new crop checkbox is disabled, then hold down the option key to apply the auto function to your new crop. This function will not update the highlight and shadow settings when you move or resize an existing crop area; it only responds when you create a new crop area.
-
Page 79: Flexcolor Icc Profiles
FlexColor ICC Profiles Generic ICC Output Profiles FlexColor includes six generic ICC output profiles for generating various types of color separations. The name of each profile provides a description of the results it creates. See Table 1 for details. ���� ������... -
Page 80: Editing Colorsync Color Profiles
In the majority of cases, the Hasselblad 330SKEL 30K75 profile will provide the best results. In some cases, a ICC profile for your (or your service bureaus) specific output device may be available. - Page 81 3. Use the CMYK pop-up menu to select the profile you would like to edit. Note that the profile you select must be as close as possible to the profile you want to make - you are not able to create a completely different profile using the editor.
- Page 82 5. We recommend that you save your edited profile using a new name, so click on the Save as... button. The Create new Profile window appears. Type a name for your edited profile and click on the Create button. 6. Return to the Output Profile window. It shows the output values applied in the final separated file for each color at each of four brightness (neutral-gray) levels (0%, 5%, 50%, and 100%).
- Page 83 9. The Advanced section includes value settings for even more gray levels. These settings include the same four levels that you were able to adjust using the standard part of the Output Profile window. 10. When you are done making settings in the window, click on the Save button to apply the settings to your new profile.
-
Page 85: The Thumbnails Window
The Thumbnails Window Introduction The Thumbnails window works like a light table, showing you a small preview image of each of the scans made using the 3f button and stored in the currently selected folder. Click the Folder button to select the folder you want to use for your thumbnails. -
Page 86: Files And Formats
Files and Formats When you scan using the Scan 3f button, the image is scanned and saved as a 3f file in the currently selected folder and displayed in the preview area of the main FlexColor window. See “The 3f File Format” on page 10 earlier in this manual for a detailed description. -
Page 87: Selecting Images
Crop mask button: Masks off the area outside the current cropping (if any) for each image. The Thumbnails window displays information about each 3f file: Selected thumbnail Image currently (highlighted) previewed Crop mask Image name Approval mark Selecting Images You are able to select one or more images in the Thumbnails window. Once you have selected an image, it will be shown highlighted. - Page 88 Working with Selected Images The Thumbnails window includes the following controls, which operate on the images you have highlighted: Get Info Opens the Info window, which holds various information about the image, such as size, resolution, frame size and various information about copyright etc. (you can also choose Get Info from the File menu or type cmd-i to open the Info window).
- Page 89 Choose either of the settings and then use the Mode pop-up menu to select one of the following save options: Normal: to save the selected images as TIFF-files. Preview: to save the selected images as a low-resolution TIFF- file for preview purposes. Layers: to save the selected images as separate layers in a Photoshop file (.psd) Having selected the appropriate save options, click the Save...
-
Page 90: Modifying Selected Images
Modifying Selected Images The Thumbnails window gives access to many different types of information about each image. It provides settings that enable you to modify the images by adding new setups to the history, selecting a default setup, entering meta data and more. You can make these settings in two ways: using the Info window or by using the Modify window, each of which is available from the Thumbnails window. - Page 91 1. stablish the setup you wish to use by doing one of the following: • Load a target 3f image into the main FlexColor window and work with the image size, position and correction controls until you have the setup you need. This setup is known as the “current” setup.
- Page 92 • All: applies your modifications to all of the images currently open in the Thumbnails window (i.e., to all 3f images in the current folder). • Approved: applies your modification settings to all images marked as approved, regardless of which images were selected when you opened the Modify window.
- Page 93 Renaming Your Images Each 3f file was given a name generated by the settings you made when you scanned it. Sometimes, especially after a batch scan, you may want to give a more descriptive name to each image. You can use the Modify window to modify the name of one or more images as follows: 1.
- Page 94 your images, you can also do that now by checking the appropriate boxes and making settings as described elsewhere in this section. Clear one or both of these boxes to prevent these changes from being made. 8. Click on Modify to apply your settings. Neutralize and Unprocess These two settings in the Modify window are only relevant for digital camera images.
- Page 95 marked as approved, regardless of which images were selected when you opened the Modify window. 4. Mark the Change IPTC info check box in the Modify window; this enables the IPTC options. 5. If the IPTC settings are not visible, then click on the triangle next to the check box to expose them.
-
Page 96: Folder Selection And Favorites
Folder Selection and Favorites The Thumbnails window displays a thumbnail image for each of the 3f files stored in a selected folder. You can use it to view any folder available to your computer, including network shares. You do not need to have scanned an image from your computer—or even have a scanner attached—to view and edit images using the Thumbnails window. -
Page 97: Printing The Thumbnails
• Remove Favorite: removes the currently selected folder from the favorites list at the bottom of the menu. This entry is not available unless the current folder is already a favorite. • Recent: this section of the menu lists the folders you have most recently viewed using the Thumbnails window. -
Page 99: The Info Window
The Info Window Introduction The Info window holds various information about the currently selected file and its contents, a complete history of applied settings and the possibility to add unique file data (including IPTC-tags) such as copyright information and keywords to support an image database. Using the Info Window Opening the Info Window From the main FlexColor window, when an image is loaded, choose Get... - Page 100 file. PPI: Resolution of the file. Device: Hasselblad device used to scan the image. Use the following fields to enter your own file information: Byline: Usually the name of the photographer. The contents, if any, from the Byline field in the Default Info section of the 3f tab in the Preferences window (see page 53) will be added automatically each time you scan using the Scan 3f function.
- Page 101 The history list includes an entry (with name, date, time and file size) for each time new settings have been applied to the image and for each TIFF file that has been created from it. The buttons below the list have the following functions: Show: Select an entry and click the button (or double-click...
- Page 102 Make Default: Use button to select the entry with the settings that the file should be opened, saved and exported with. The check mark to the left indicates which entry is currently selected as default. The settings of the entry selected as default are also applied to the thumbnails displayed in the Info window and in the Thumbnails window.
-
Page 103: The Color Info Window
The Color Info Window Introduction The Color Info window enables you to read pixel values at any point in your image. You can also set up to five fixed Sample points and read the values at all of them simultaneously to monitor the effects of your other settings. -
Page 104: Setting Fixed Sample Points
Setting Fixed Sample Points You are able to set up to five fixed Sample points so that you can monitor the effects that your settings are having in key areas around your image. Each sample point is indicated with a diamond and a number in the preview image. -
Page 105: The Histogram Window
The Histogram Window Introduction The easiest way to set the highlight and shadow points is to use the Auto tonal range button in the main FlexColor window. However, in some cases, the auto function will not provide the desired results. The color pickers and sliders in the Histogram window provide the tools you need to fine tune your highlight and shadow points. -
Page 106: The Histogram Display
The Histogram Display To open the Histogram window, type cmd-2 or click on the Histogram button in the Correction area of the main FlexColor window, or select Histogram from the Window menu. The Histogram window contains a graph that indicates the tonal range of your image. - Page 107 Color Pickers These enable you to click on pixels in your image to set highlight, shadow and neutral points. See “The Histogram Color Pickers” on page 89 for more information about using them. Sliders Click and drag the sliders to set the highlight and shadow points and to set the minimum- and maximum output values.
- Page 108 Apply settings: When this is pressed (grey), then your correction settings will be applied to the preview and final image. When not pressed (white), then the tool will hold your settings, but they will not be applied to the image. Reset/Preset: Click once here to reset the control to the settings from your loaded setup or preset.
-
Page 109: The Histogram Color Pickers
The Histogram Color Pickers The histogram color pickers enable you to point at any pixel in your preview image and assign the highlight, neutralize, or shadow point based on the value of that pixel. Both the highlight and shadow color pickers will affect the brightness and contrast in your image by choosing the tonal range. - Page 110 2. Move the mouse pointer over the preview image; note pixel value readings that appear in the Color area of the main FlexColor window. Note that the numbers displayed in the Color area are the current values (after histogram or gradation settings). 3.
- Page 111 • When selecting a neutralize point, select an object in the image that should be a neutral (gray) color. This will not affect the image brightness, only the color cast. For best results, select a point close to the middle of the exposure range, for example with RGB pixel values around 150.
-
Page 113: The Gradations Window
The Gradations Window Introduction The functions described in this section will not always be needed during normal operation. They enable you to make fine adjustments to your output images that will affect brightness and contrast and will compensate for printing conditions. As with the advanced highlight and shadow controls, take care when using the Gradations settings. -
Page 114: Using The Sliders
small triangle beneath the Shadow depth slider. All of the settings you make using the curves and sliders in the Gradations window are saved with the current setup. The contrast, brightness, gamma and shadow depth settings can also be adjusted using the Contrast tab of the Setup window. -
Page 115: Using The Gradations Color Picker
Using the Gradations Color Picker The Gradations Color Picker in the lower left corner of the Gradations window enables you to place a gravity point on the curve at the brightness of a point that you select in the preview. Click on the eyedropper icon to activate the gradations color picker, then click on a point in the preview to place the gravity point. - Page 116 • To remove a gravity point from the curve, click on the point and then press the backspace button on your keyboard. • A neutral (default) gradation curve is a straight, diagonal line from the lower left to the upper right of the graph. •...
-
Page 117: Setting The Threshold For Lineart Scans
key to restrict its movement to the horizontal direction. • Clicking in the curve area while holding down the alt key changes the numbers of grid lines. Setting the Threshold for Lineart Scans When you are scanning in Lineart mode, FlexColor applies a threshold to create an image in which every pixel is either completely black or completely white. - Page 118 The pop-up menu is divided into up to four sections, giving you the following options: • Create Preset: Saves your current tool settings. A window will open in which you can name the new preset. • Delete: if you have currently loaded one of your own custom presets, then this entry is available.
-
Page 119: Selective Color Correction
Selective Color Correction Introduction Sometimes you need more control over the image colors than simply removing a color cast. FlexColor features a powerful selective color correction feature, which enables you to adjust the appearance of specific colors throughout your image. Opening the Color Correction Window To open the Color Correction window, type cmd-3 or click on the Color Correction button in the Correction area of the... - Page 120 Offsets to its pixel values are listed in the R, G, B, C, M, and Y fields (by default, these values are all set to zero). 4. The pop-up menu near the top of the window displays the nearest primary color to the one you picked in the preview. Adjusting this color will have the most dramatic effect on the color you chose.
-
Page 121: The Texture Window
The Texture Window Introduction The Texture window holds both the Unsharp Mask filter and the FlexTouch filter. Unsharp Mask Filter The Unsharp Mask filter applies an algorithm that increases contrast along sharply defined edges. Unsharp masking has the potential to both improve and degrade your image - it makes the features more sharp, but can also bring out noise or graininess. -
Page 122: Using The Texture Window
Using the Texture Window To open the Texture window, type cmd-4 or click on the Texture button in the Correction area of the main FlexColor window, or select Texture from the Window menu. To access either of the filter’s setting parameters, click the appropriate triangle to the left. - Page 123 • Amount: Controls the strength of the sharpening effect. The higher the value, the stronger the sharp lines will become. Depending on your image, a value between 80 and 200 is recommended. • Dark limit: Sets the brightness level below which the filter has no effect. This will keep the filter from enhancing noise or unwanted textures in your image.
- Page 124 To apply the filter, open the Texture window and set the Color Noise Filter field to a value between 0 and 50. A setting of 0 effectively disables the filter; a setting of 50 gives the maximum effect. The best setting to use varies by image, so you must experiment to find the optimal setting.
- Page 125 Reset/Preset: Click once here to reset the control to the settings from your loaded setup or preset. Click and hold to open a menu for selecting, saving and deleting presets. See “Working with Presets” on page 97 for complete details about how to work with this menu.
-
Page 127: The Detail Window
The Detail Window Introduction The Detail window can show up to 4 detail views of the preview image (in 100 to 400%). The detail views are especially useful when you want to see the effect of the corrections performed using the various correction tools in different areas of your preview image. -
Page 128: Using The Detail Window
Using the Detail Window To open the Detail window, type cmd-5 or click on the Detail button in the Zoom area of the main FlexColor window or select Detail from the Window menu. Delete detail view Add detail view Currently Zoom Out selected Detail view... -
Page 129: Batch Scanning
Batch Scanning Introduction The Batch Scan function enables FlexColor to: • Create several different scans of one or more originals contained in a single original holder. Each scan in the batch can have completely different settings for all FlexColor windows, including resolution, crop, color space, sharpening, tonal range, color correction, gradation, and all setup tabs. - Page 130 To access the Manual parameters, click the triangle to the left. 3. Define a crop area and make scan settings in the Size area of the main FlexColor window and in all Setup and Correction windows. 4. Click on the Add button in the Batch Scan window. A standard file save window will appear.
- Page 131 6. If you want to change any of your previously defined scans, click on the scan name in the Batch Scan window and make changes in the other FlexColor windows. Then return to the Batch Scan window and click on the Update button to save your changes. To remove a scan from the batch set, click on the scan name and then click on Remove.
-
Page 132: Getting Information About Each Scan
Getting Information about Each Scan You can get information about any scan listed in the Batch Scan window, by double-clicking on an entry in the Batch Scan list. This will open a Batch Scan Info window for the selected entry. The window shows the following information: •... -
Page 133: Working With Batch Presets
Working with Batch Presets If you want to save a batch preset, then click on the New button in the Batch Scan window. The Create New Batch Preset window appears. Type a name and then click on Create. The preset name then appears in the pop-up menu in the Preset area. -
Page 135: Using Flexcolor With A Feeder
Using FlexColor with a Feeder Introduction Some Flextight scanner models either include or can be fitted with a batch feeder, which enables you to set up a series of images and then scan them all at once without needing to stand at the scanner and monitor progress. -
Page 136: Scanning With A Feeder
• Drum position: use this pop-up menu to set the drum position. Depending on your feeder, you might use this to load/unload the original holder and to set the scanner for scanning. • Feeder position: use this pop-up menu to adjust the position of the feeder magazine. -
Page 137: Working With 3F
Hasselblad’s unique 3f image-file format gives you the opportunity implementing a more flexible and efficient workflow in which your store full resolution, 16-bit images in your library and then export from these as needed for various types of jobs. -
Page 138: Scanning To 3F
any time. It also holds many other types of meta data (such as name, key words, copyright details, etc.), which make 3f images perfect for indexing with a database to create a searchable image library. Because 3f is essentially an enhanced TIFF format, any image database application that can read TIFF files will also be able to index the meta data stored in 3f files. - Page 139 2. Set the Crop pop-up menu to one of the following: • Auto Detection: FlexColor will attempt to crop the image as tightly as possible to keep all unexposed pixels out of the scan. • Current Crop: FlexColor will use the crop area currently defined for the preview in the main FlexColor window.
- Page 140 can work with this box cleared; the scanner will then use its calibrated focus settings. • Frame recognition: Most Flextight original holders include a bar code that identifies the original format used by the holder (6x6, 6x7, 24x36, etc.), though not all Flextight scanners are equipped to read the code.
- Page 141 not update to match any changes you make to the Destination setting above. If you change your scanner configuration (e.g., by removing the Mounted Slide Feeder or attaching a different scanner), then your new scans will be saved in the last-used Job sub-folder until you change the Destination setting.
-
Page 142: Working With 3F Images
9. If you are using a Flextight RF Scanner (for scanning roll films), then the following controls are also available (if they are hidden, then click on the triangle next to the Rollfilm scanner heading to expose them): Spool backwards: click here to spool the film backwards. It will continue to spool until you click on stop or click again. - Page 143 When you are ready to use a 3f image in an actual job, do the following: 1. Use the Thumbnails window to view the folder where your 3f image is saved. 2. Double-click on the target image to open it in the main FlexColor window.
-
Page 144: Appendix
Appendix Keyboard Shortcuts Main FlexColor Window Makes a preview scan. Cmd or: Opens previous or next image respectively. Space: Press and hold to drag preview around. Cmd-0: Zoom to fit the entire preview image in the window. Cmd +: Zoom in. Cmd –: Zoom out. - Page 145 Info Window F10: Toggles between General and History. File Menu Cmd-N: Makes a preview scan. Cmd-S: Makes a final scan. Cmd-W: Closes the currently selected window if possible. Cmd-U: Opens the Setup window. Cmd-I: Opens an Info window, which contains various information about the currently selected image.
- Page 146 Window Menu Cmd-1: Opens/closes the Histogram window. Cmd-2: Opens/closes the Gradations window. Cmd-3: Opens/closes the Color Correction window. Cmd-4: Opens/closes the Texture window. Cmd-5: Opens/closes the Detail window. Cmd-6: Opens/closes the Batch Scan window. Cmd-8: Opens/closes the Thumbnails window. Cmd-9: Opens/closes the Color Info window.
-
Page 147: Preventive Maintenance
Preventive maintenance All Flextight scanners should be serviced every 25,000 scans or every 12 months, whichever comes first. If a Feeder is mounted, the recommended number of scans is 15,000 provided that the feeder is mounted for all scans. Please note that previews are also counted as scans. Newer Flextight scanners have a counter installed so as the number of scans can be monitored. - Page 150 FlexColor 4.5 Documentation Addendum...
- Page 151 Table of Contents Part 1: For All FlexColor Users ..............4 How to Use this Document....................4 System Requirements ......................5 Most Important Changes for All Users .................. 5 New Support for Instant Approval Architecture..............5 Gamma Slider Replaced by Midtone Slider..............6 Instant Approval Architecture ....................
- Page 152 File Size Options......................32 Using a Batch Feeder ..................... 32 Reading the 3F Scan Log ....................33 Preventive Maintenance for Scanners ................33 FlexColor 4.5 Documentation Addendum...
-
Page 153: Part 1: For All Flexcolor Users
Part 1: For All FlexColor Users How to Use this Document Part 1: For All FlexColor Users This part describes general information about working with FlexColor with all types of images, regardless of whether you are using a camera or scanner. All users of FlexColor should read this part. -
Page 154: System Requirements
New Support for Instant Approval Architecture FlexColor 4.5 now provides full support for the Instant Approval Architecture (IAA) system introduced with the latest Hasselblad digital cameras and Ixpress digital camera backs. Using this system, you are able to assign one of three approval levels (green, yellow or red) to each image. -
Page 155: Gamma Slider Replaced By Midtone Slider
Part 1: For All FlexColor Users Instant Approval Architecture Gamma Slider Replaced by Midtone Slider In FlexColor 4.0, the window featured a slider labeled , which Gradations Gamma provided a precise gradation adjustment that lightened or darkened the image in a consistent way that is compatible with color management. -
Page 156: Standard Instant Approval Workflow
Part 1: For All FlexColor Users Instant Approval Architecture Green for your best shots Yellow for images that need closer inspection Red for images that should probably not be used. Standard Instant Approval Workflow The standard method of working with the Instant Approval Architecture is as follows: 1. -
Page 157: Approval Settings In The Thumbnails Window
Part 1: For All FlexColor Users Instant Approval Architecture Green : all new shots and scans will initially have a green status. : all new shots and scans will initially have a yellow status. Yellow Auto : Each time you take a new shot or scan, FlexColor will analyze the image to see if it looks good (properly exposed, in focus, correctly framed, etc.). -
Page 158: Approval Settings In The Preview Window
Part 1: For All FlexColor Users Instant Approval Architecture To change the approval status of any image, first select the image by clicking on it once, then click on the appropriate button in the tool panel at the left side of the window. -
Page 159: Modify Thumbnail Setups By Approval Rating
Part 1: For All FlexColor Users Instant Approval Architecture Figure 3: Approval-level display and control in the preview window Modify Thumbnail Setups by Approval Rating Modify function of the thumbnail window enables you to modify the settings for several images at once. You are able to control whether your changes will apply to all images, selected images or to all images of a given approval rating. -
Page 160: Using The Detail Window
Part 1: For All FlexColor Users Using the Detail Window Using the Detail Window In FlexColor 4.5, the Detail window has been improved to support larger images and extended functionality. The description below fully replaces the section from the FlexColor 4.0 User’s Guide. Introduction Detail window can show up to 4 detail views of the preview image (in 100 to... - Page 161 Part 1: For All FlexColor Users Using the Detail Window Figure 4: Using the Detail window Once an image is loaded into the window, you can do the following: Detail To move the image in the Detail window, hold down the space bar, then click and drag in any unlocked pane of the window.
-
Page 162: Using Multiple Panes
Part 1: For All FlexColor Users Using the Detail Window pane shows an image different from the current preview, the file name is shown under the affected pane(s). To unlock a pane, click the closed-clock icon so that it opens again. When you do this, the unlocked pane will immediately update to match the current preview and settings. -
Page 163: Using Zoom
Part 1: For All FlexColor Users Modifying Images in the Thumbnail Window comparing the effects of your changes; for example, load identical images into two panes, then lock one pane and make settings in the window to Gradation compare the effects of your settings at the pixel level. Using Zoom You can use the window at any of three zoom levels: 100%, 200% or 400%. -
Page 164: Setting The Scope Of Affected Images
Part 1: For All FlexColor Users Modifying Images in the Thumbnail Window Setting the Scope of Affected Images Before you open the window, you can start setting the scope of images that Modify you will affect by working in the Thumbnails window (e.g., by using select, search and/or filter), though this is usually not necessary. -
Page 165: Modifying The Current Preview
Part 1: For All FlexColor Users Midtone Slider in the Gradation Window Modifying the Current Preview When you have loaded a 3F file into the main FlexColor preview window, you can modify its history from here, without needing to go back to the Thumbnails window. -
Page 166: Effects On Older 3F Images
Part 1: For All FlexColor Users Keyboard Shortcuts independently for each color channel. The midpoint controls for the independent channels do not implement a strict gamma curve, so the effects are slightly different (though similar). These midpoint values are therefore shown as pixel levels (0 - 255) rather than gamma values. -
Page 167: Part 2: Flexcolor For Cameras
Part 2: FlexColor for Cameras Most Important Changes for Camera Users Part 2: FlexColor for Cameras This part provides information about how FlexColor works when connected to a camera and/or when working with camera images. If you never use FlexColor with a camera or camera images, then you can ignore this part (scanner users should skip ahead to “Part 3: FlexColor for Scanners”... -
Page 168: 3F File Compatibility Issues For Camera Shots
Part 2: FlexColor for Cameras Most Important Changes for Camera Users This issue does not affect 3F files captured using a scanner, which never contained a processed image. With scanner files, you can still zoom in to the pixel level using the preview window. -
Page 169: New White Balance Handling For Camera Captures
Setup window and set the Input profile to “Hasselblad RGB”. This is the profile you should always use when shooting with an Ixpress camera. It is automatically selected in all of the new default camera setups. 3. Click on to save your changes. -
Page 170: Using The Exposure And White-Balance Controls
Part 2: FlexColor for Cameras White Balance Settings for Cameras For scanned images, there are no white-balance controls. This is because the precise qualities of the light in the scanner are known and encoded into the Flextight input color profile, so further control is not needed—images are always scanned to look exactly as they did on film. -
Page 171: Working With White Balance Presets
The following rules apply: When shooting away from your computer, newer cameras (including the Hasselblad H2D camera and Ixpress CF and CFH camera backs) save images locally using the DNG format, which is a raw camera format developed by Adobe. -
Page 172: Using The Import Window
Part 2: FlexColor for Cameras Importing Camera Images When shooting away from your computer, older Ixpress cameras save images using a proprietary raw-file format on the Image Bank. When you shoot connected to your computer, all of your shots are saved only as 3F files on your hard disk. -
Page 173: Import Window Buttons And Controls
Part 2: FlexColor for Cameras Importing Camera Images Click on Load to open the Load window. This window provides more scope controls and enables you to establish the initial setup, name and numbers for the imported image(s). See also “Load Window Buttons and Controls”... -
Page 174: Load Window Buttons And Controls
Part 2: FlexColor for Cameras Importing Camera Images active 3F folder (this is also the folder currently shown in the Thumbnails window). See “Load Window Buttons and Controls”, below, for details. Update : updates the selection of images shown in the Import window. -
Page 175: Using Reproduction Mode
Part 2: FlexColor for Cameras Using Reproduction Mode Scope controls: use the pop-up menu at the top of the window and its accompanying controls to set the scope of the import. At most, you can import all of the images that were shown in the Import window (after filtering) just before you opened the... - Page 176 Part 2: FlexColor for Cameras Using Reproduction Mode During standard operation (when not using reproduction mode), colors are mapped in a way that is most appropriate for everyday photography. An important feature of this processing is its emphasis on reproducing pleasing skin tones for all types of skin. The result still provides extremely accurate color reproduction, but also more attractive skin tones.
- Page 177 Part 2: FlexColor for Cameras Using Reproduction Mode Figure 7: Effects of reproduction mode when shooting flat artwork. Note the shift in the histogram FlexColor 4.5 Documentation Addendum...
-
Page 178: Part 3: Flexcolor For Scanners
Part 3: FlexColor for Scanners Scanning with 3F Part 3: FlexColor for Scanners This part provides information about how FlexColor works when connected to a scanner and/or when working with scanned images. If you never use FlexColor with a scanner or scanned images, then you can ignore this part. Scanning with 3F The procedure for scanning images to 3F files is approximately the same in FlexColor 4.5 as it was in FlexColor 4.0. -
Page 179: File Names And Locations
Part 3: FlexColor for Scanners Scanning with 3F To open the window, click on the button in the tool panel on the left side of the main FlexColor window. File Names and Locations Use the settings at the top of the window to control where your 3F files will Scan 3F be stored and how they will be named. - Page 180 Part 3: FlexColor for Scanners Scanning with 3F scan(s). The setups listed in this pop-up menu will only be those that match the film type you have selected; for example, if you set to “Positive”, Film Type then you will only see positive setups in the Setup pop-up menu.
- Page 181 Part 3: FlexColor for Scanners Scanning with 3F File Size Options Beneath the setup options, the window includes a group of settings that Scan 3F enable you to control the size of your 3F files. Usually, you should use a Scanning of 100%, which ensures that your 3F files will contain the full scan data Resolution...
- Page 182 Part 3: FlexColor for Scanners Preventive Maintenance for Scanners Reading the 3F Scan Log FlexColor keeps a log of each 3F scan that you make using the window. This Scan 3F is mostly useful when you are using a batch feeder because, in this case, you might set up a batch and then leave the scanner for up to an hour.
- Page 183 Part 3: FlexColor for Scanners Preventive Maintenance for Scanners In the Preventive Maintenance window, you can read the following information: Timeline: the indicator and colored bar at the top of the windows show how far along you are until you should send your scanner in for preventive maintenance.
Need help?
Do you have a question about the FLEXTIGHT X1 and is the answer not in the manual?
Questions and answers